
Aruba Wi-Fi Lab
In this lab session we are going to setup and configure enterprise-grade access points. This is a group lab and there will be 9 groups. For this lab please refer to the IP table and network diagram given here.
Initial setup of the Access Point
We are using two models of access points for this lab Aruba AP-515 and AP-225. Two are having differences in the way they are setup and configurations are done.
Note: Each group will be provided two Access points. Each group is allocated 4 ports(given in the table) on a PoE switch which you need to plug your access points. Don't plug both access points at once. First plug one and configure it until done. When you add the second AP it should automatically get the configurations from the previous AP.
Initial setup of AP-515
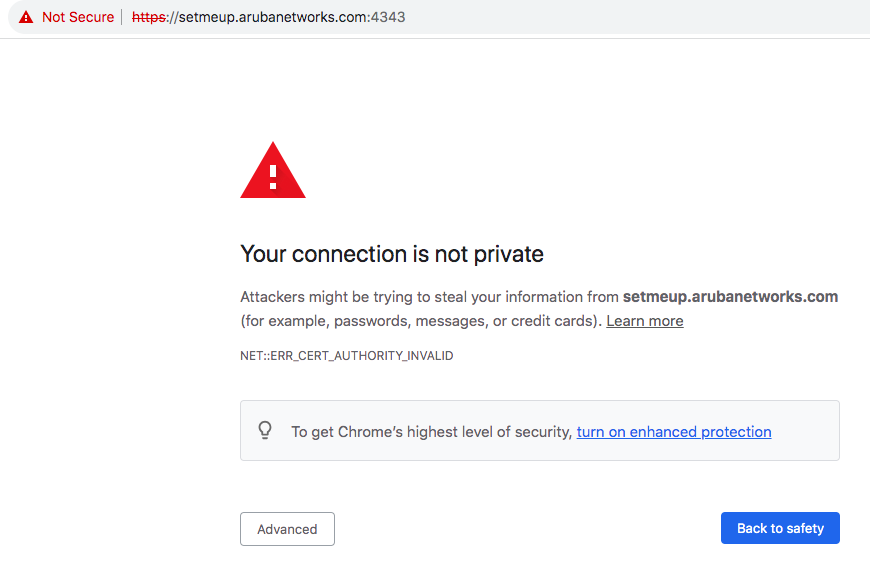
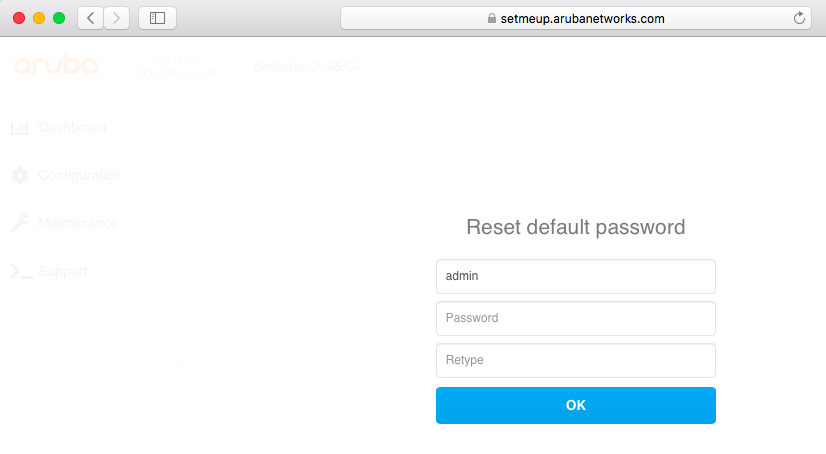
When you power up the AP it should show a SSID named setmeup-XX:XX:XX . Connect your laptop to it. Then browse the page https://setmeup.arubanetworks.com/ (prefer chrome browser). It may show up a certificate warning. Select Advanced and proceed to visit the page.

Credentials will be as below.
user : admin password : serial number of the AP

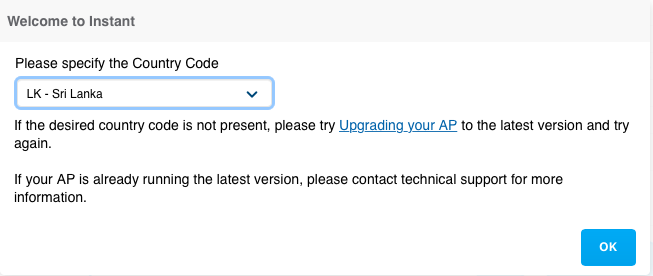
Once logged in you need to select the country code.

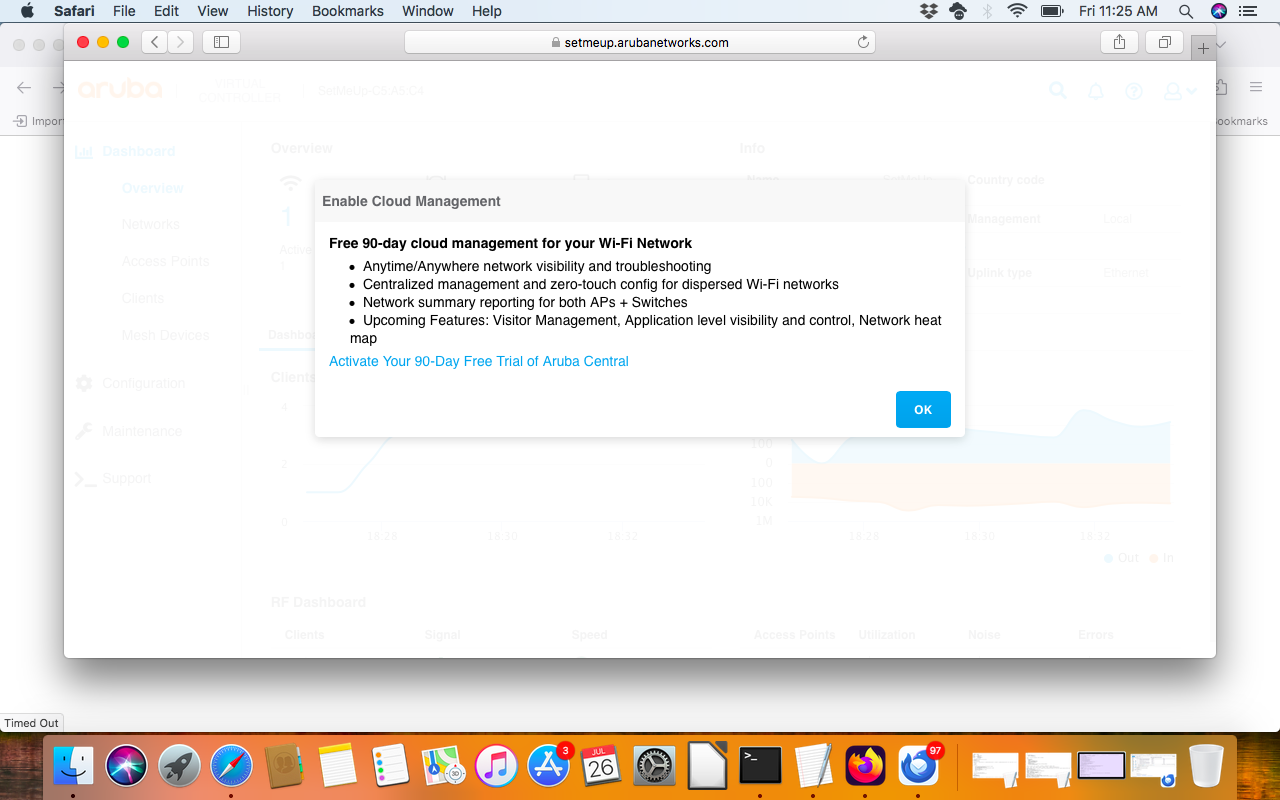
It will show a message on Aruba cloud central.

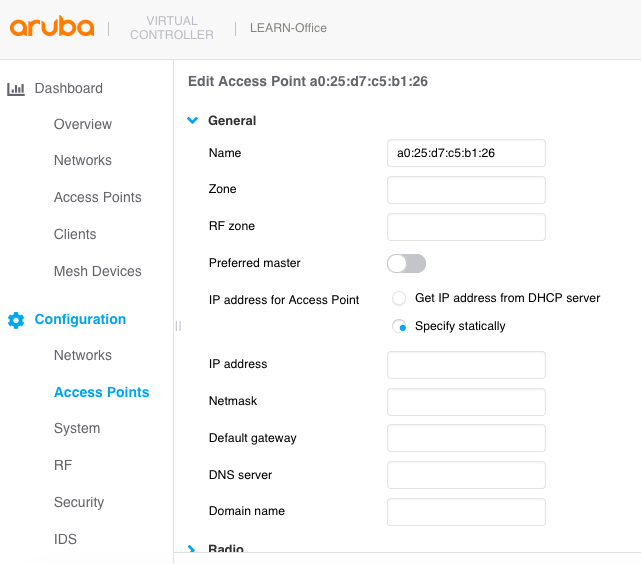
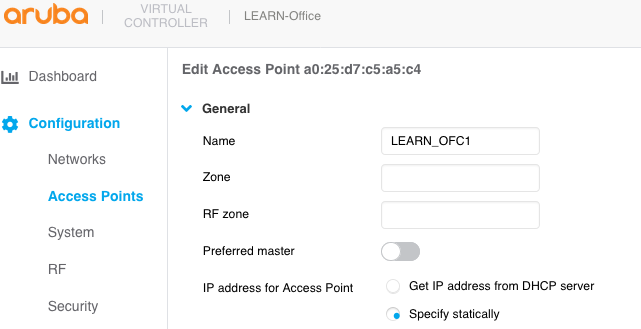
Once click on OK the web page will be displayed. First need to change the IP address of the AP. Go Configuration => Access Points. Select 'IP address for Access Point' as 'Specify statically' and enter IP details given for AP1 in the table.

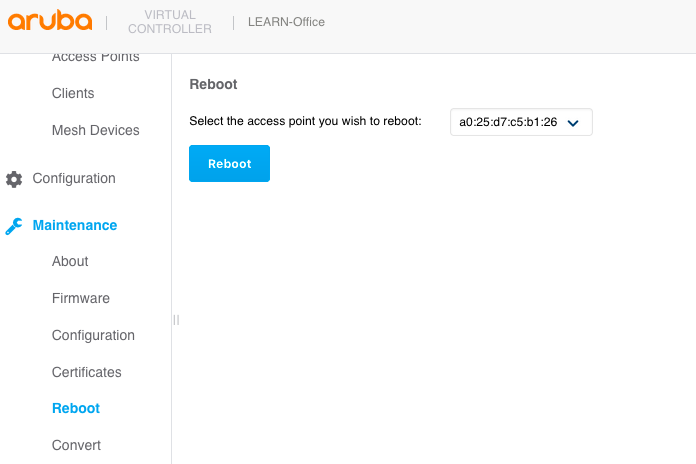
Then click save and a pop-up will come up displaying reboot of AP required. Close it and go to Maintainance => Reboot and select the AP from the MAC address and reboot the AP.


Now you are able login to the AP through a web console. Enter https://<AP_IP_address>:4343/ on a browser. Credentials will be as follows.
user : admin password : serial number of the AP
Initial setup of AP-225
Install putty on a laptop with a serial console cable attached(We will provide a shared laptop to setup APs). Connect the AP to the console port. The plug a patch cord to the Ethernet 0 port of the AP. Plug the other end of the patch cord to a given switch port. AP will power up and within five seconds hit enter to stop autoboot of the AP. You will enter to a low level configuration mode of the AP. enter below commands to do IP configuration for the AP.
at apboot mode,
setenv ipaddr 192.248.4.X
setenv netmask 255.255.255.248
setenv gatewayip 192.248.4.Y
setenv dnsip 192.248.1.161
saveenv
printenv
optional,
setenv domainname g<Group No>.learn.ac.lk
saveenv
Then enter 'boot' to load OS image.
Console will show as Init -> Master. Then the AP will be the master.
Now you are able login to the AP through a web console. Enter https://<AP_IP_address>:4343/ on a browser. Credentials will be as follows.
user : admin password : serial number of the AP
System Configurations
After the initial setup let us do some basic system configurations.
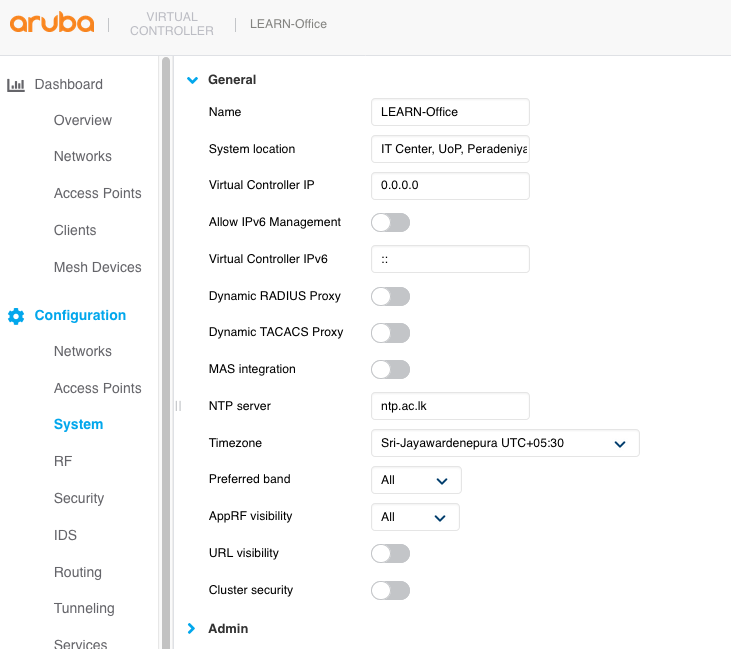
Go to Configuration => System. In general section you change some important settings. Change settings like Name, System Location, NTP server, Timezone settings and save.

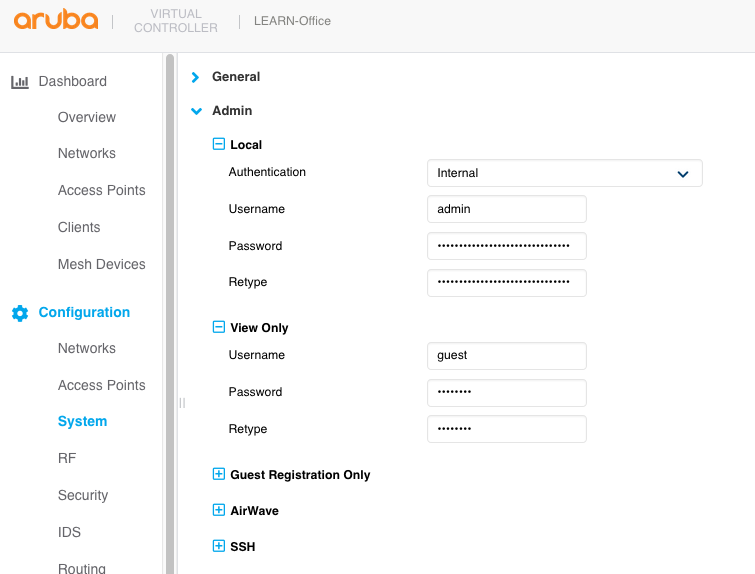
Go to Admin section and create the view only user as below with a password. This user will have Dashboard monitoring capabilities and not any configuration and maintenance.

Customize AP settings
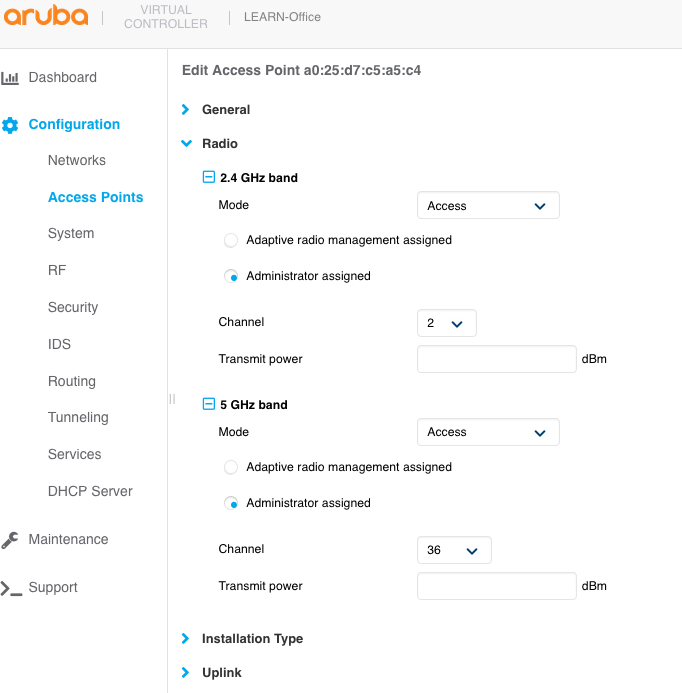
Navigate to Configuration => Access Points. You will see the current AP listed. select it and click Edit (pencil mark). Then give it a suitable name like GX_AP1.

Next go to Radio section and assign it the radio channels given in the table and save it. You may also change the radio transmit power in dBm. higher the number higher the range of the signal.

Setting UP SSIDs
Create a Network with Pre-Shared Key (PSK)
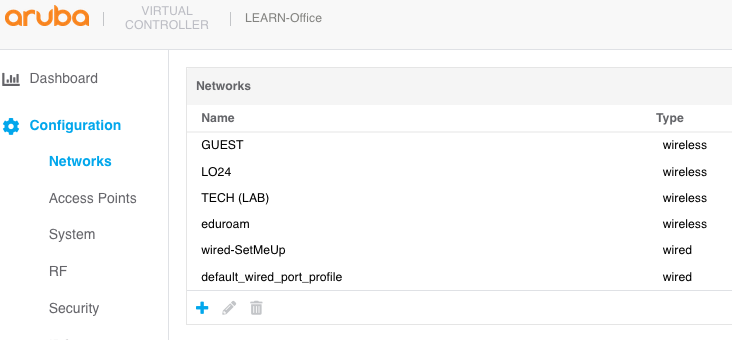
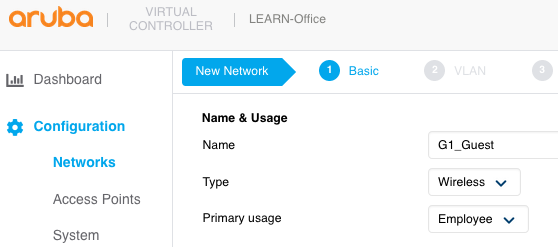
Navigate to Configuration => Networks. Click Plus button to add a new Wi-Fi Network.

Give a suitable name as given and select the other options as shown.

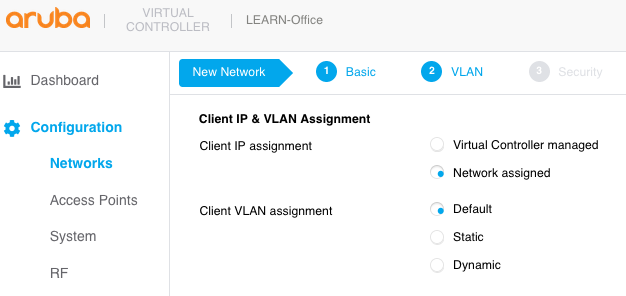
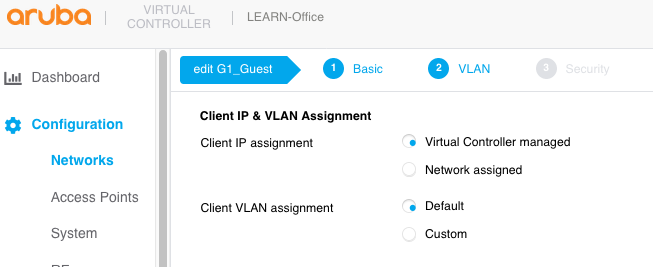
Keep the default Client IP and VLAN assignments.

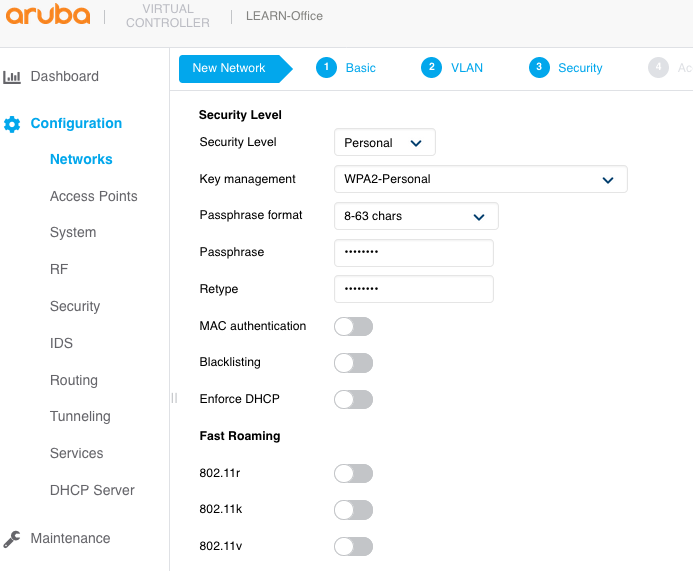
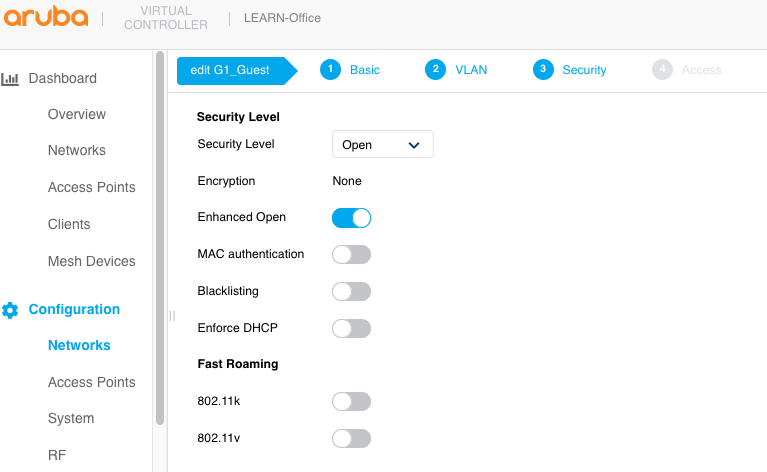
Select the security level Personal, Key management WPA2-Personal as default. Give a suitable password for the SSID. Go next.

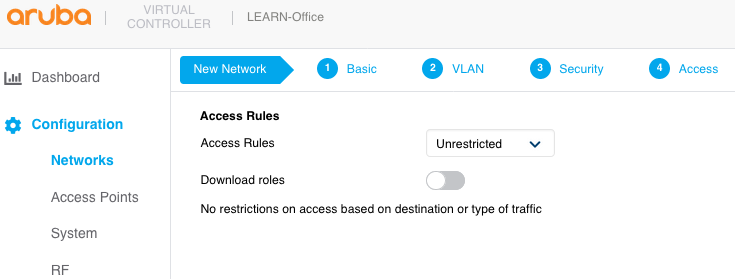
Keep the default Access Rules and click finish to save the configuration.

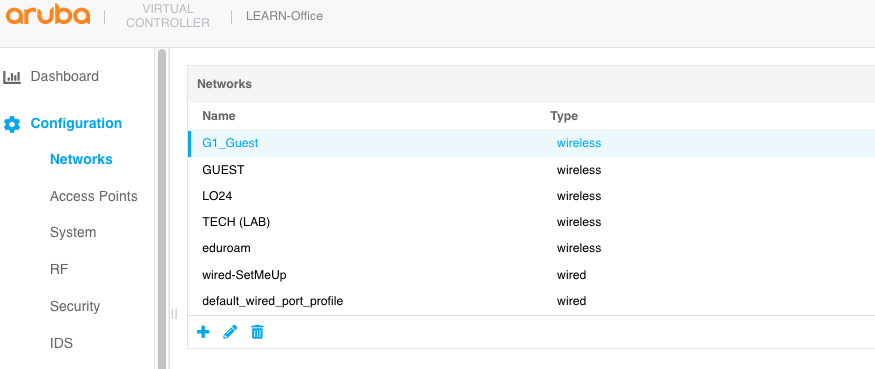
Navigate back Networks menus under Configuration and Dashboard sections. You will see the SSID and you can try to connect that SSID. Check the IP address assigned to your client devices and it should be a 192.248.6.XXX.
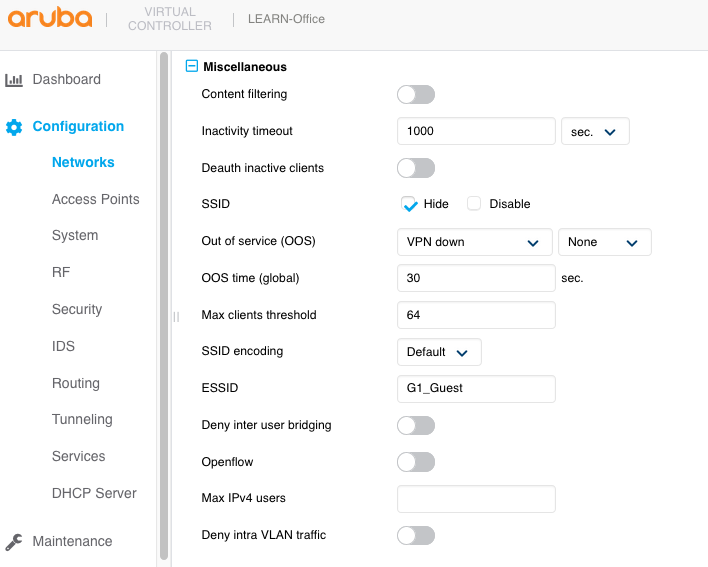
Create a Open network with hidden SSID and NAT
We can hide the SSID broadcast so that no one can see or identify the name of the SSID. If ssid is hidden we can make it a open network as an option without password assigned to it. Further we can change the Client IP address assignment method by enabling NAT. In NAT all clients share the AP IP address to access the internet.
Go to Configurations => Networks and select the SSID created.

Click on Edit scroll down to section Miscellaneous. Find the SSID Hide option and select it.

Then Go next and select 'Virtual Controller Managed' for the client IP assignment.

In the next step select the security level as 'Open'. Then go through the Wizard without any changes and click Finish to save the configuration.

Once changes done you might need to forget the Network SSID before connecting it again because its settings has been changed. Once the SSID profile is removed from your client device you need add the hidden network to the client device manually because the SSID is no longer broadcasted and it's hidden. Please consult the instructors if you don't know how to forget and add a Wi-Fi network to the client device. Once connected observe IP address assigned and it should be private IP address.
In addition to above changes there are many more features available under the Configuration => Networks menu.
Setting up a DHCP server
Login to AP. Go to DHCP servers menu.
default DHCP scope is for virtual controller assigned networks. It uses private IP ranges only.
IN Local DHCP scopes click new.
Name : WS
Type : Local, L2
VLAN :1
Network : 192.168.1.0
Netmask : 255.255.255.0
Default router : 192.168.1.254
DNS : 192.248.1.161
Domain name : <group_no>.learn.ac.lk
Lease time : 720
Add other Access Points
reset other IAPs and set static IPs. APs in same subnet will be added to the cluster. If there is OS mismatch in new APs will be synced from Master AP and reboot.
Eduroam SSID configuration
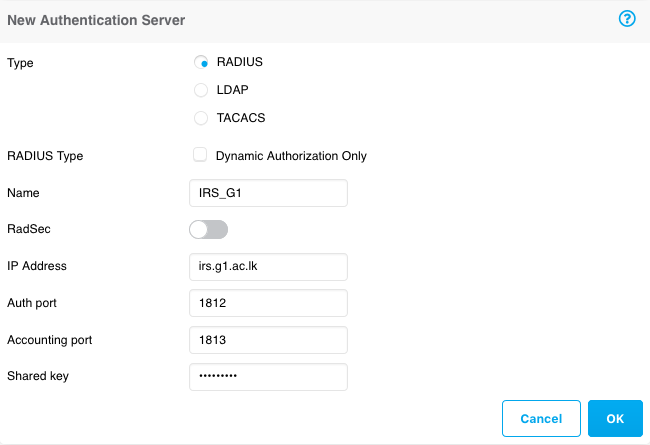
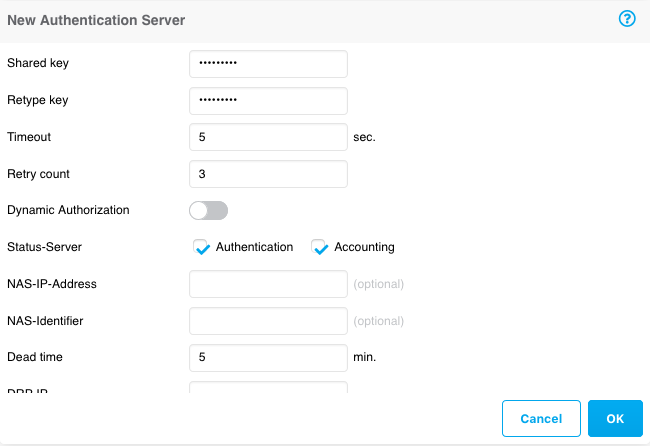
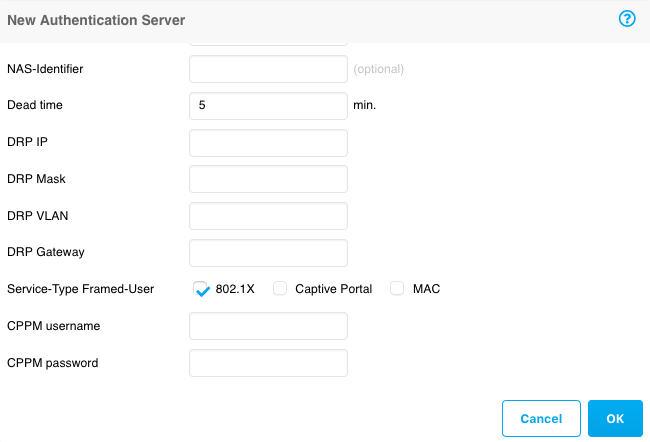
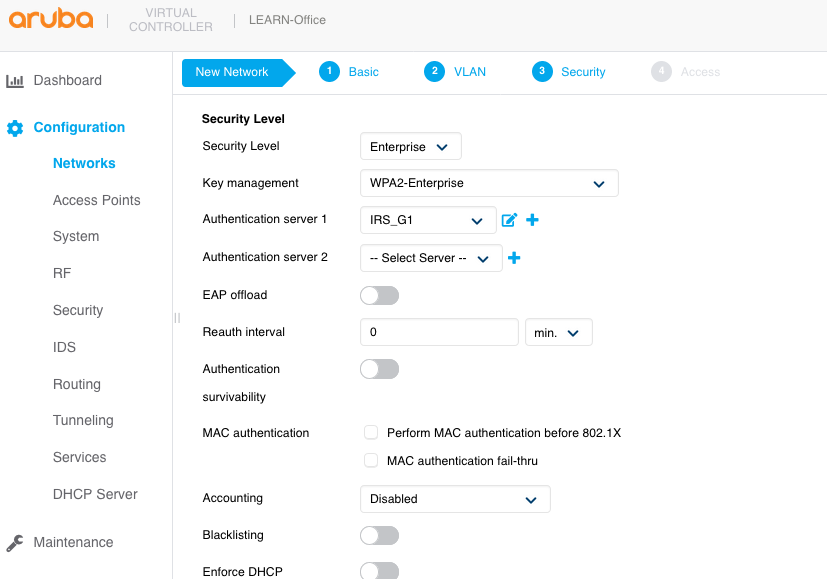
login to the AP and go to Configuration => Security. Select Authentication servers and Click on Plus button to add new server.

Select type RADIUS and type other details as suitable. Save the configuration.


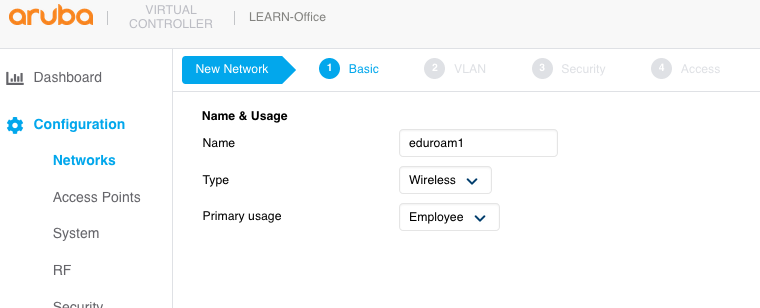
Go to Configuration => Networks and add new network. Give the SSID as instructed and go forward.

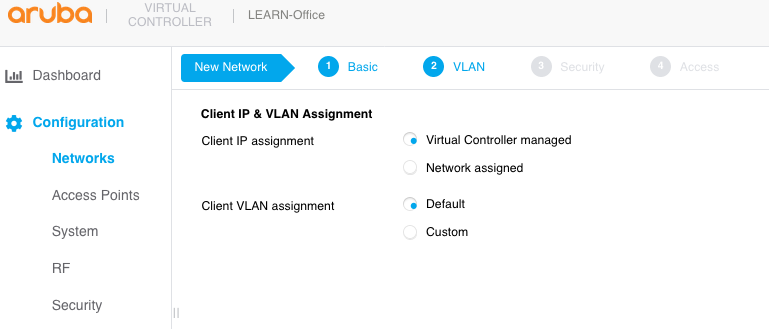
Select virtual controller managed as the IP assignment.

Select security level as Enterprise and key management as WPA2-Enterprise. Select the authentication server created. Go forward and click Finish to save the configuration.

Attachments (28)
- wifilab1.png (69.0 KB ) - added by 2 years ago.
- wifilab1a.png (38.8 KB ) - added by 2 years ago.
- wifilab2.png (34.6 KB ) - added by 2 years ago.
- wifilab3.png (263.0 KB ) - added by 2 years ago.
- wifilab4.png (66.9 KB ) - added by 2 years ago.
- wifilab5.png (16.7 KB ) - added by 2 years ago.
- wifilab6.png (45.6 KB ) - added by 2 years ago.
- wifilab7.png (16.3 KB ) - added by 2 years ago.
- wifilab9.png (81.9 KB ) - added by 2 years ago.
- wifilab10.png (61.7 KB ) - added by 2 years ago.
- wifilab11.png (42.6 KB ) - added by 2 years ago.
- wifilab12.png (77.4 KB ) - added by 2 years ago.
- wifilab14.png (39.4 KB ) - added by 2 years ago.
- wifilab15.png (32.2 KB ) - added by 2 years ago.
- wifilab16.png (40.1 KB ) - added by 2 years ago.
- wifilab17.png (69.1 KB ) - added by 2 years ago.
- wifilab18.png (38.2 KB ) - added by 2 years ago.
- wifilab20.png (44.2 KB ) - added by 2 years ago.
- wifilab21a.png (72.3 KB ) - added by 2 years ago.
- wifilab22.png (38.4 KB ) - added by 2 years ago.
- wifilab23.png (59.1 KB ) - added by 2 years ago.
- wifilab25.png (46.8 KB ) - added by 2 years ago.
- wifilab26.png (33.3 KB ) - added by 2 years ago.
- wifilab27.png (36.5 KB ) - added by 2 years ago.
- wifilab28.png (33.8 KB ) - added by 2 years ago.
- wifilab29.png (37.8 KB ) - added by 2 years ago.
- wifilab30.png (43.2 KB ) - added by 2 years ago.
- wifilab31.png (82.7 KB ) - added by 2 years ago.
Download all attachments as: .zip