
Install Request Tracker 5 (RT) on Ubuntu 20.04
Requirements:
To properly install RT you'll need some things
- root access to the server you're going to install it on
- RT source code
- Perl -Perl 5.10.1 or later
- Various and sundry perl modules
- Database backend
- MySQL 5.7 with InnoDB support
- MariaDB 10.2 or later with InnoDB support
- Postgres 9.5 or later
- Oracle 12c or later
- SQLite 3.0 or later; for testing only, no upgrade path guaranteed
Note : We are using MariaDB here
- Web server
Apache version 2.x with mod_fcgid or mod_perl or nginx or another webserver with FastCGI support (RT's FastCGI handler needs to access RT's configuration file.)
Update system package cache;
# sudo su
# apt update
# apt upgrade
Install Required Build tools
# apt install build-essential libapache2-mod-fcgid libssl-dev libexpat1-dev libdbd-mysql-perl liblwp-protocol-https-perl libhtml-formattext-withlinks-andtables-perl libhtml-formattext-withlinks-perl html2text
Install Apache Web Server
# apt install apache2
# systemctl start apache2
# systemctl enable apache2
Install MariaDB Database Server
Install MariaDB 10.5 on Ubuntu 20.04;
# apt-key adv --fetch-keys 'http://mariadb.org/mariadb_release_signing_key.asc'

# add-apt-repository 'deb [arch=amd64] http://mariadb.mirror.globo.tech/repo/10.5/ubuntu focal main'

# apt update
# apt install mariadb-server mariadb-client
# systemctl start mariadb
# systemctl enable mariadb
Install Request Tracker (RT)
Download RT 5 Tarball
# wget https://download.bestpractical.com/pub/rt/release/rt-5.0.0.tar.gz
You can now extract the source code;
# tar xzf rt-5.0.0.tar.gz
Compile and Install Request Tracker (RT)
Change to RT 5 source code directory and configure it to adapt it to the system as well as check if required package dependency is met;
# cd rt-5.0.0/
# ./configure
Next, check for package dependency.
# make testdeps
out put as follows;
/usr/bin/perl ./sbin/rt-test-dependencies
perl:
    5.10.1 ................................................. ok (5.30.0)

users / groups:
    rt group (www-data) .................................... ok (gid 33)
    bin user (root) ........................................ ok (uid 0)
    libs user (root) ....................................... ok (uid 0)
    libs group (bin) ....................................... ok (gid 2)
    web user (www-data) .................................... ok (uid 33)
    web group (www-data) ................................... ok (gid 33)

CORE dependencies:
    Apache::Session >= 1.53 ................................ MISSING
    Business::Hours ........................................ MISSING
    CGI >= 4.00 ............................................ ok (4.46)
    CGI::Cookie >= 1.20 .................................... ok (4.46)
    CGI::Emulate::PSGI ..................................... MISSING
    CGI::PSGI >= 0.12 ...................................... MISSING
    CSS::Minifier::XS ...................................... MISSING
    CSS::Squish >= 0.06 .................................... MISSING
    Class::Accessor::Fast .................................. MISSING
    Clone .................................................. MISSING
    Convert::Color ......................................... MISSING
    Crypt::Eksblowfish ..................................... MISSING
    DBI >= 1.37 ............................................ ok (1.643)
...
Fixing Request Tracker Missing Perl Dependencies;
You can fix the missing perl dependencies by installing them one by one or by simply using make fixdeps command. In order to use the make fixdeps command for fixing the missing packages, configure CPAN shell and install cpanminus.
# perl -MCPAN -e shell
CPAN.pm requires configuration, but most of it can be done automatically.
If you answer 'no' below, you will enter an interactive dialog for each
configuration option instead.

Would you like to configure as much as possible automatically? [yes] yes

Autoconfiguration complete.
...
...
cpan shell -- CPAN exploration and modules installation (v2.22)
Enter 'h' for help.

cpan[1]> quit
Install CPANMINUS . cpanminus provides a command-line (non interactive) interface to automatically download, build and install Perl modules from CPAN.
# apt install cpanminus
Next, fix the dependencies;
# make fixdeps
Once the dependencies are installed, you can reverify;
...
FASTCGI dependencies:
    FCGI >= 0.74 ........................................... ok (0.79)

GPG dependencies:
    File::Which ............................................ ok
    GnuPG::Interface >= 1.00 ............................... ok (1.00)
    PerlIO::eol ............................................ ok

MYSQL dependencies:
    DBD::mysql >= 2.1018, != 4.042 ......................... ok (4.050)

SMIME dependencies:
    Crypt::X509 ............................................ ok
    File::Which ............................................ ok
    String::ShellQuote ..................................... ok


---------------------------------------------------------------------------

All dependencies found.
You can now install Request Tracker (RT);
# make install
...
# Make the web ui's data dir writable
chmod 0770  	/opt/rt5/var/mason_data \
		/opt/rt5/var/session_data
chown -R www-data 	/opt/rt5/var/mason_data \
			/opt/rt5/var/session_data
chgrp -R www-data 	/opt/rt5/var/mason_data \
			/opt/rt5/var/session_data
Congratulations. RT is now installed.


You must now configure RT by editing /opt/rt5/etc/RT_SiteConfig.pm.

(You will definitely need to set RT's database password in
/opt/rt5/etc/RT_SiteConfig.pm before continuing. Not doing so could be
very dangerous.  Note that you do not have to manually add a
database user or set up a database for RT.  These actions will be
taken care of in the next step.)

After that, you need to initialize RT's database by running
 'make initialize-database'
Create Request Tracker Database and Database user;
Next, you need to create or if already created, define the Request Tracker database details. Therefore, within the RT source directory, run the command below;
# cd rt-5.0.0/
# make initialize-database
When the command is run, you are prompted to enter the database root password. In our case, we use MariaDB and hence, we provide MariaDB root password. If the root user has no password set, just press ENTER.
/usr/bin/perl -I/opt/rt5/local/lib -I/opt/rt5/lib sbin/rt-setup-database --action init --prompt-for-dba-password
In order to create or update your RT database, this script needs to connect to your  mysql instance on localhost (port '') as root
Please specify that user's database password below. If the user has no database
password, just press return.

Password:
When you enter password (or press ENTER for no root password), the script then creates rt5 and rt_user as RT database and database user respectively. It then populates the database with relevant data.
Working with:
Type:	mysql
Host:	localhost
Port:
Name:	rt5
User:	rt_user
DBA:	root
Now creating a mysql database rt5 for RT.
Done.
Now populating database schema.
Done.
Now inserting database ACLs.
Done.
Now inserting RT core system objects.
Done.
Now inserting data.
Done inserting data.
Done.
Configure Request Tracker
The default configuration file for Request Tracker 5 is /opt/rt5/etc/RT_SiteConfig.pm.
To begin with, set the RT domain name, the organization and the web domain.
# vim /opt/rt5/etc/RT_SiteConfig.pm
NOTE: replace <server ip> with ubuntu server Local IP/DNS for this example.
...
#Set( $rtname, 'example.com');
Set( $rtname, '<server ip>');
Set( $Organization, '<server ip>' );
Set( $WebDomain, '<server ip>' );
Save and exit the file.
Similarly, set Request Tracker Logging (change rt_log_name to proper name for your convenient )
# cat << 'EOL' >> /opt/rt5/etc/RT_SiteConfig.pm
Set($LogToFile,      'debug');
Set($LogToFileNamed, '<rt_log_name>');
Set($LogDir,         '/var/log/rt5');
EOL
Make a directory for RT logs and changing the ownership for the rt5 log directory
# mkdir /var/log/rt5
# chown -R www-data: /var/log/rt5
Running Request Tracker in Standalone Mode
You can now run Request Tracker. Note that it can be run in standalone mode or via a web server.
This should open the web server port 80 and you should be able to access your Request Tracker web interface via the url, http://server-IP-or-domain.
To confirm this;
# netstat -altnp | grep :80
tcp 0 0 0.0.0.0:80 0.0.0.0:* LISTEN 3829/perl
If UFW is running, open this port;
# ufw allow 80/tcp
To run RT in standalone mode;
# systemctl stop apache2
# /opt/rt5/sbin/rt-server
Login using the default RT credentials:
Username: root
Password: password
Now access the Request Tracker Web Interface via http://server-IP-or-domain. You should land on Request Tracker login page.
If you need to use a different port, specify the port by passing the --port <port>. for example;
# /opt/rt5/sbin/rt-server --port 8080
We recommend not to run standalone mode if you are going to install the system for enterprise use. Run on a webserver.
Running Request Tracker via Web Server
You can stop RT standalone mode by pressing CTRL+c and proceed to configure Apache to Server RT on Ubuntu.
we have already installed Apache2
Set the maximum HTTP request length by editing the file, /etc/apache2/mods-available/fcgid.conf, and adding the line, FcgidMaxRequestLen 1073741824.
vim /etc/apache2/mods-available/fcgid.conf
<IfModule mod_fcgid.c>
  FcgidConnectTimeout 20
  FcgidMaxRequestLen 1073741824

  <IfModule mod_mime.c>
    AddHandler fcgid-script .fcgi
  </IfModule>
</IfModule>
Save and exit the file.
Enable module
sudo a2dismod fcgid
Create a RT5 sites-available configuration file.
vi /etc/apache2/sites-available/rt5.conf
<VirtualHost *:80>
        # rt.learn.com Demo server
        # Ensure that your log rotation scripts know about these files
        # ErrorLog /opt/rt5/var/log/apache2.error
        # TransferLog /opt/rt5/var/log/apache2.access
        # LogLevel debug

        AddDefaultCharset UTF-8

        ScriptAlias / /opt/rt5/sbin/rt-server.fcgi/

        DocumentRoot "/opt/rt5/share/html"
        <Location />
            Require all granted
            Options +ExecCGI
            AddHandler fcgid-script fcgi
        </Location>
</VirtualHost>
Edit the apache2.conf file and add information as following
vi /etc/apache2/apache2.conf
<Directory /opt/rt5/share/html>
        Options Indexes FollowSymLinks
        AllowOverride All
        Require all granted
</Directory>
Enable the RT5 site
sudo a2ensite rt5
Disable the default site
sudo a2dissite 000-default
Restart apache service
sudo systemctl restart apache2
Note : Here, Mails are sent using a locally configured postfix to send mails to create tickets. postfix and RT are installed in same server in this setup. We advice you to have a proper mail configurations when you install RT for institutional purposes.
If you are installing a testbed, you can use the manual for installing Postfix here . Otherwise we advice you to configure proper mail gateway for rt.
Edit /etc/aliases file for mailgate configuration in rt.
vi /etc/aliases
Add following lines. (rt, rt-comment: mail users, Change the mail users as your requirements)
rt: "|/opt/rt5/bin/rt-mailgate --queue general --action correspond --url http://localhost/rt"
rt-comment: "|/opt/rt5/bin/rt-mailgate --queue general --action comment --url http://localhost/rt"
After, Please reload the configurations to postfix and reload the service
# newaliases
# postfix reload
When you are done with configuring rt, you will be able to log into the system.
Let's get Familiar
Open your browser and enter http://rt.yourdomain/
You will see following window.
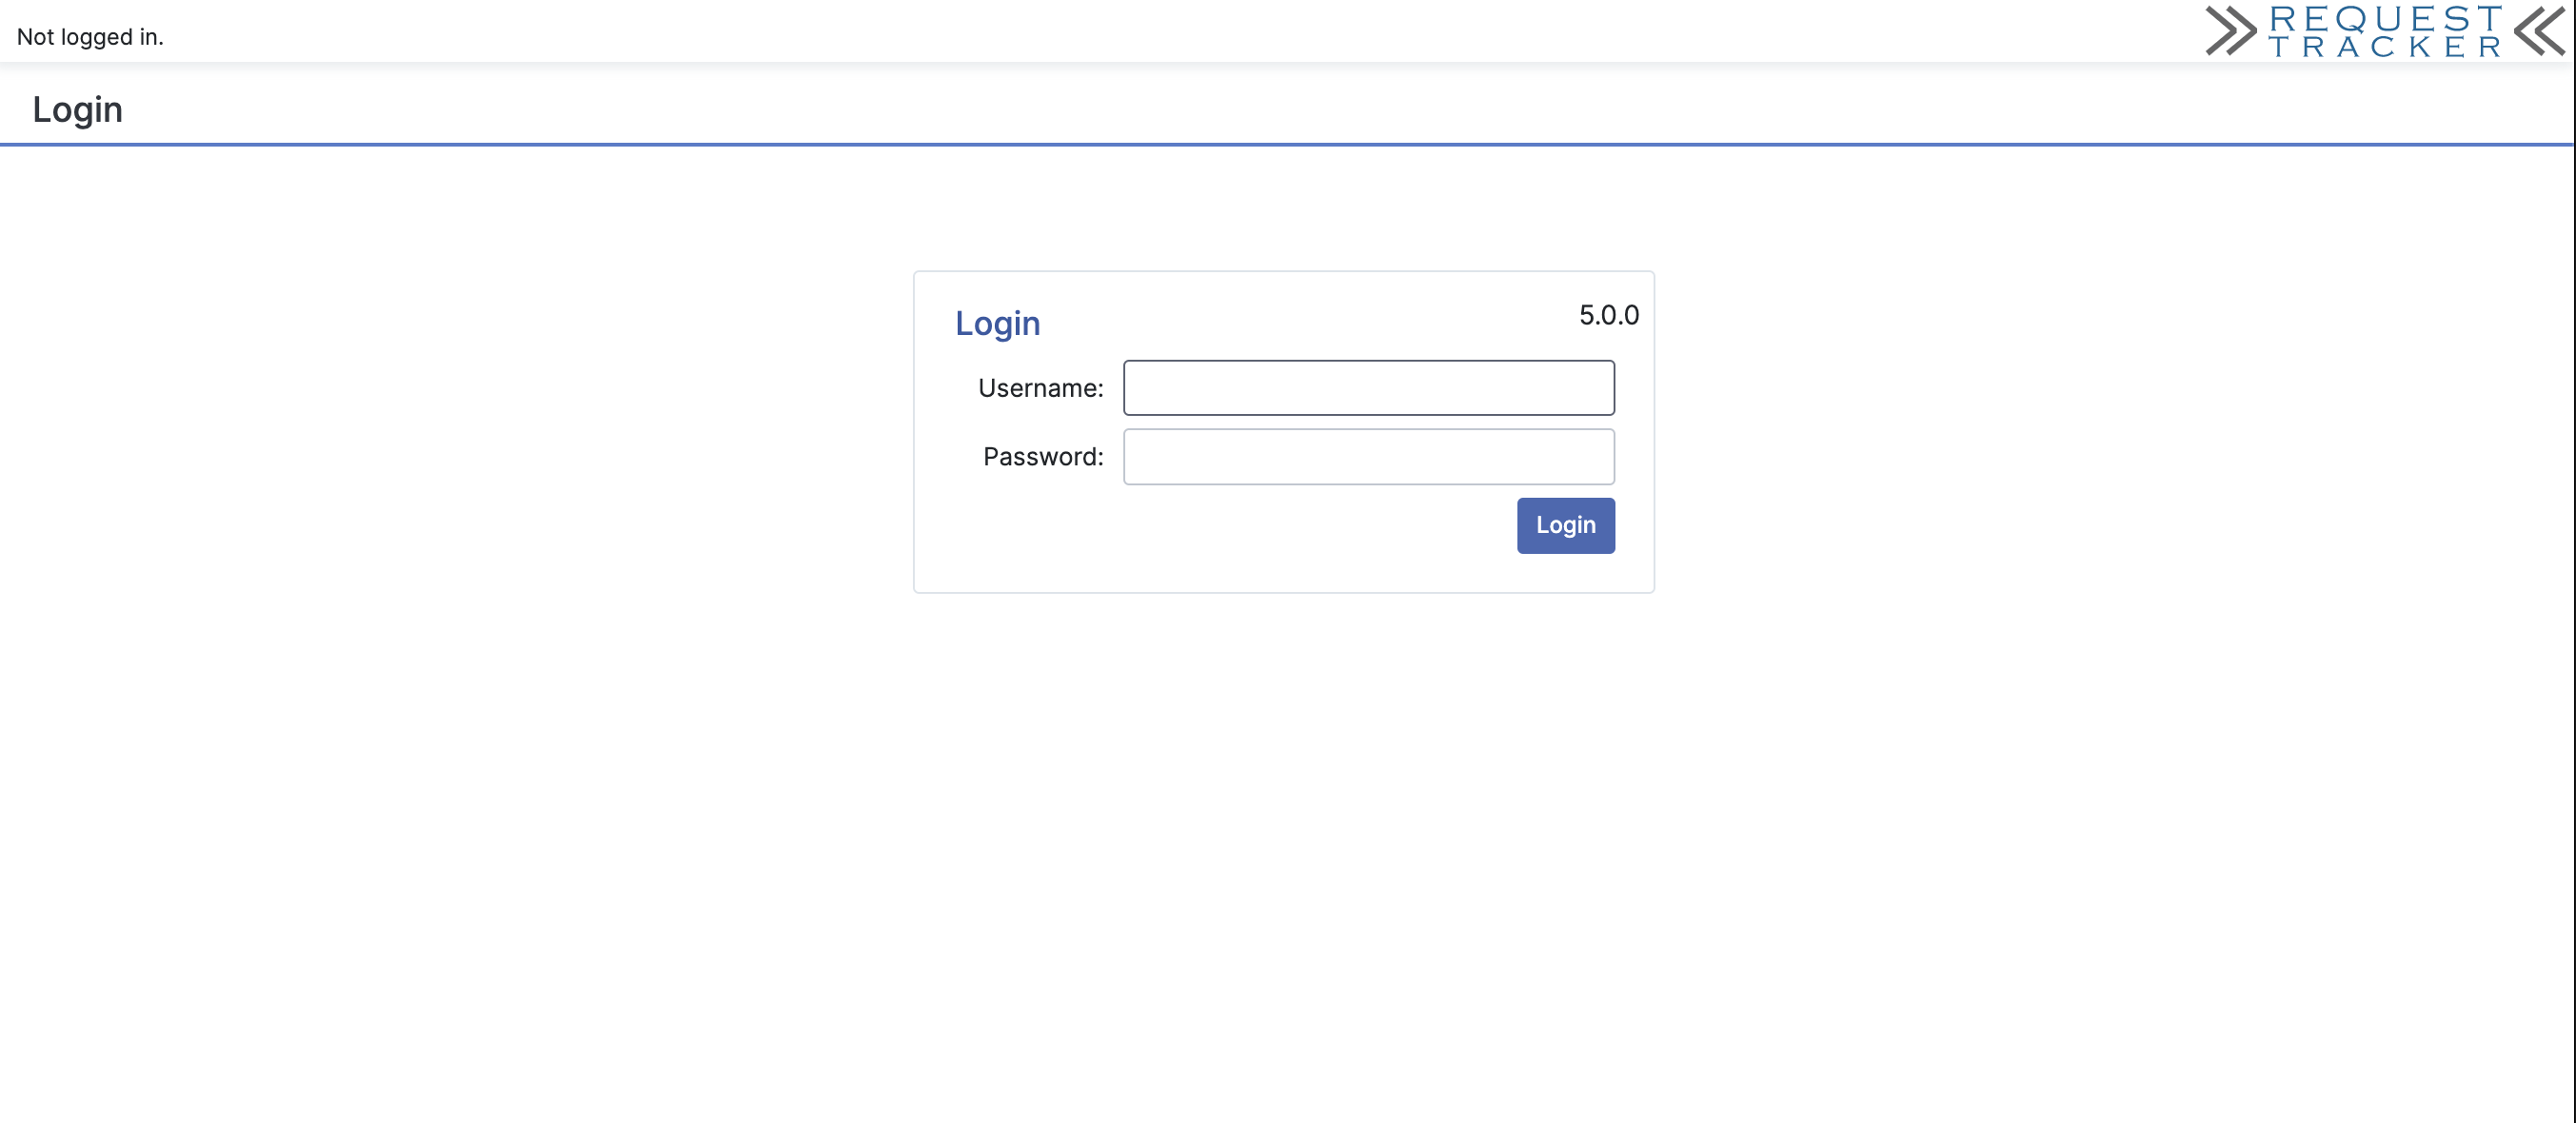
User : root Password : password
(You may change the passwords accordingly)
After login in to the webUI, You will see your newly installed homepage
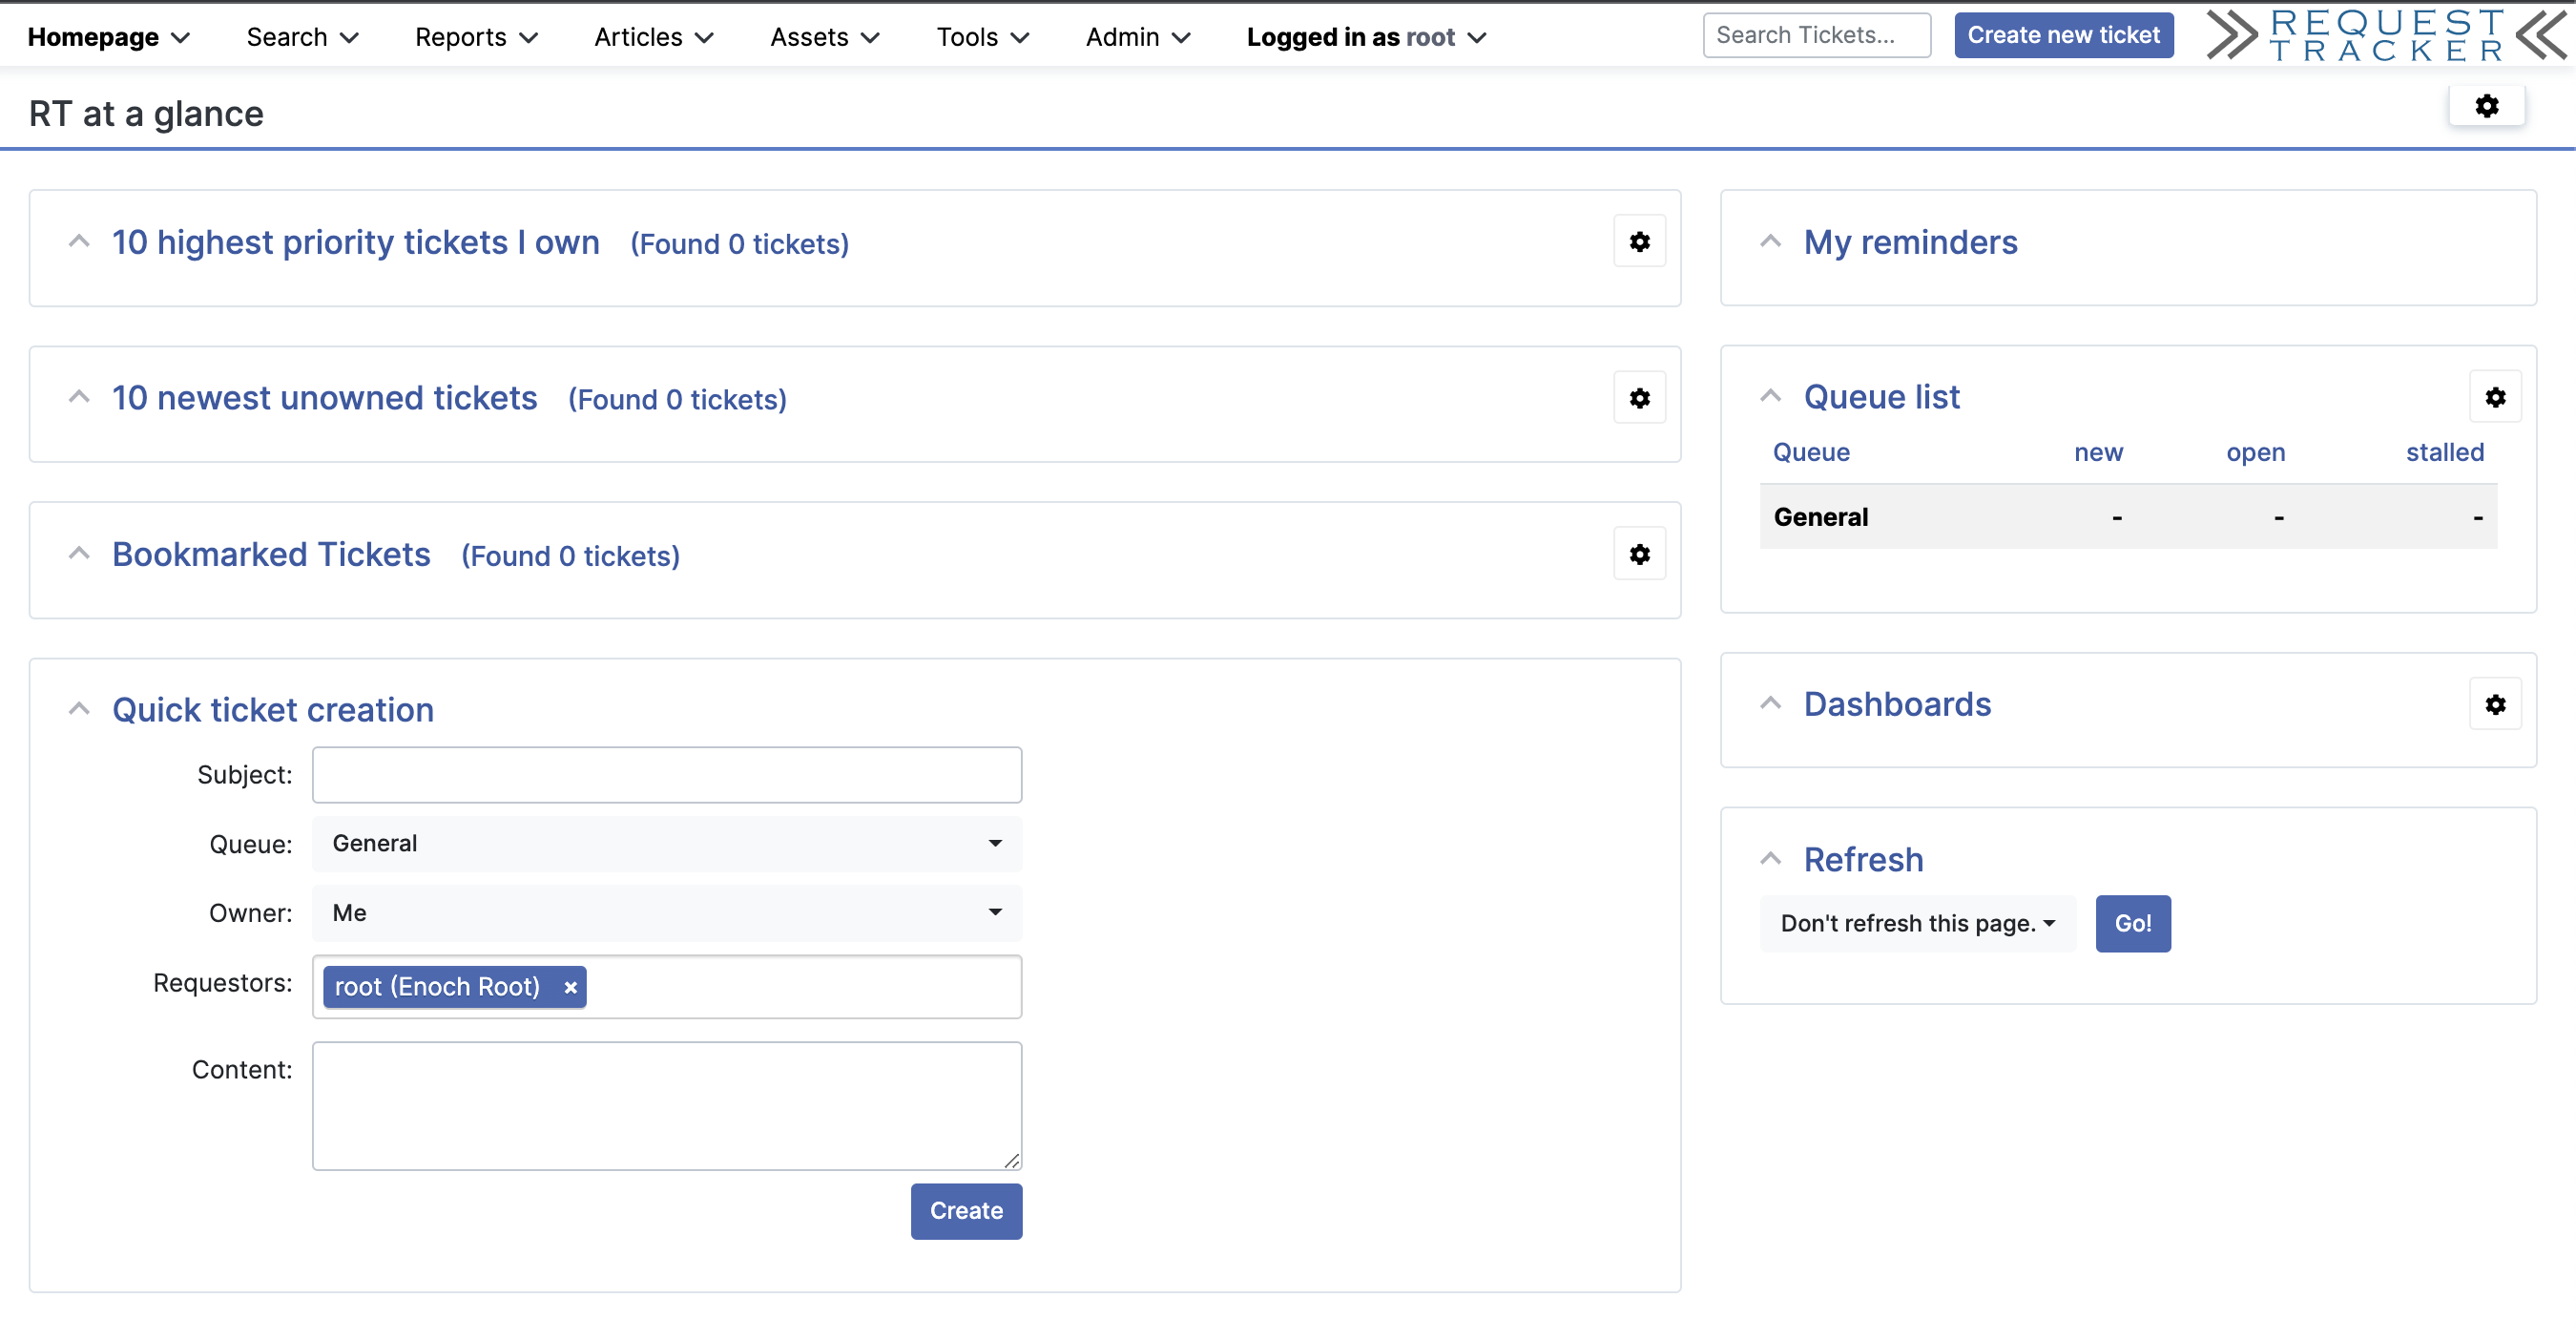
You can navigate through tabs to get familiar.
Currently in root dashboard, you will able to see,
- Homepage
- Search
- Reports
- Articles
- Assets
- Tools
- Admin
- As who you are logged in
- Create ticket
- The logo
Let's look into admin tab in the webUI, The options are as follows.
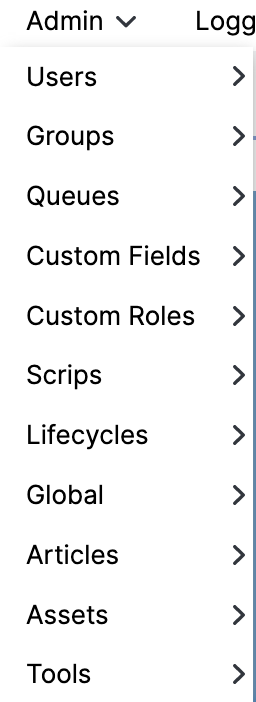
(Select and create options are there under admin tab for every option)
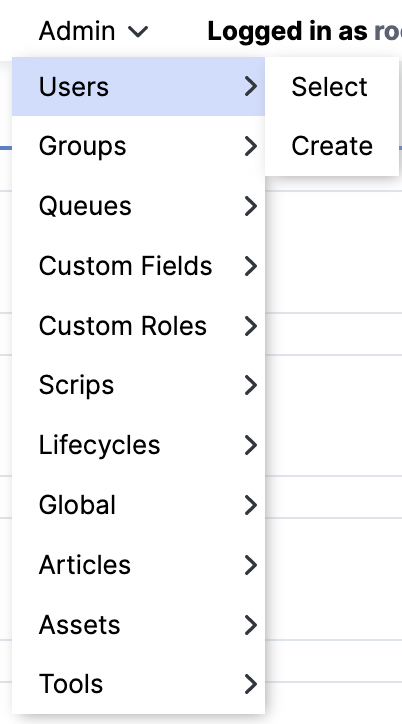
Lets Create an user
Select user option from admin tab(Root user)
Then you can fill the details for the user and the password for user as follows (Details may vary with the requirements)

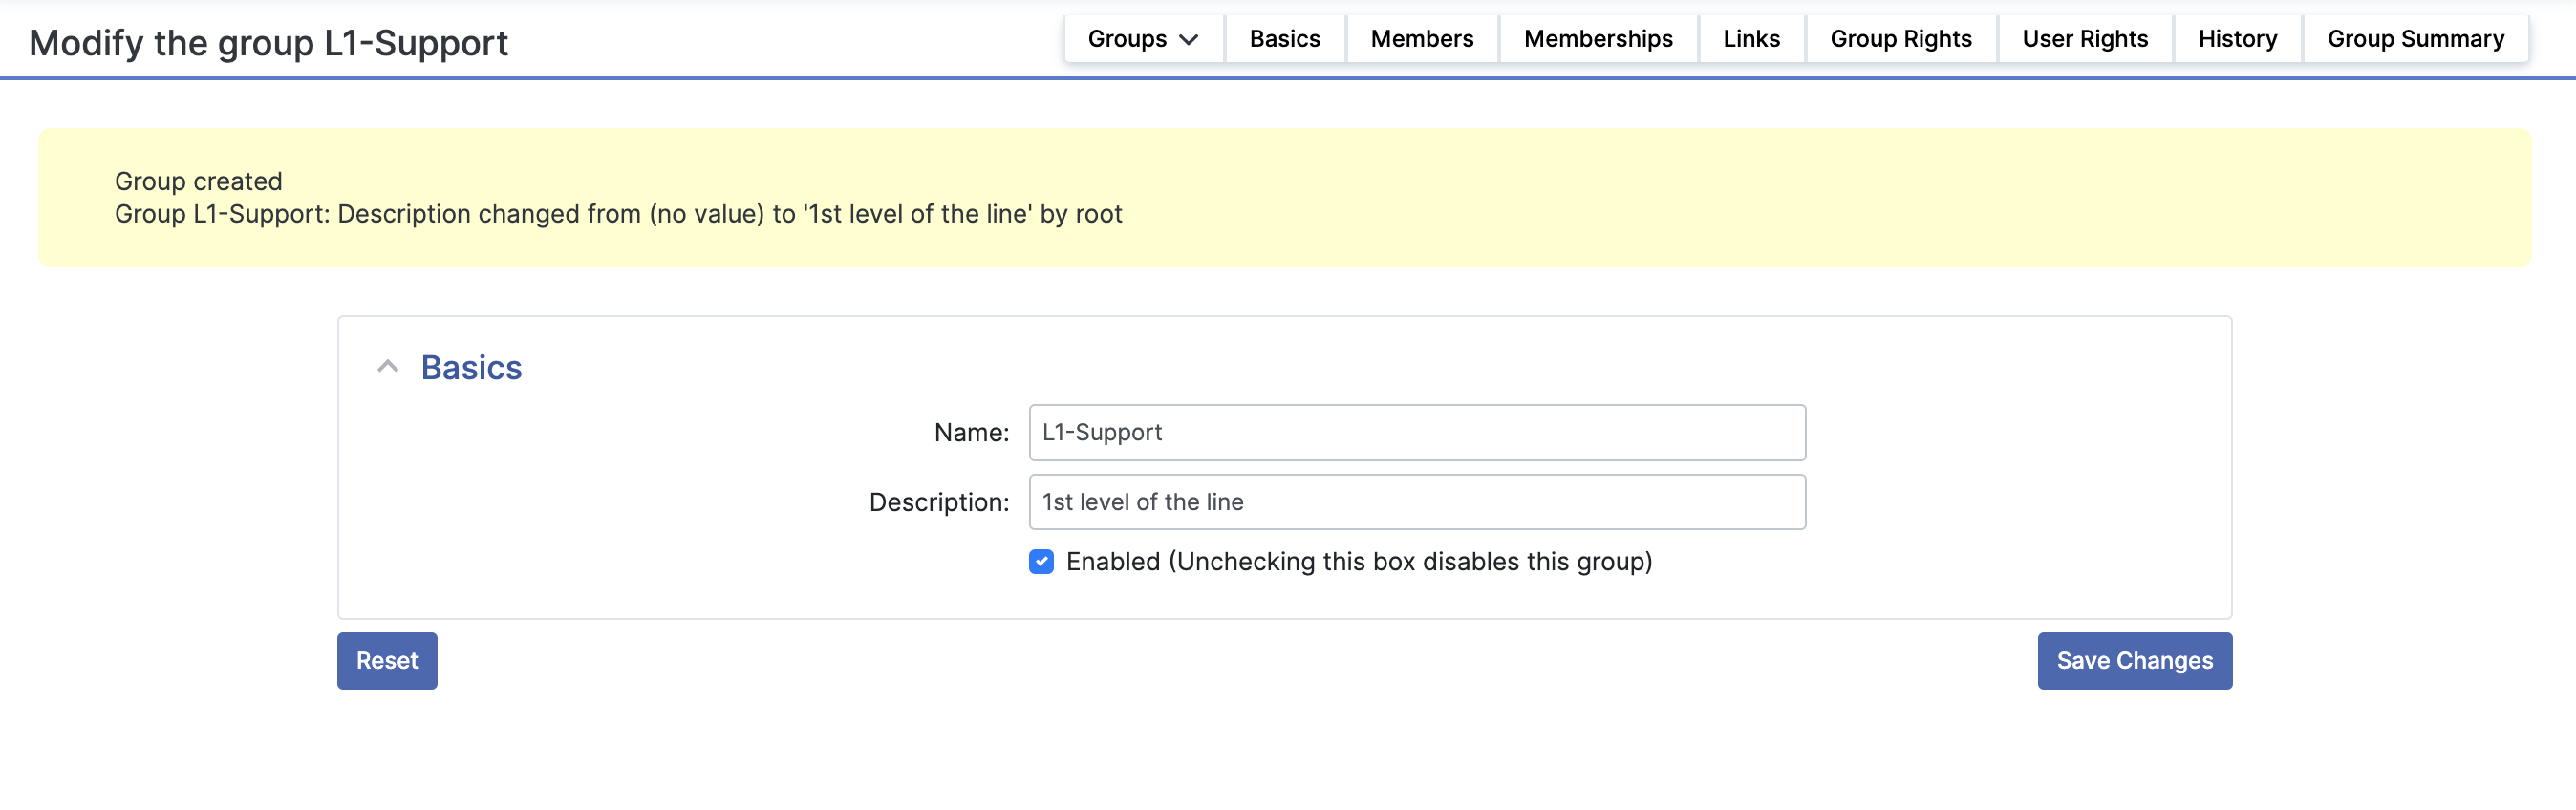
Lets Create a group
Navigate: Admin > Groups > Create
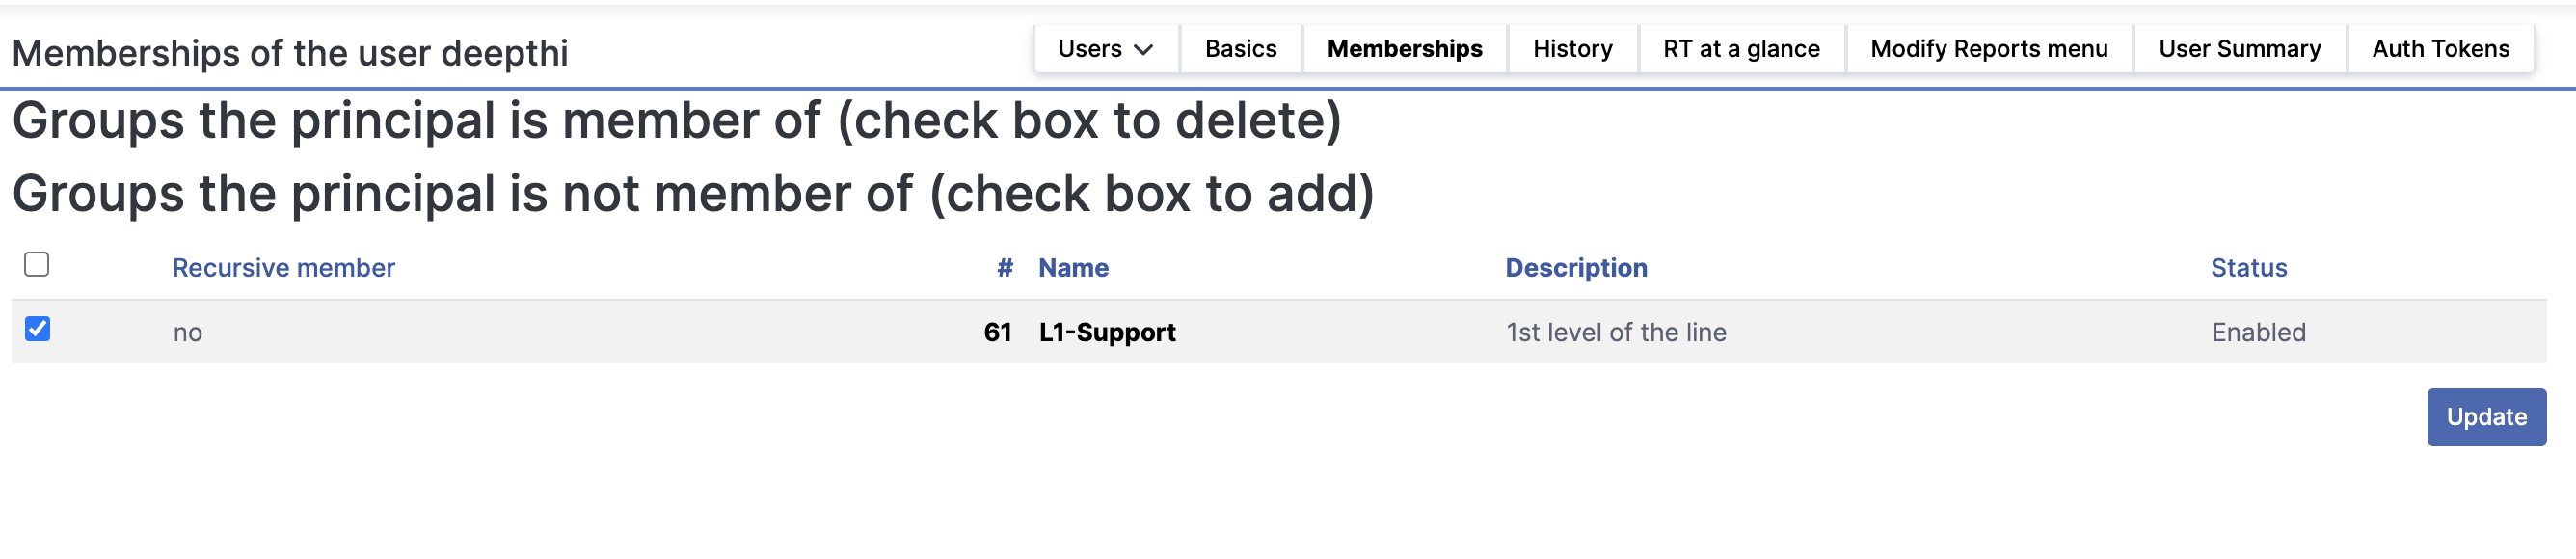
To add members to the group, click on the group and upper right corner, click on "member" tab
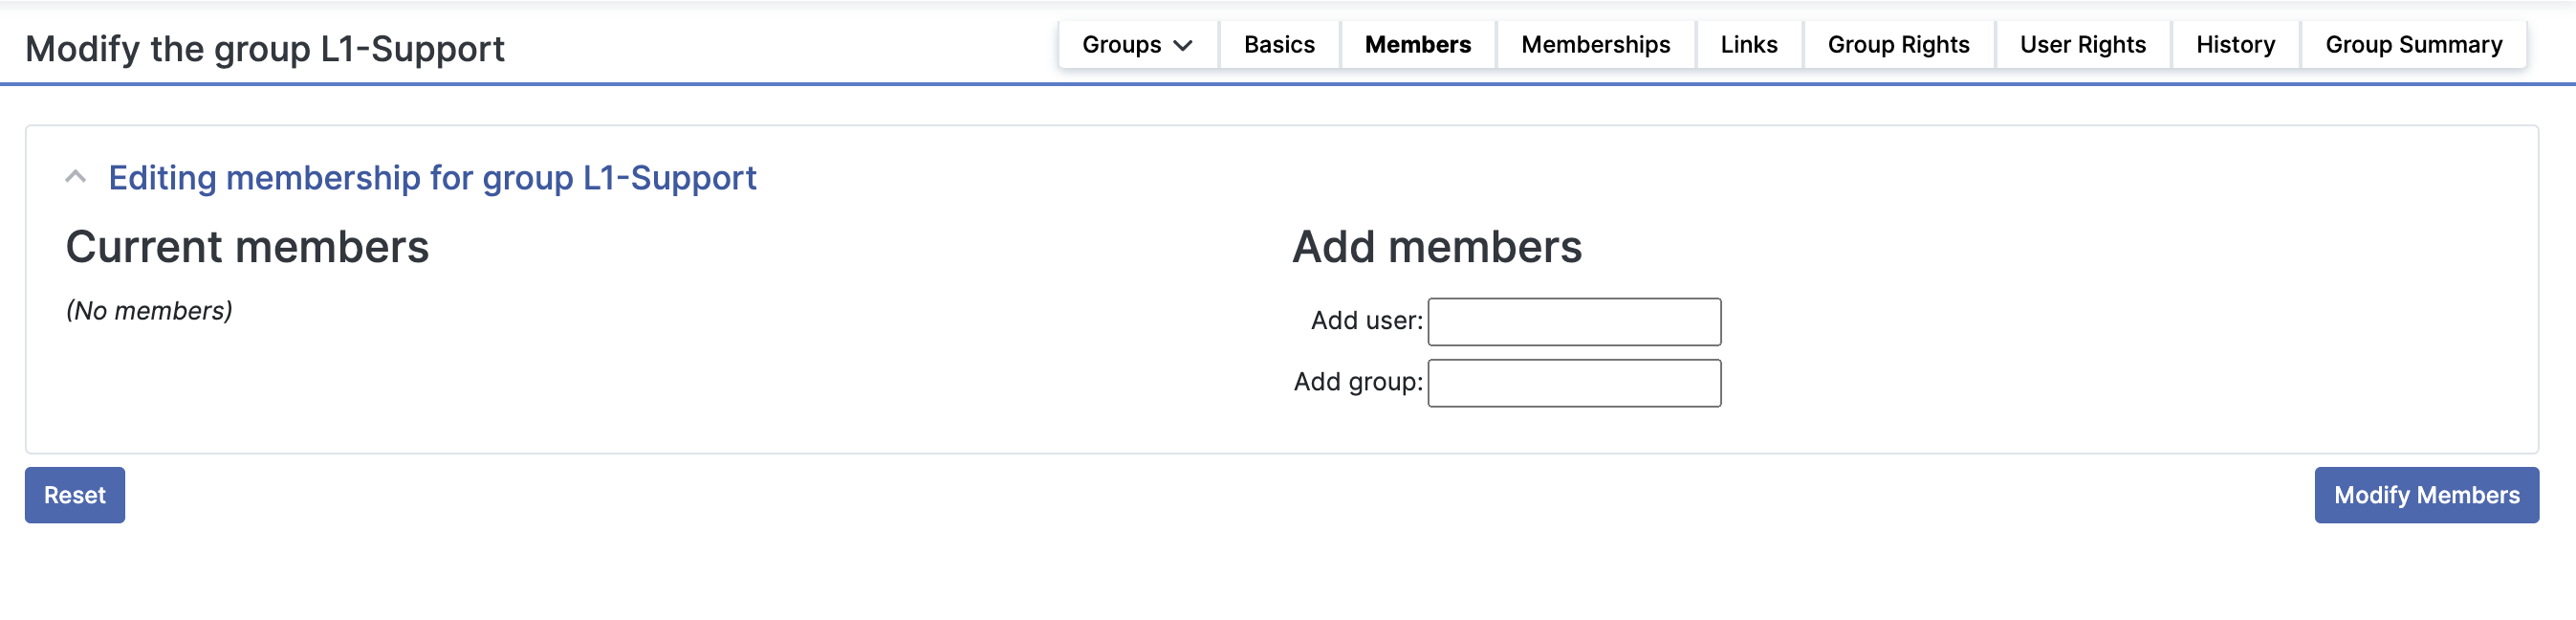
after, add the users to the groups
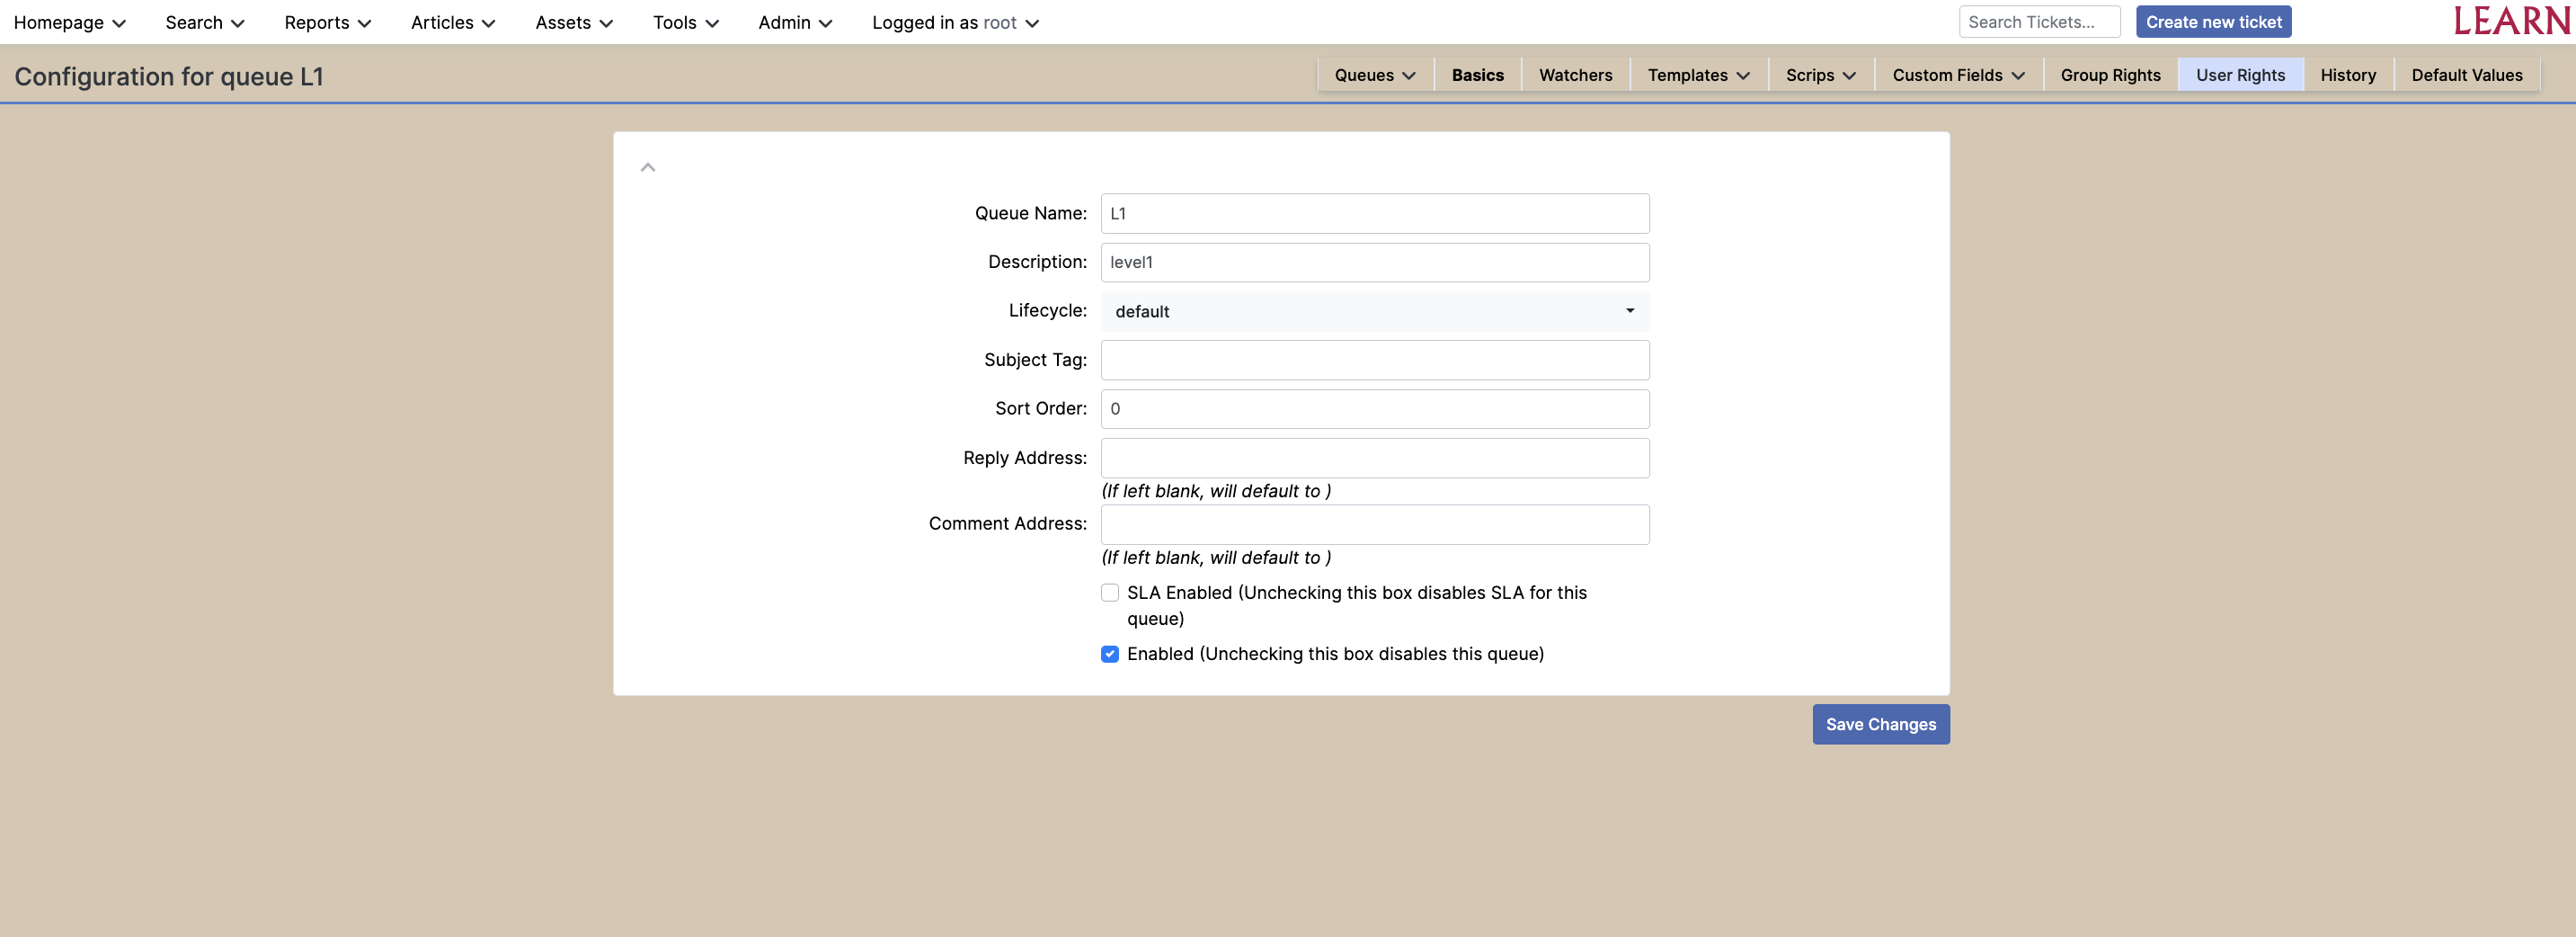
Lets Create a queue
Under Admin tab, Option Queue allows us to make queues for tickets. Click on create queue option. You will get a creation page as follows
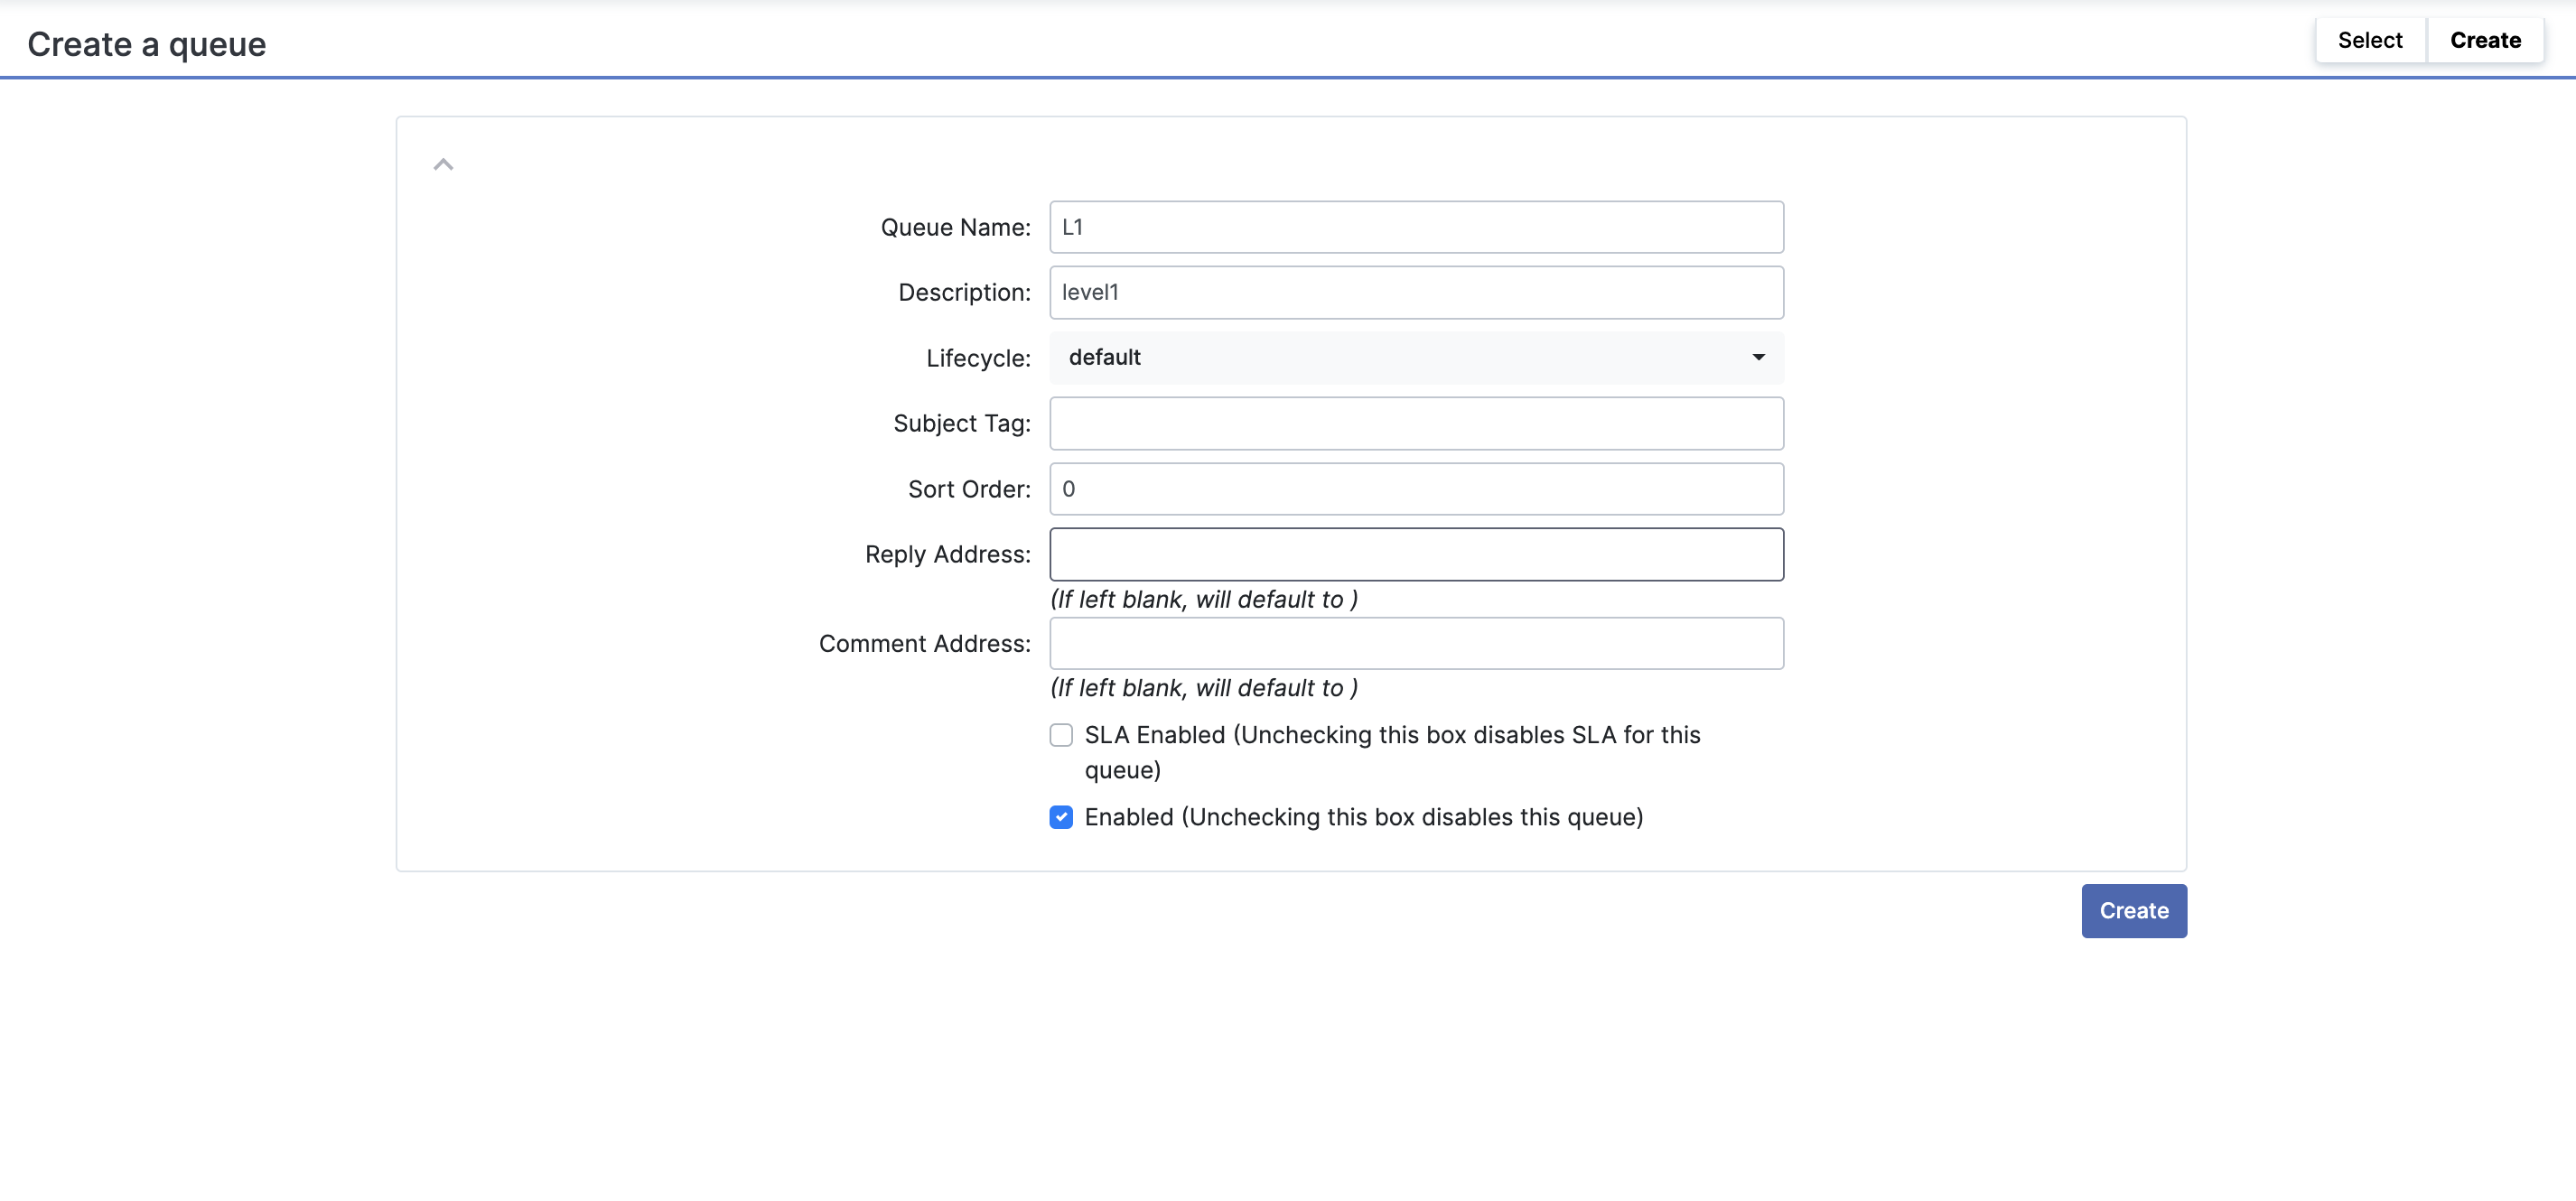
(Moderate as per your requirements)
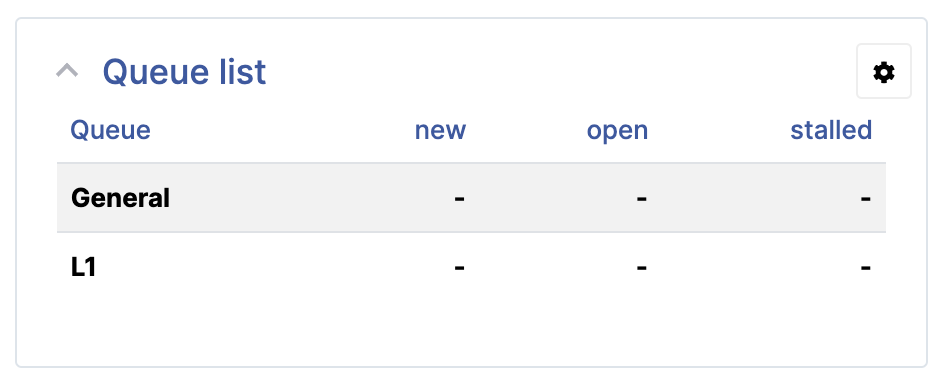
Navigate to homepage, Newly created queue is listed under queues
Change the rights for queue (If you are using a custom queue for general purpose, please change the rights/ permissions for the queue: otherwise users will not be able to create tickets.)
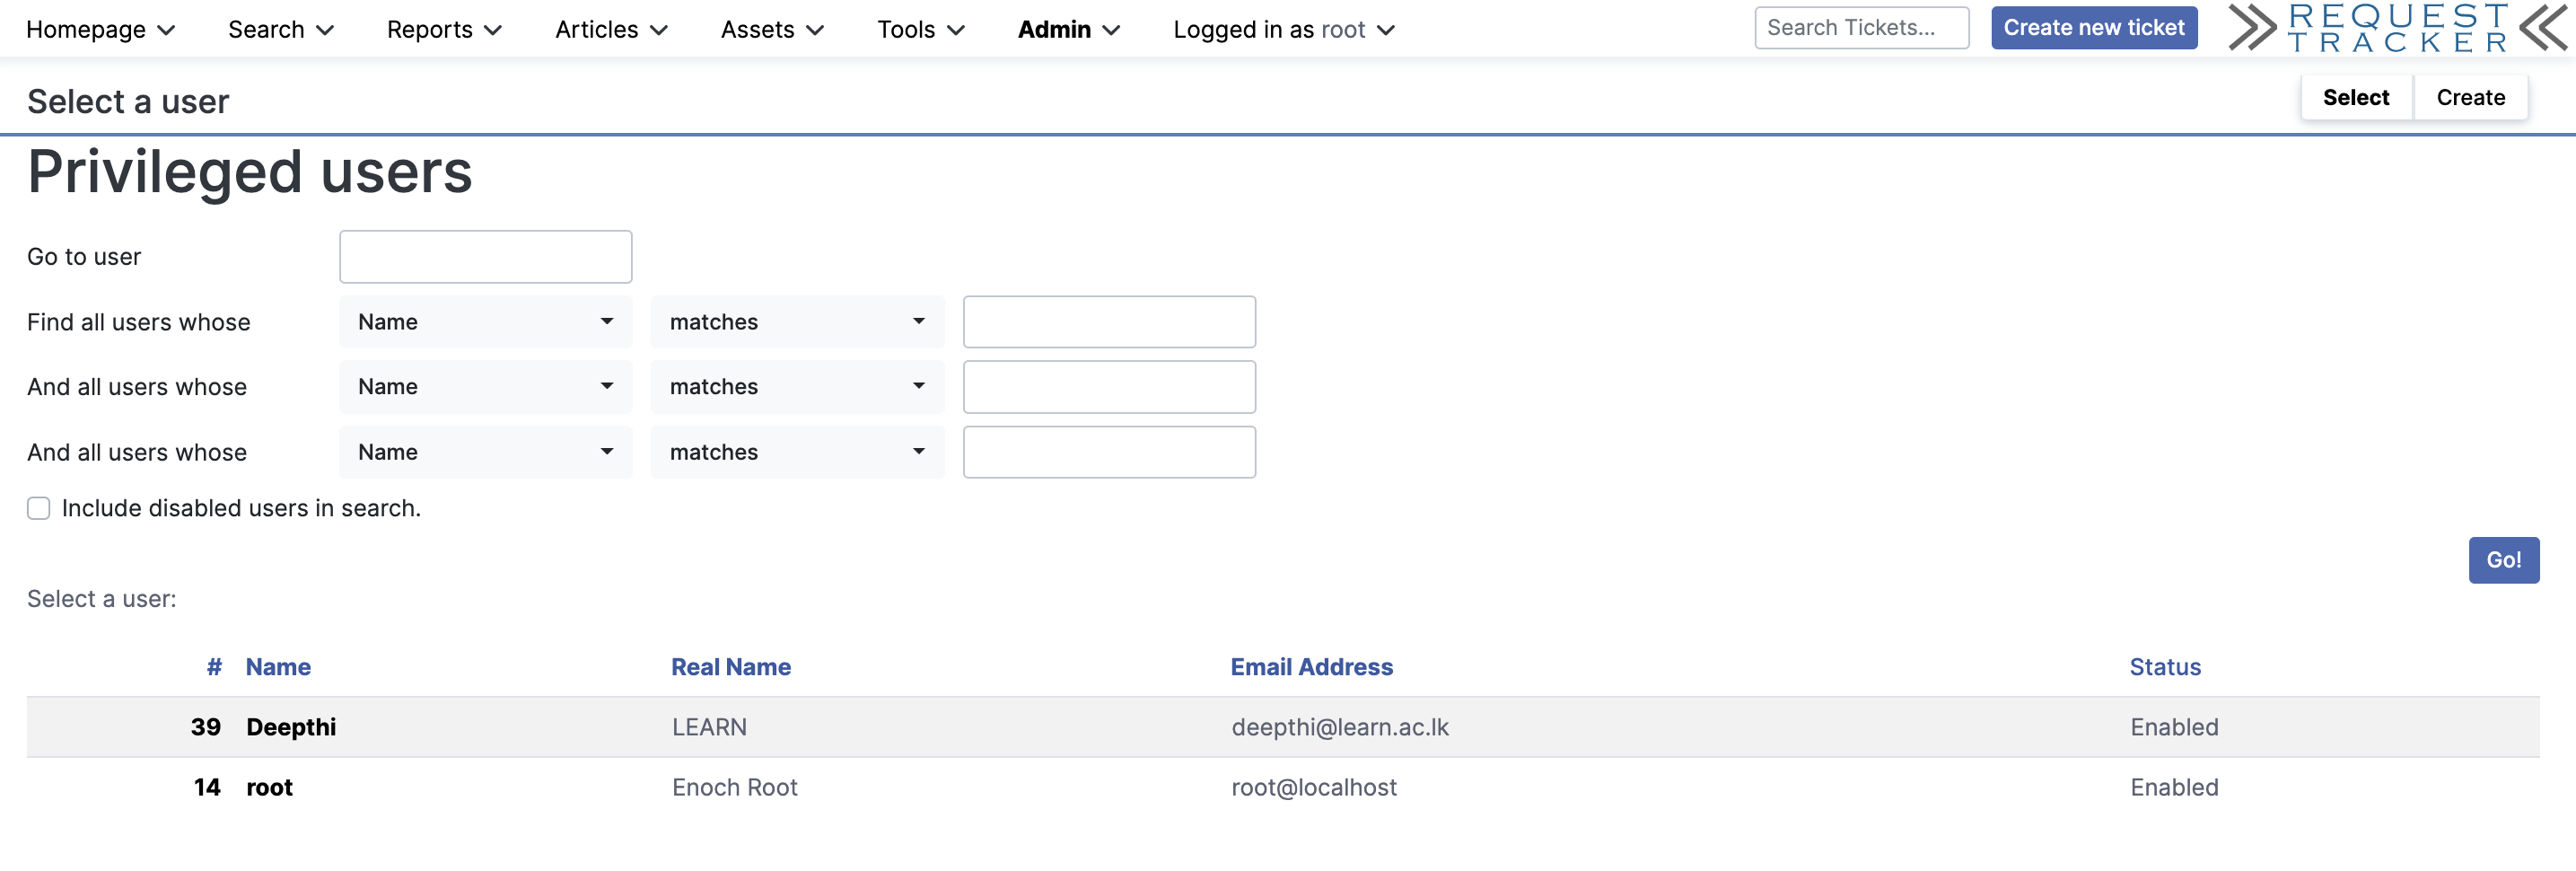
Let's see the user list. (There, a user have to be created before)
Changing user rights according to the queues
Navigate : Admin > Users > select
Then the page will similar as follows
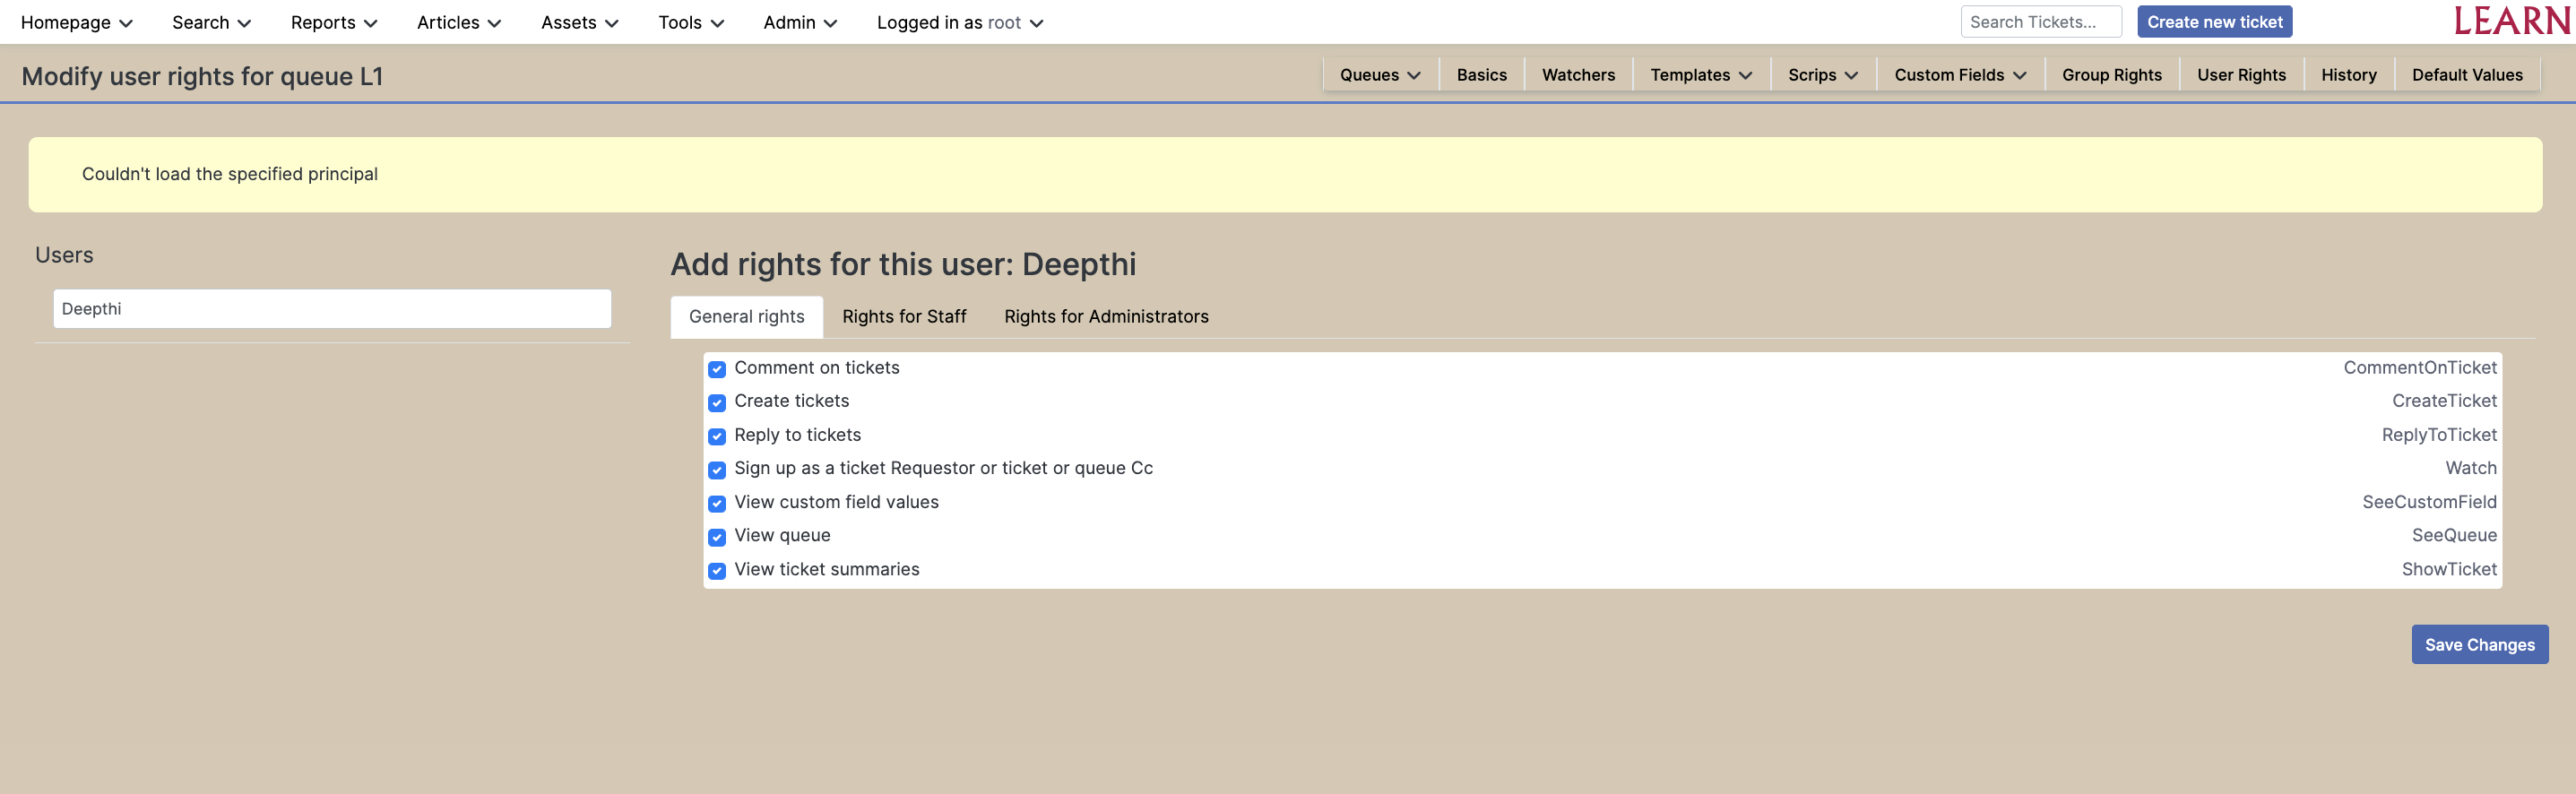
Navigate :
Click on the queue you want to assign
Select "User rights", Select a user to assign rights(tick as required in "General Rights,Rights for Staff and Rights for Administration")
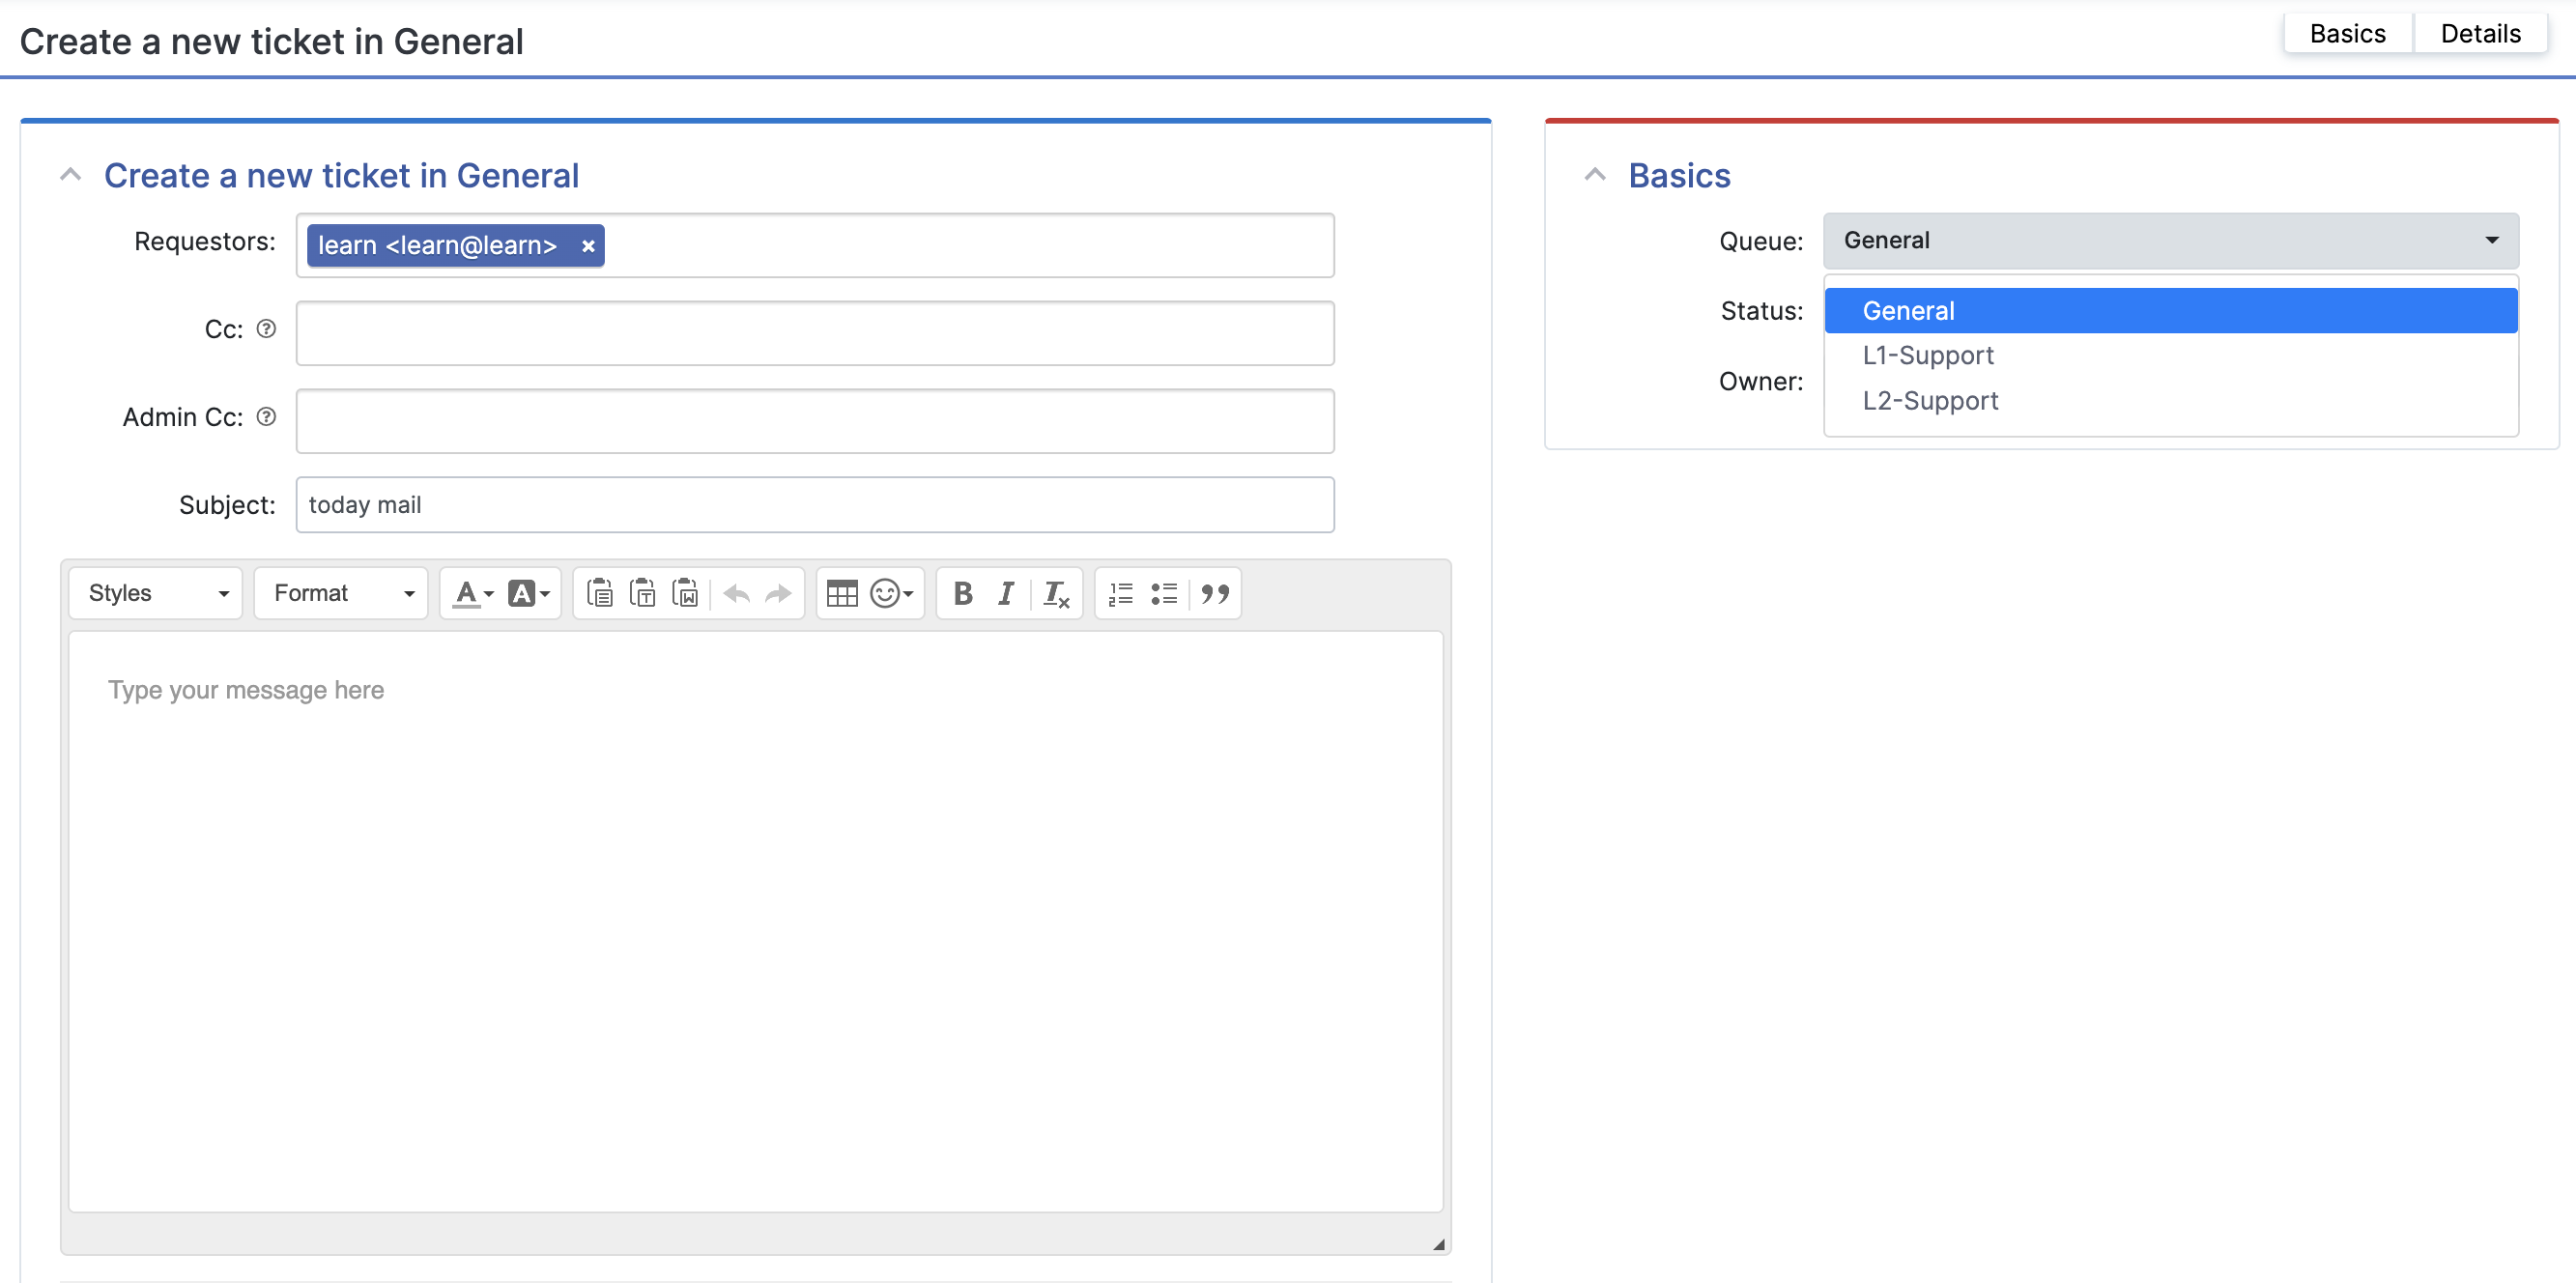
Let's create a tickets from inside in RT
Lets Create a ticket in installed rt5 system and Currently root is logged
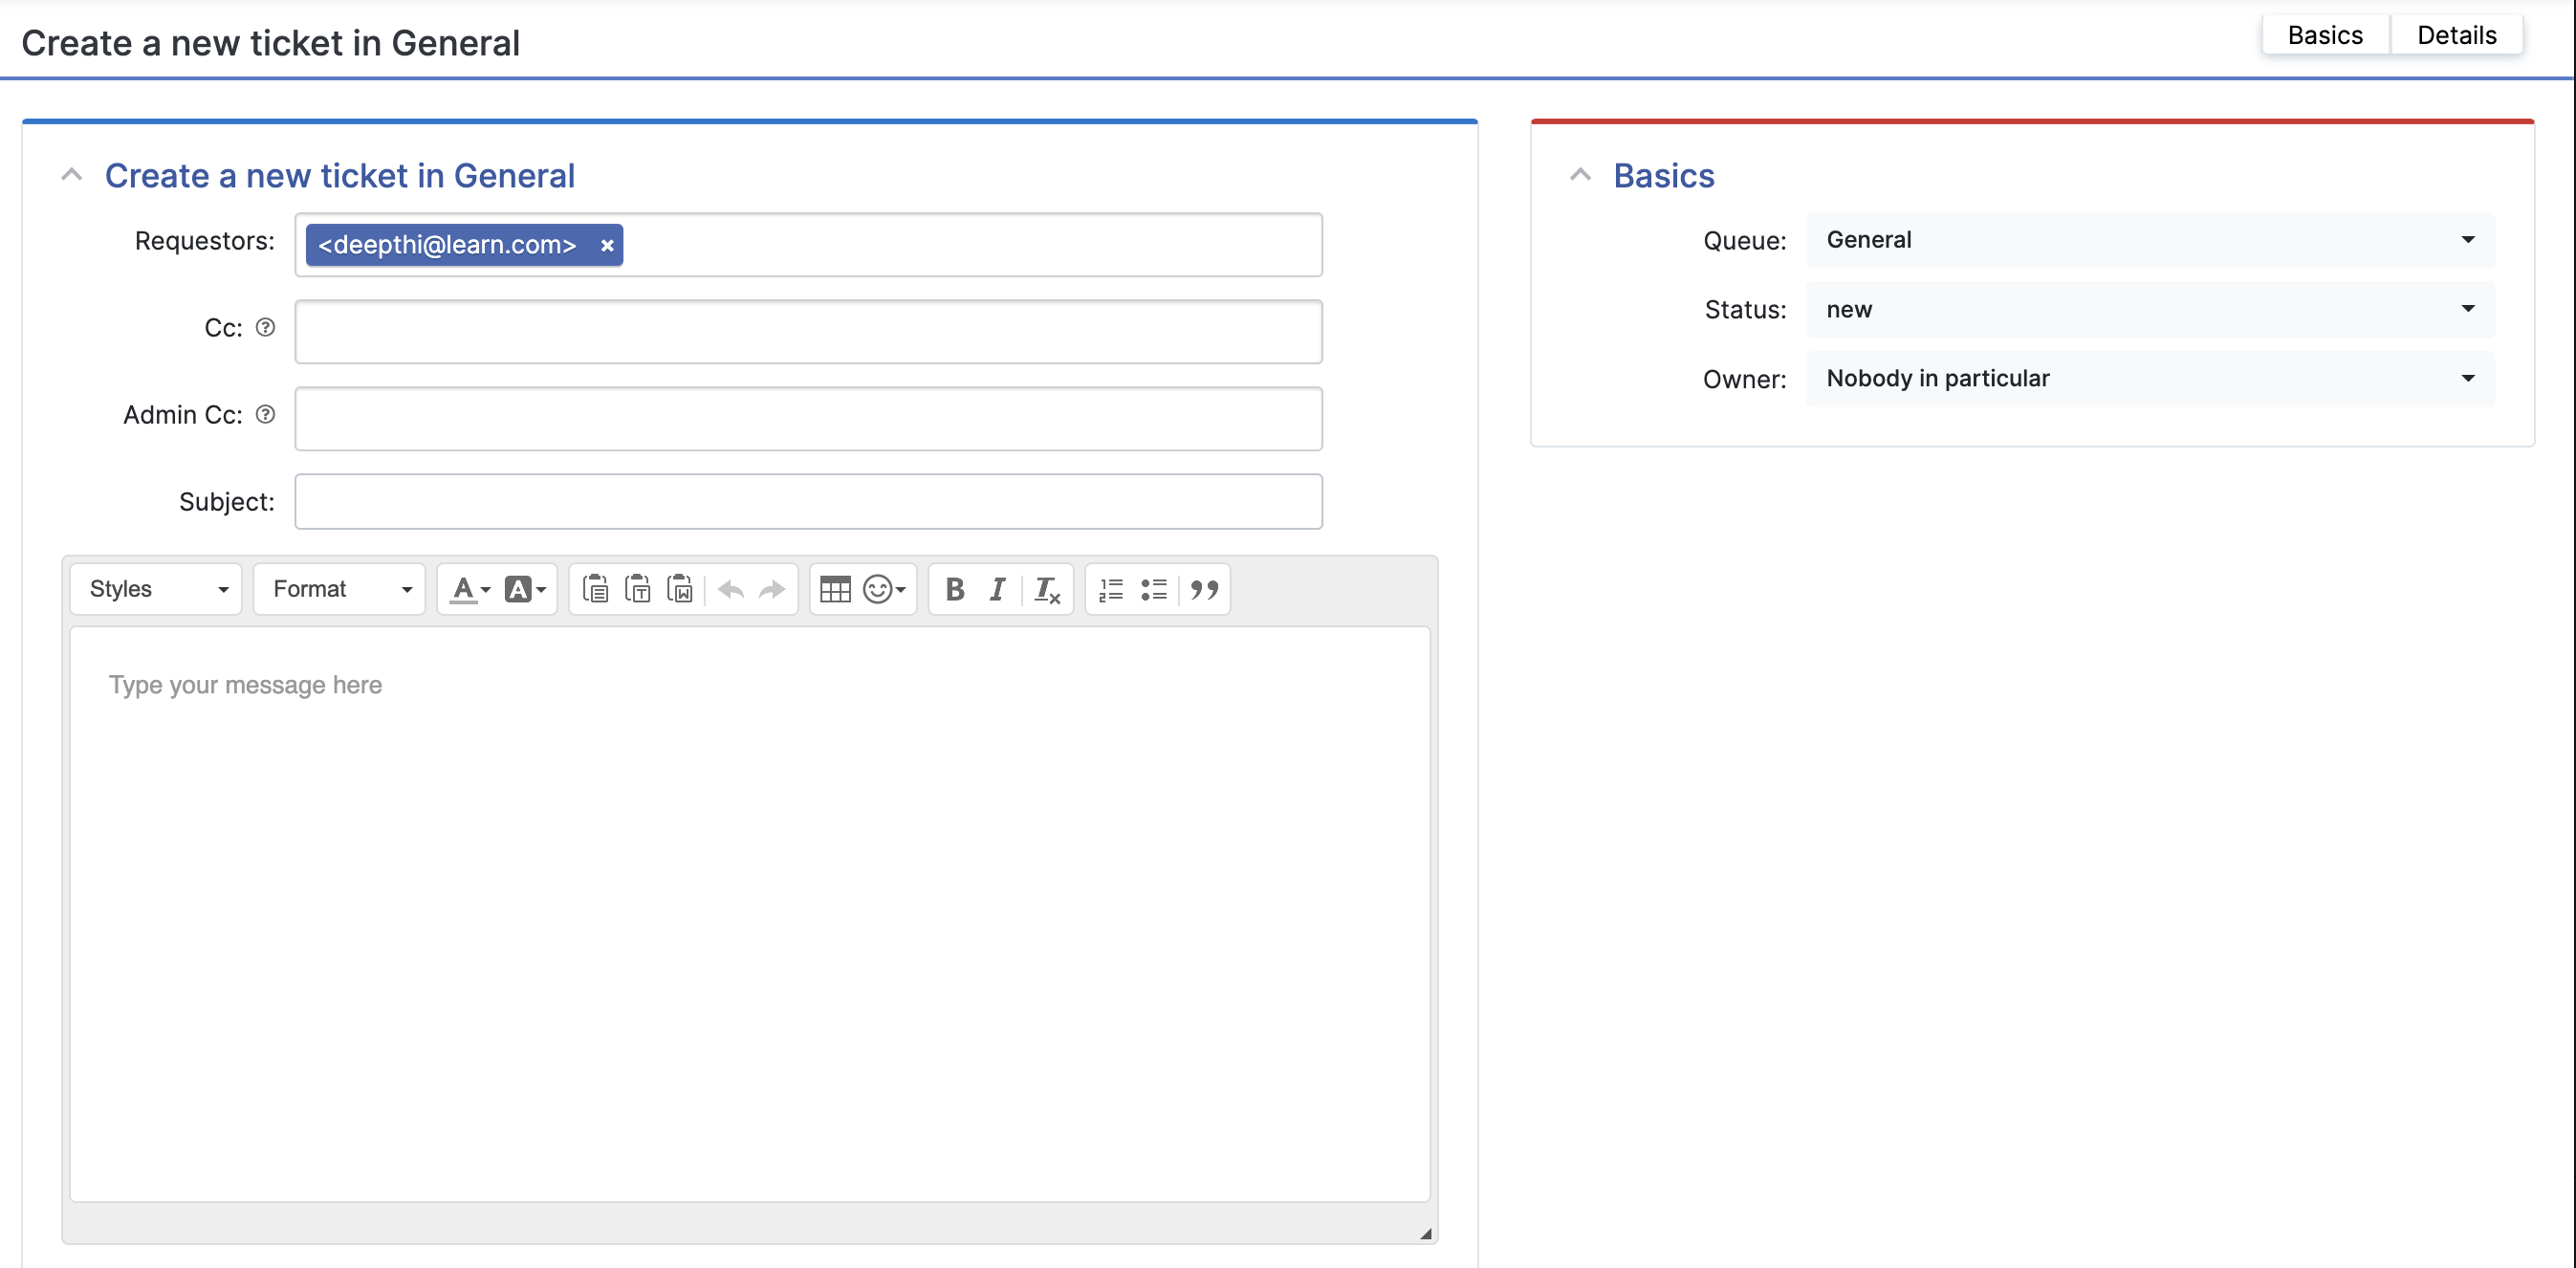
Add subject, cc, and if there are attachments for the ticket. Following is a sample ticket while completing
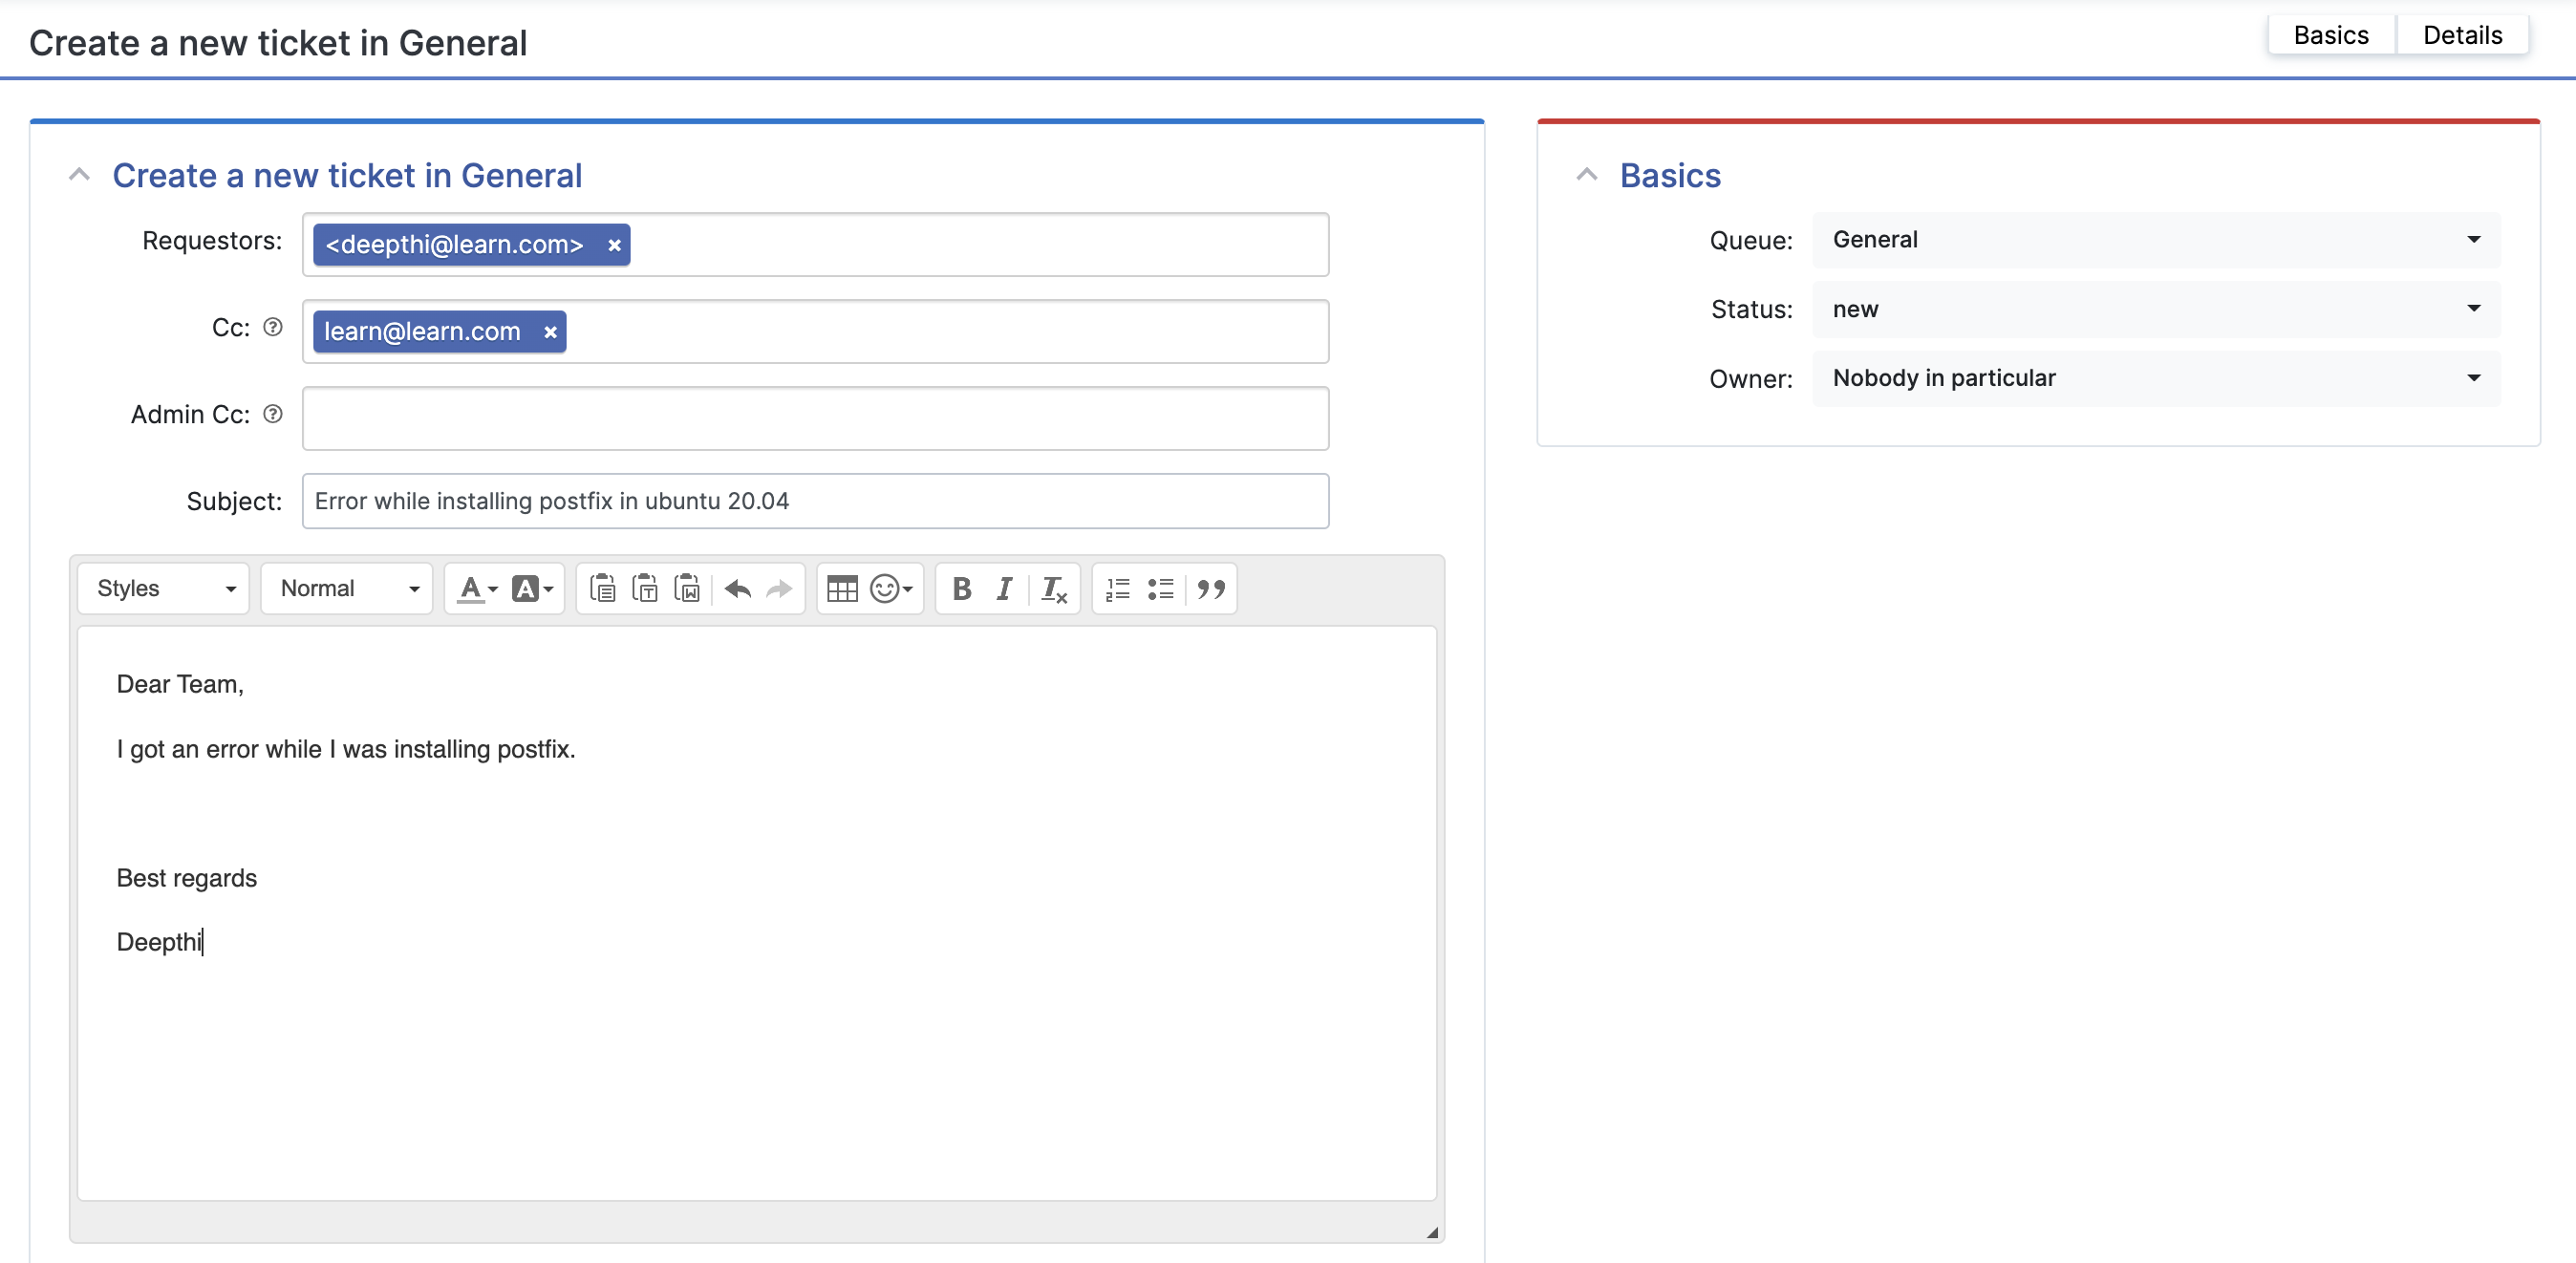
You will see in right side, there are the details for the ticket, to what queue it is directed, and the status of the ticket which is going to be created
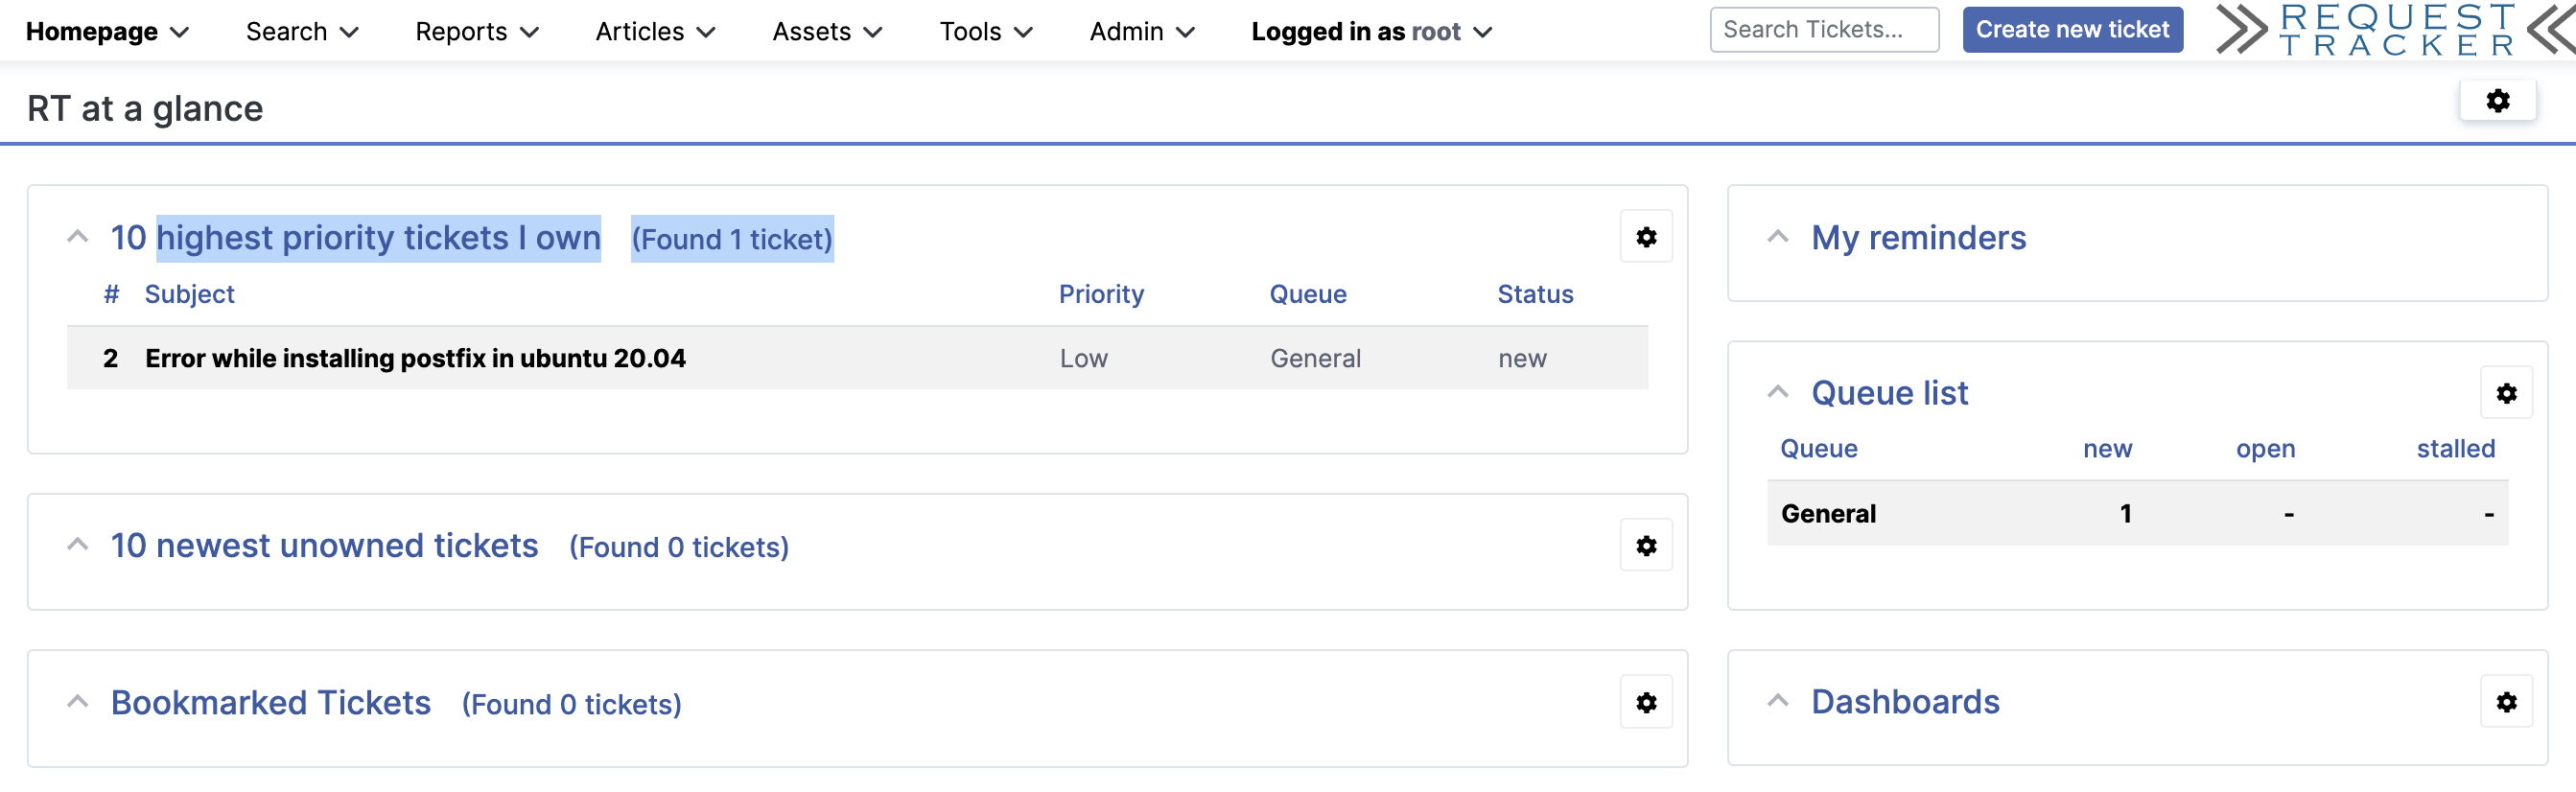
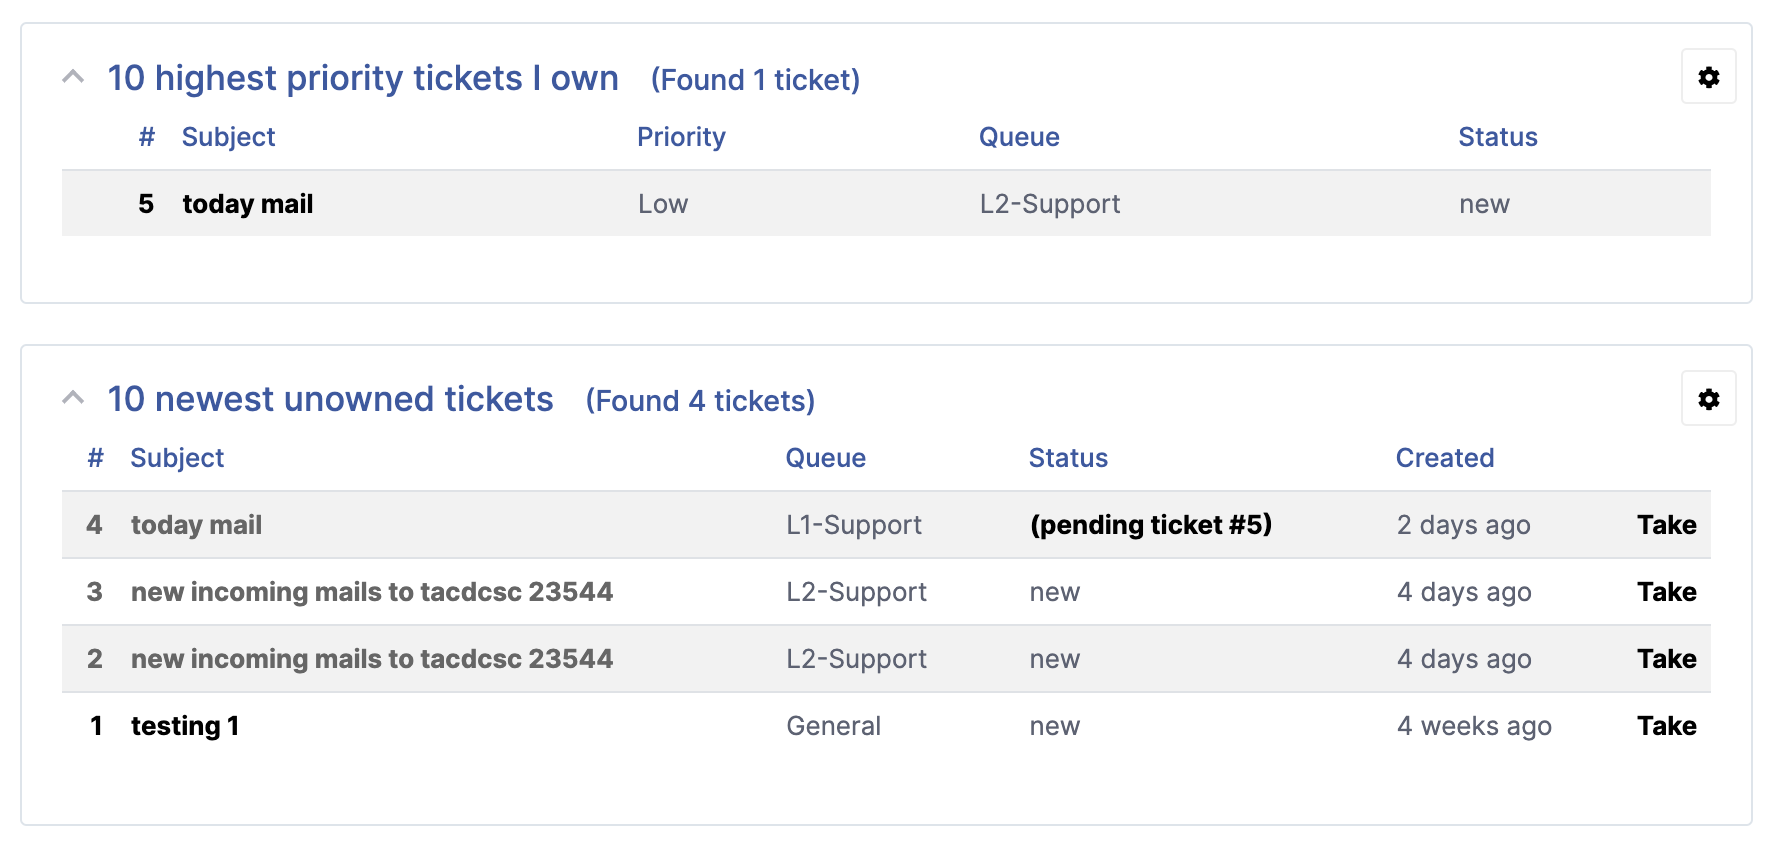
Newly created ticket will be shown as below under "Newest Unknown tickets" since the tickets is not taken by anyone.
 There you can see a button "Take" the ticket. This means you are going to engage with the customers issue.
When you click take, then it will be disappear under "newest unowned tickets" and appear the ticket under "highest priority tickets I own"
There you can see a button "Take" the ticket. This means you are going to engage with the customers issue.
When you click take, then it will be disappear under "newest unowned tickets" and appear the ticket under "highest priority tickets I own"
Let others to create tickets
If you are managing RT institutional level, when people send emails to the mail you have announced, you will be able to see a created ticket on the system. In this setup, mails are sent over terminal using mail command.
Example:
mail -s "Apache2 error" tac1@learn.com
after sending the mail, reload your rt and you will see a new ticket with the subject "Apache2 Error" under the queue with a queue number.
Changing status of a ticket
While you move the cursor on the ticket, you will see a pencil icon, There you will be able to change the priority and also the status of the ticket.
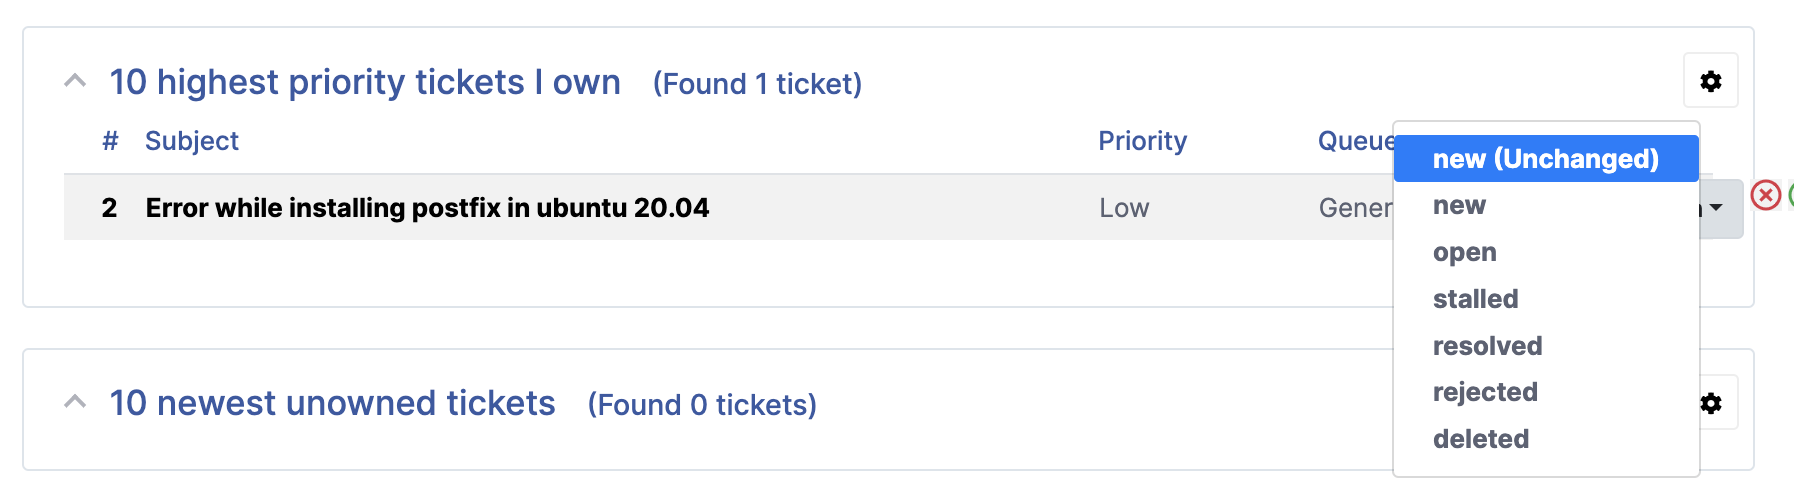
(We change the status of the ticket when we work on the issue. And change the status to open while working and then if the issue is solved, then We mark as "resolved")
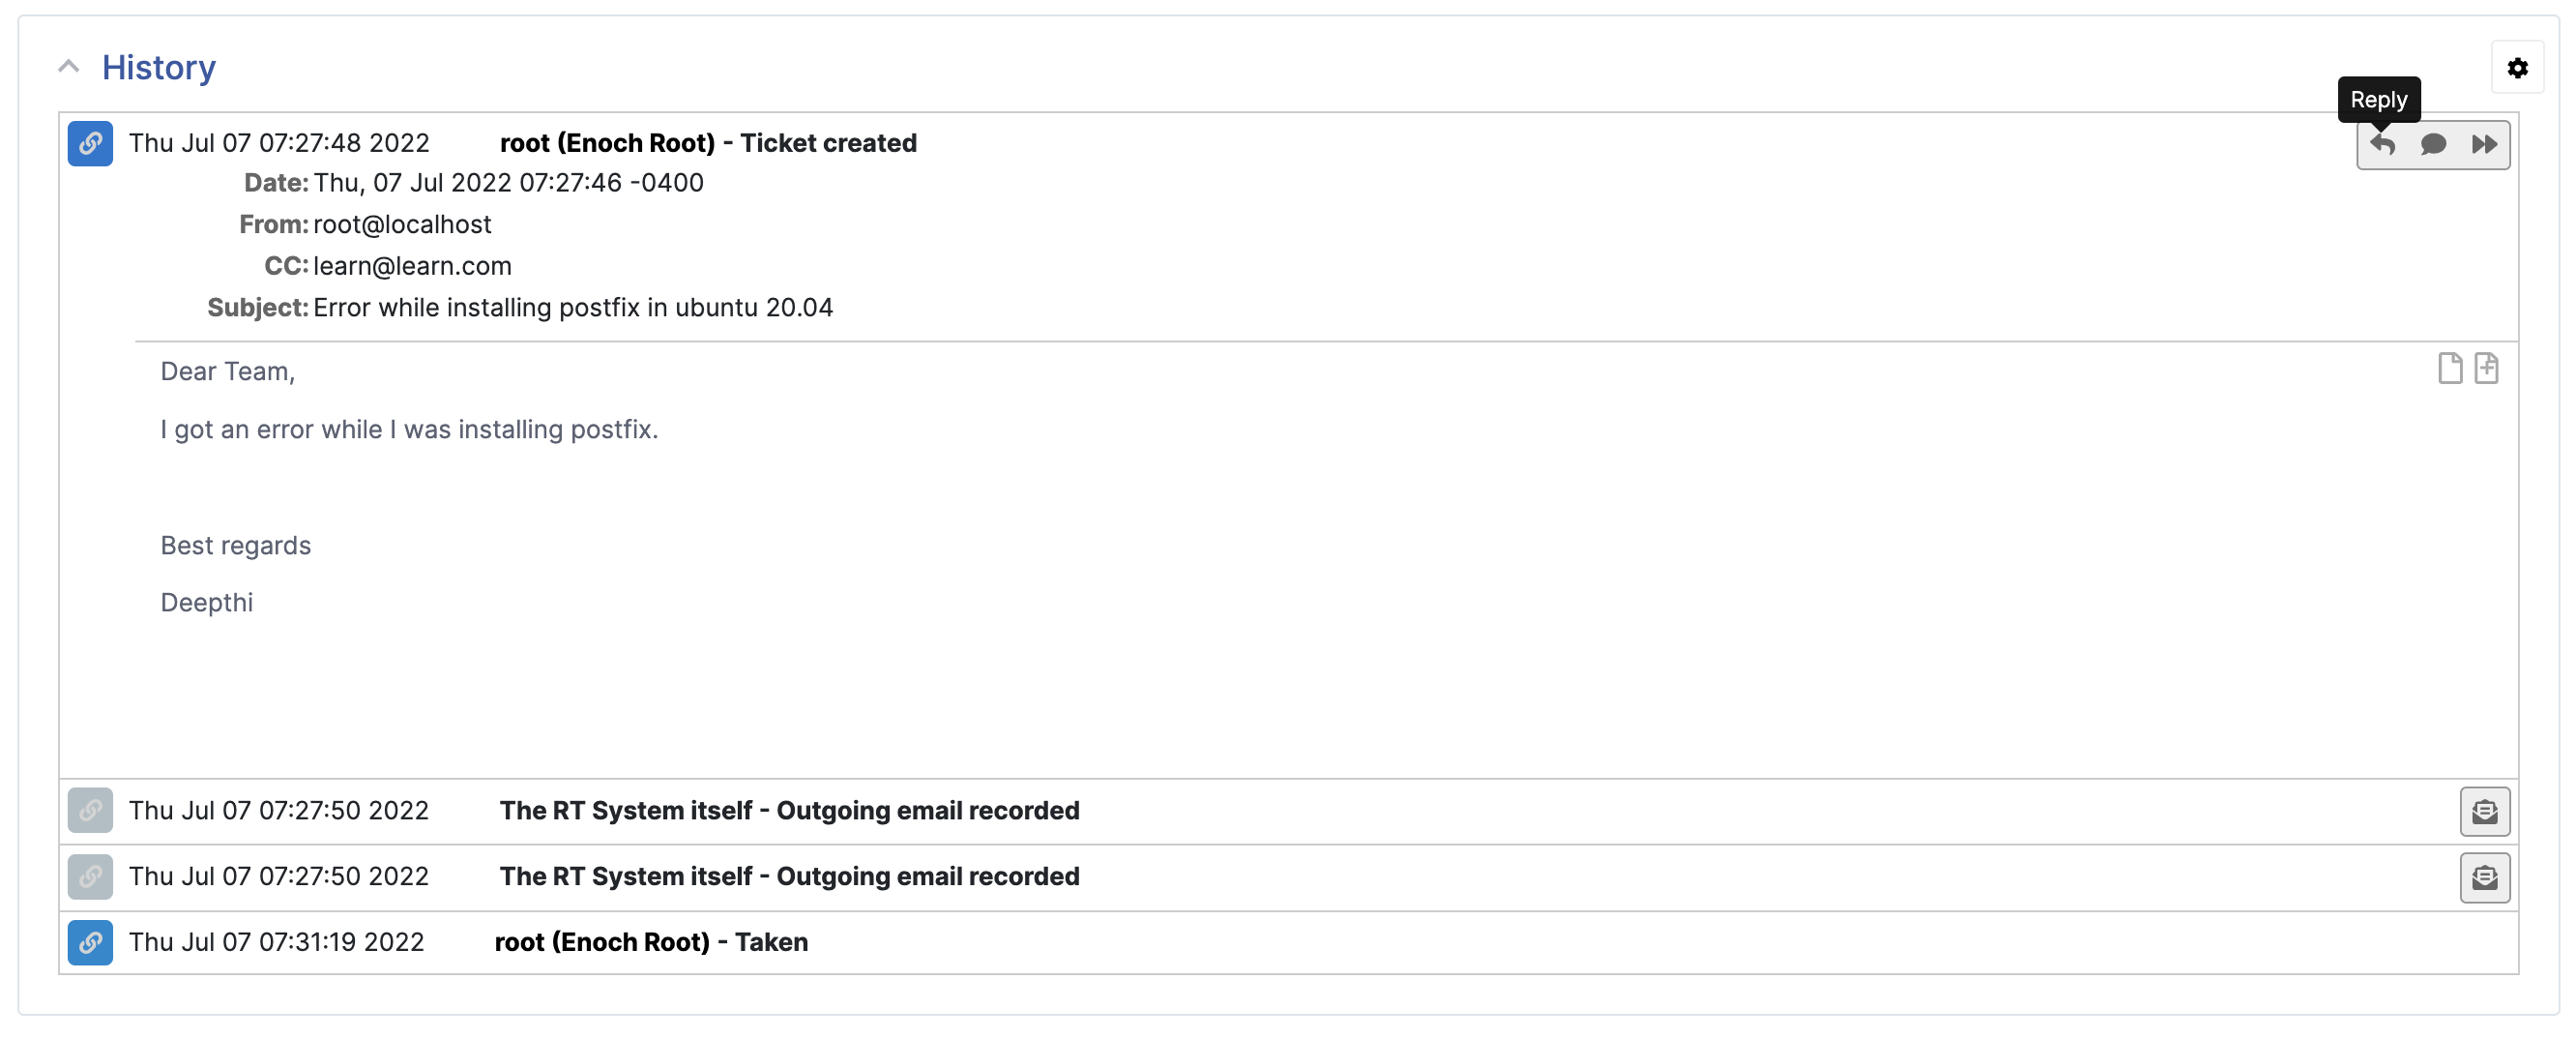
When we click on the ticket, we can see another window details and the buttons to moderate on the ticket.

On the right upper corner, there are tabs to get familiar with to handle a ticket.
Note : We can change the status of the ticket using "Action"
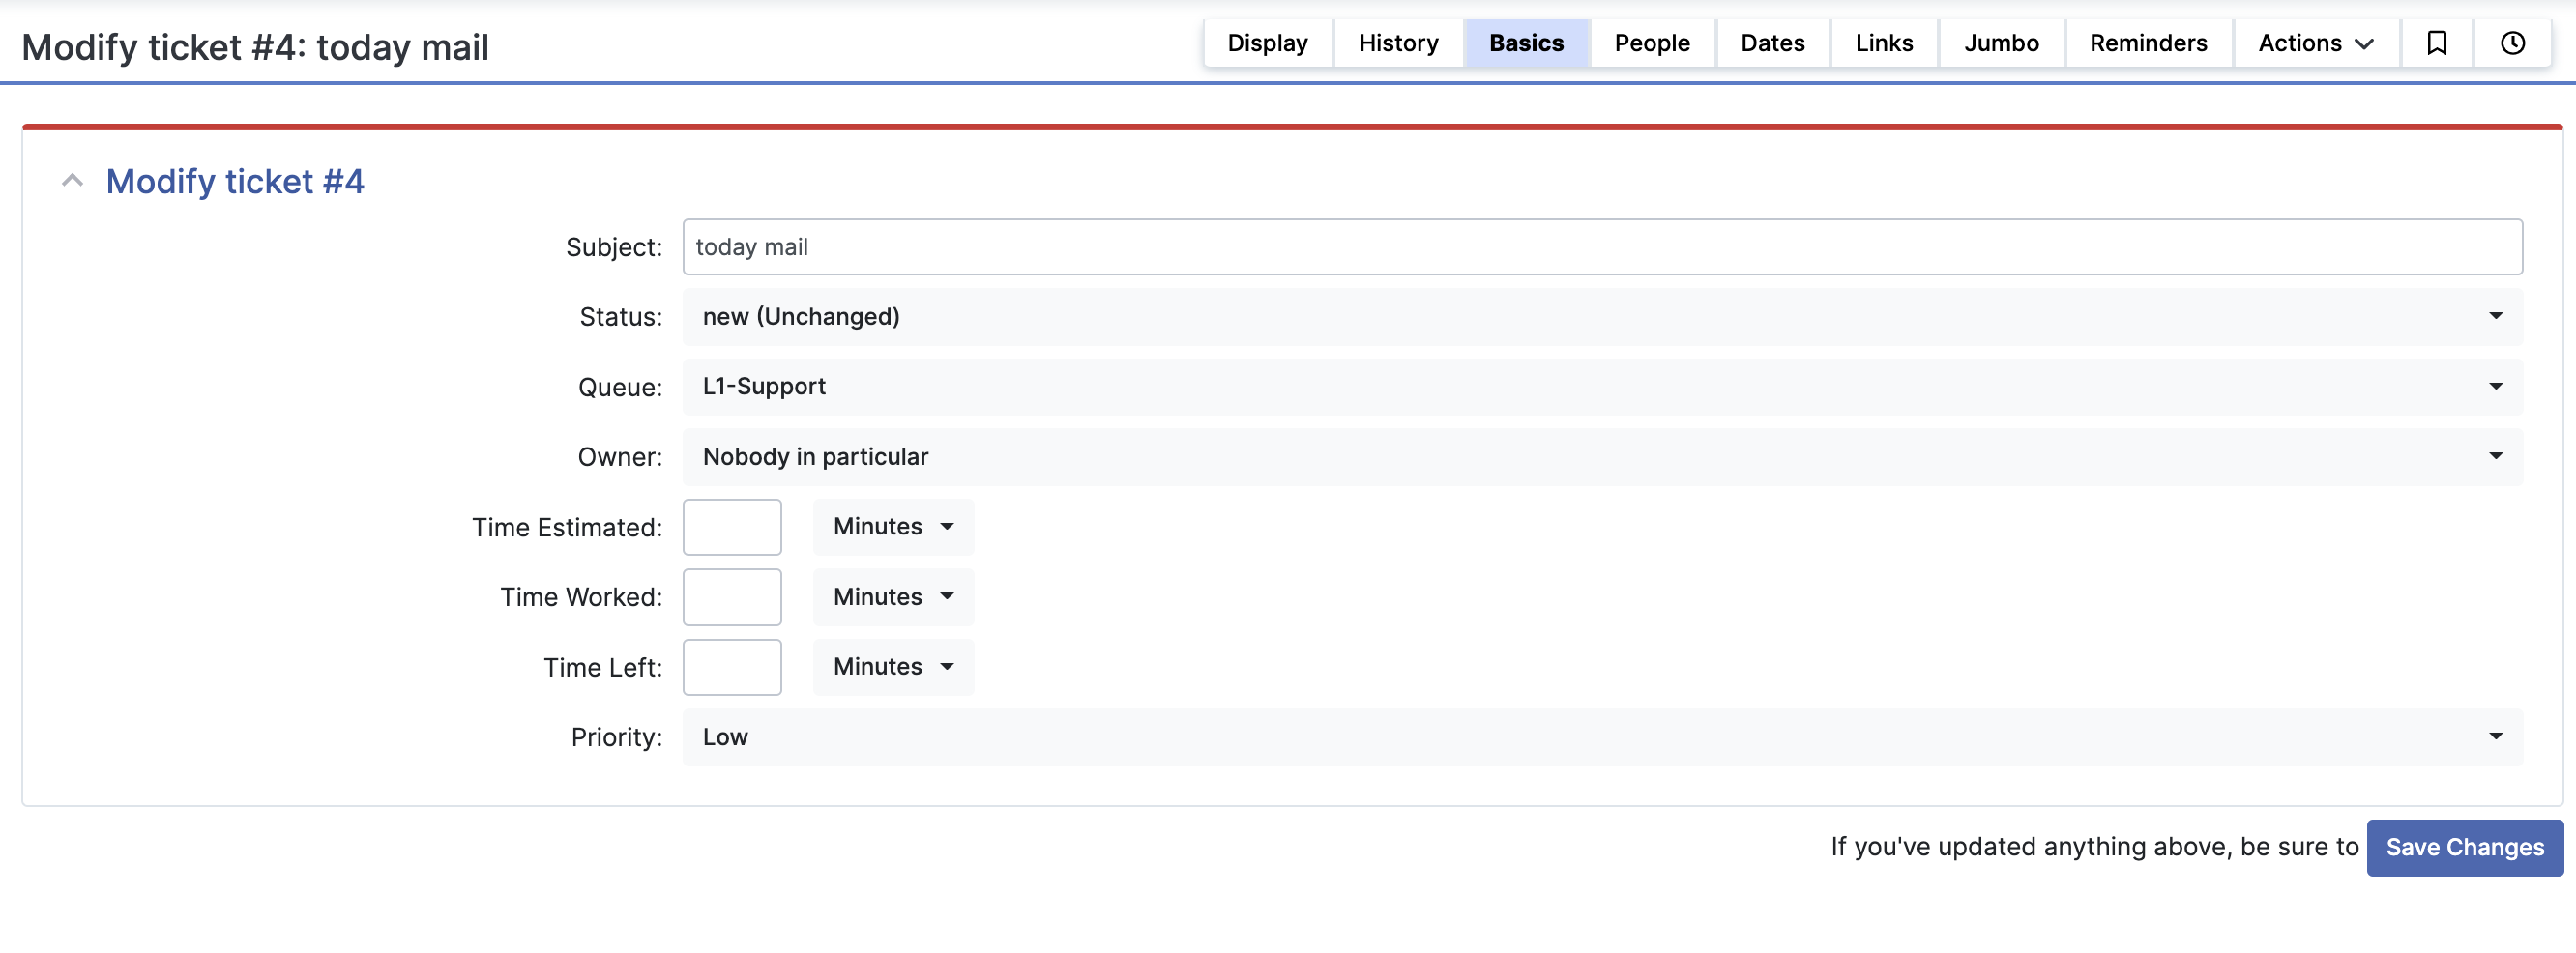
And another way to Change the Status and the owner, You can click on the ticket and click on "Basics"
When you scroll down, You will see the body of the ticket, there you will have the facility to reply to the requestors, comment and forward the ticket.
When replying/updating a ticket, you will be able reply to the requestors and also, update the owner, status and how much time you worked on the issue(Updating time is a new feature) as following
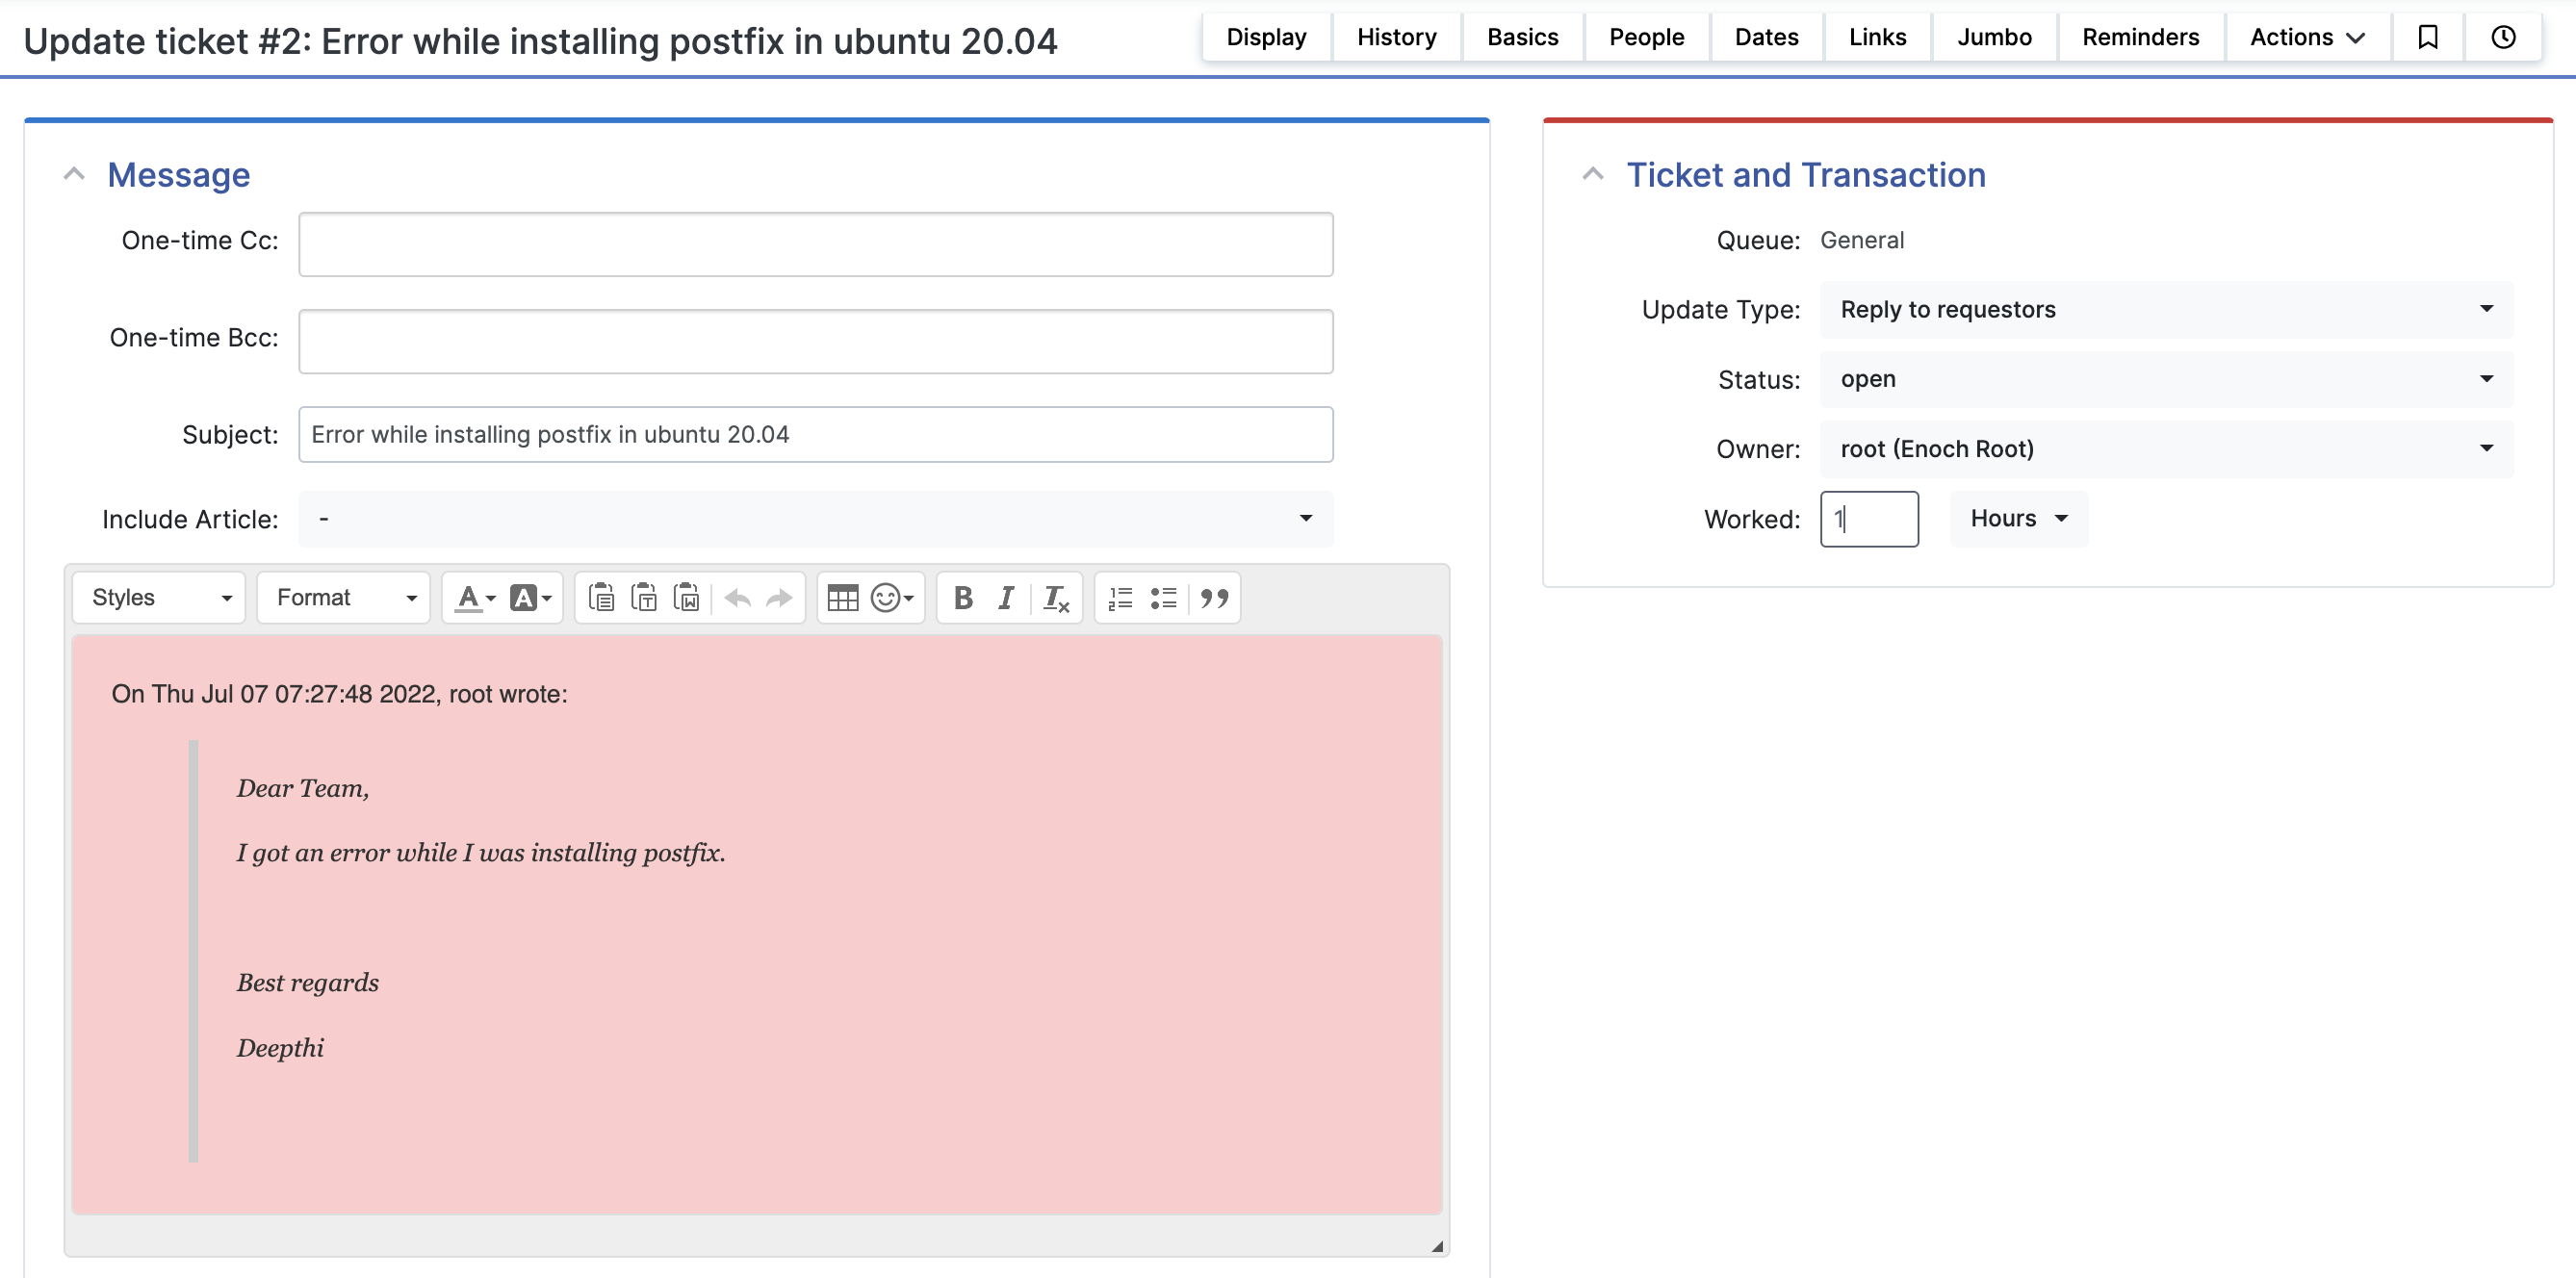
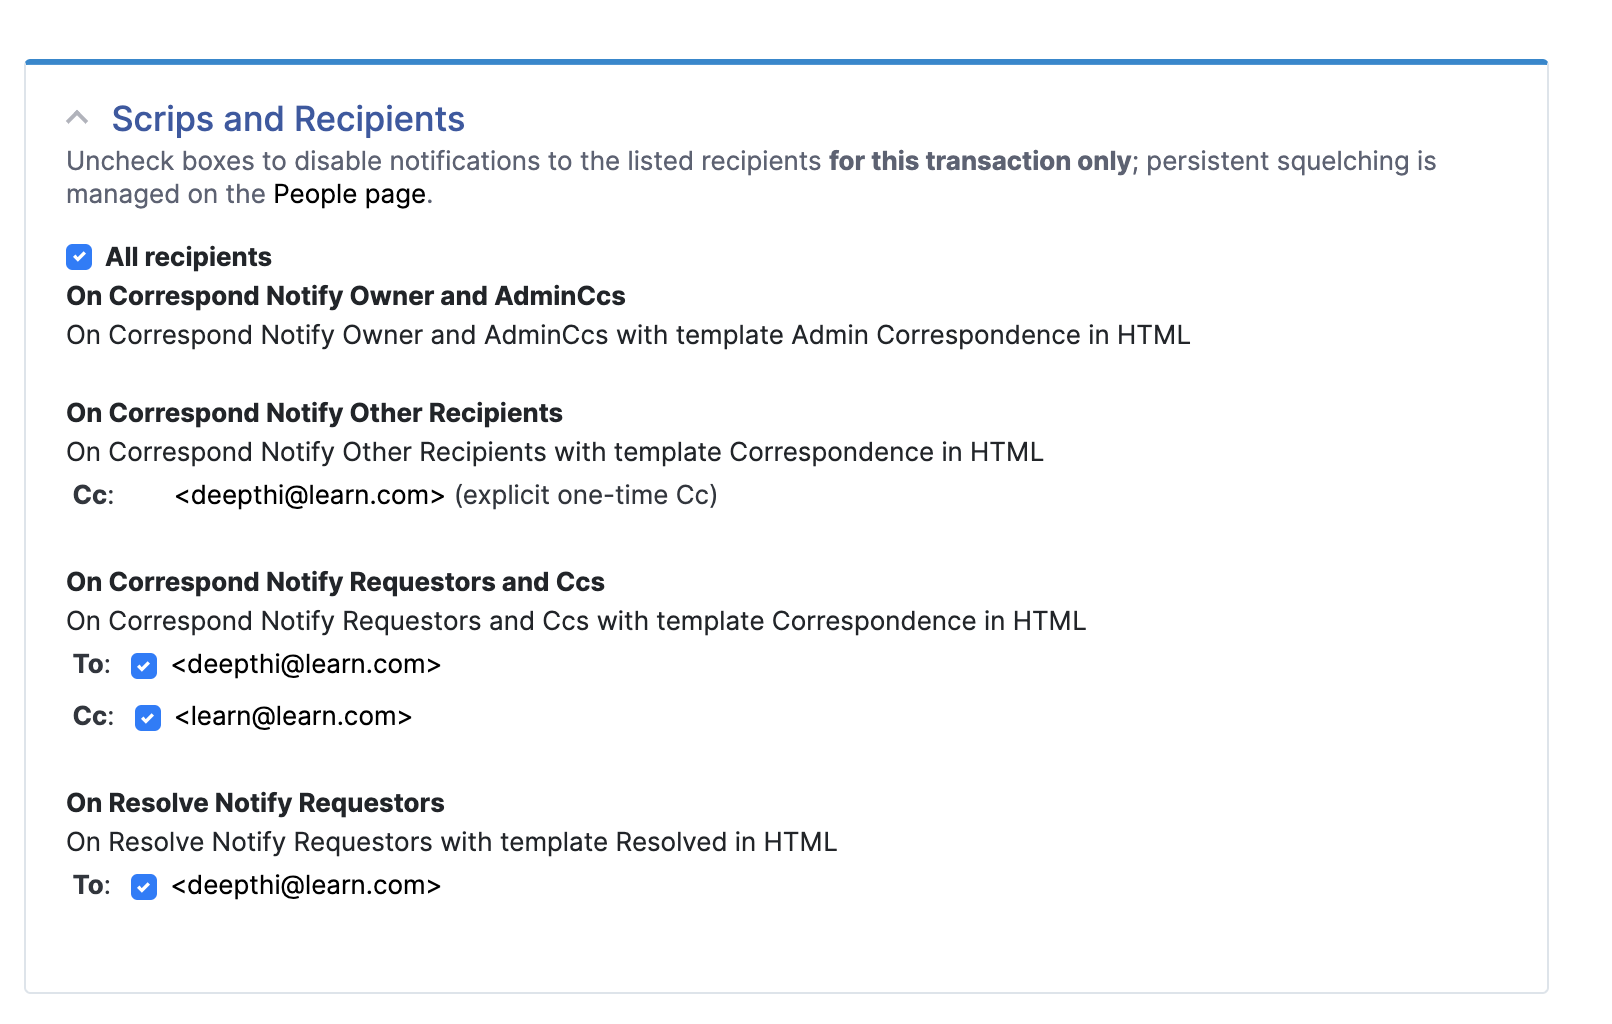
Also you will see as following block when updating a ticket to cc,bcc the other parties
Bulk update option is for updating tickets at once

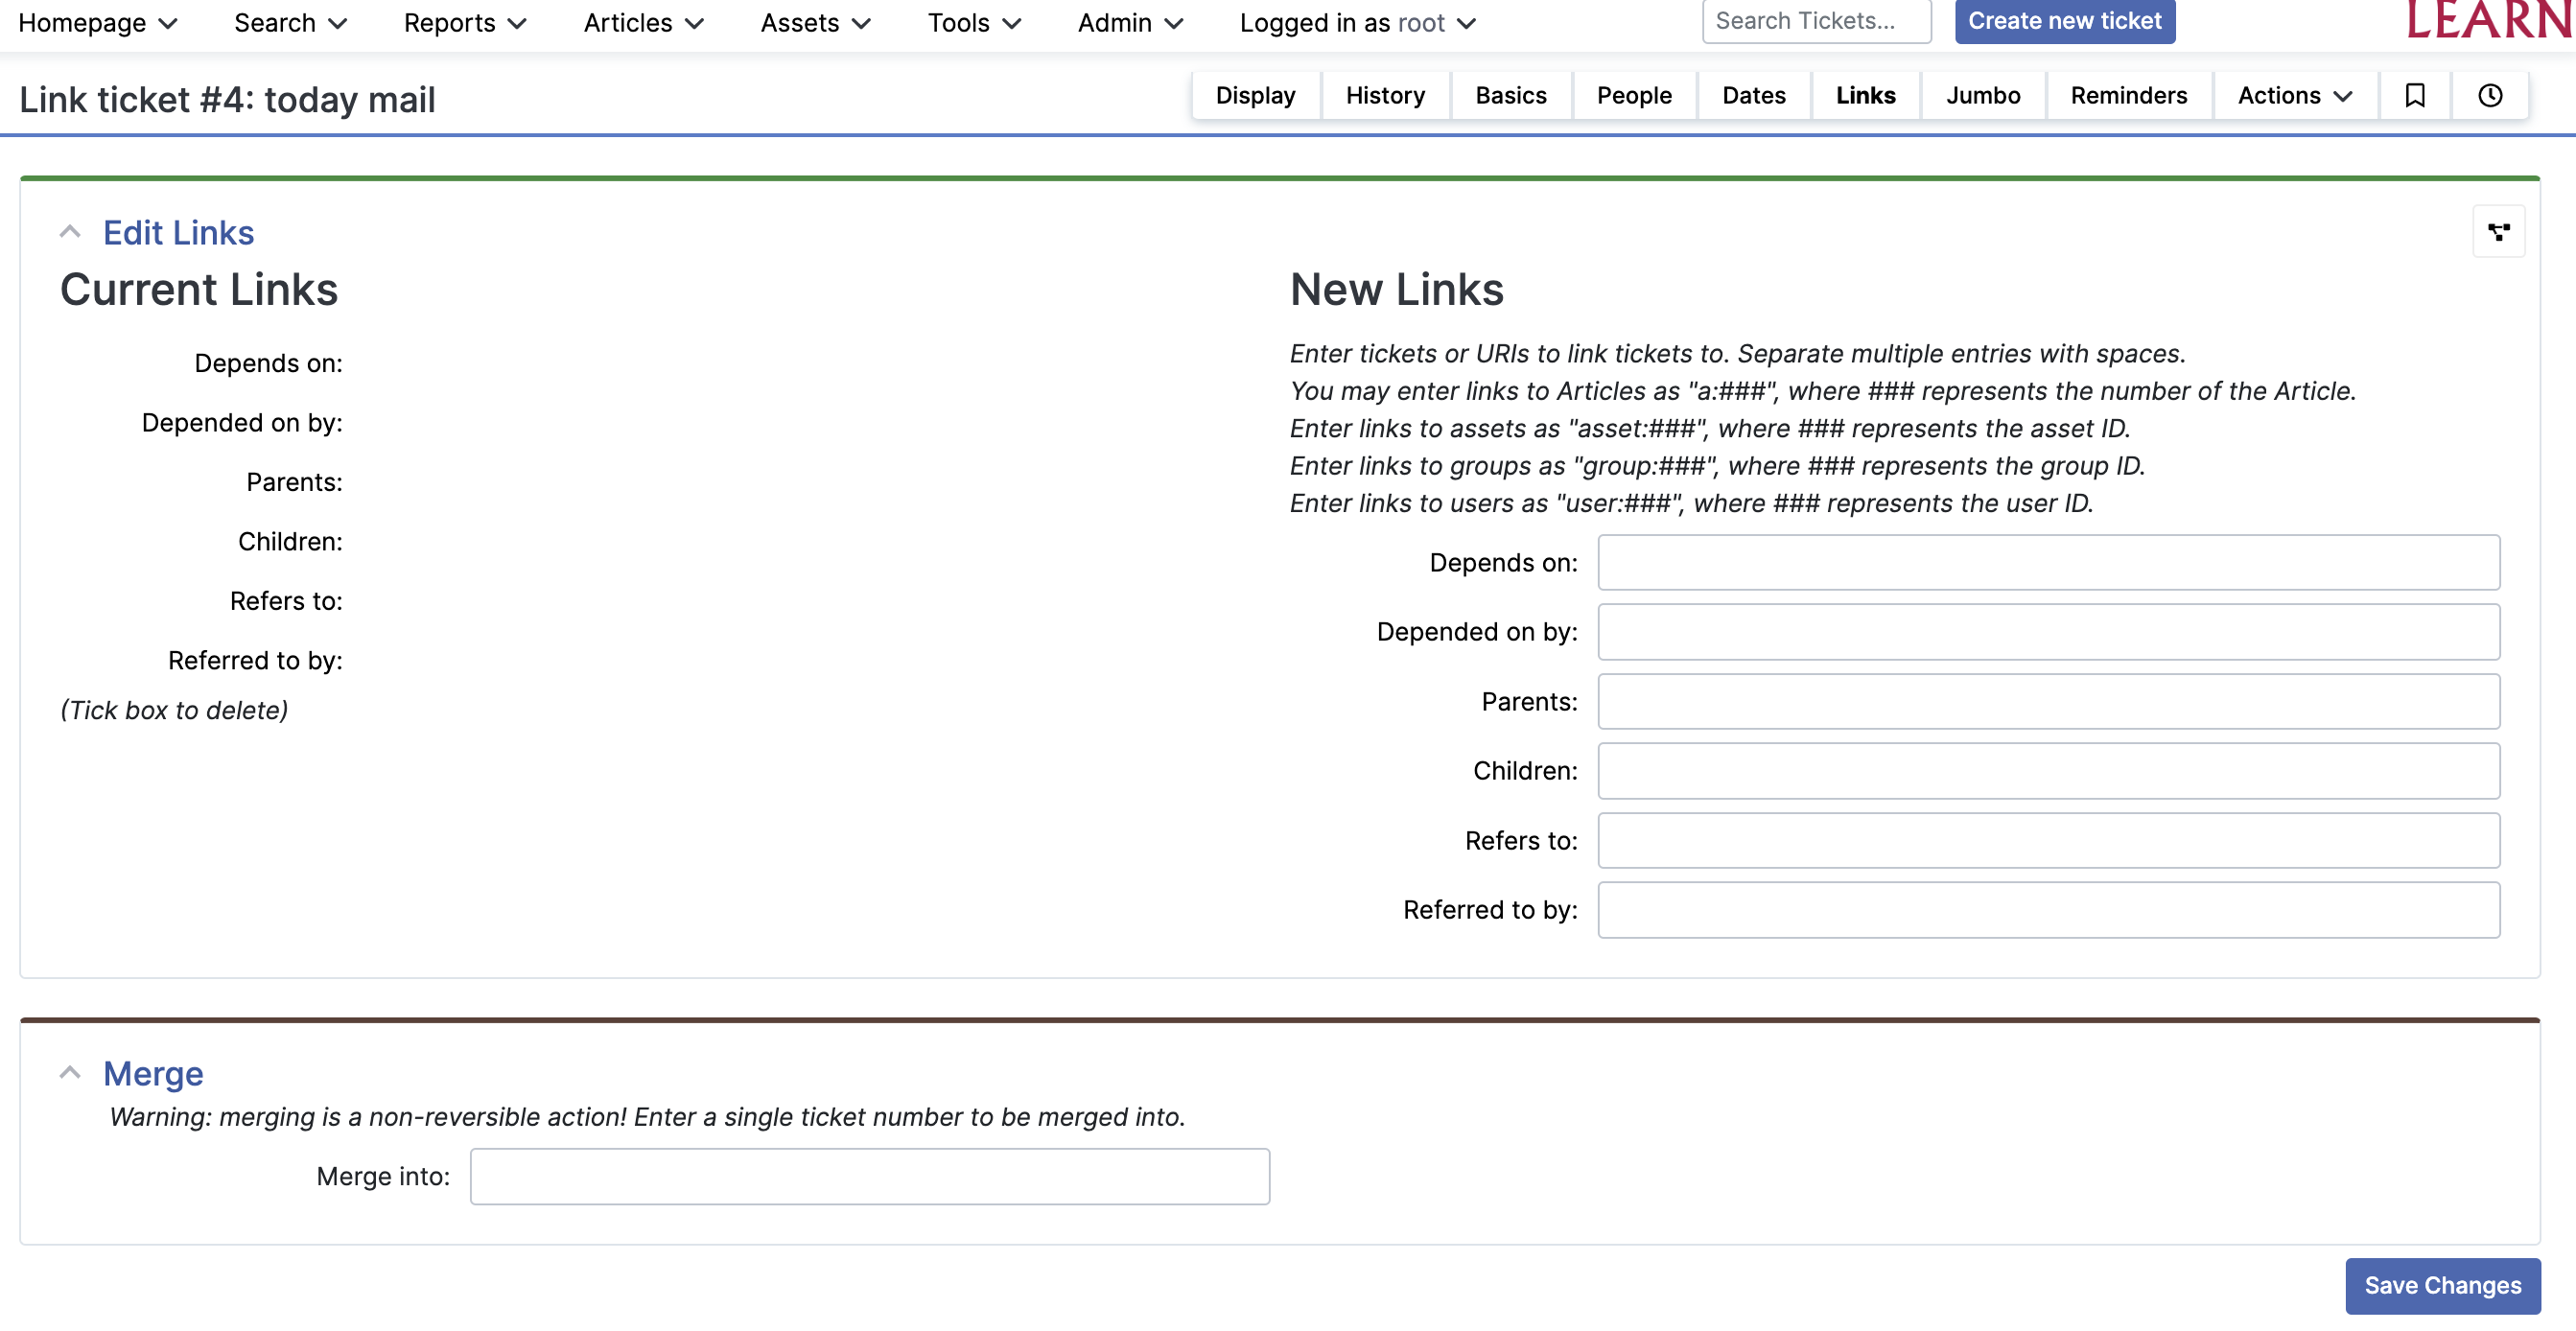
Merge Tickets =
In RT, normally if we receive same request or same kind of request, We merge them together. So when we refer the ticket. We can find the similar cases for an institute.
Click on a ticket and click on "Links". You will see a window as follows.
You will need to enter the ticket number in "Merge into:" box and enter
Escalading tickets
Tickets are escaladed among level. Tickets are passed to next level to solve
To escalade a ticket, click on the ticket and scroll you will be able to see "Link".
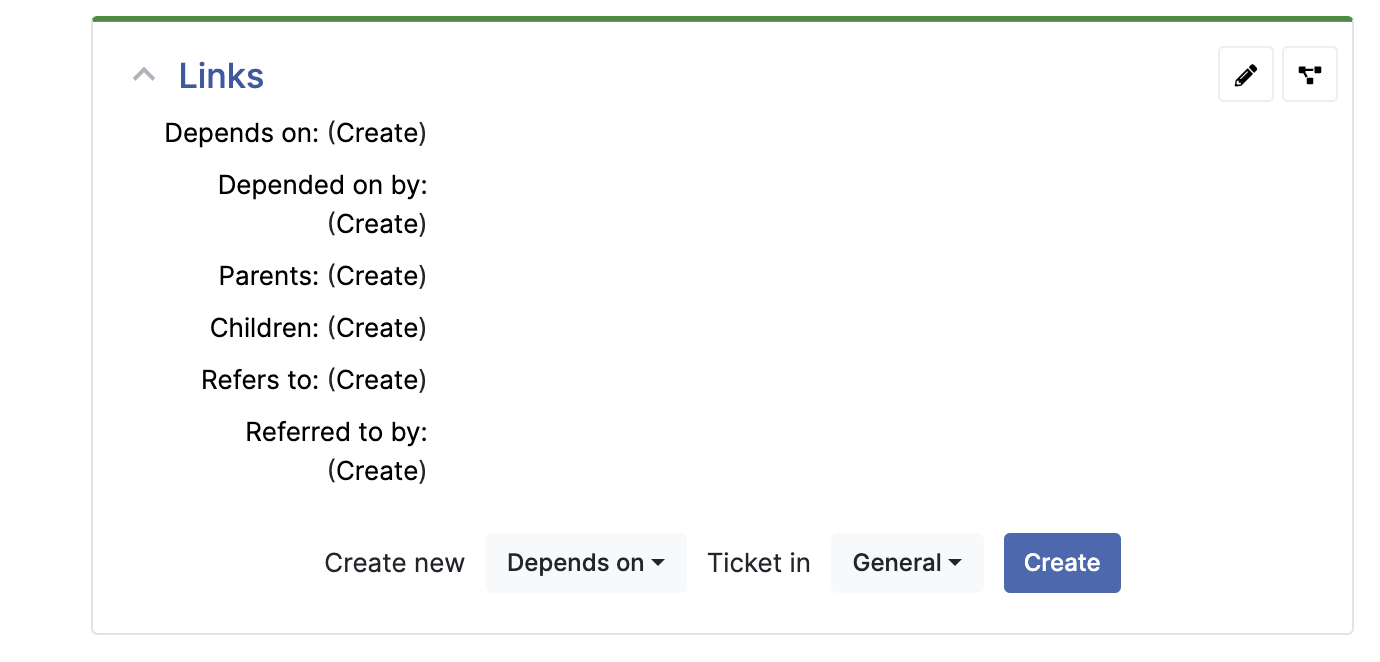
Then click on "Create", then change the level status to new and change the level to which level you want to escalade.
Now go to home page and you will see the ticket in L1-support status has changed to "Pending #ticket number" as follows
After L2-support person resolve and change the new L2-support to "solve", can change the L1-support ticket to solve
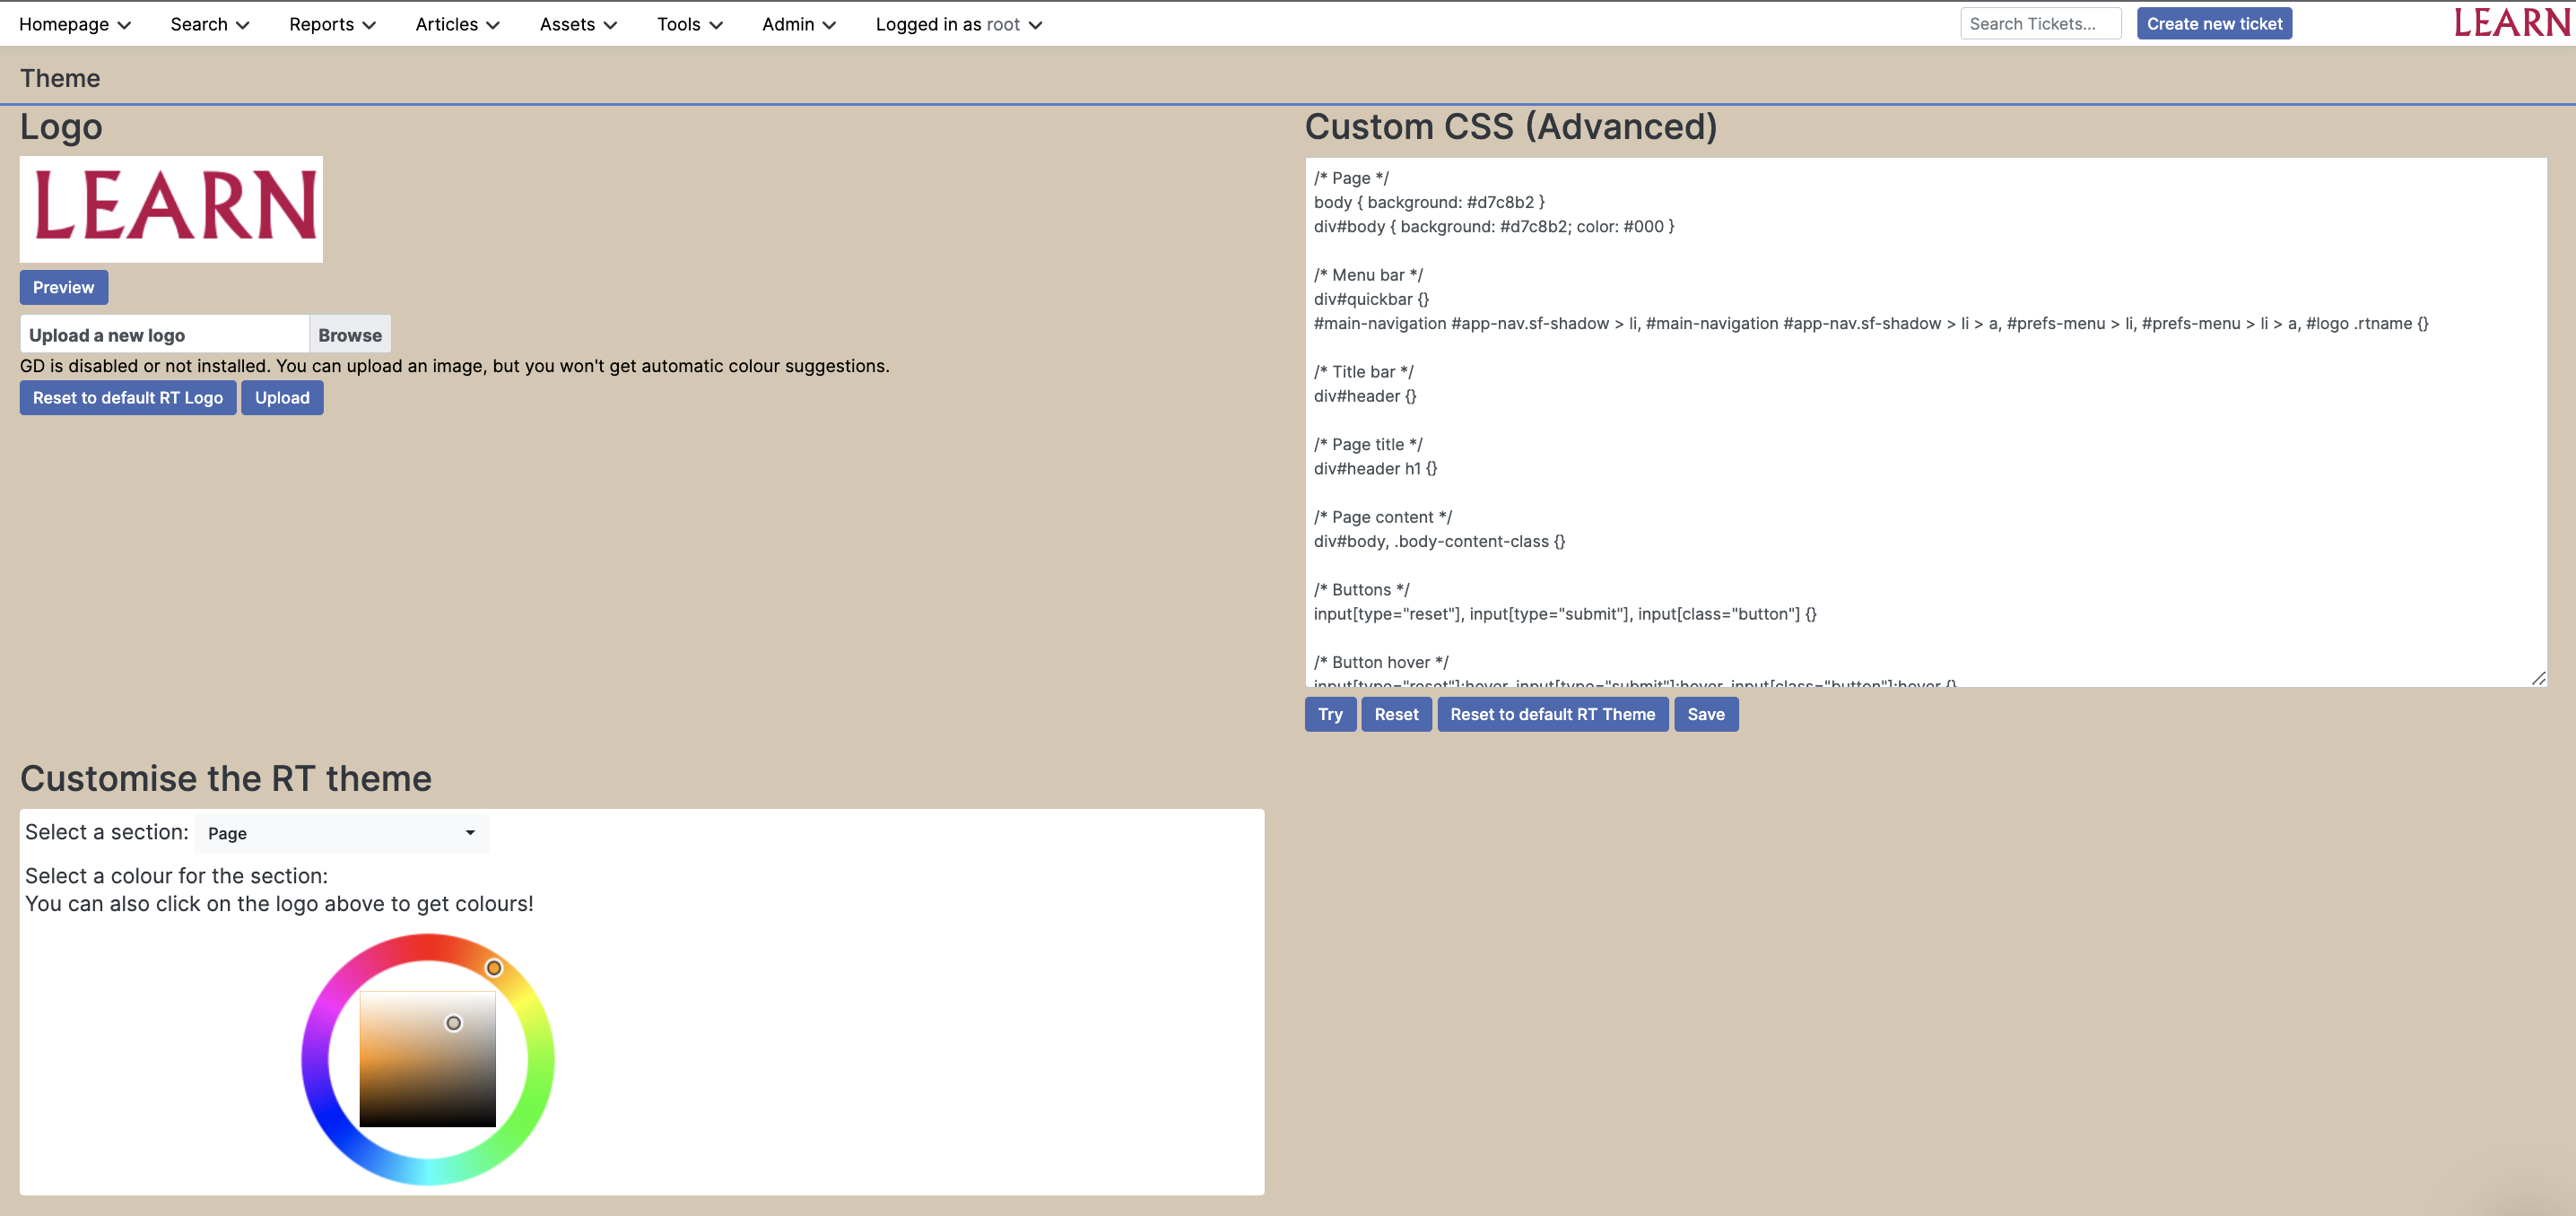
Change the logo and theme
Here you will be able to change the logo into your institutional logo and the theme
Navigate :
Admin > Tools > Theme
![]()
Note:
Possible Cross-site request forgery message RT5
Edit the RT_SiteConfig.pm add an additional line to indicate your Webdomain either IP or FQDN.
sudo vi /opt/rt5/etc/RT_SiteConfig.pm
Set( $WebDomain, 'your-servers-ip' );
(This can be ip or dns. it depends on what you use)
Restart Apache
sudo systemctl restart apache2
Proof of Work
- Provide the screen shots of your /opt/rt5/etc/RT_SiteConfig.pm configurations
- Create a ticket from outside(After configuring rt-mailgate), click on the ticket and send a screenshot of display window of the ticket
- Screenshot of browser after loading RT site(This must include your logo and a Pending ticket on the in L1 and linked ticket in L2).
Note: Ticket created from outside(by emailing) much escaladed among L1 and L2.
After completing the lab, you should email a screenshot of a configuration file(s) to deepthi@…. Please mention your 'your workshop registration details, session and the session topic' in the email.
Attachments (29)
- loginpage_1.png (108.3 KB ) - added by 4 years ago.
- homepage_2.png (269.7 KB ) - added by 4 years ago.
- create_user_3.png (53.4 KB ) - added by 4 years ago.
- create_ticket_4.png (194.6 KB ) - added by 4 years ago.
- sample_ticket_5.png (219.5 KB ) - added by 4 years ago.
- newly_created_6.png (57.5 KB ) - added by 4 years ago.
- taken_ticket.png (199.8 KB ) - added by 4 years ago.
- change_status_1.png (98.6 KB ) - added by 4 years ago.
- actions_on_a_ticket.png (290.0 KB ) - added by 4 years ago.
- message_body.png (196.7 KB ) - added by 4 years ago.
- update_ticket.png (249.9 KB ) - added by 4 years ago.
- receipts_for_update.png (202.8 KB ) - added by 4 years ago.
- bulkupdate.png (248.5 KB ) - added by 4 years ago.
- admin tabl.png (37.1 KB ) - added by 4 years ago.
- create_a_user.png (273.7 KB ) - added by 4 years ago.
- create_queue.png (193.5 KB ) - added by 4 years ago.
- updated_queue_list.png (27.8 KB ) - added by 4 years ago.
- user_list.png (211.2 KB ) - added by 4 years ago.
- theme_logo.png (365.7 KB ) - added by 4 years ago.
- changing_user_rights.png (183.2 KB ) - added by 4 years ago.
- user_rights_assigning.png (199.4 KB ) - added by 4 years ago.
- group_creation.png (143.1 KB ) - added by 4 years ago.
- add_members_to_the_groups.png (116.8 KB ) - added by 4 years ago.
- add_user_to_a_queue.png (140.3 KB ) - added by 4 years ago.
- basics_fo_a_ticket.png (167.1 KB ) - added by 4 years ago.
- links_of_a_ticket.png (311.5 KB ) - added by 4 years ago.
- Escalading_to_L1_to_L2.png (80.0 KB ) - added by 4 years ago.
- Create_new_ticket_in_l2.png (187.9 KB ) - added by 4 years ago.
- Pending_tickt_L1_and_new_in_L2.png (153.9 KB ) - added by 4 years ago.