Icinga Hands - On - Cont
Through this hands-on you see
- How to add a host
- How to add a service
- How to check DNS
- How to add an agent
- How to monitor disk space
- How to check files
How to add a host
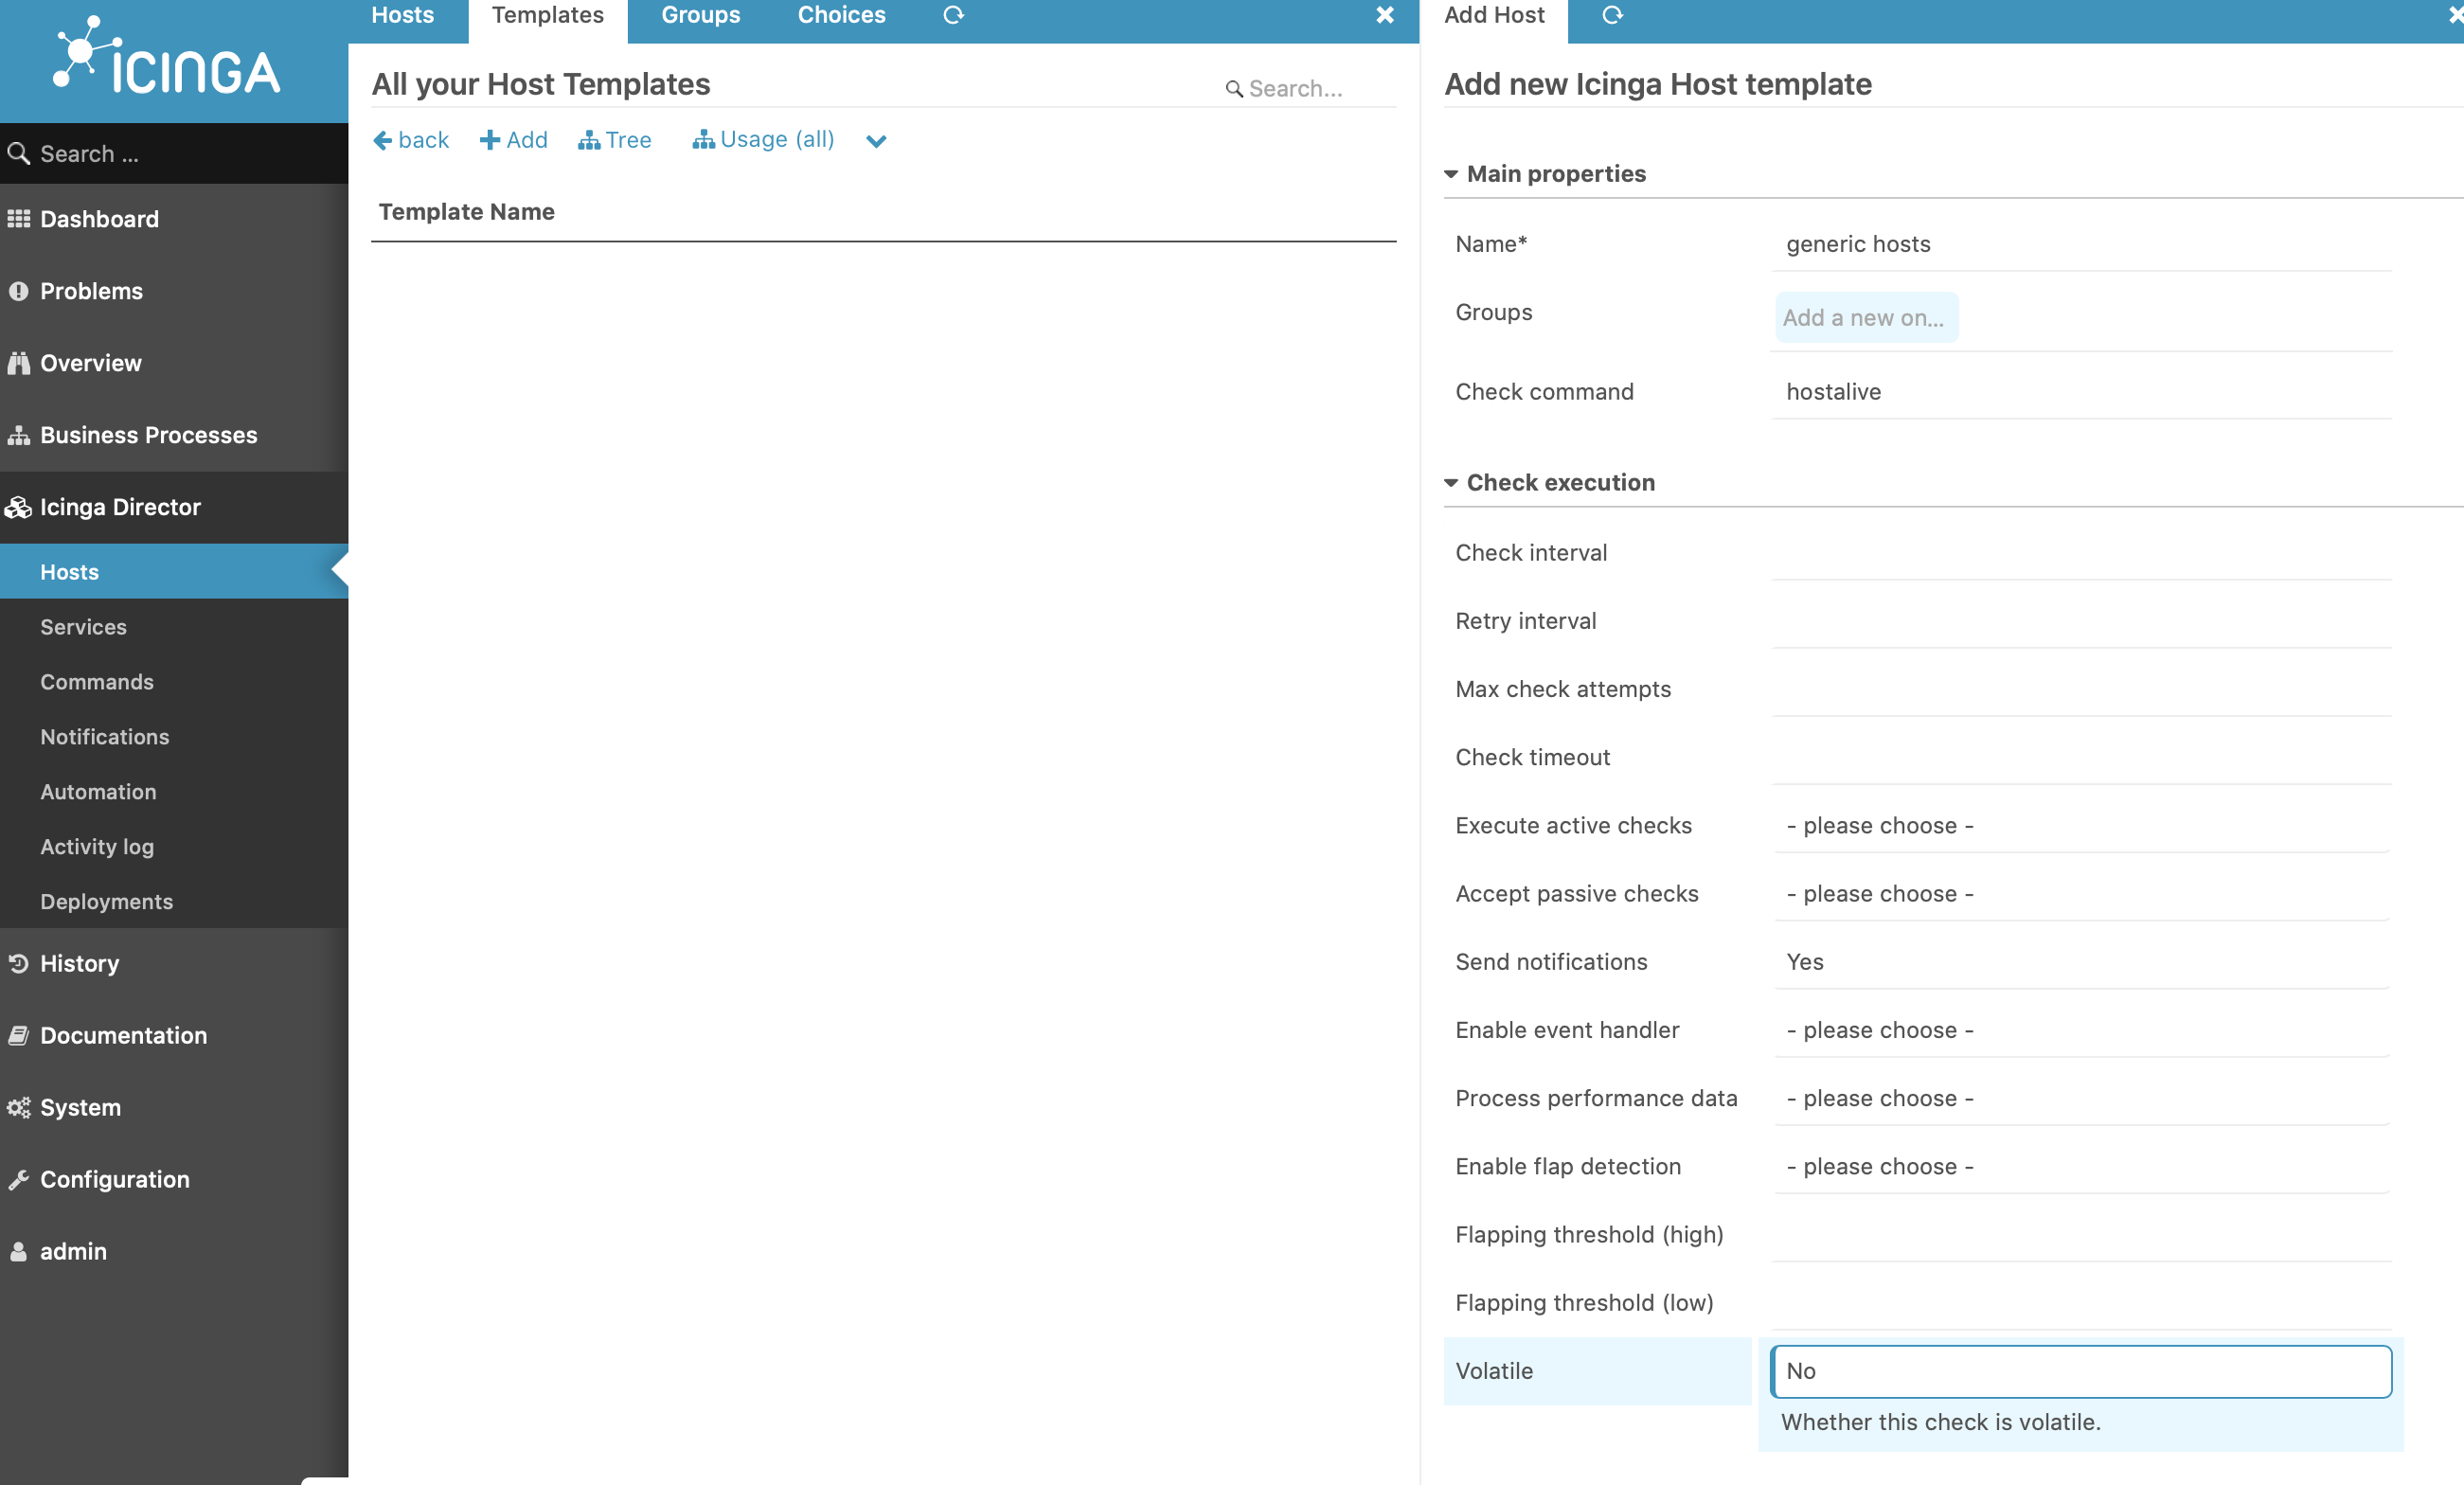
How to add a host template
Before adding hosts, the host templates have to be added. These templates should have the details on how host needs to be checked.
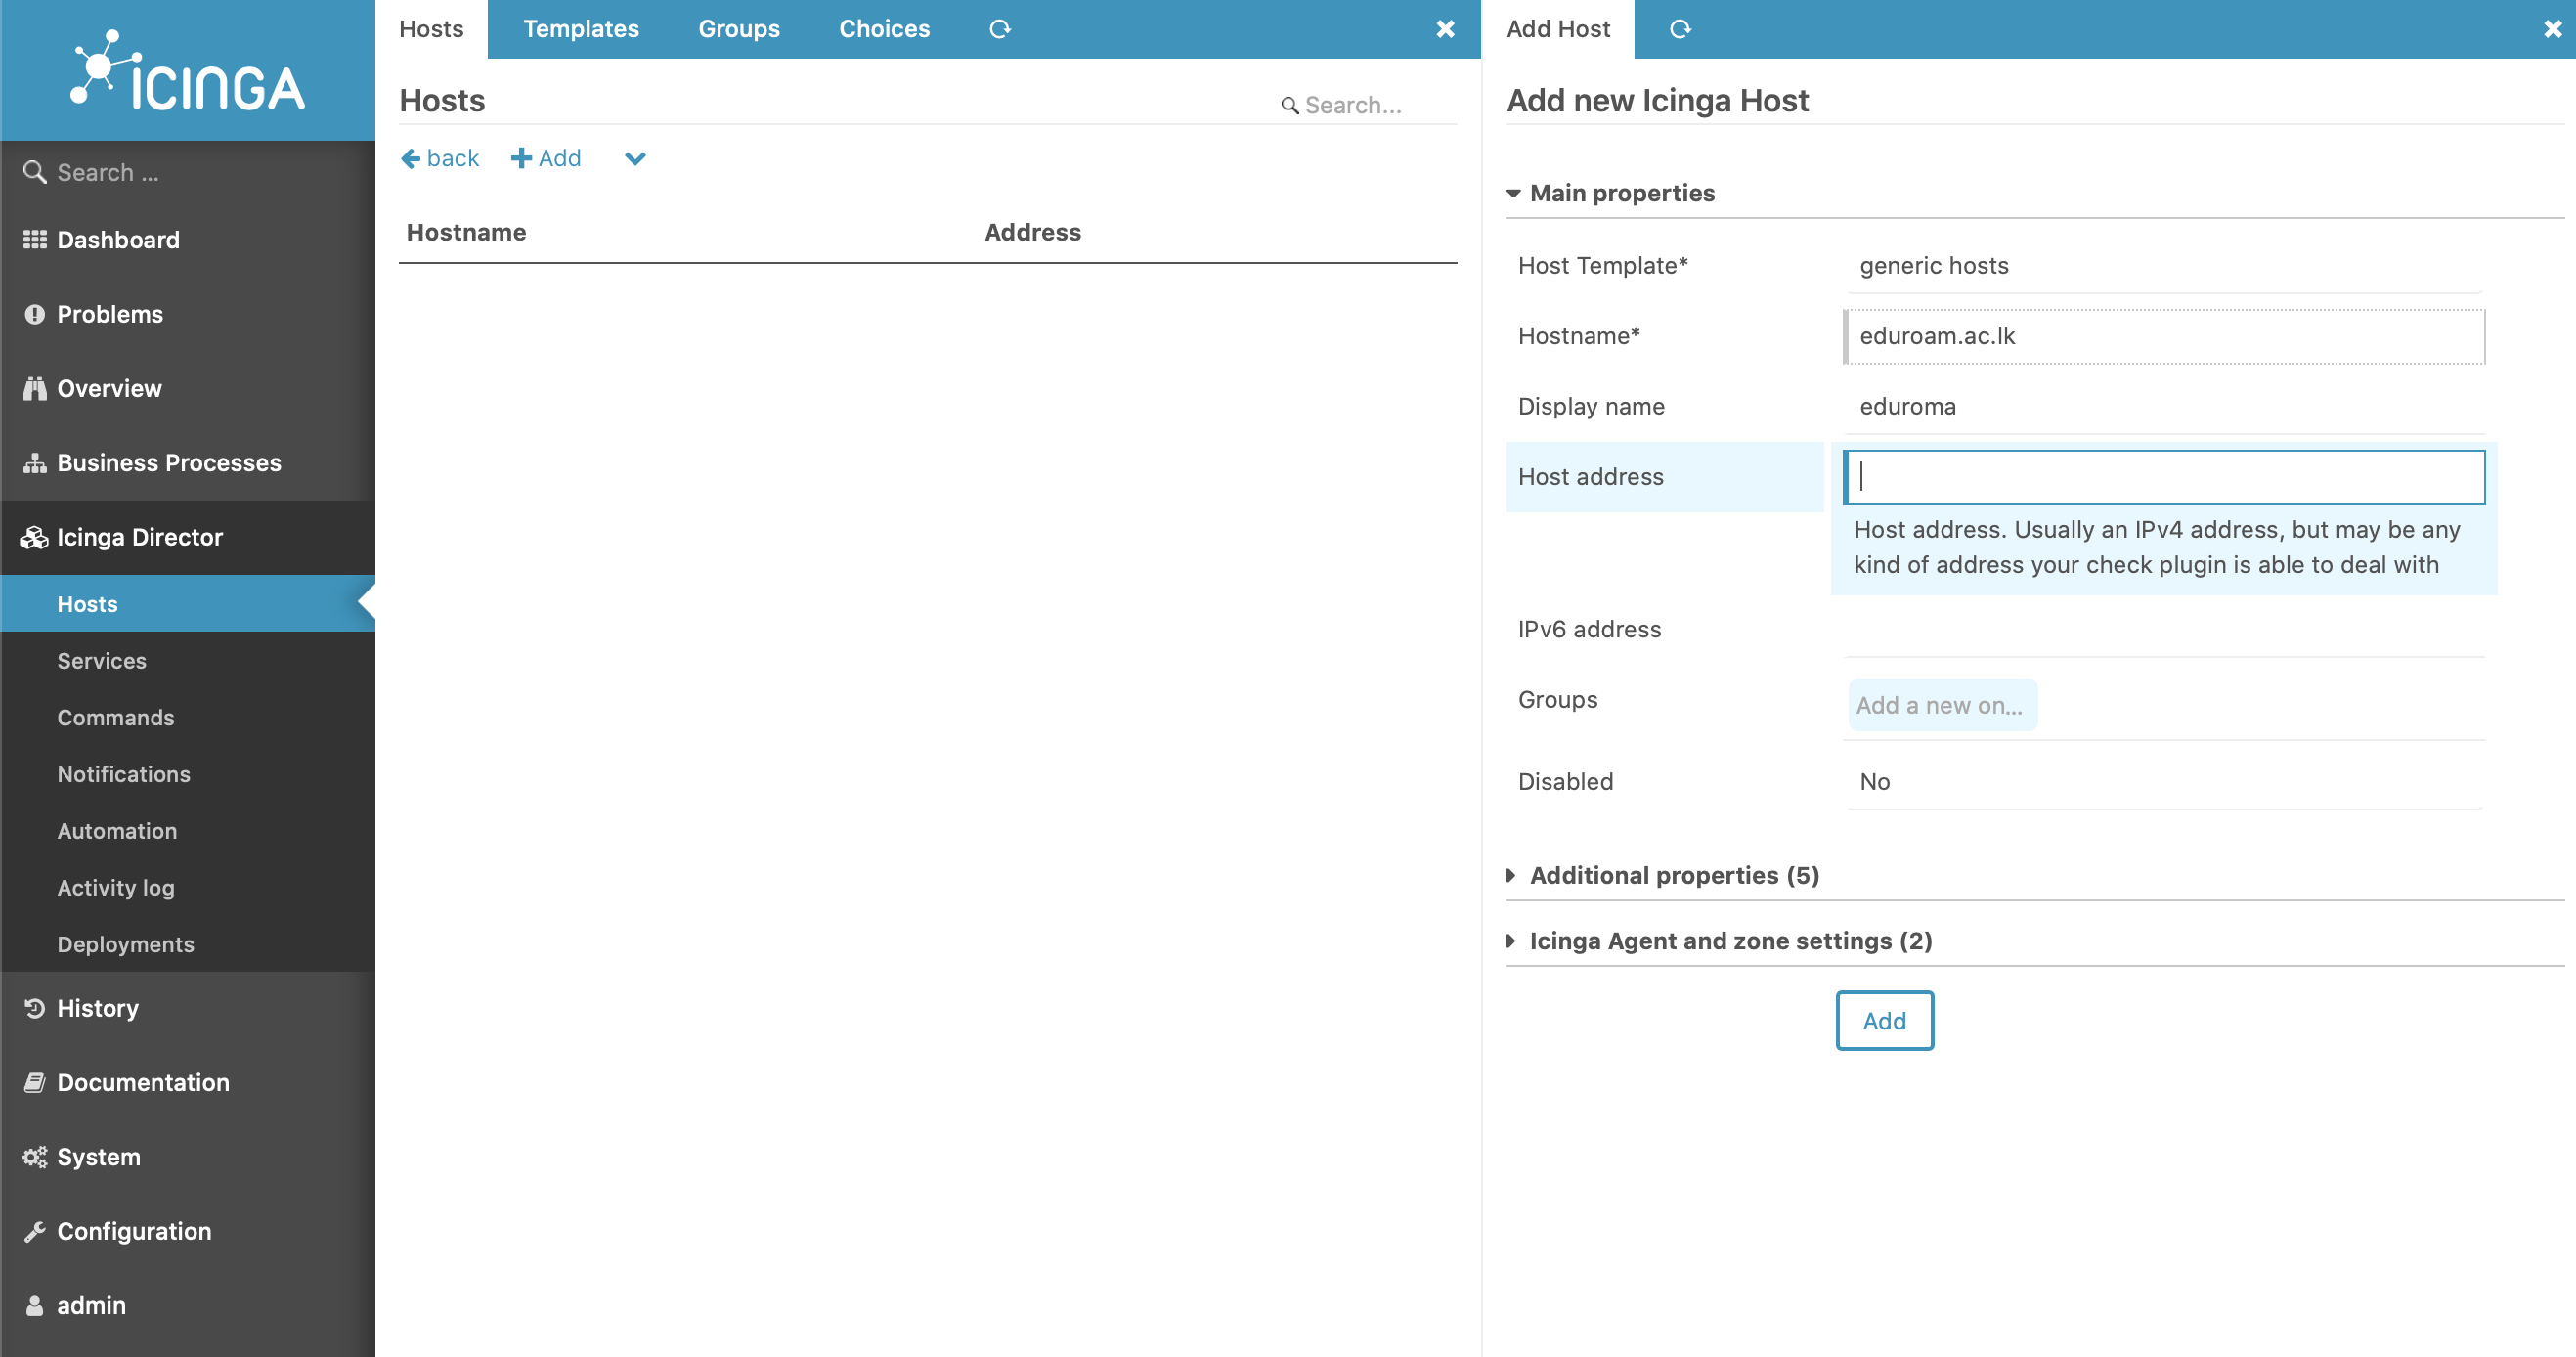
Add a host
Add the hosts after adding host template:
How to add a Service
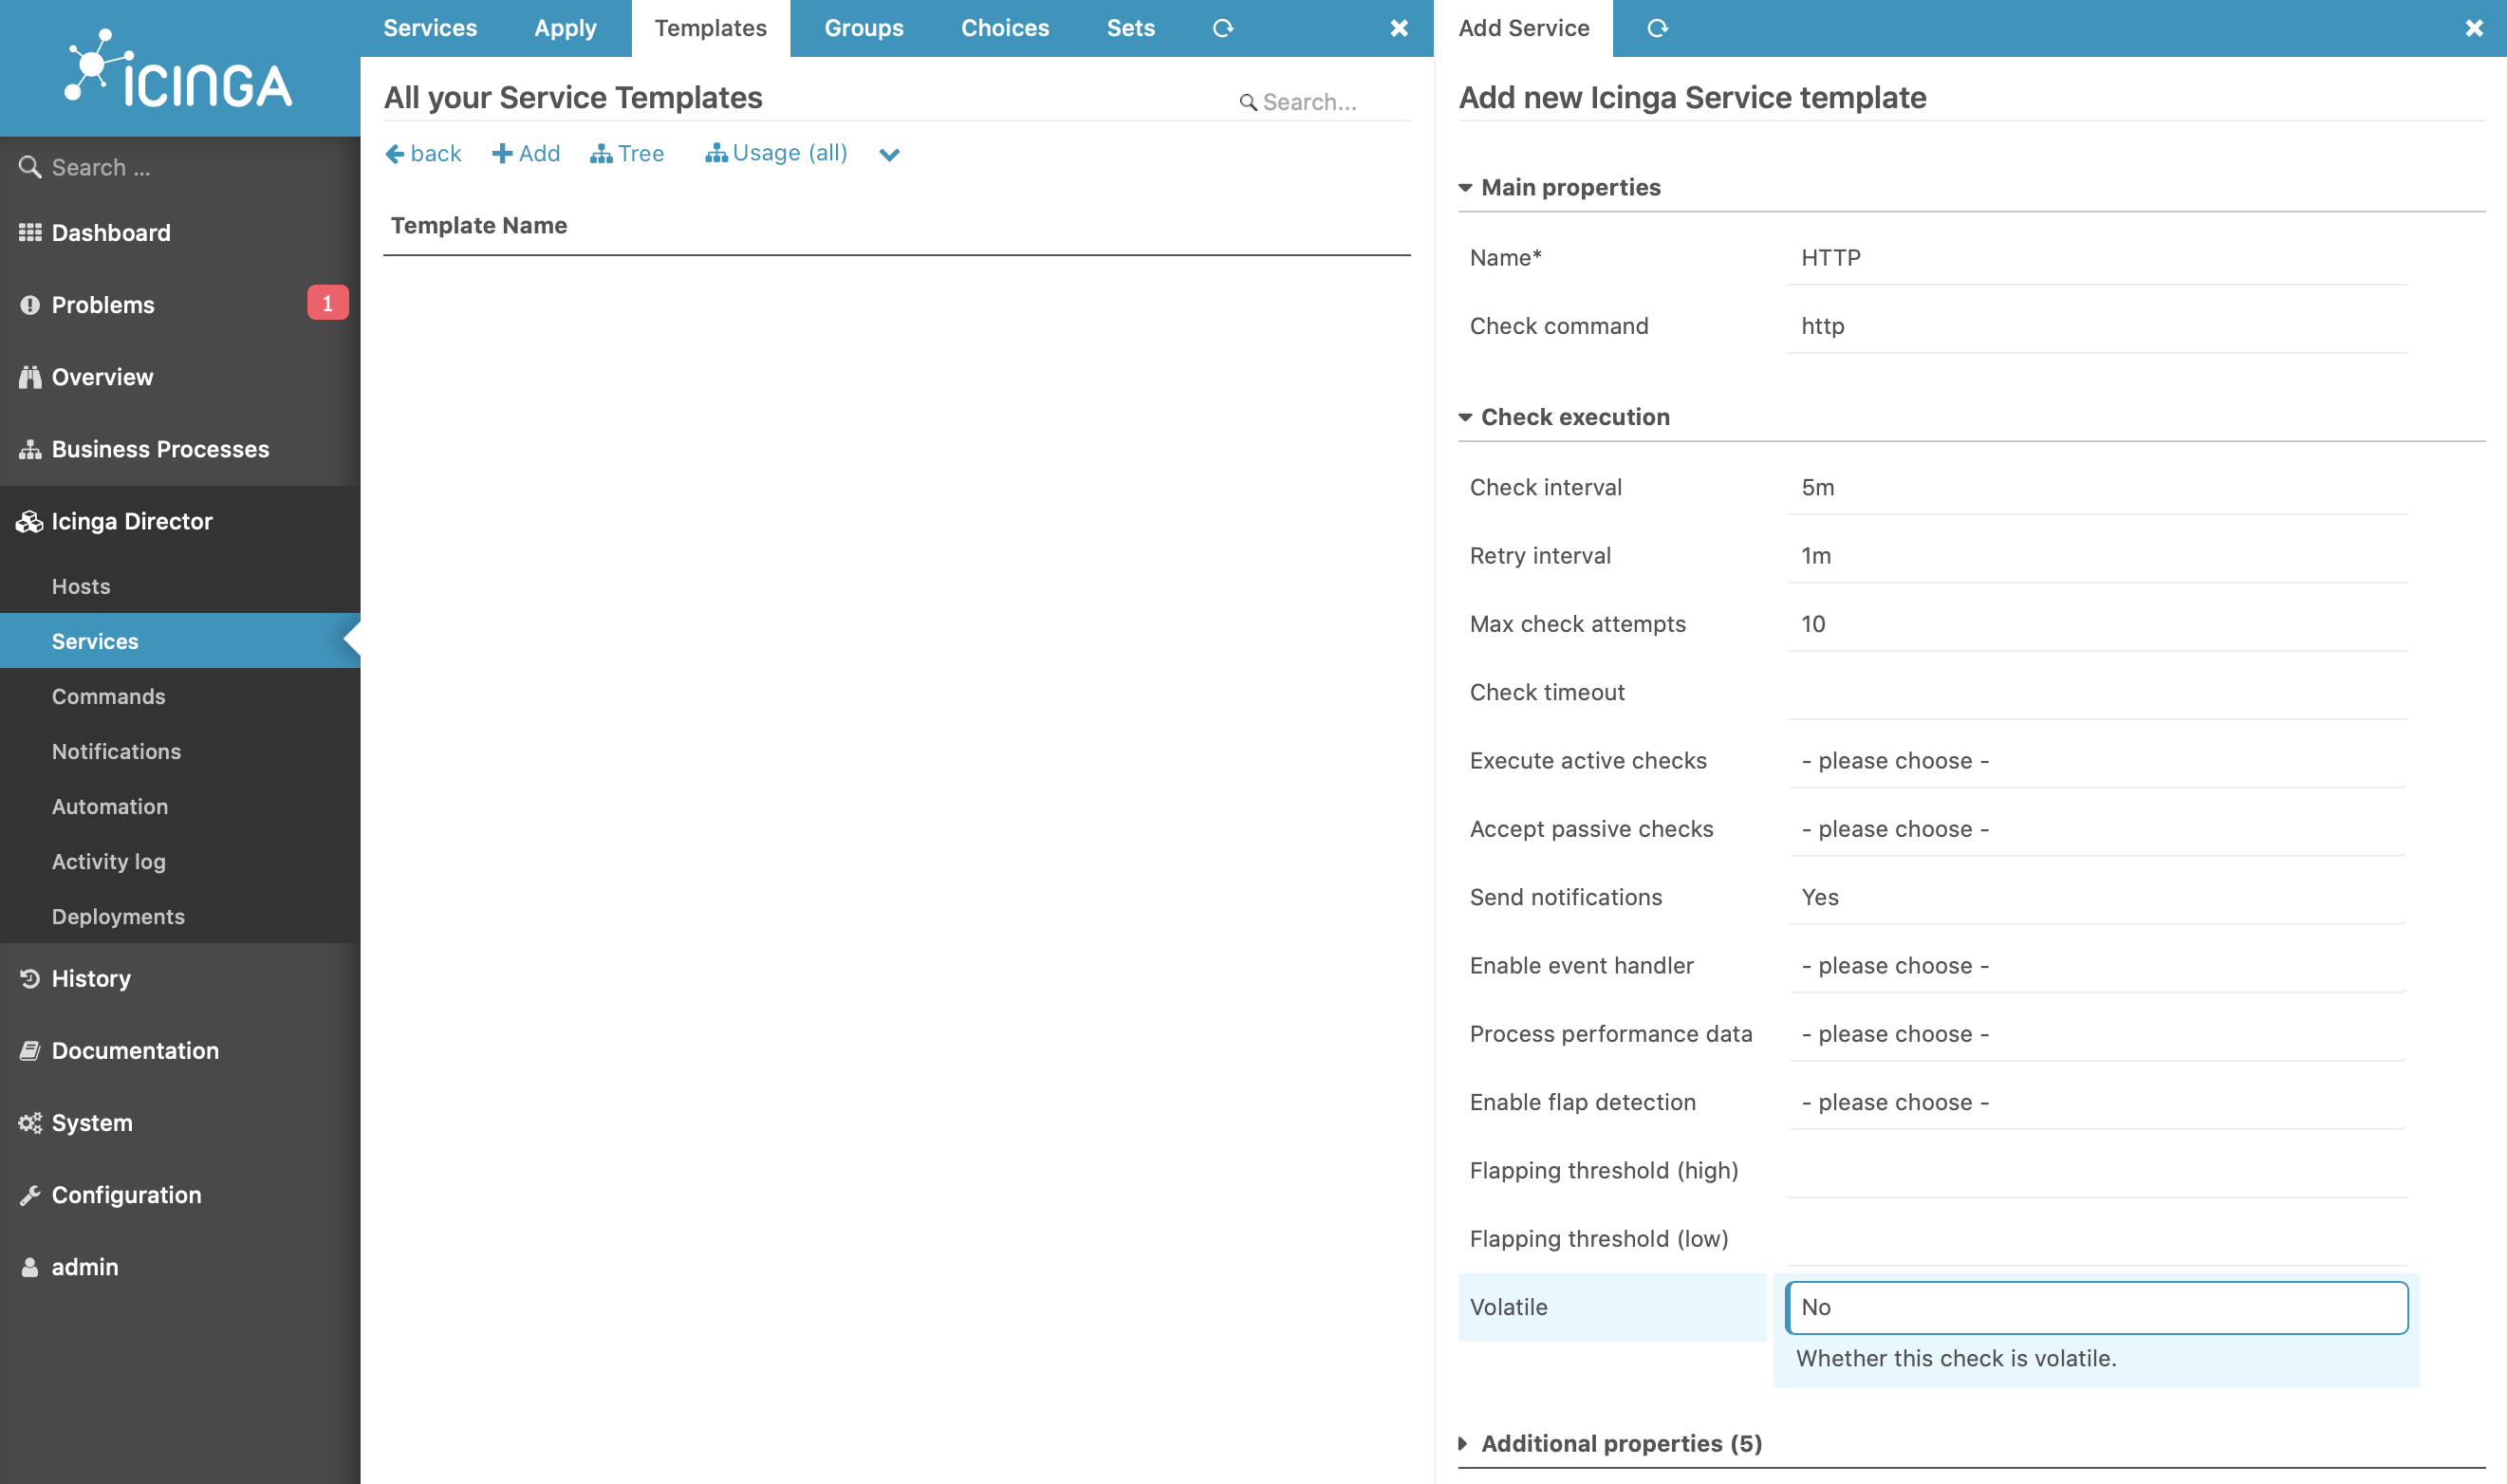
How to add a service template
Before adding services, the service templates has to be added,
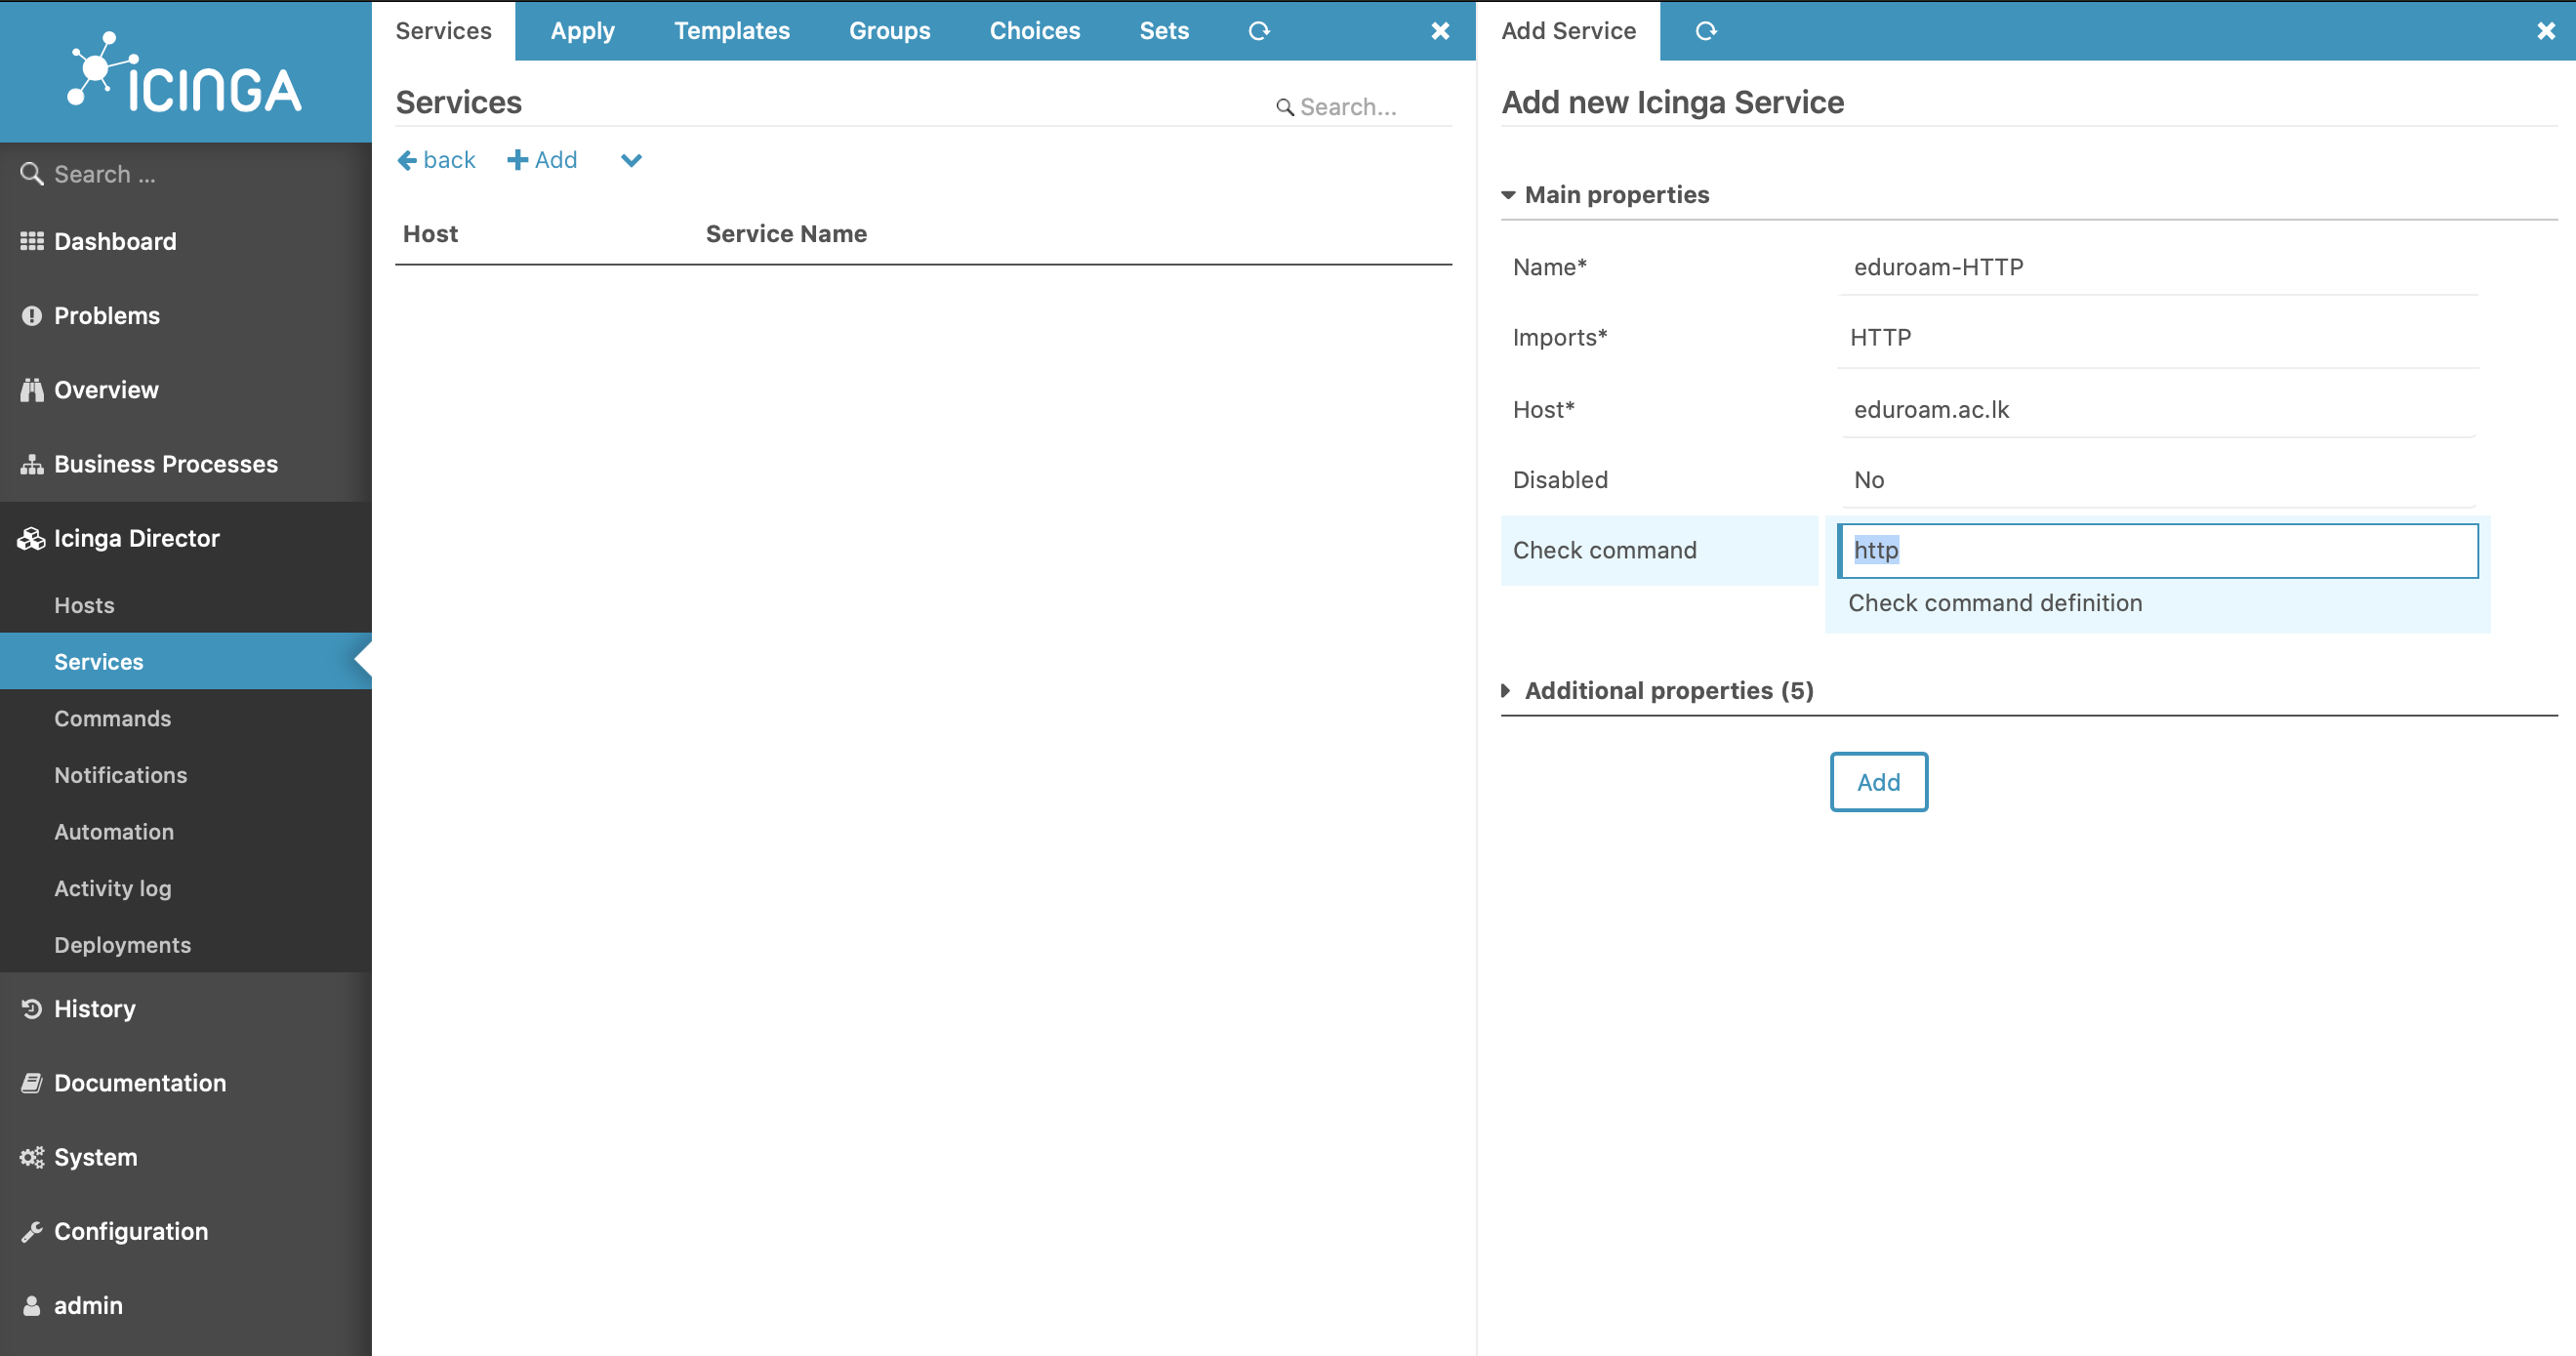
Add a Service
After, services can be added as following as per requirements:
Check DNS
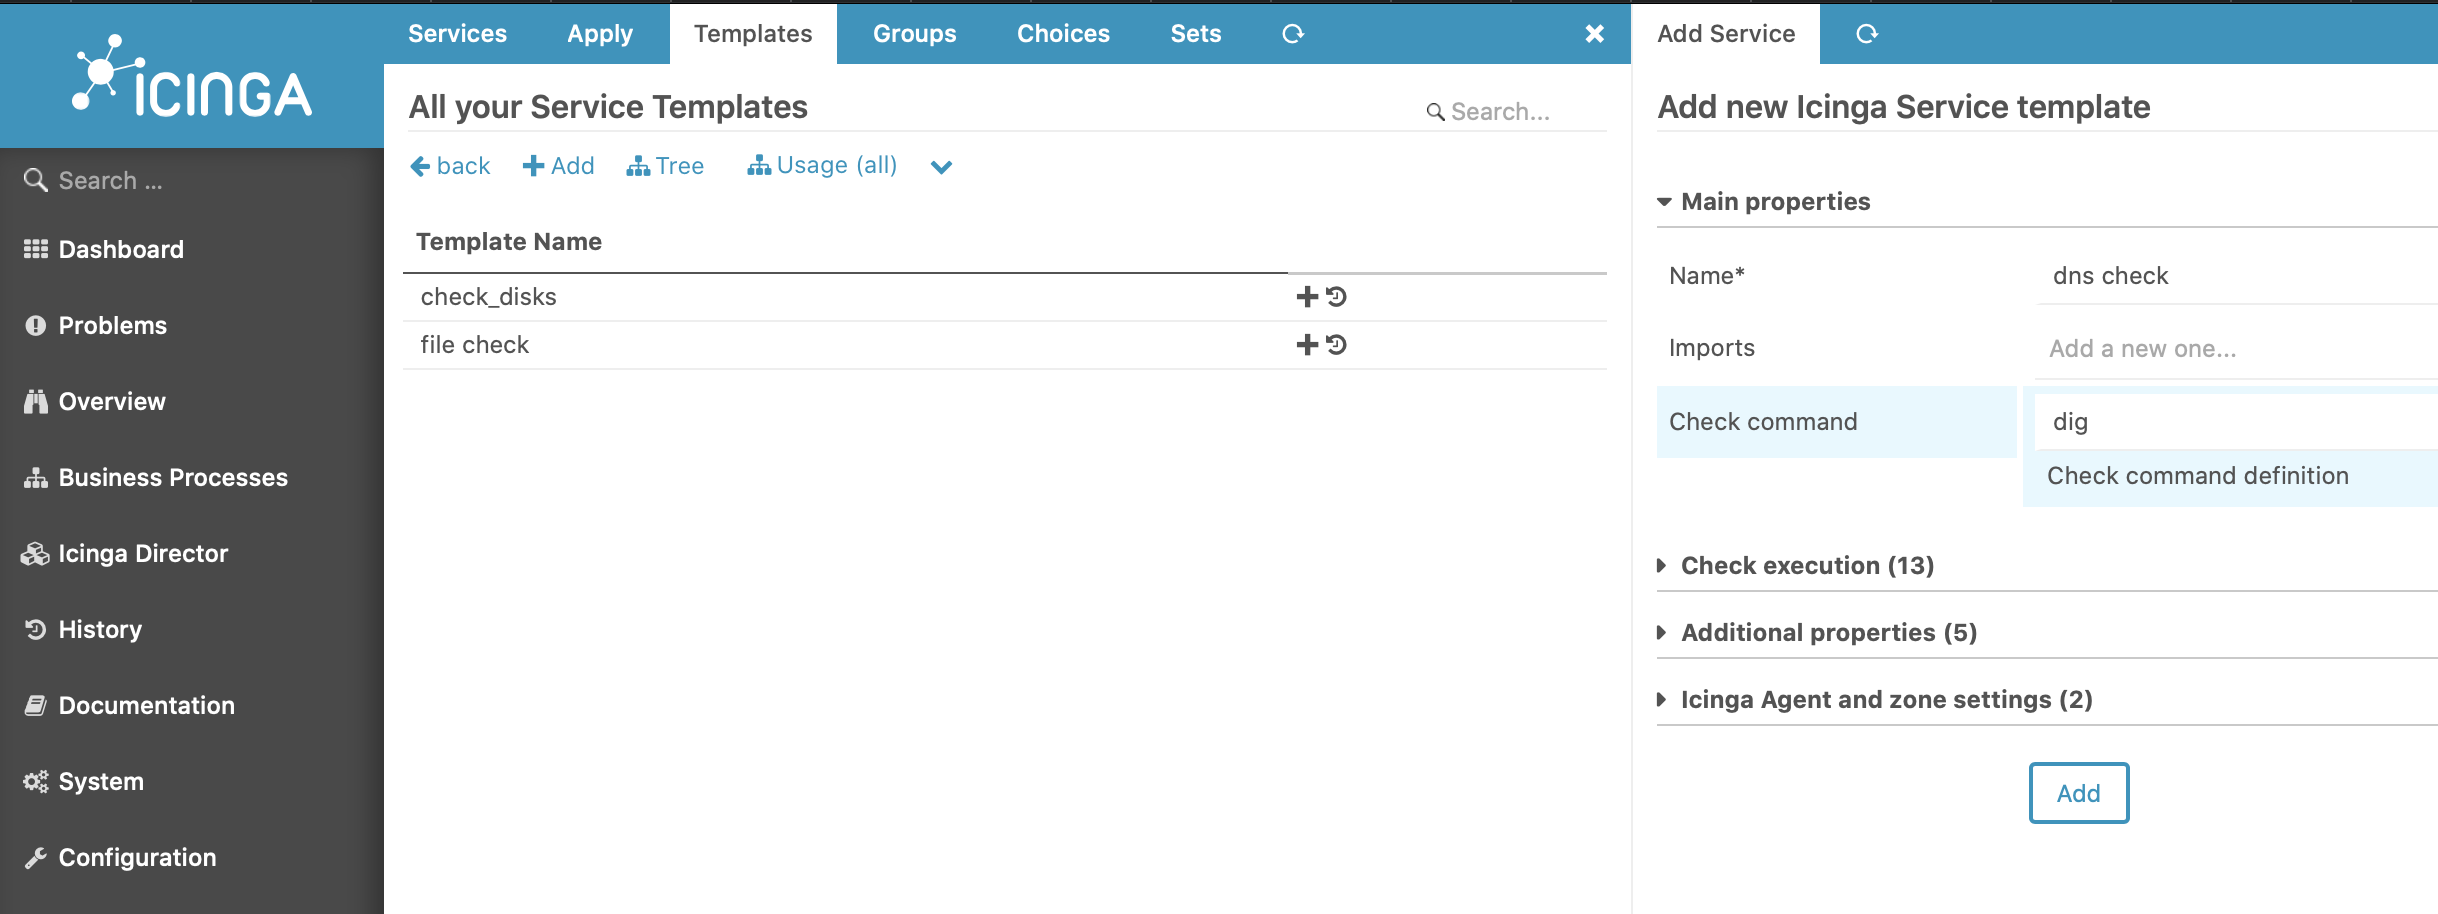
Add the service template to dns check as follows,
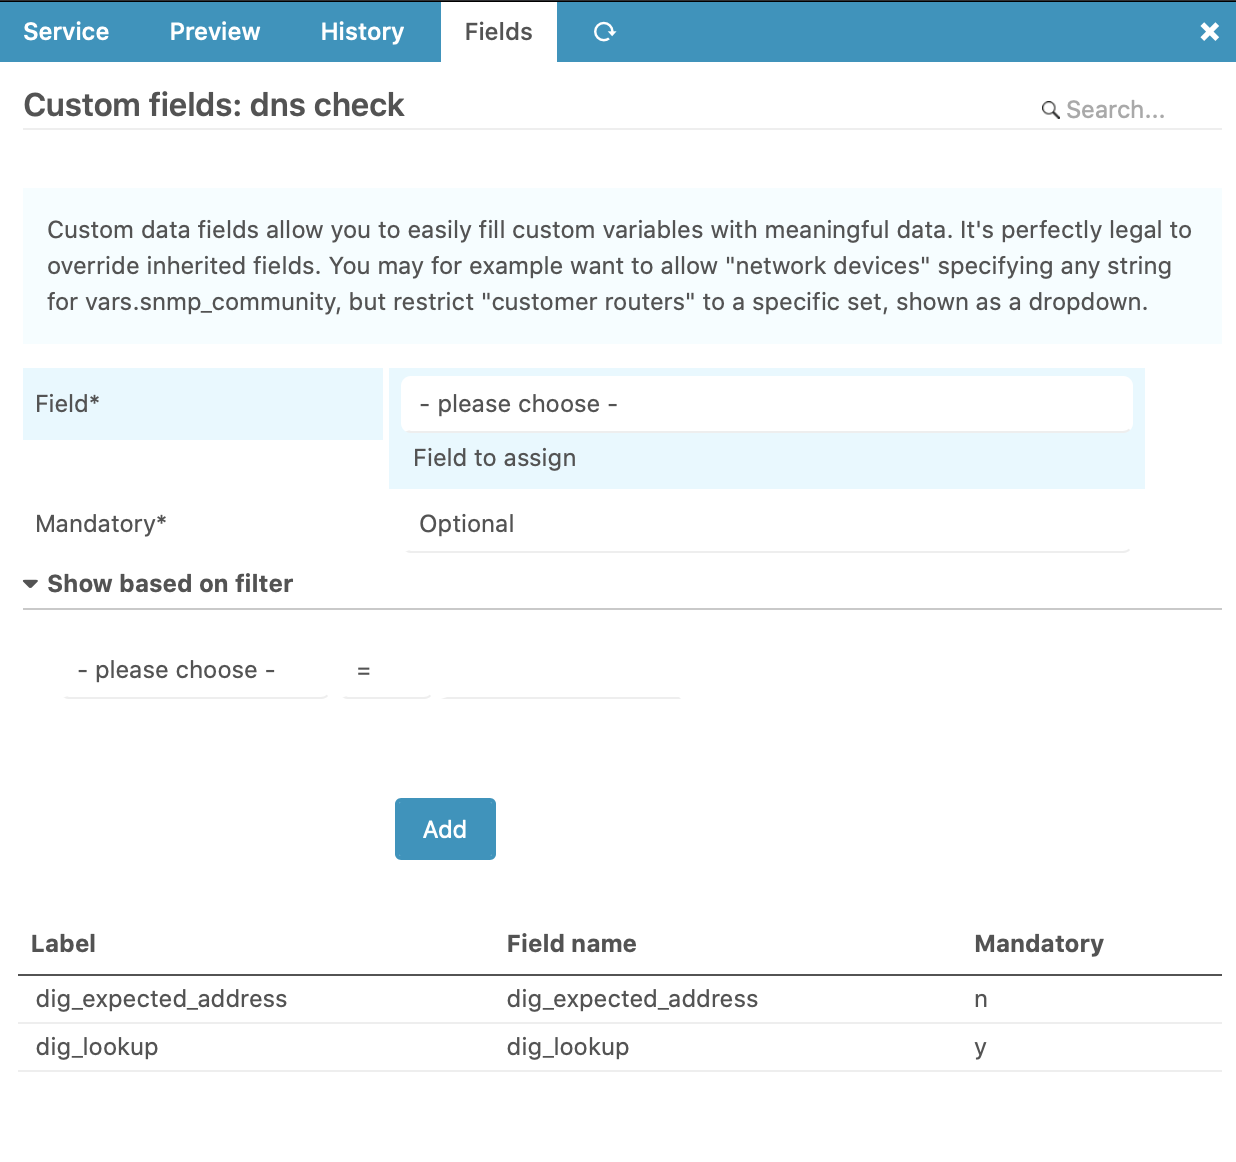
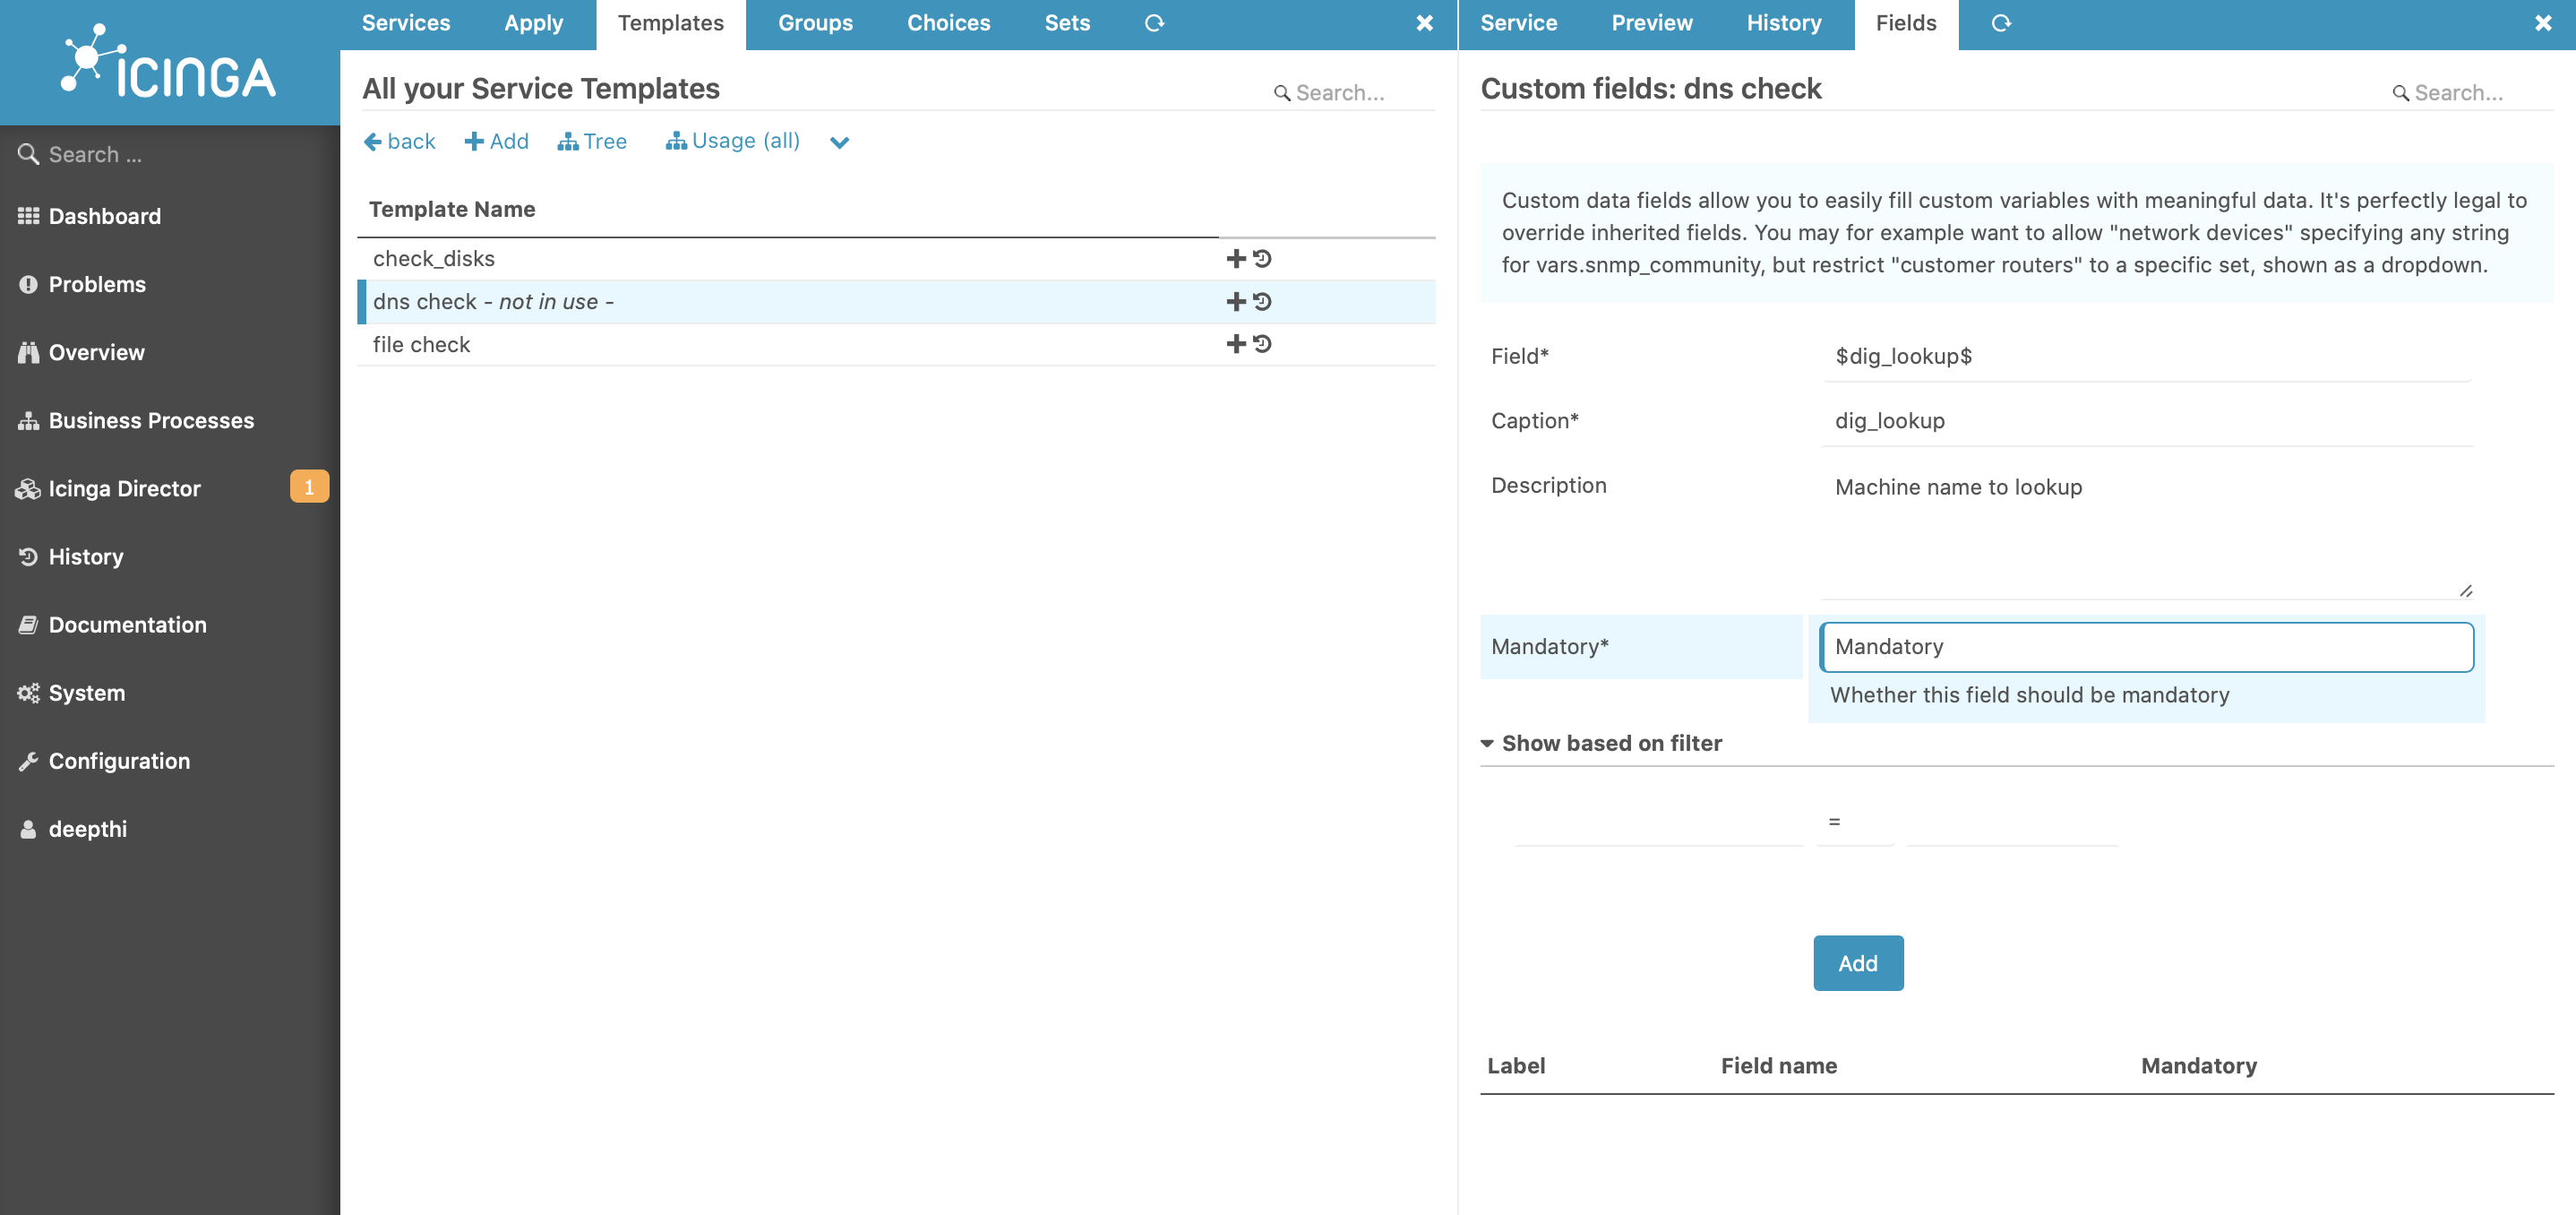
After, adding the service template, you will see a field when select the service template as in the example below, as Custom fields : dns check
After selecting the fields from dropdown list as per the requirements, add the fields to the service template.
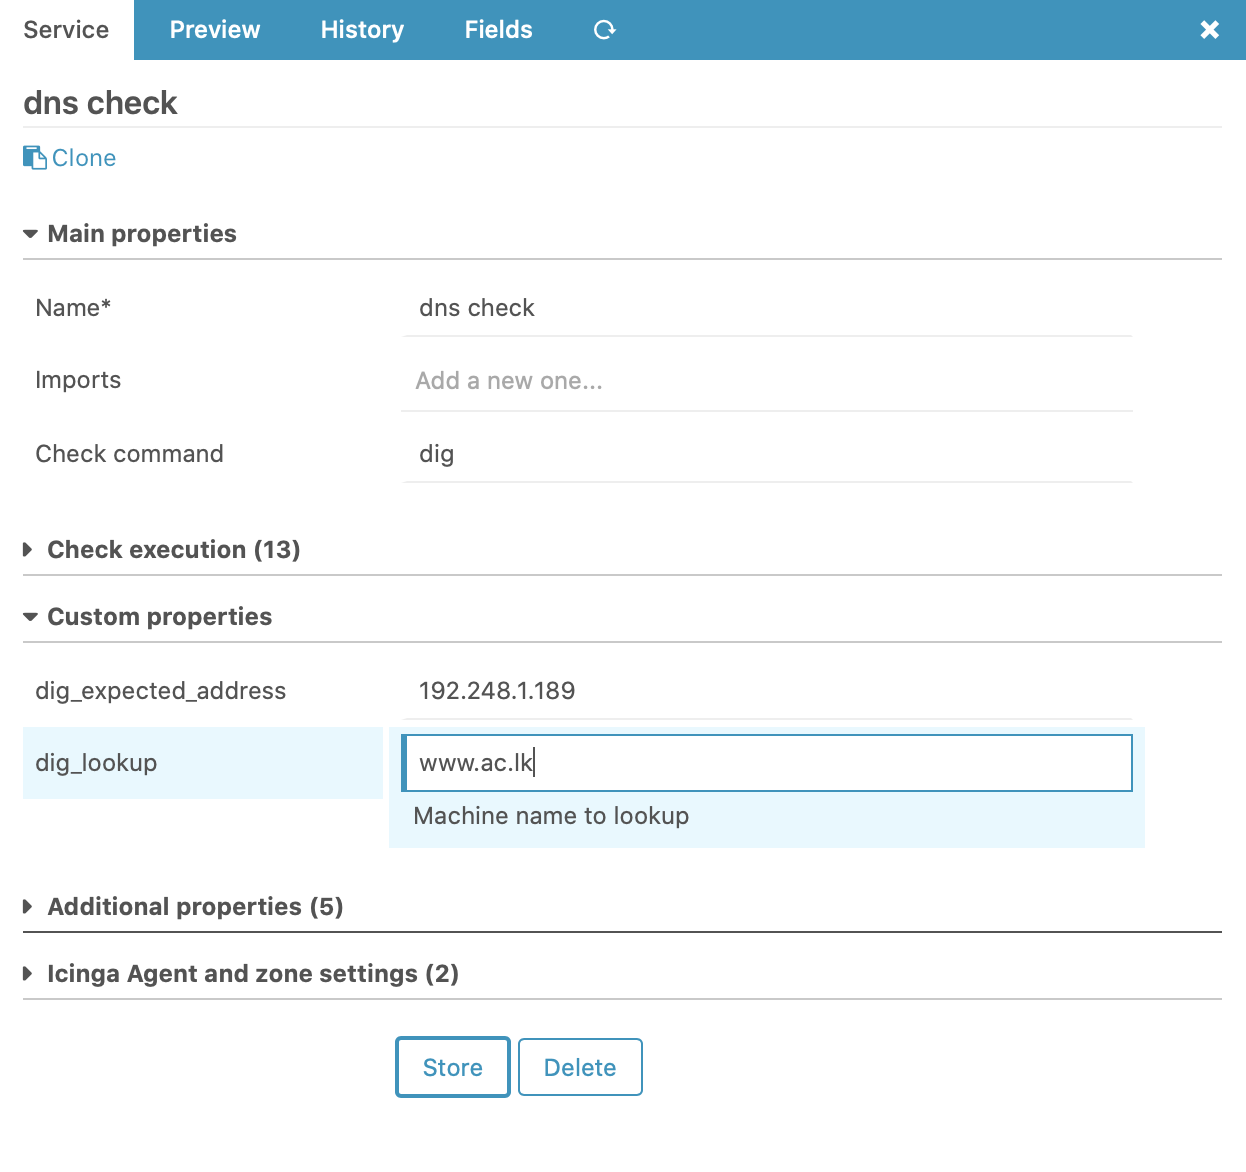
Deploy the changes you made and then you can modify the service template as follows if you need.
Use the DNS service you created as needed.
How to add an Agent
Host template for agents
Agent settings are not available for modification directly on a host object. This requires you to create an “Icinga Agent” template. You could name it exactly like that; it’s important to use meaningful names for your templates.
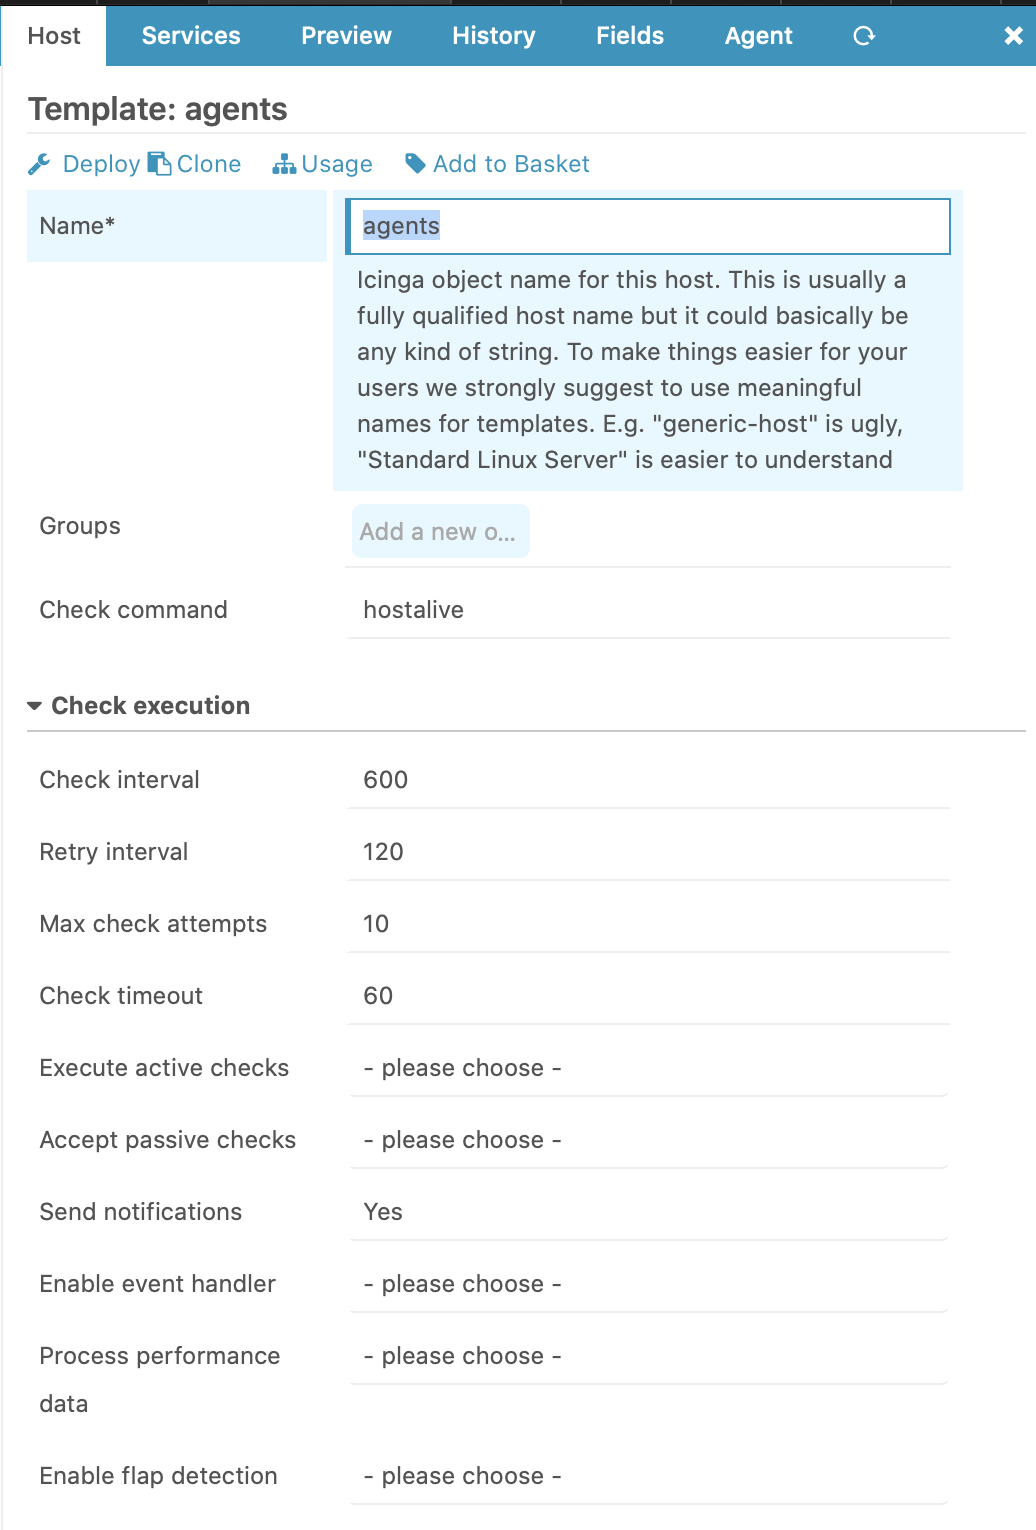
For setting up an agent, Host template should be created using iCinga director as follows,
Icinga director > Hosts > Host Templates
Main Properties will be shown as following
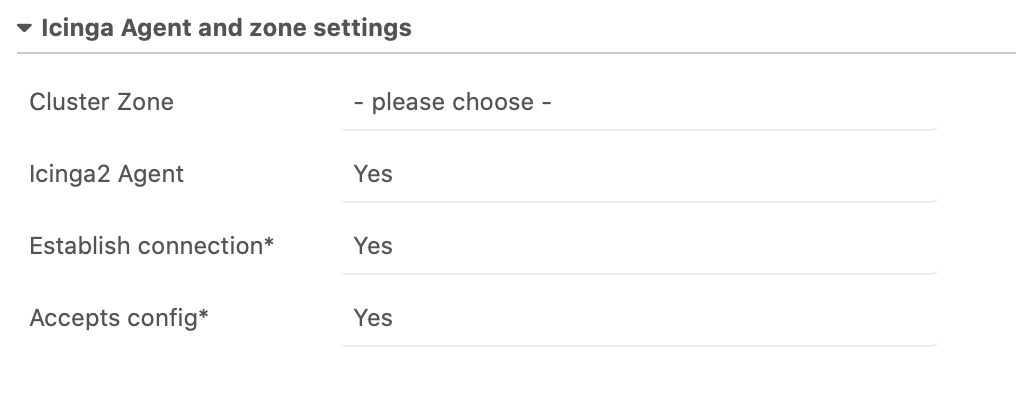
In the Icinga agent and zone settings , Following options should be selected,
NOTE : You should click deploy pending changes in Activity log section under Icinga Director
Adding hosts as agents
Note : Always try to use meaningful names in configurations
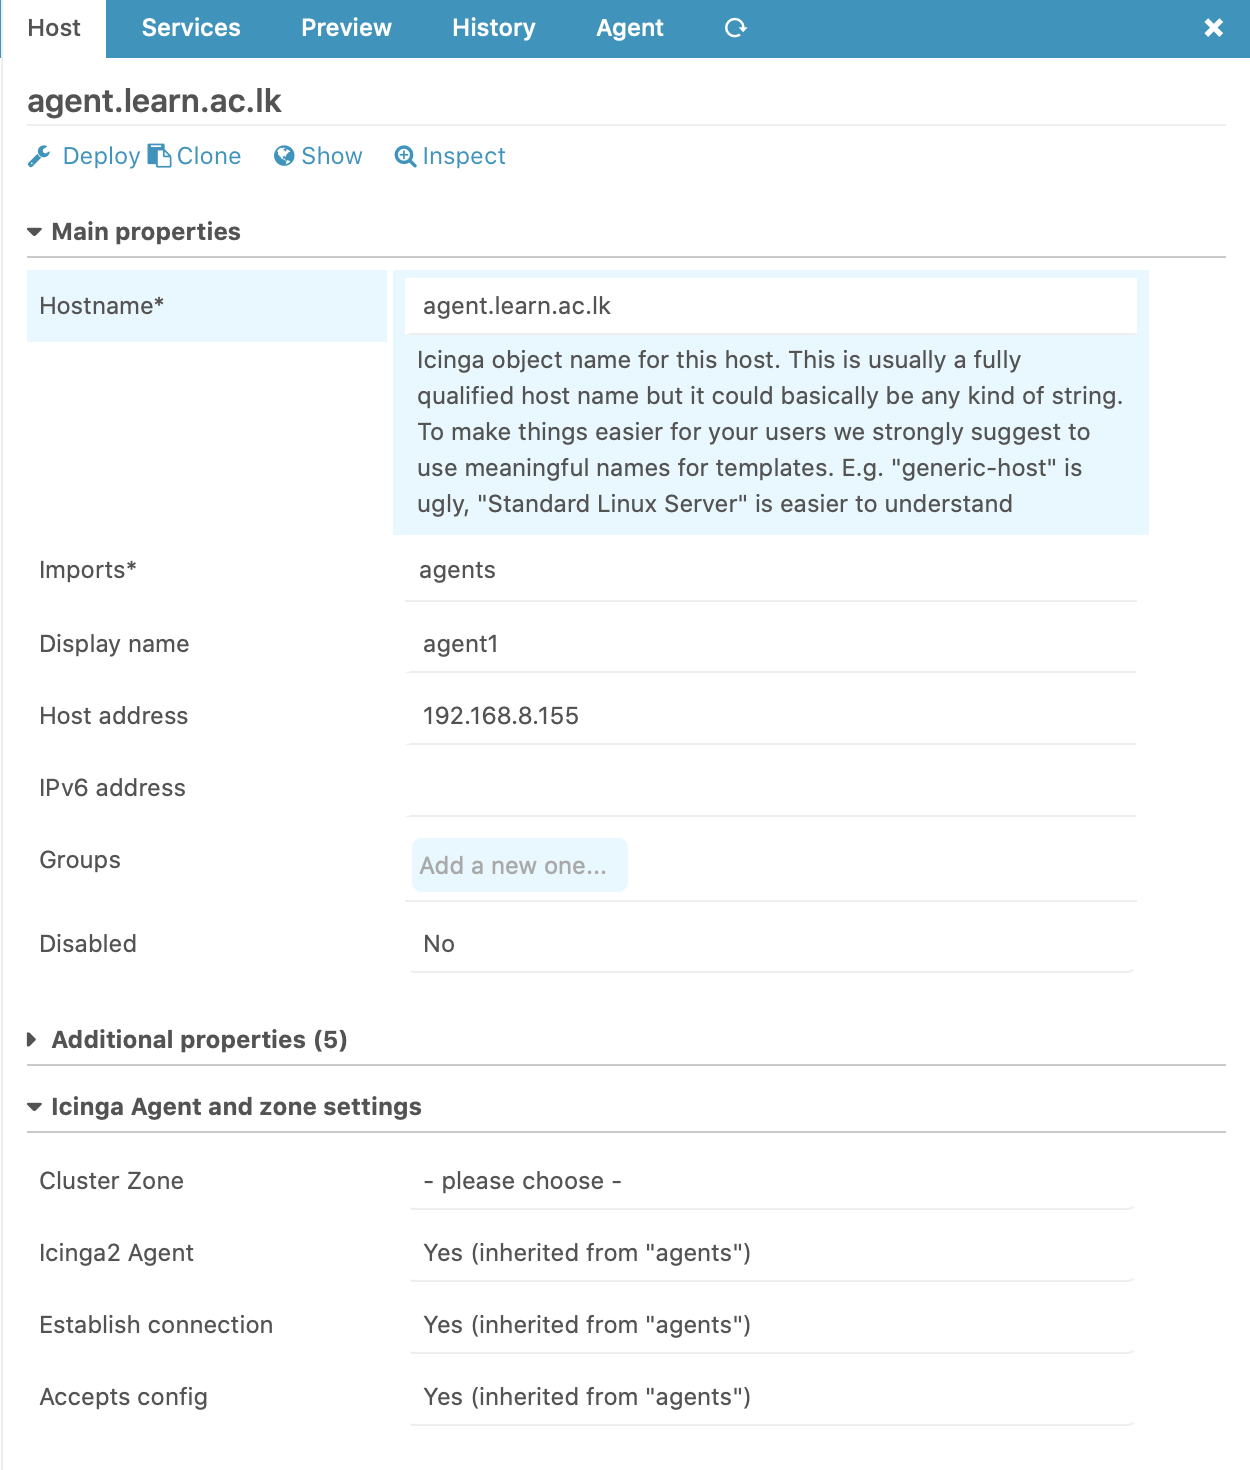
After creating host template for, host can be added as an agent for the system.
Icinga director > Hosts > Host
As following example, the details should be assigned as per the requirement,
After apply the deployment, setup preparation for agent has to be done
Before Executing the agent scripts…
Before executing the agent scripts in the relevant machines,
Icinga2 have to be installed in the Agent as following instructions below,
apt-get -y install apt-transport-https wget gnupg

wget -O - https://packages.icinga.com/icinga.key | apt-key add -

. /etc/os-release; if [ ! -z ${UBUNTU_CODENAME+x} ]; then DIST="${UBUNTU_CODENAME}"; else DIST="$(lsb_release -c| awk '{print $2}')"; fi;

echo "deb https://packages.icinga.com/ubuntu icinga-${DIST} main" > /etc/apt/sources.list.d/${DIST}-icinga.list

echo "deb-src https://packages.icinga.com/ubuntu icinga-${DIST} main" >> /etc/apt/sources.list.d/${DIST}-icinga.list

apt-get update

apt-get install icinga2 monitoring-plugins
Note : Please check the /etc/hosts file and verify that the agent is resolving for the Nodename of master node before executing the agent scripts.
(Otherwise you will not be able to connect agent hosts with a certificate error)
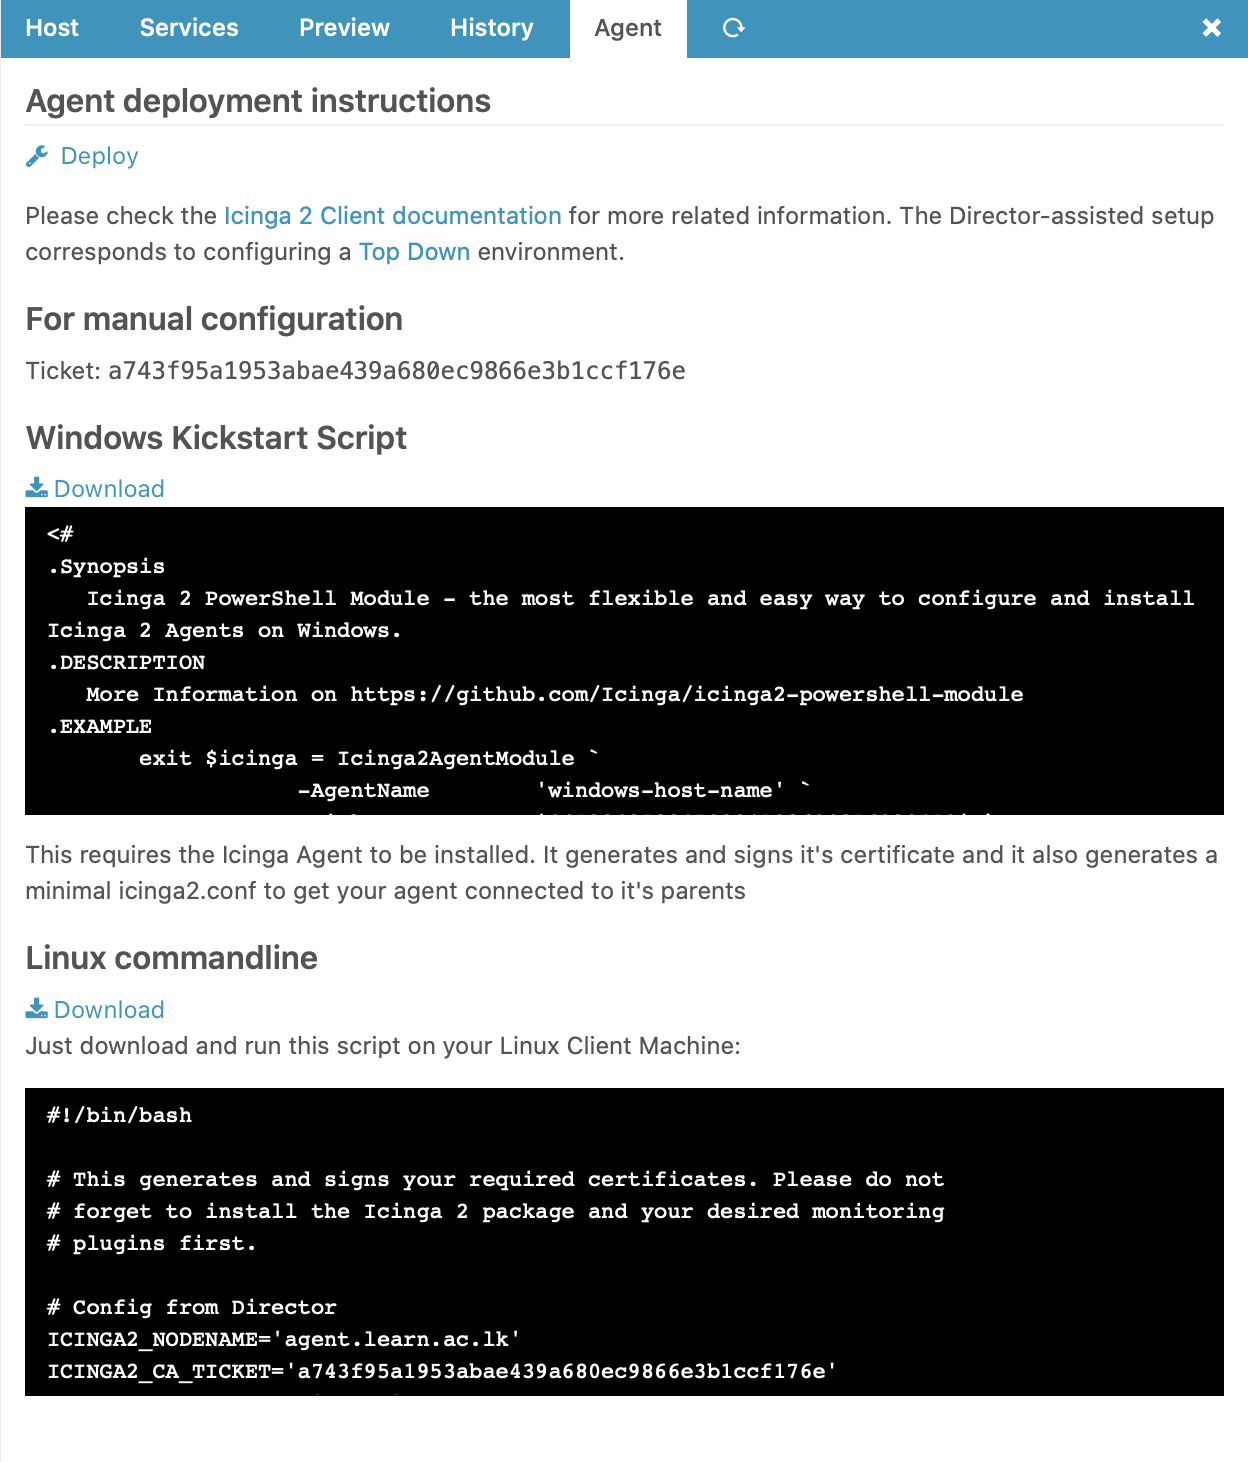
icinga director > hosts > host >, click on the agent and agent tab contains the scripts for agent manual configurations.
Click on the agent host you added and a tab called Agent will be shown as in the following image,
You will see two scripts to execute on agent hosts.
They are for Agent deployment instructions, you will get Windows Kickstart Script and a Linux command line script for the agents as above in the example.
Download the required script into the agent hosts and execute the scripts for configurations. (you may copy paste the script content into a file via vim or nano, but do not directly run them on plain console ). Assuming the script file is icinga-agent.sh
chmod +x icinga-agent.sh

./icinga-agent.sh
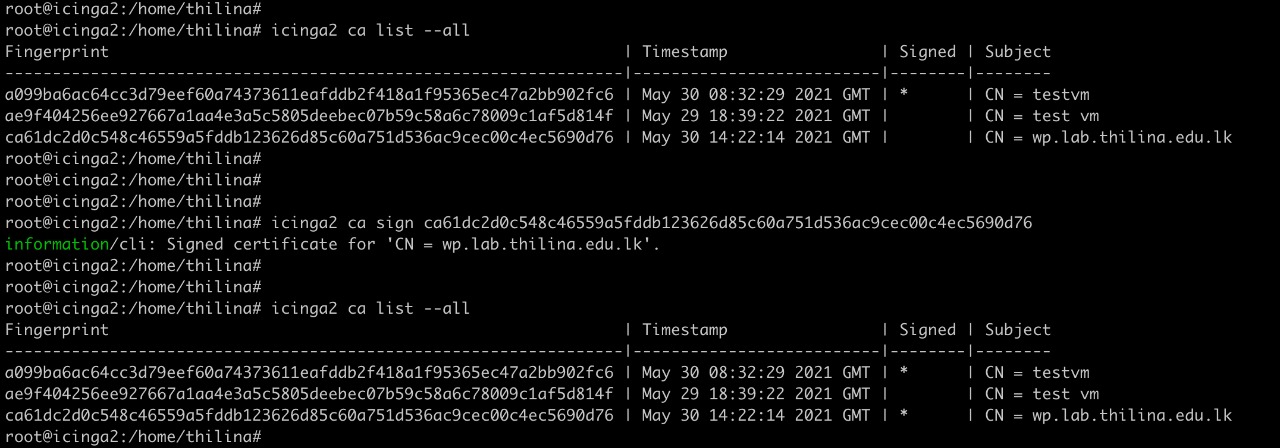
After, you need to sign the agent's security certificate by execute following commands on master node as follow in the example
- Find Agent Fingerprint:
icinga2 ca list --all
- Sign Agents Fingerprint:
icinga ca sign <Agent Fingerprint>
How to check disk space
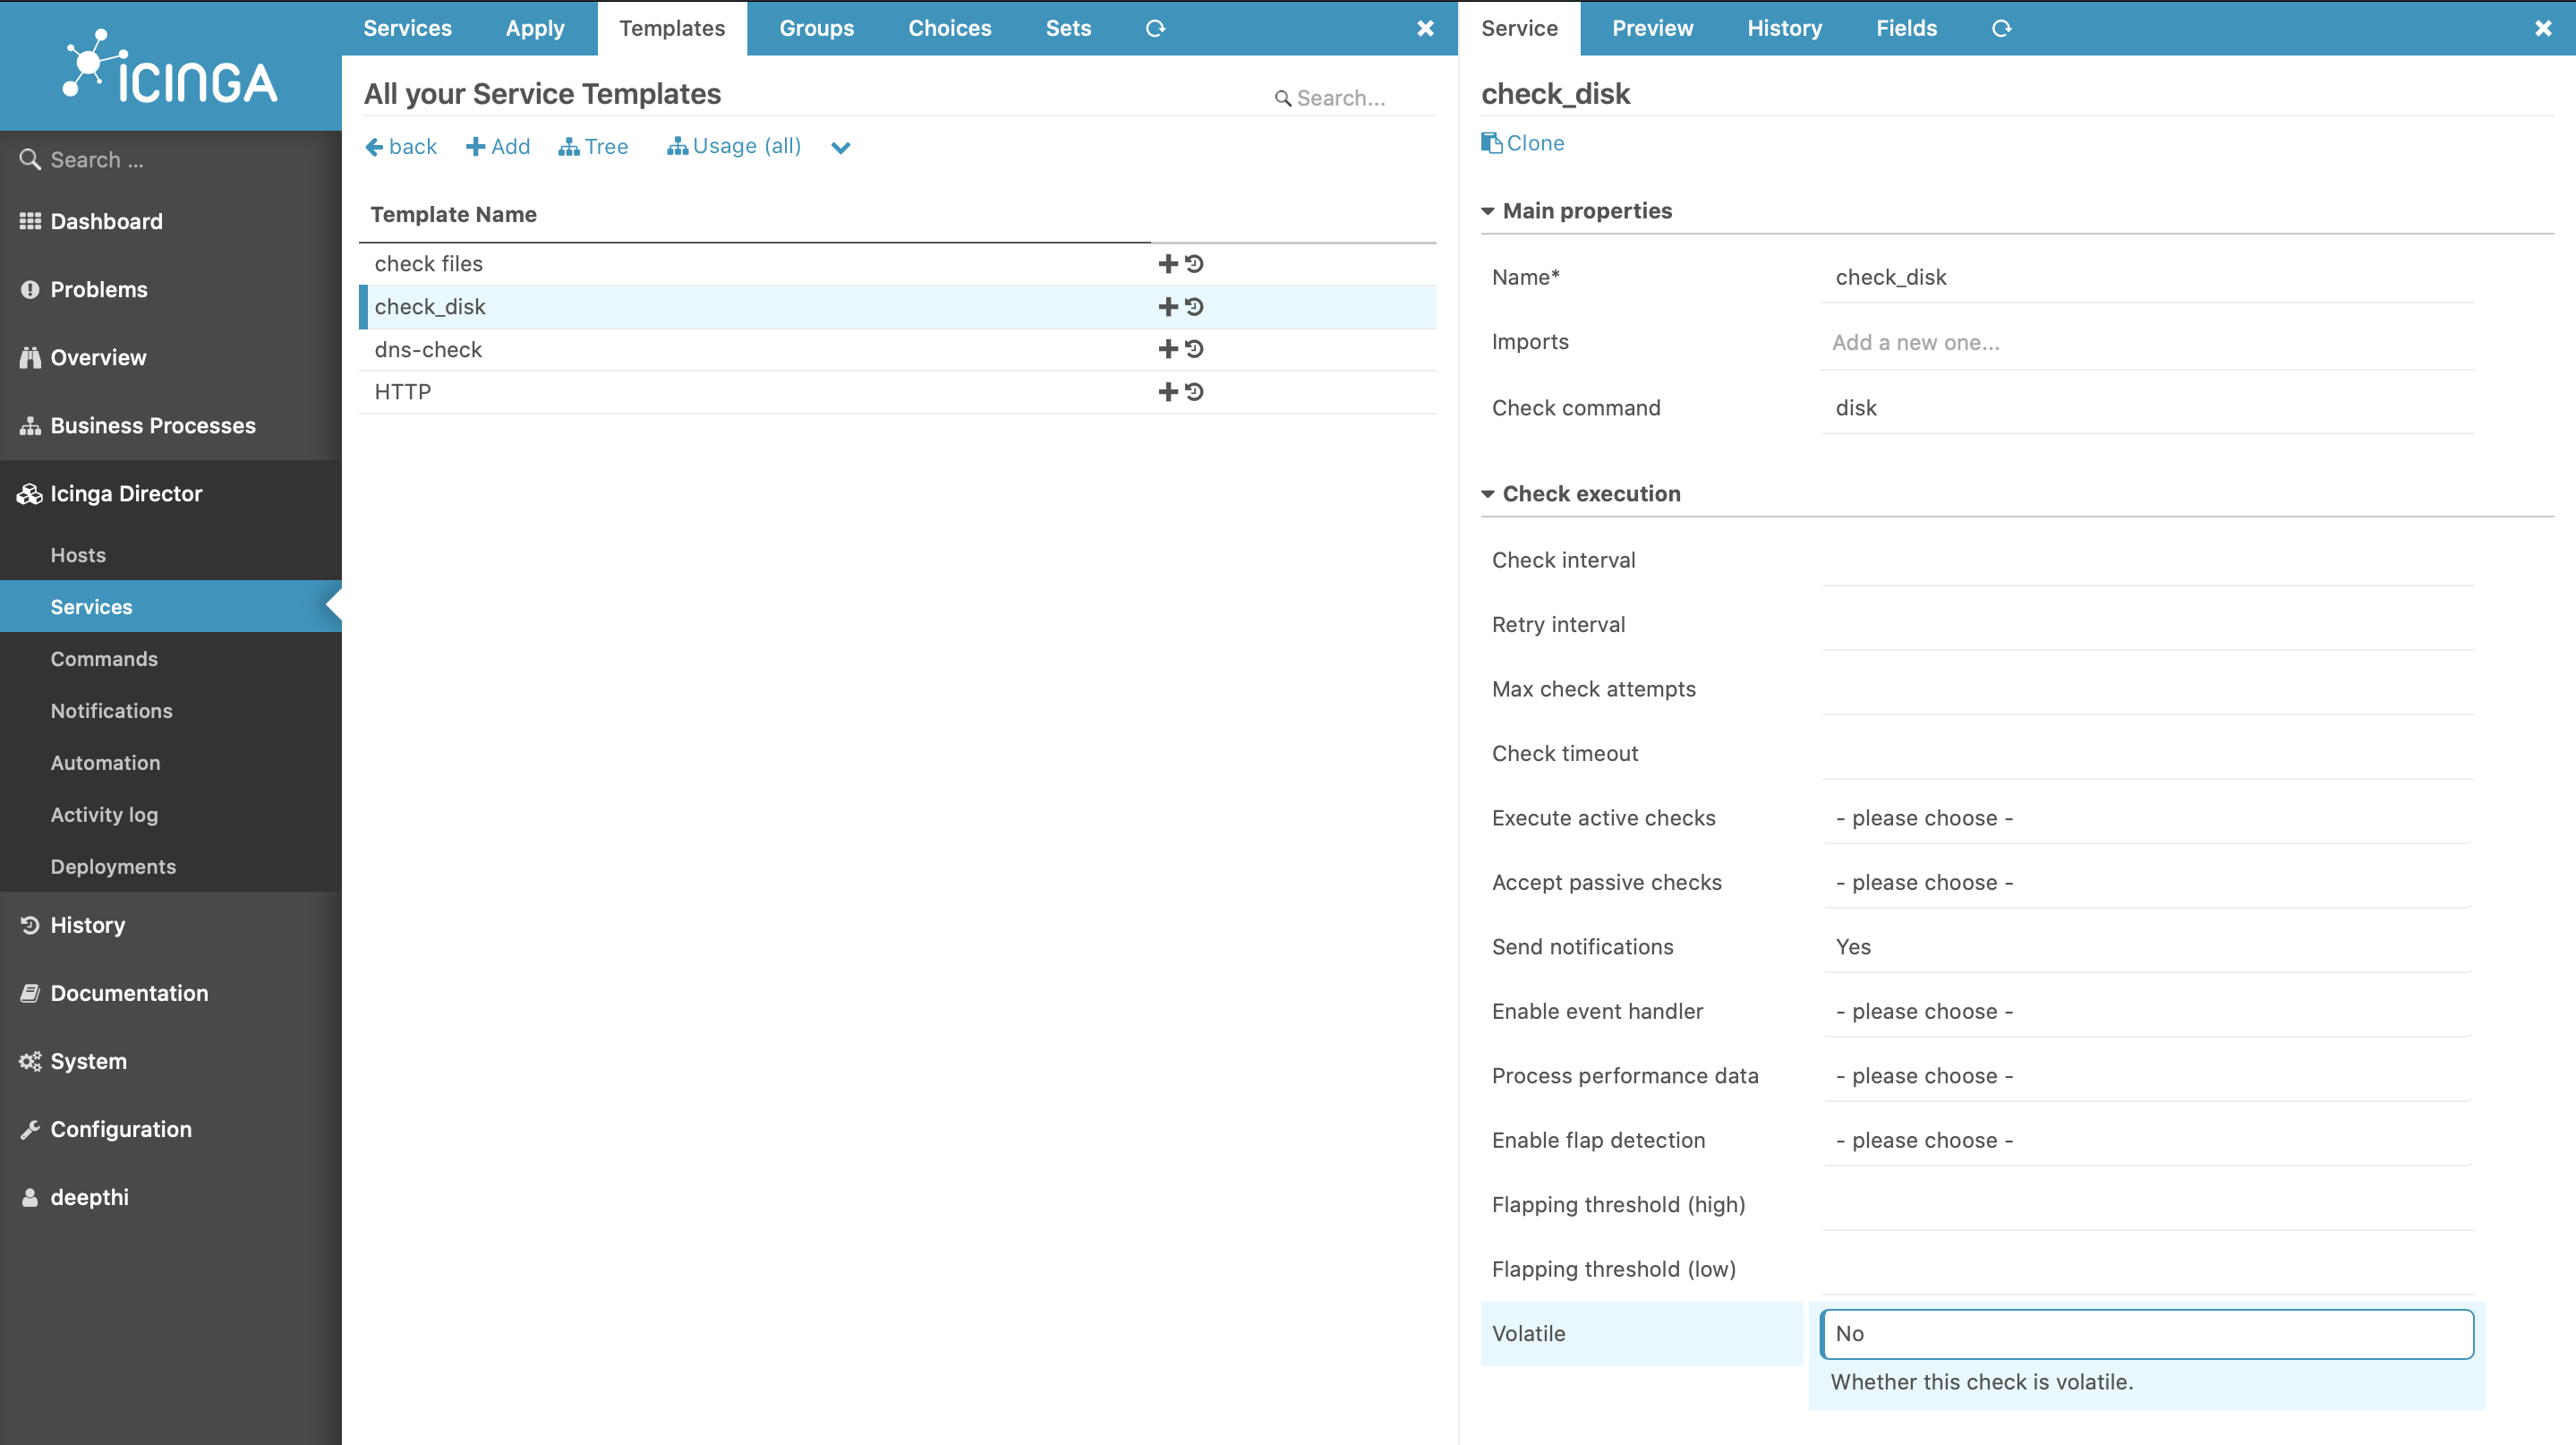
Before adding the service to check the disk space in a host, add the service template for the diskspace with necessary commands as following image
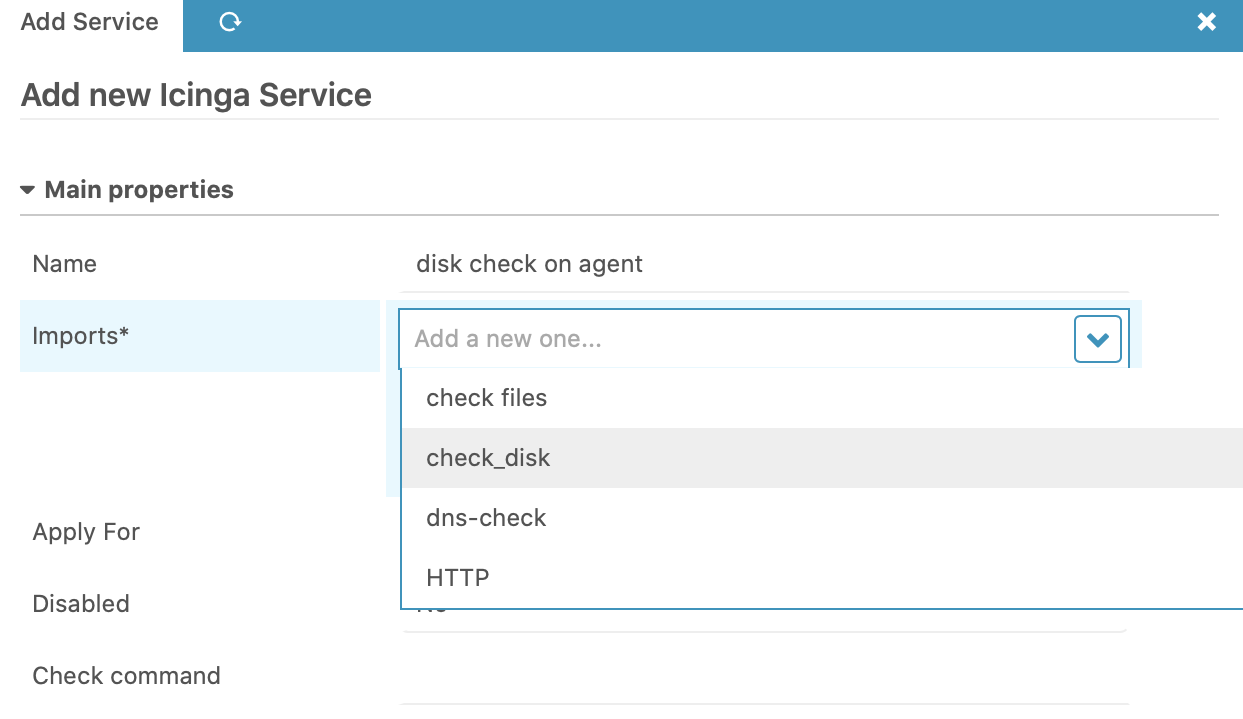
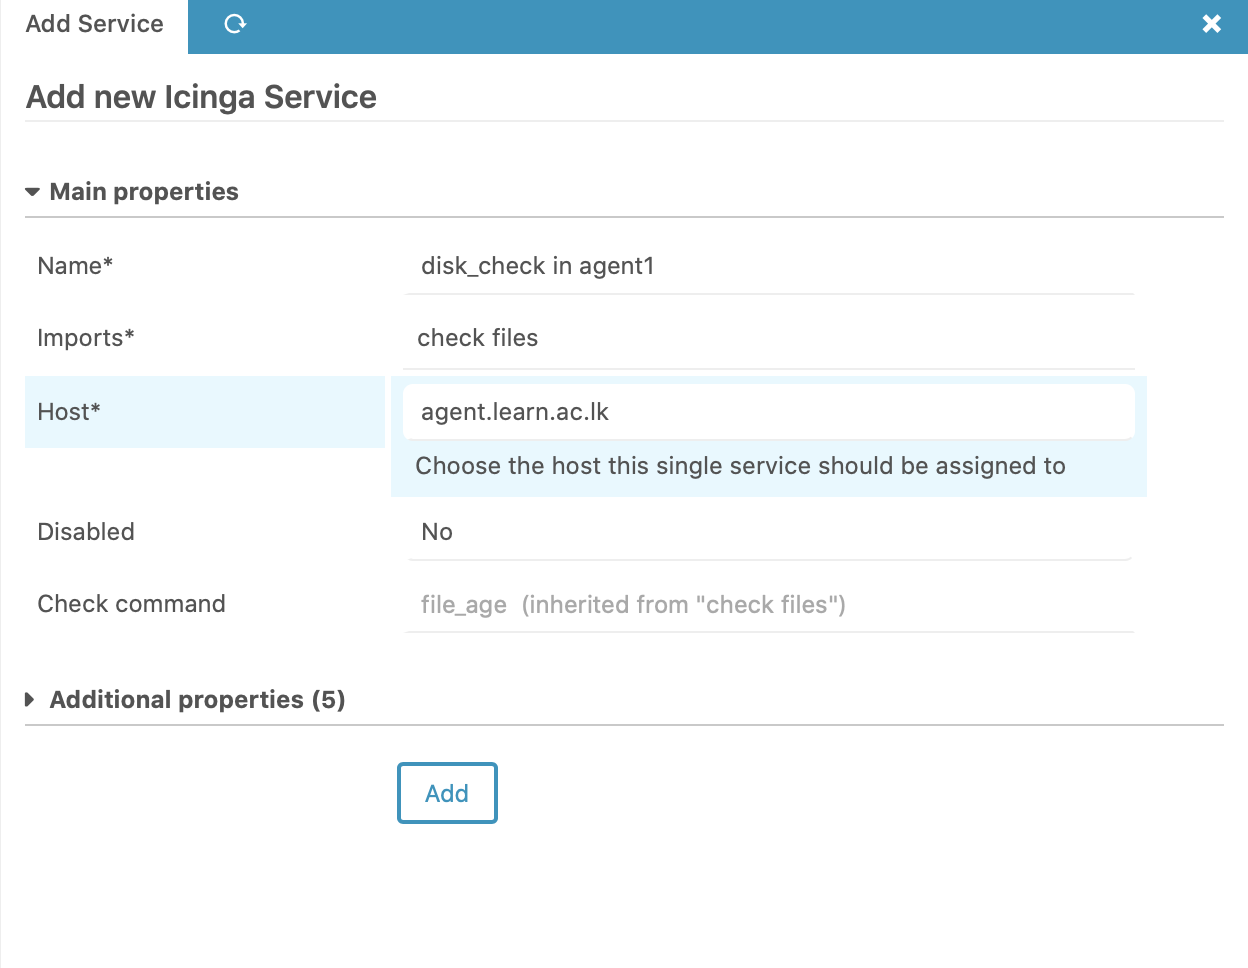
And after, Please add the service to the host to monitor the diskspace as follows
How to check files
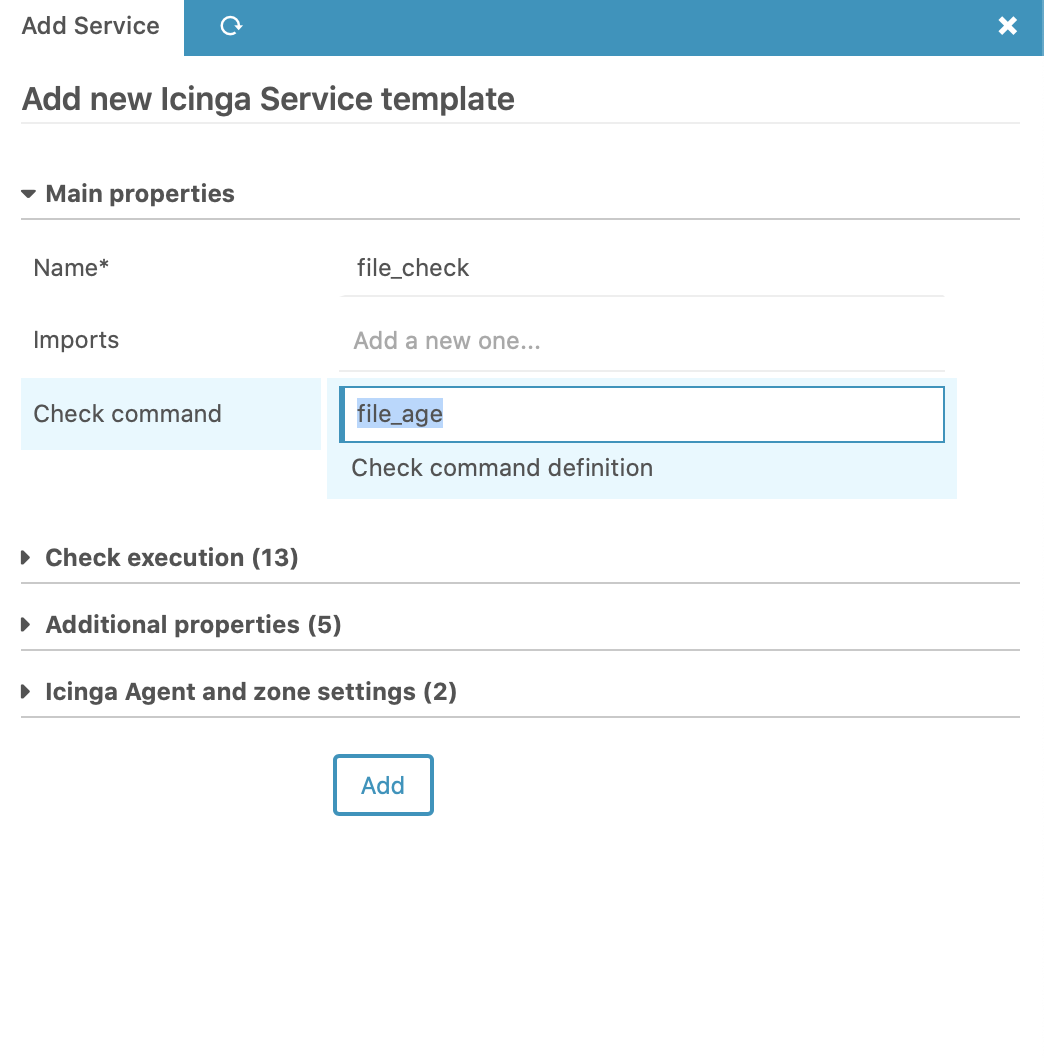
To monitor files, an example is taken to show how to monitor specific file. A service for has to be created to check the files.
As per the example below, create a template for the file checking
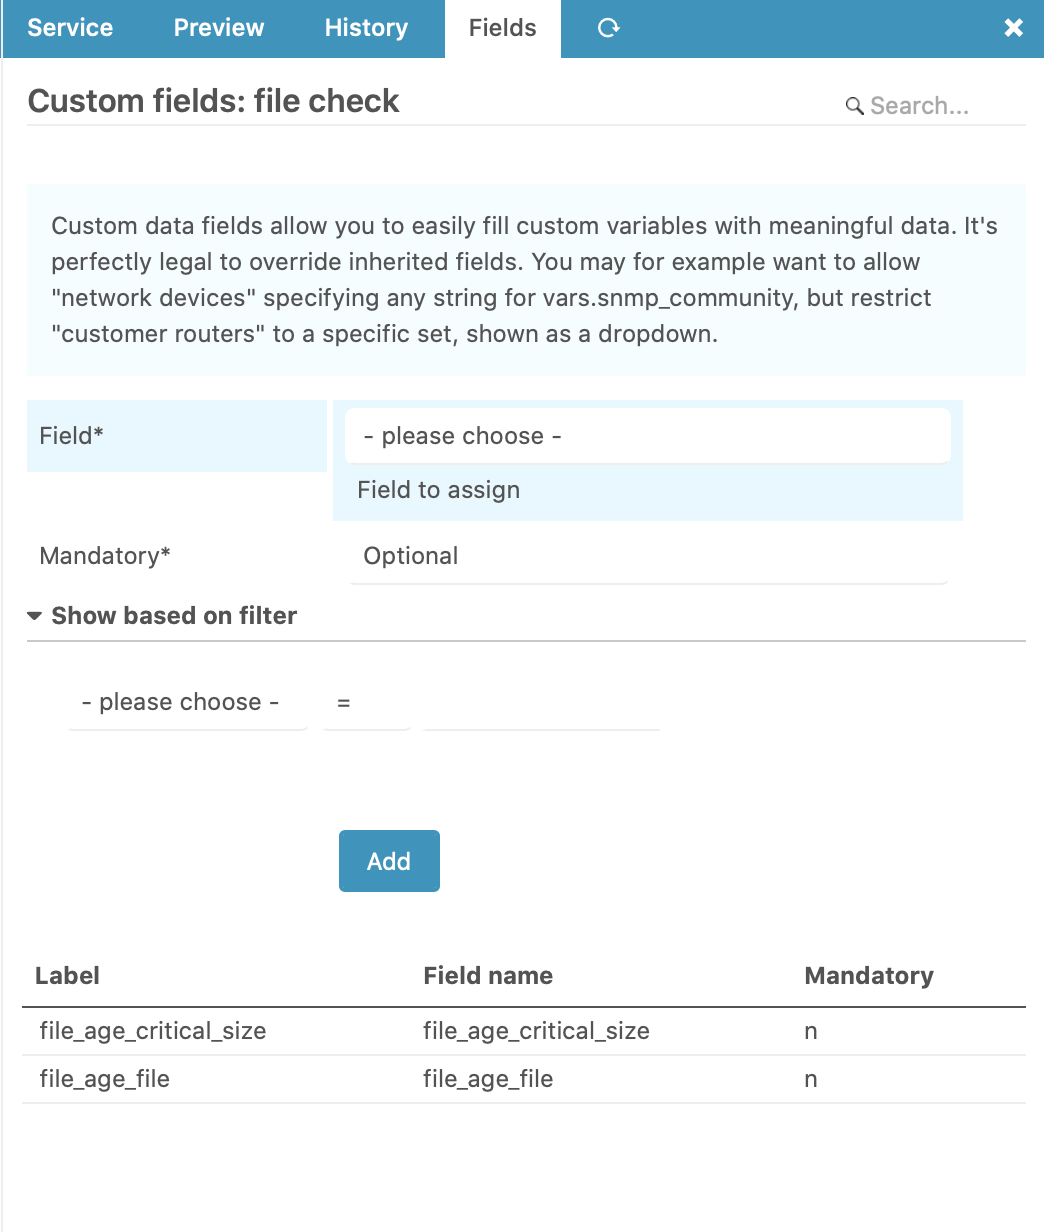
And since we have to pass the parameters, We can add the fields after adding the template,
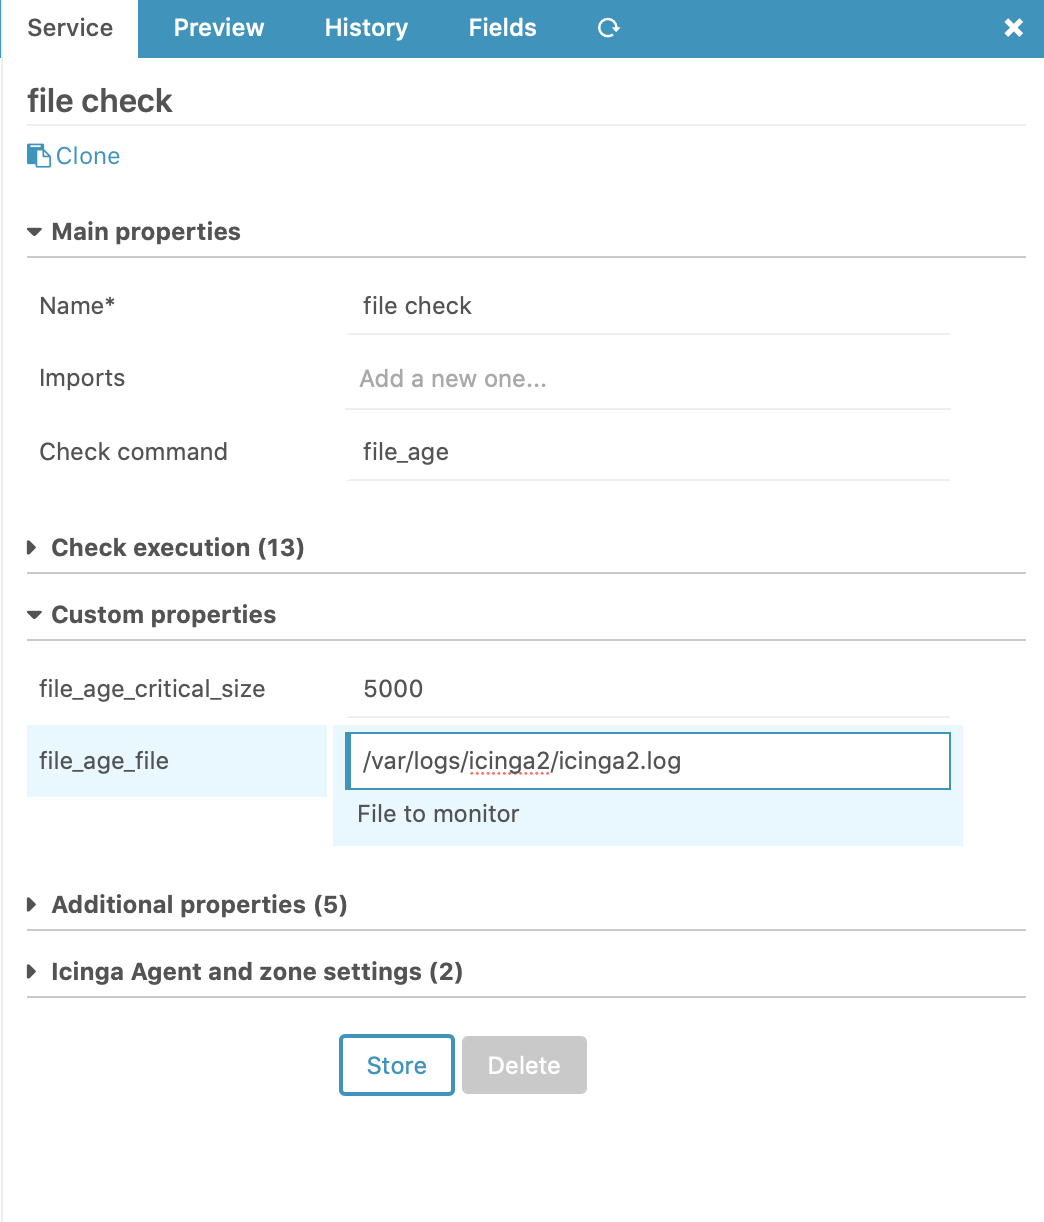
Select the parameters which are needed to be used in the drop down list and after adding the fields, you can change the filed values in custom properties in the service template
After changing the configurations, Deploy the changes for Icinga director > activity log.
Attachments (16)
- diskspace_service.png (357.5 KB ) - added by 5 years ago.
- diskcheck1.png (66.1 KB ) - added by 5 years ago.
- diskcheck2.png (90.1 KB ) - added by 5 years ago.
- dnscheck.png (151.8 KB ) - added by 5 years ago.
- agent1_host_template.png (181.7 KB ) - added by 5 years ago.
- agent_host_template2.png (37.5 KB ) - added by 5 years ago.
- adding_agent_host.png (187.2 KB ) - added by 5 years ago.
- agent_scripts.png (237.9 KB ) - added by 5 years ago.
- master_listing_agents.jpeg (149.5 KB ) - added by 5 years ago.
- dns_template.png (210.1 KB ) - added by 5 years ago.
- fields_dns.png (130.3 KB ) - added by 5 years ago.
- dns_fields.png (306.3 KB ) - added by 5 years ago.
- dns_check3.png (110.7 KB ) - added by 5 years ago.
- check_files_template.png (86.7 KB ) - added by 5 years ago.
- Change_parameters_checkFiles.png (106.2 KB ) - added by 5 years ago.
- adding_fileds_check_fils.png (131.3 KB ) - added by 5 years ago.

