
| Version 13 (modified by , 5 years ago) ( diff ) |
|---|
Configuring iCinga2 on Single server
This will guide you through installing Icinga setup on Ubuntu 20.04 LTS server;
Requirements
- Linux Server running Ubuntu 20.04 LTS
- SSL/ HTTPS Certificates issued ( May be using Letsencrypt or Otherwise)
- sudo access to the server. All following commands have to be entered as the root user. Best way to do it is, by login in as root with
sudo su
Execute the commands as super user
Installing using a Script
Download the script into your server
wget https://raw.githubusercontent.com/LEARN-LK/Tutorials/master/installing_icinga2_ubuntu.sh
Assign execute permission for the script
chmod +x installing_icinga2_ubuntu.sh
Then execute file using terminal
./installing_icinga2_ubuntu.sh
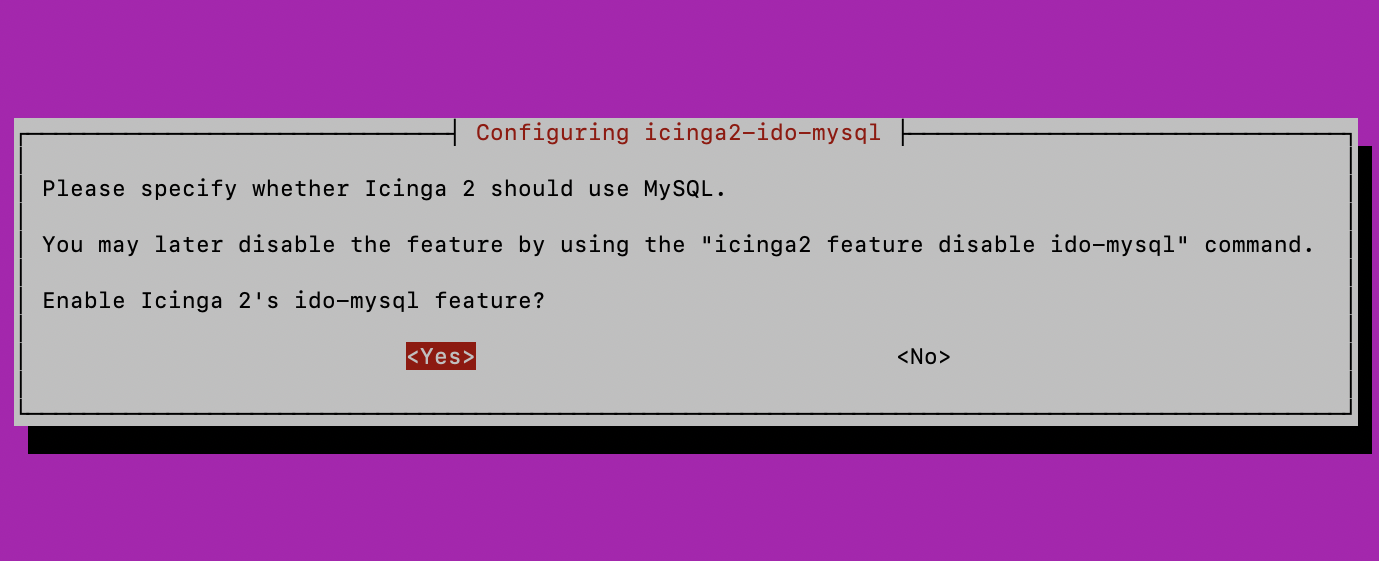
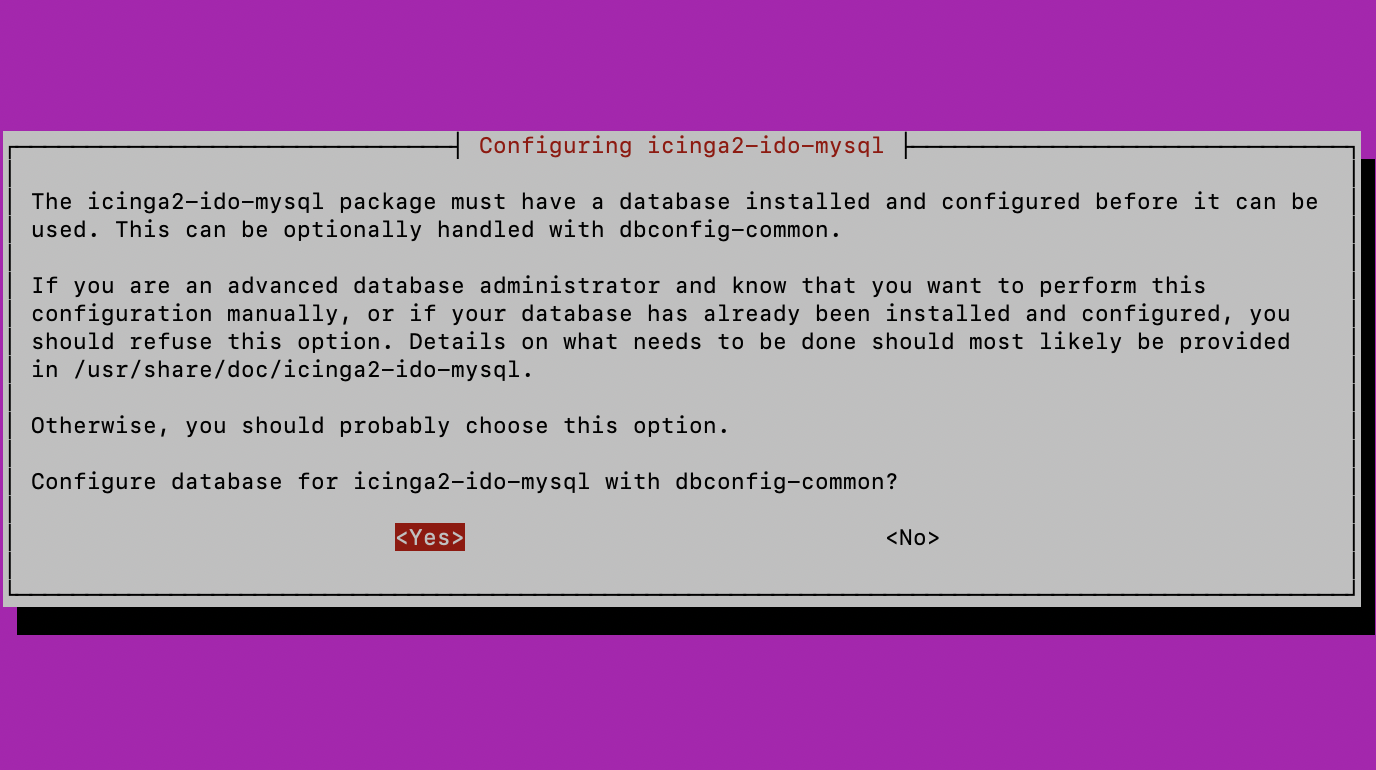
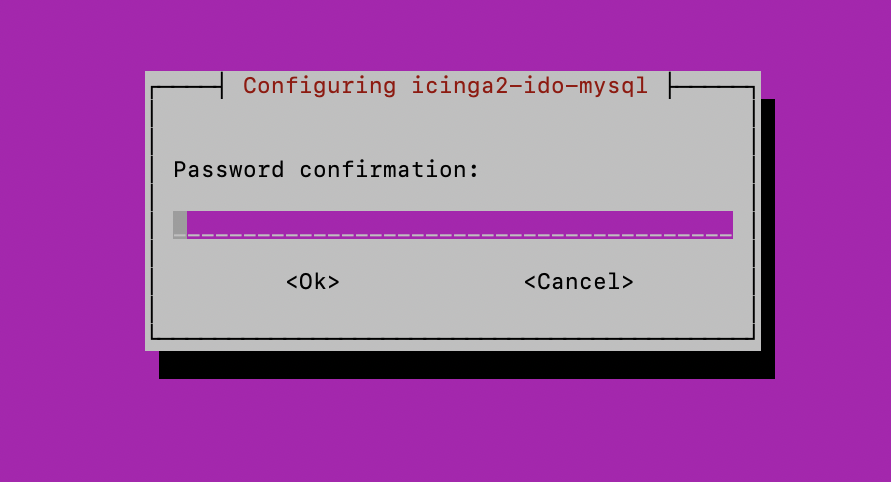
Select yes for the options pop up when icinga2-ido-mysql starts installing and creating database for module. Enter a password for when it prompt(it is used for icinga2 database)

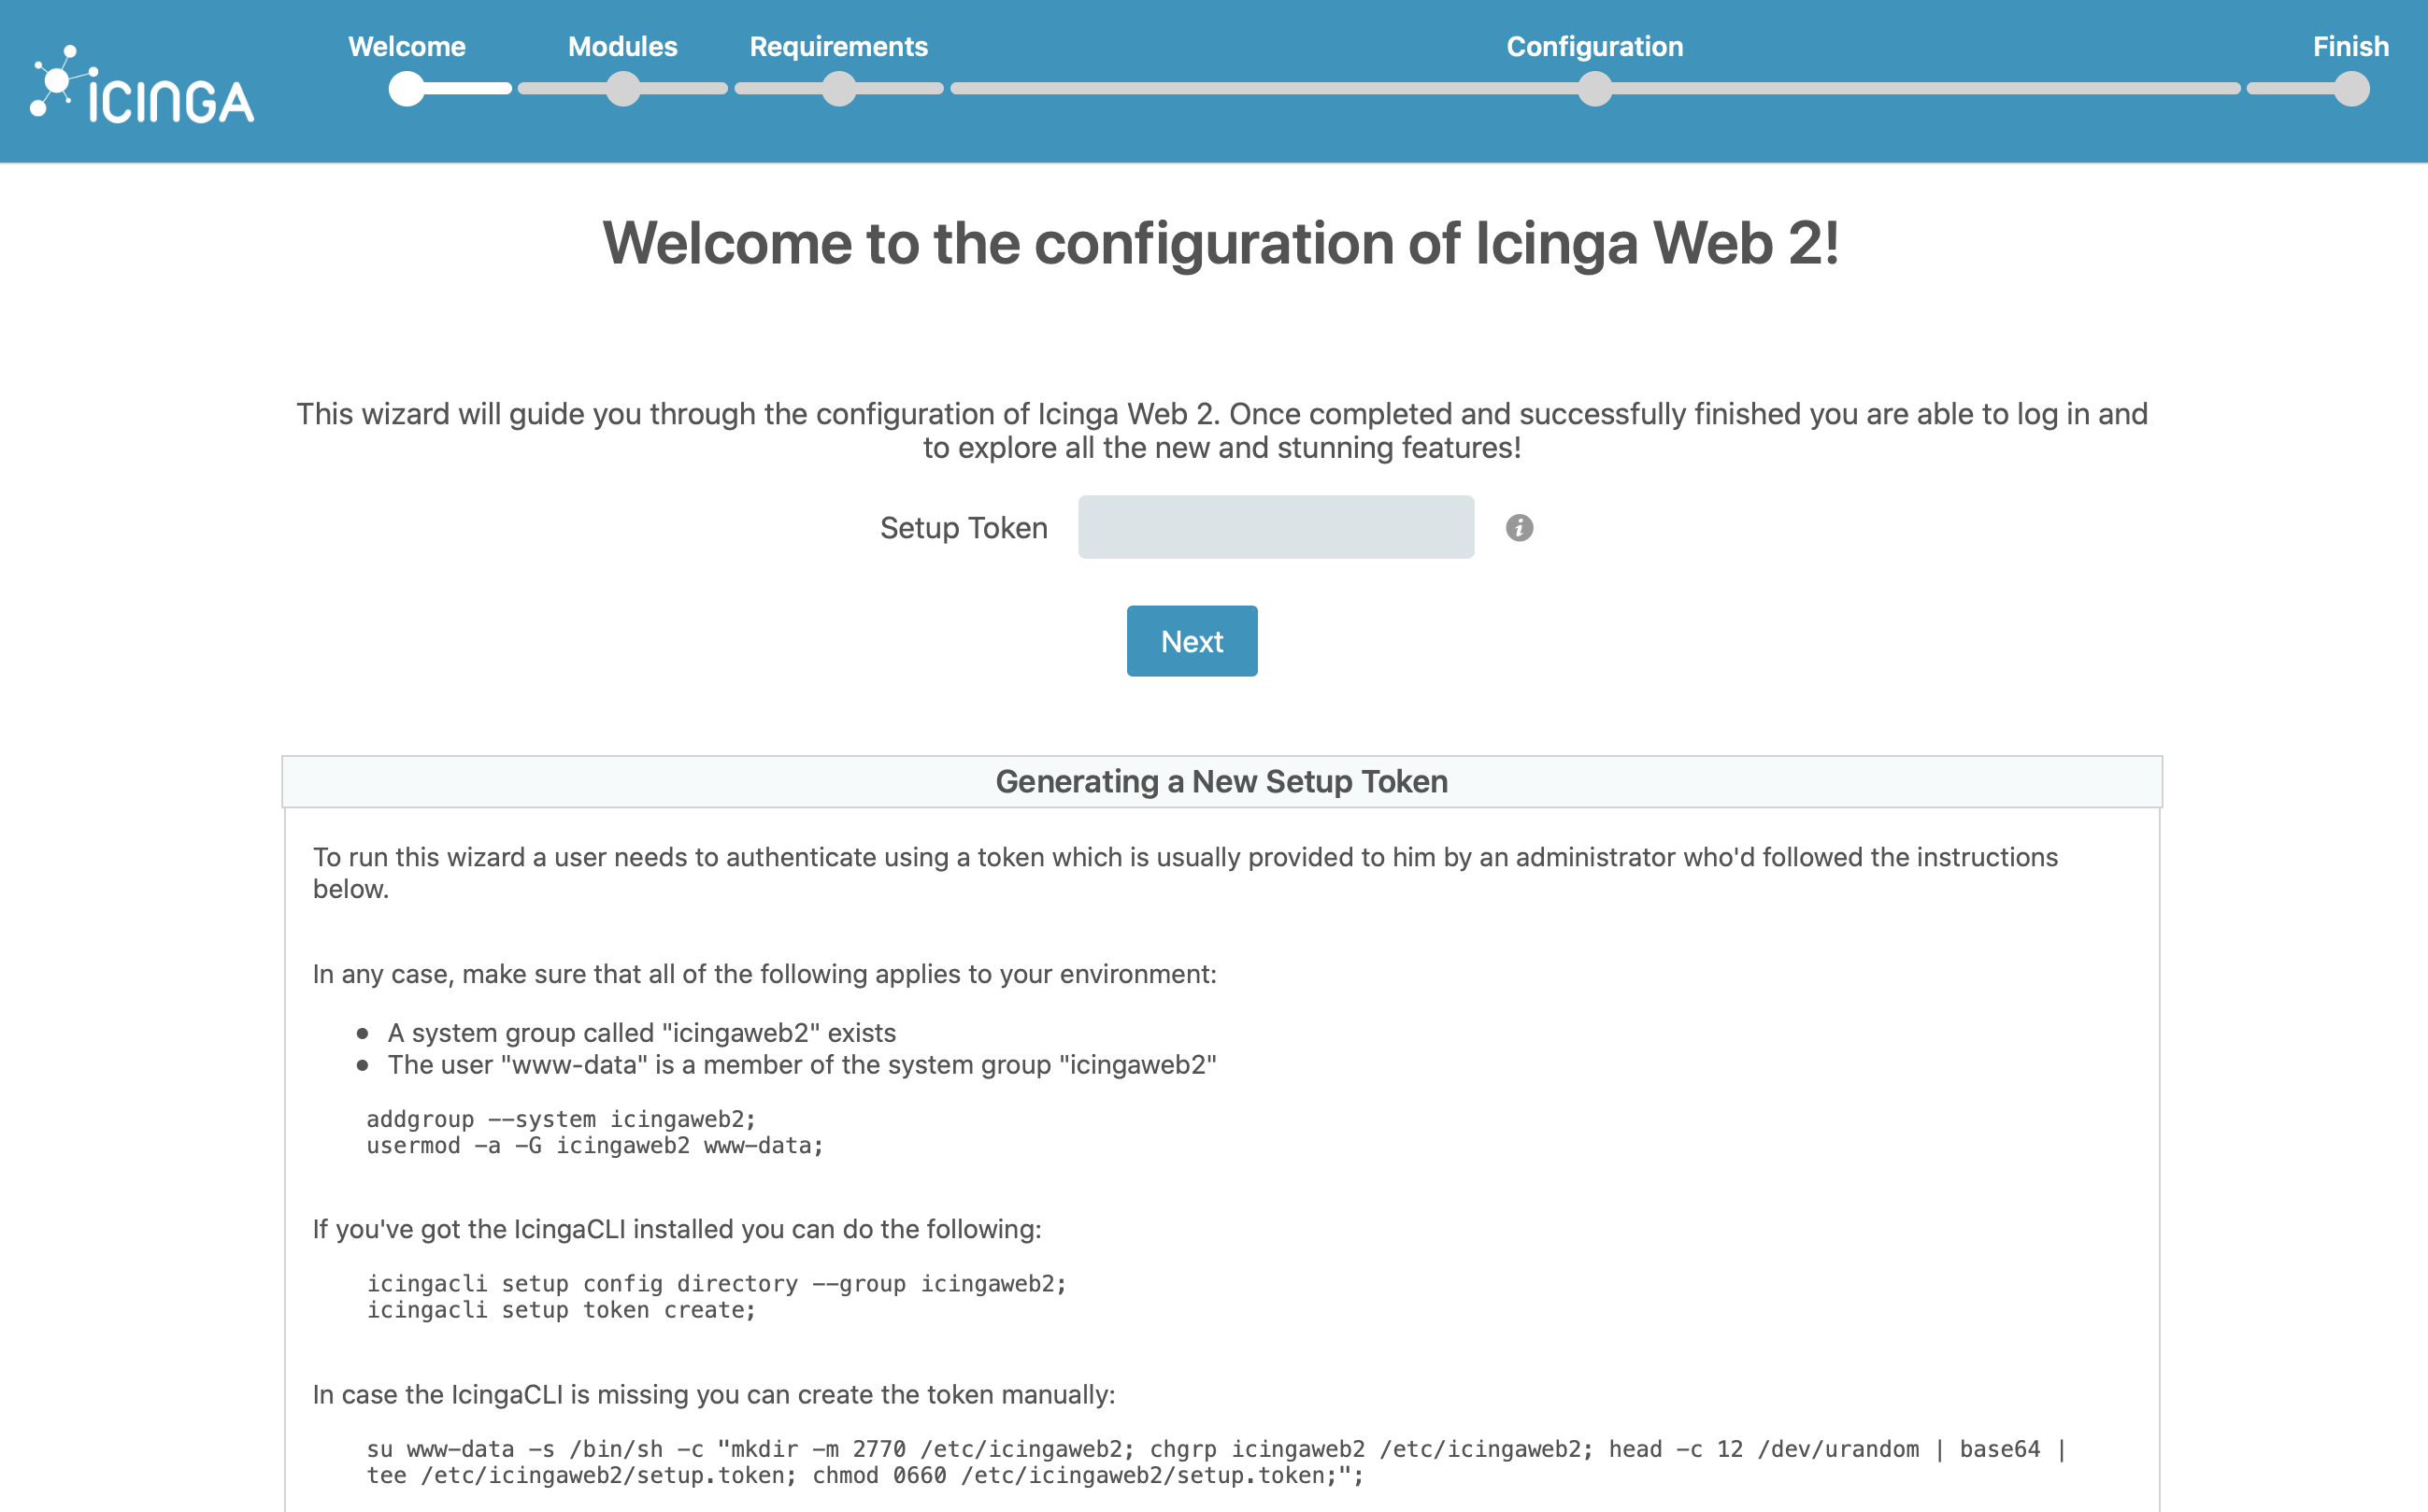
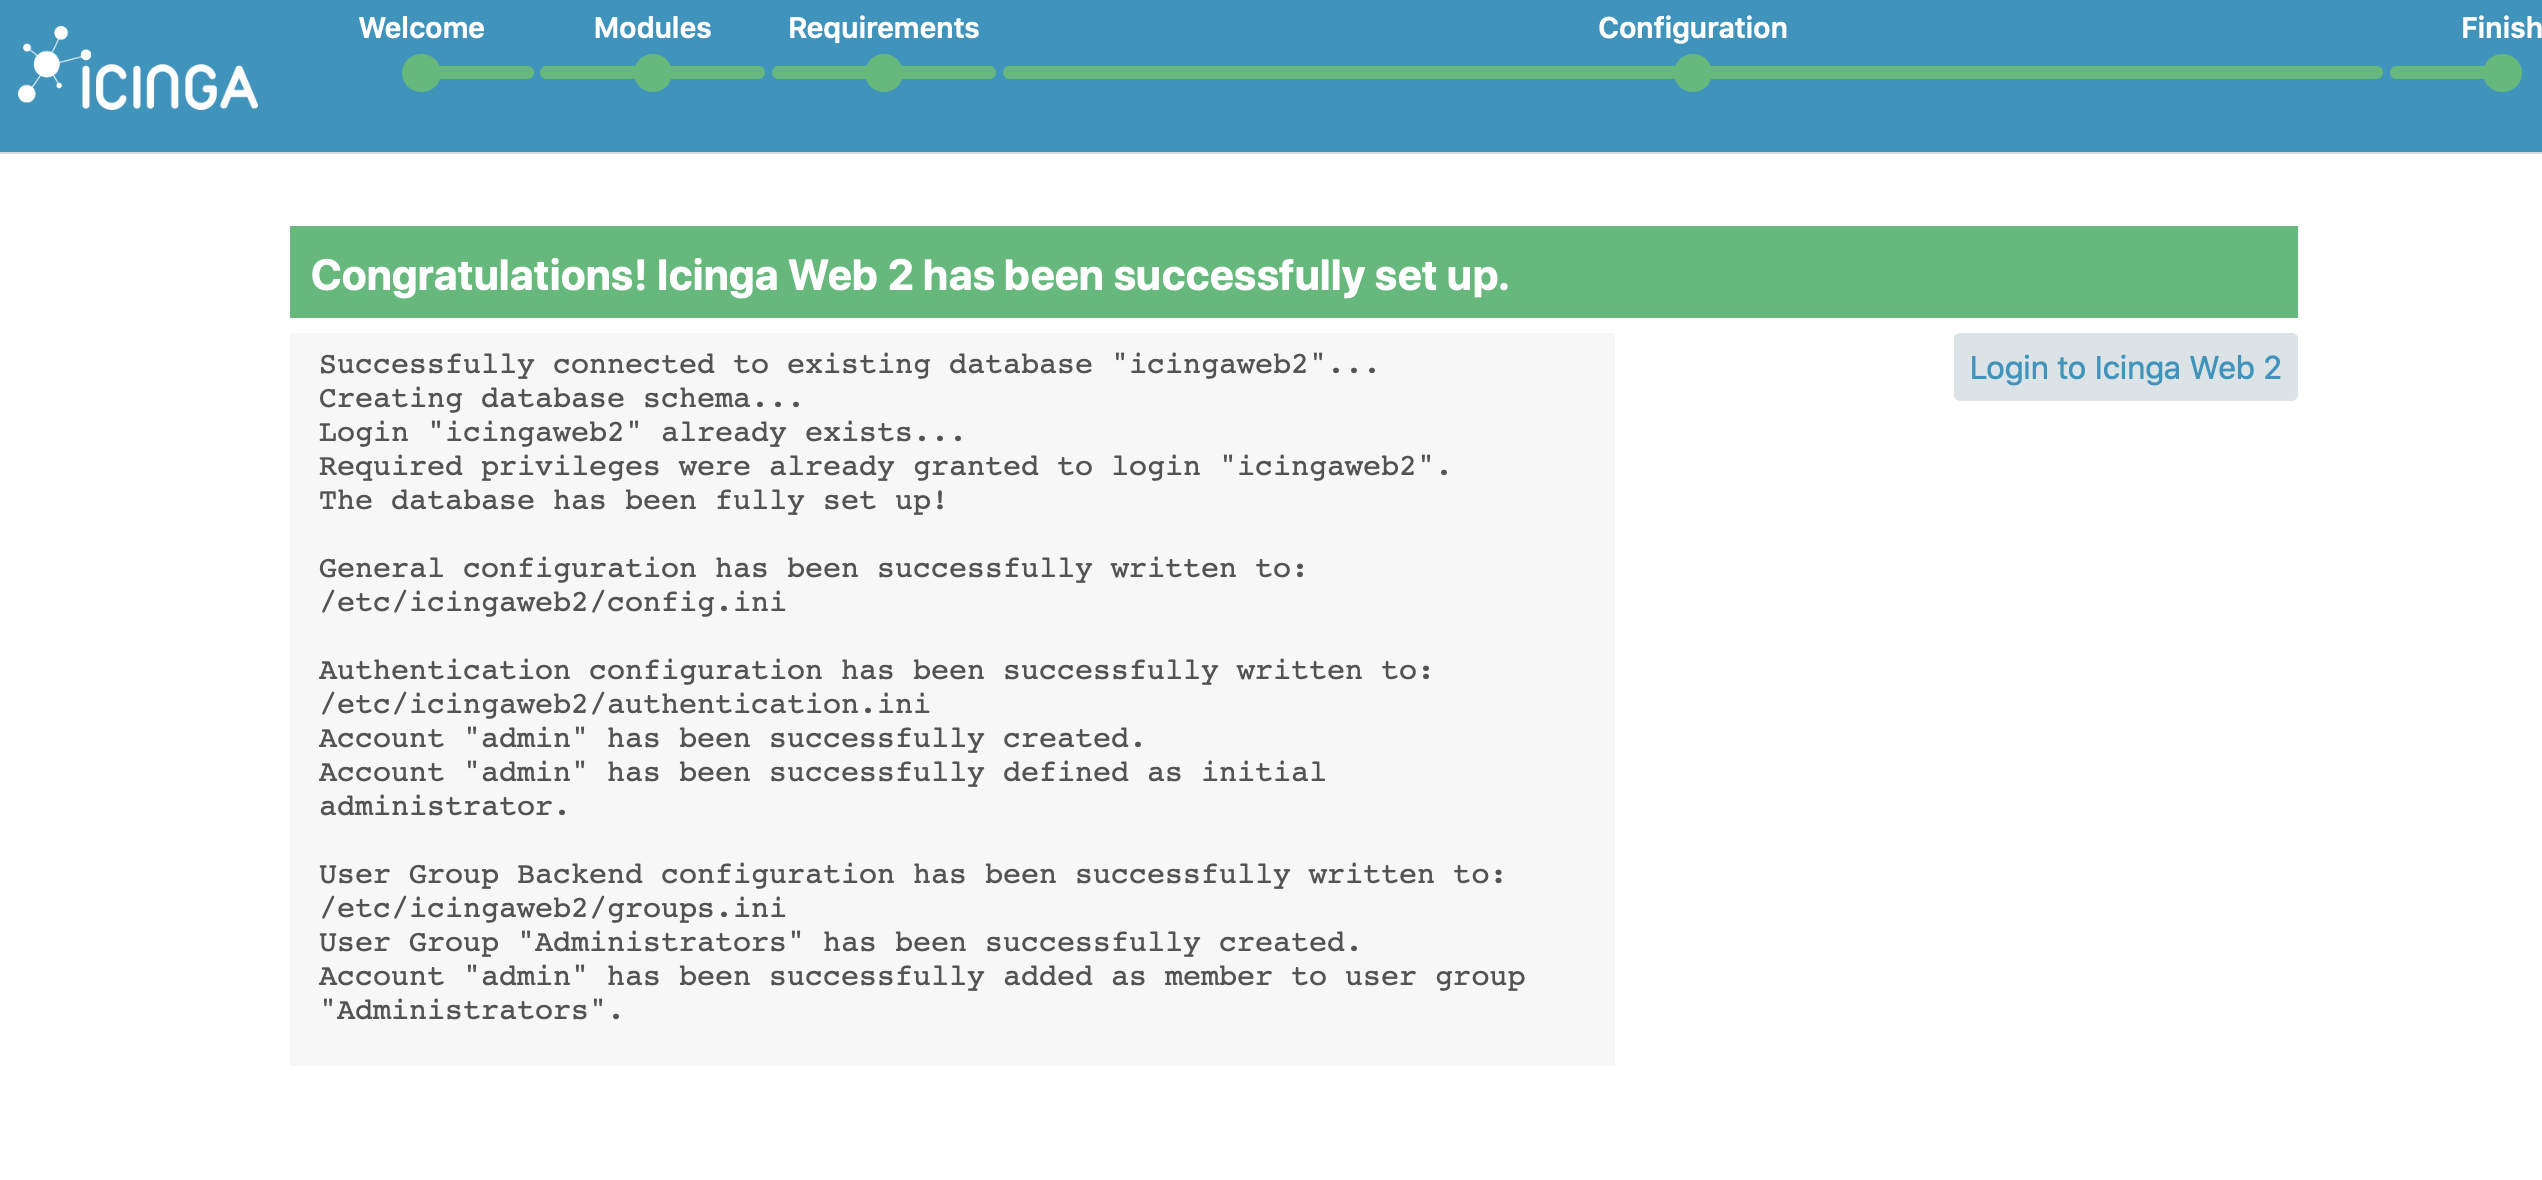
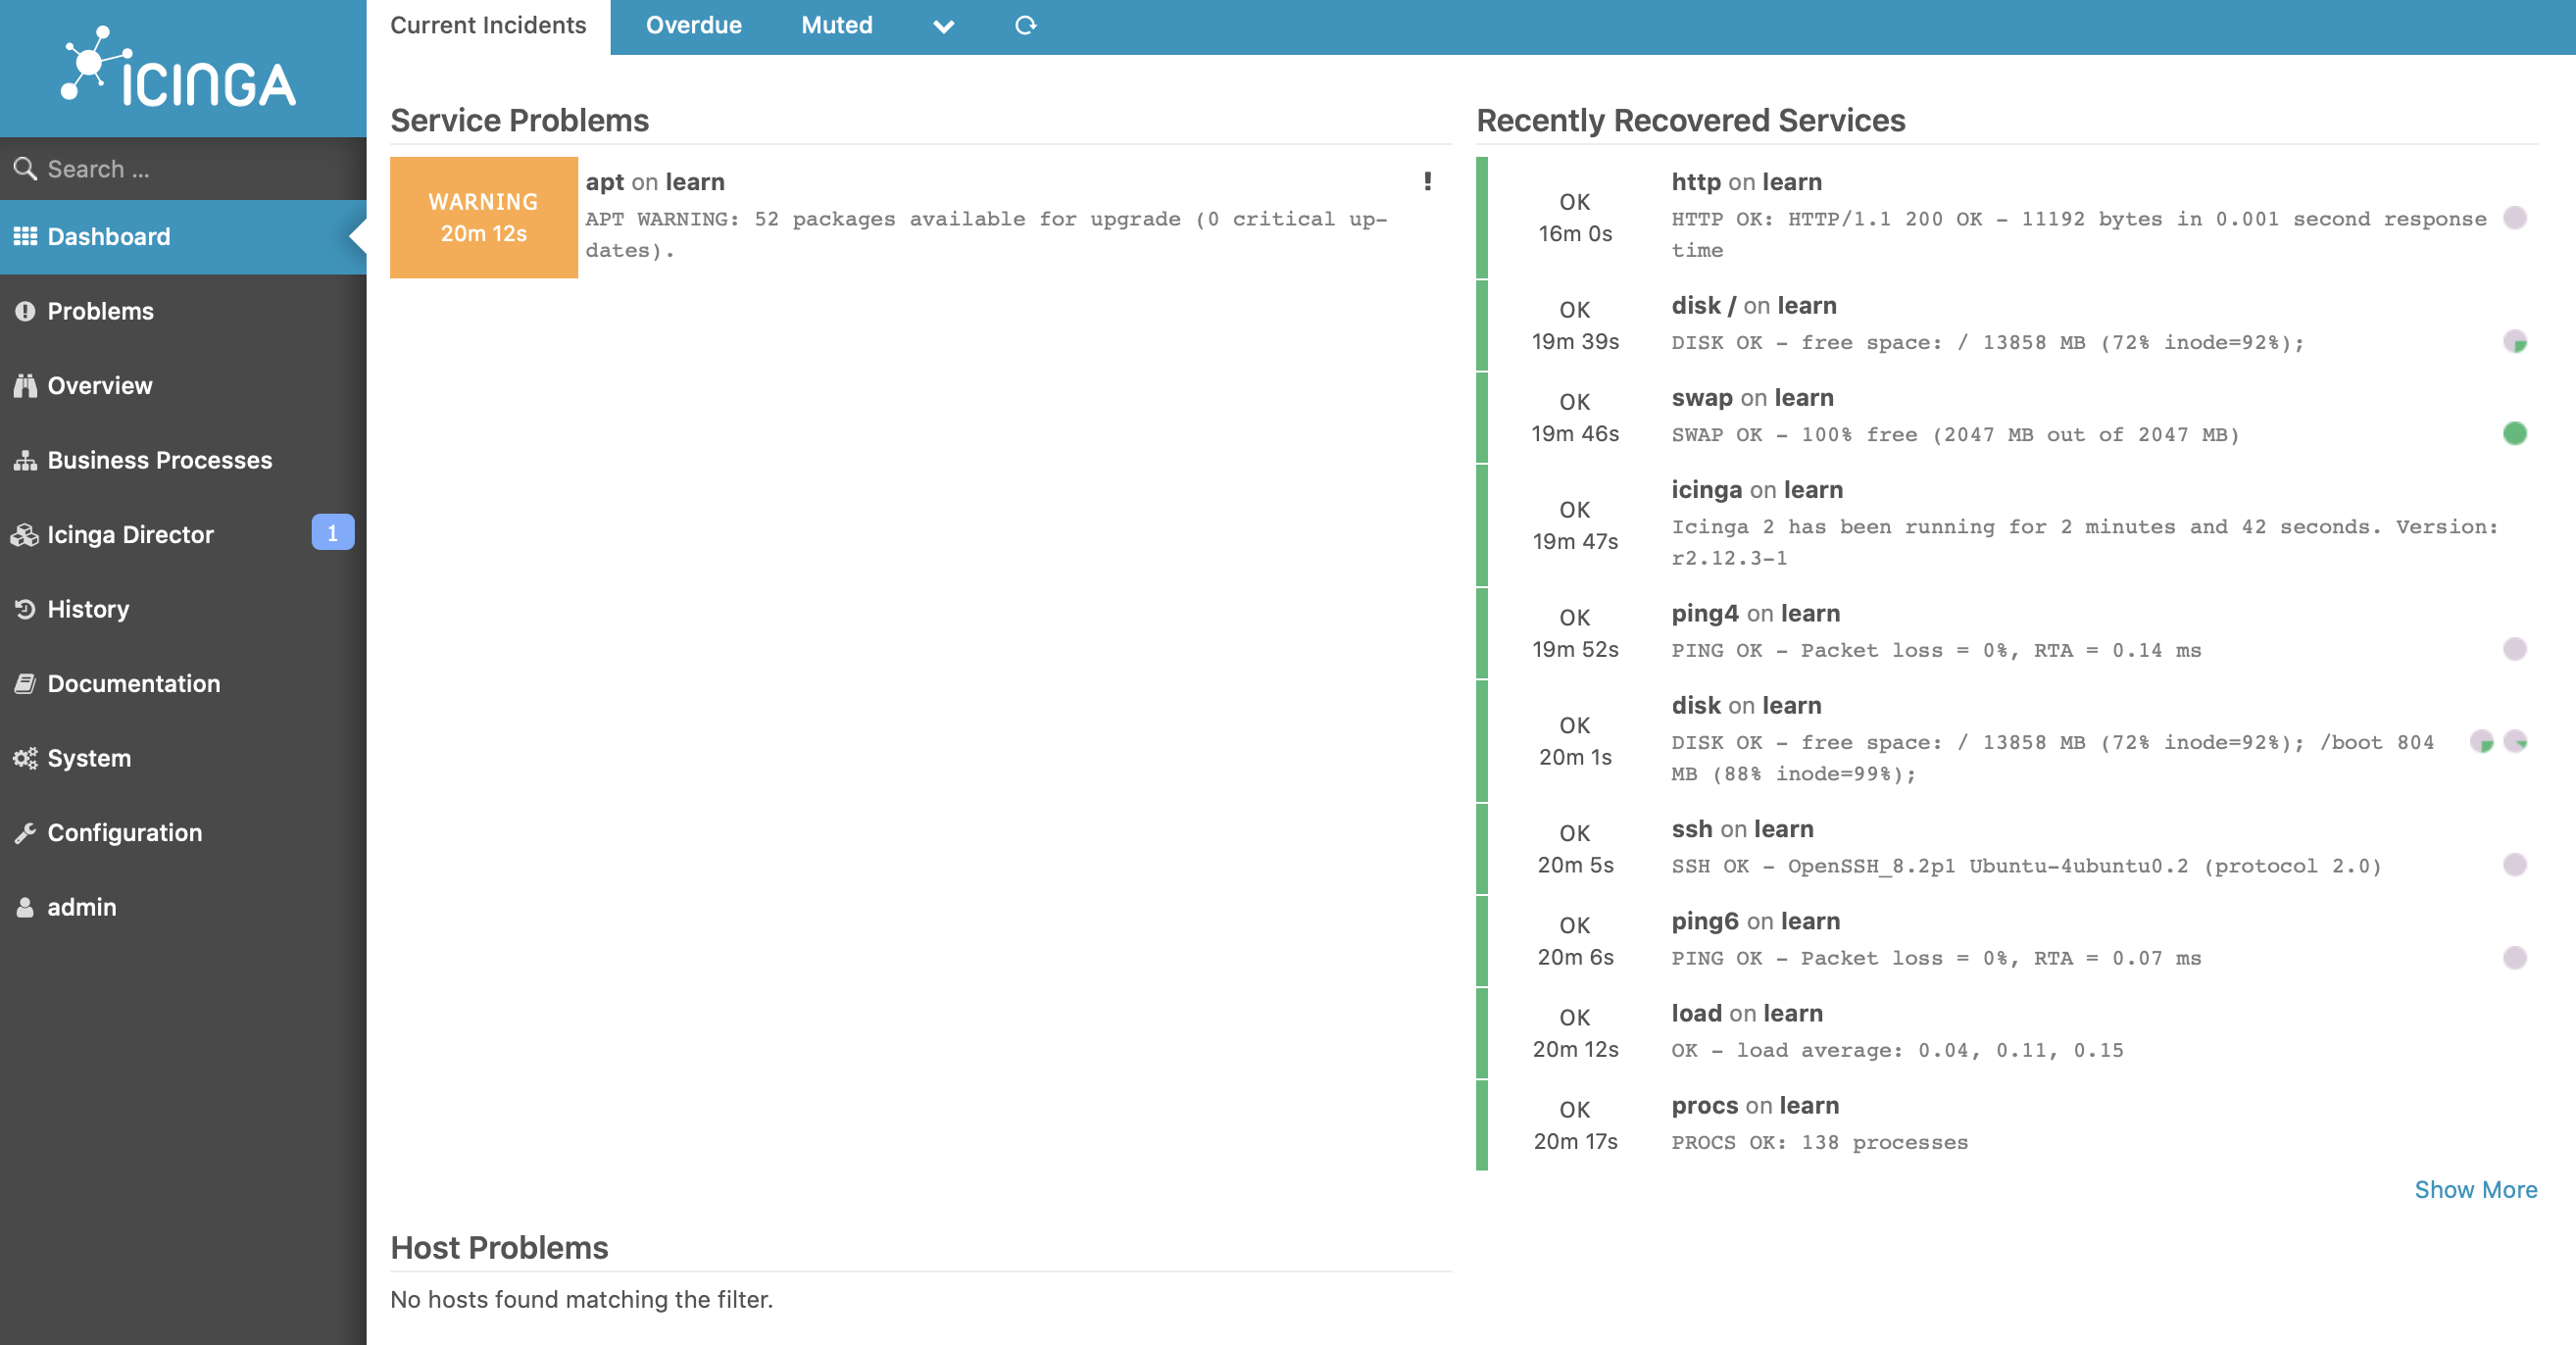
Starting Web Setup
Finally visit Icinga Web 2 in your browser to access the setup wizard and complete the installation:
http://IP-ADDRESS/icingaweb2/setup
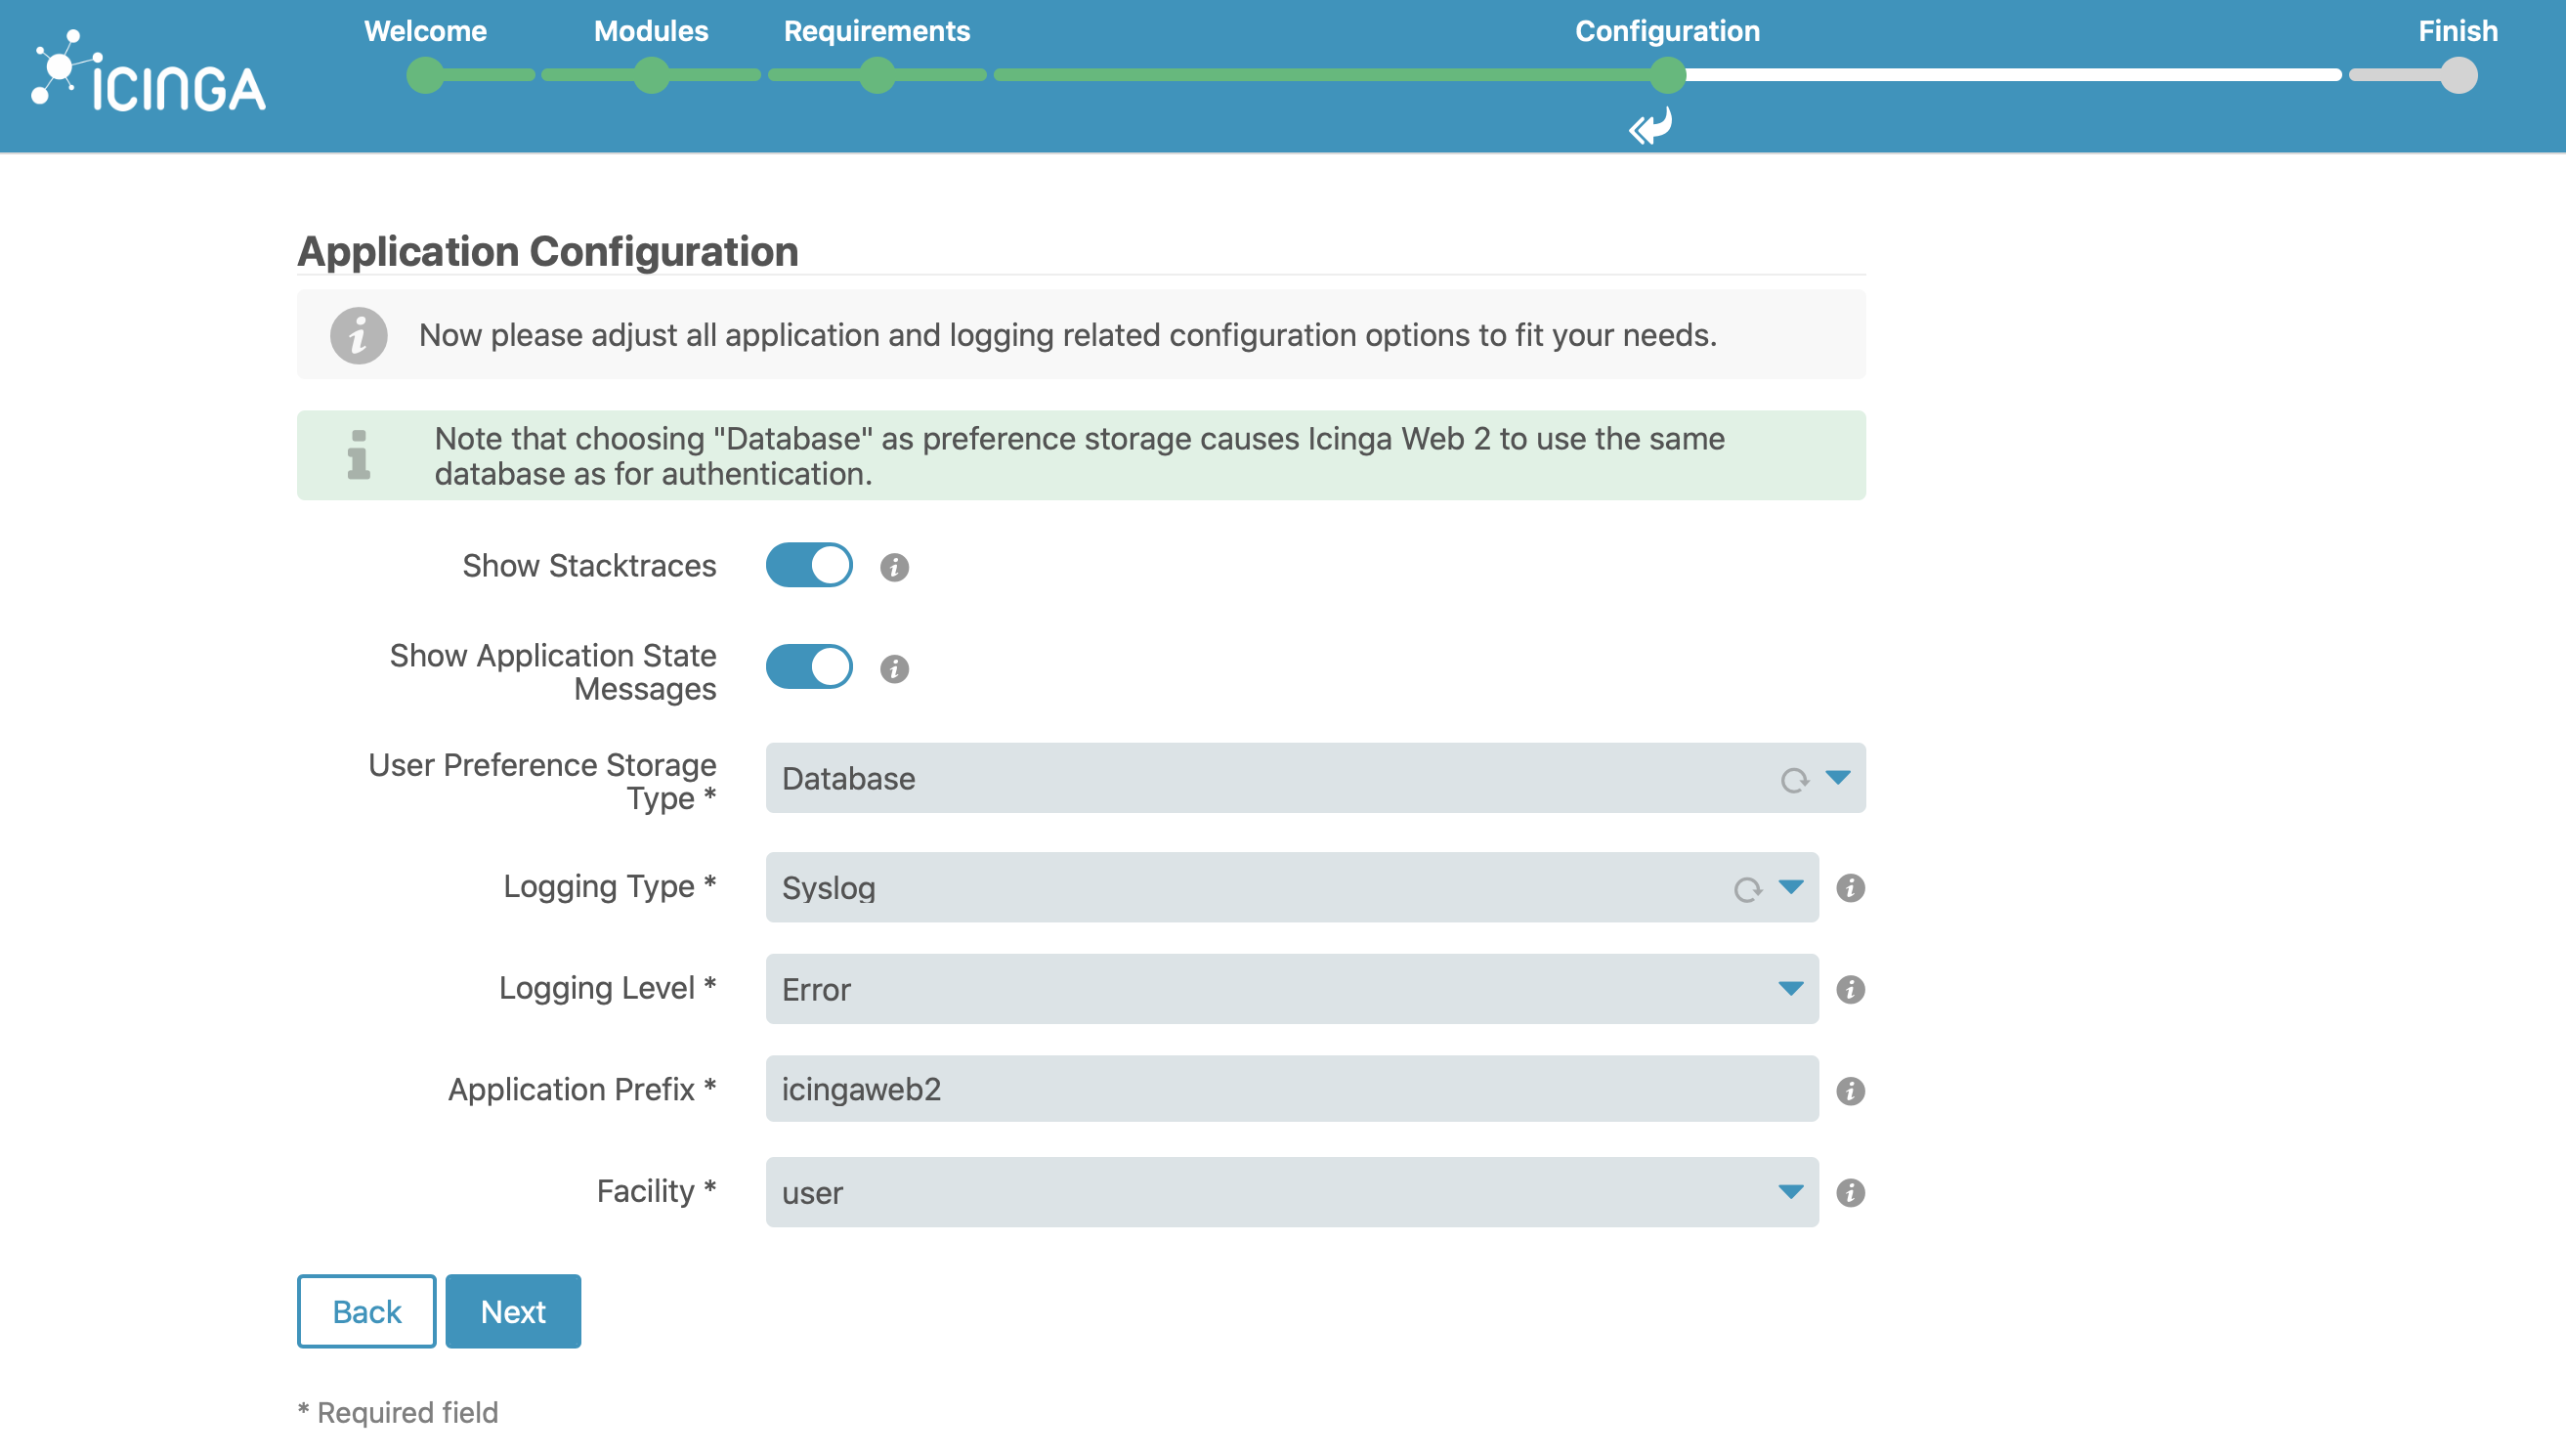
Configuration on web
You can set up Icinga Web 2 quickly and easily with the Icinga Web 2 setup wizard which is available the first time you visit Icinga Web 2 in your browser. When using the web setup you are required to authenticate using a token.
you can show it using the icingacli:
icingacli setup token show

Next page will show you the modules:

You can enable the modules you want sliding bars:

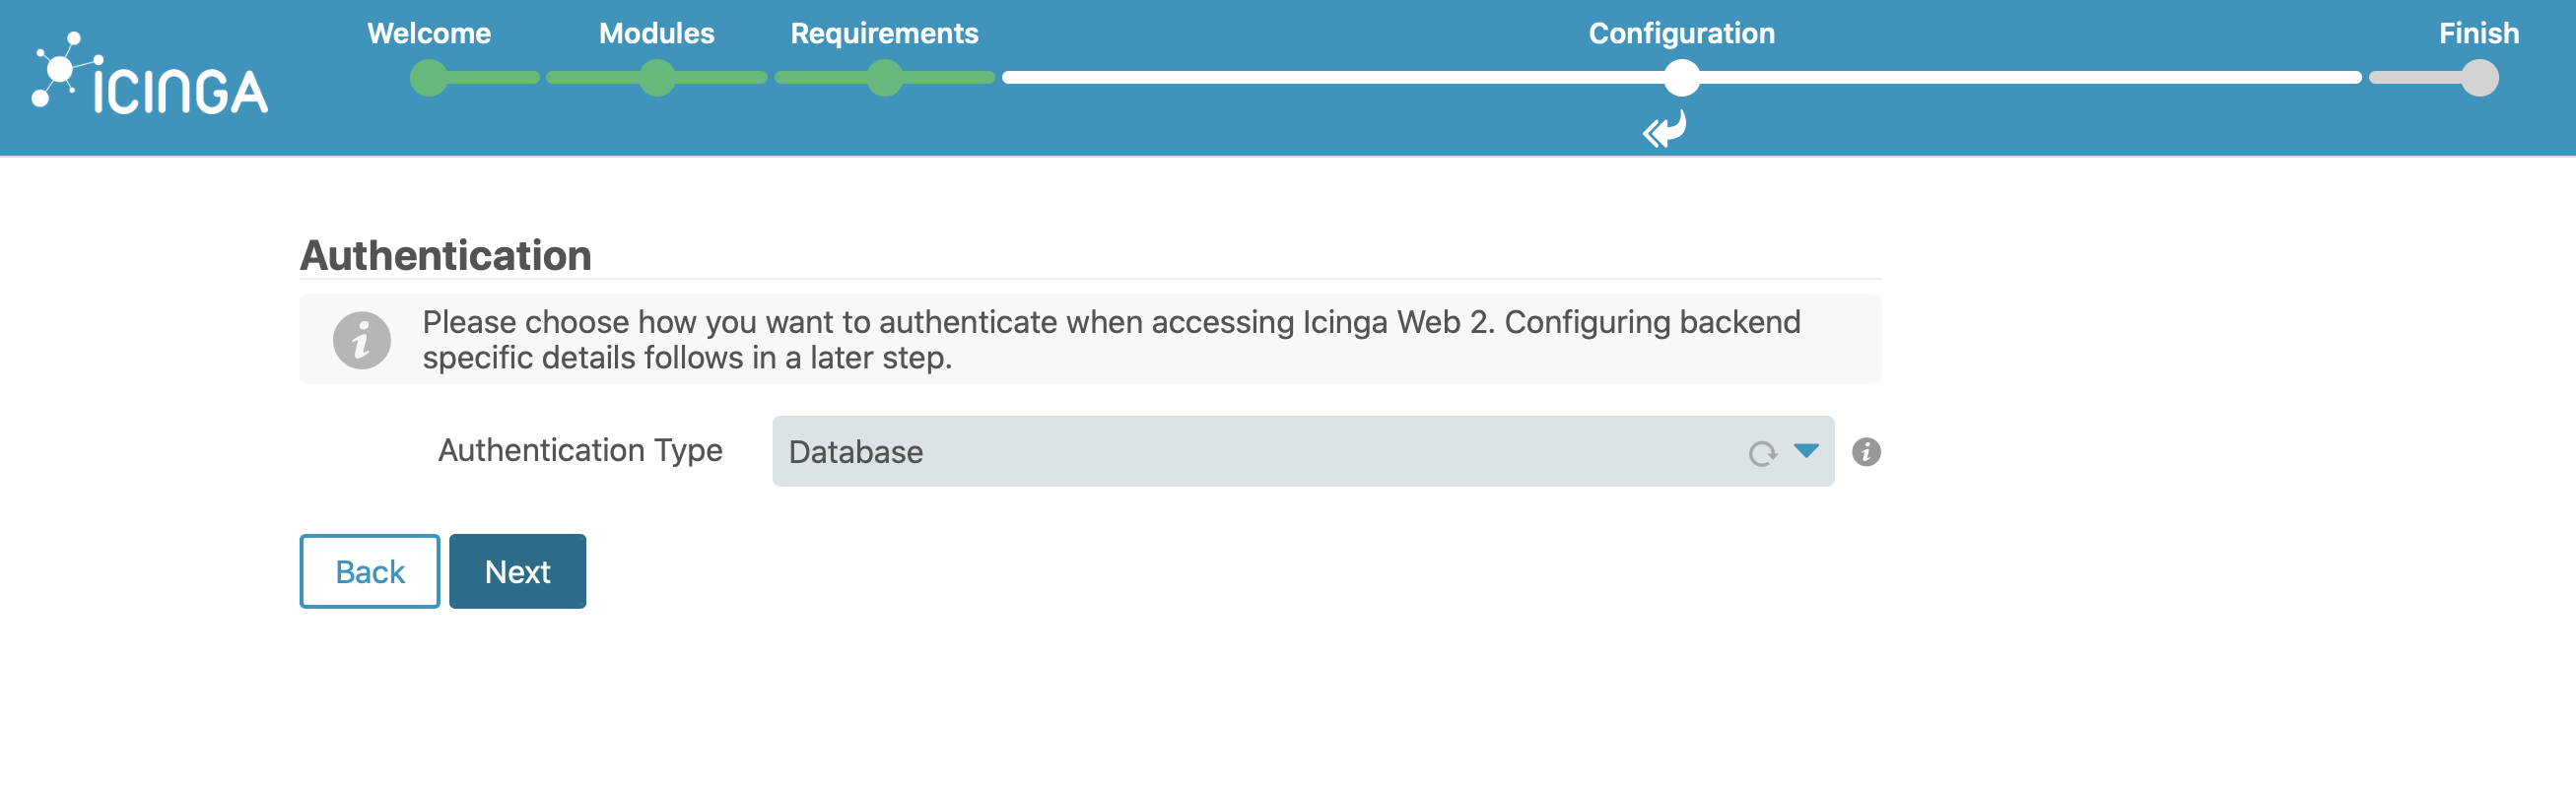
Please keep the Authentication type as database:


Manual Installation
Ubuntu Repositories
You need to add the Icinga repository to your package management configuration. The following commands must be executed with root permissions unless noted otherwise.
apt-get update
apt-get -y install apt-transport-https wget gnupg
wget -O - https://packages.icinga.com/icinga.key | apt-key add -
. /etc/os-release; if [ ! -z ${UBUNTU_CODENAME+x} ]; then DIST="${UBUNTU_CODENAME}"; else DIST="$(lsb_release -c| awk '{print $2}')"; fi;
echo "deb https://packages.icinga.com/ubuntu icinga-${DIST} main" > /etc/apt/sources.list.d/${DIST}-icinga.list
echo "deb-src https://packages.icinga.com/ubuntu icinga-${DIST} main" >> /etc/apt/sources.list.d/${DIST}-icinga.list
apt-get update
Installing Icinga 2
The following commands must be executed with root permissions unless noted otherwise.
apt-get install icinga2
Setting up Check Plugins
Without plugins Icinga 2 does not know how to check external services. The Monitoring Plugins Project provides an extensive set of plugins which can be used with Icinga 2 to check whether services are working properly.
apt-get install monitoring-plugins
Running Service
Start the service using following command
systemctl restart icinga2
Enabling the service if a reboot happens
systemctl enable icinga2
Extra :
If you’re stuck with configuration errors, you can manually invoke the configuration validation.
icinga2 daemon -C
Configuration Syntax Highlighting
If you are using Vim
apt-get install vim-icinga2 vim-addon-manager
vim-addon-manager -w install icinga2
Ensure that syntax highlighting is enabled e.g. by editing the user’s vimrc configuration file:
# vim ~/.vimrc
syntax on
Test it:
vim /etc/icinga2/conf.d/templates.conf
Note : If you are using Nano the syntax files are installed with the icinga2-common package already
Setting up Icinga Web 2
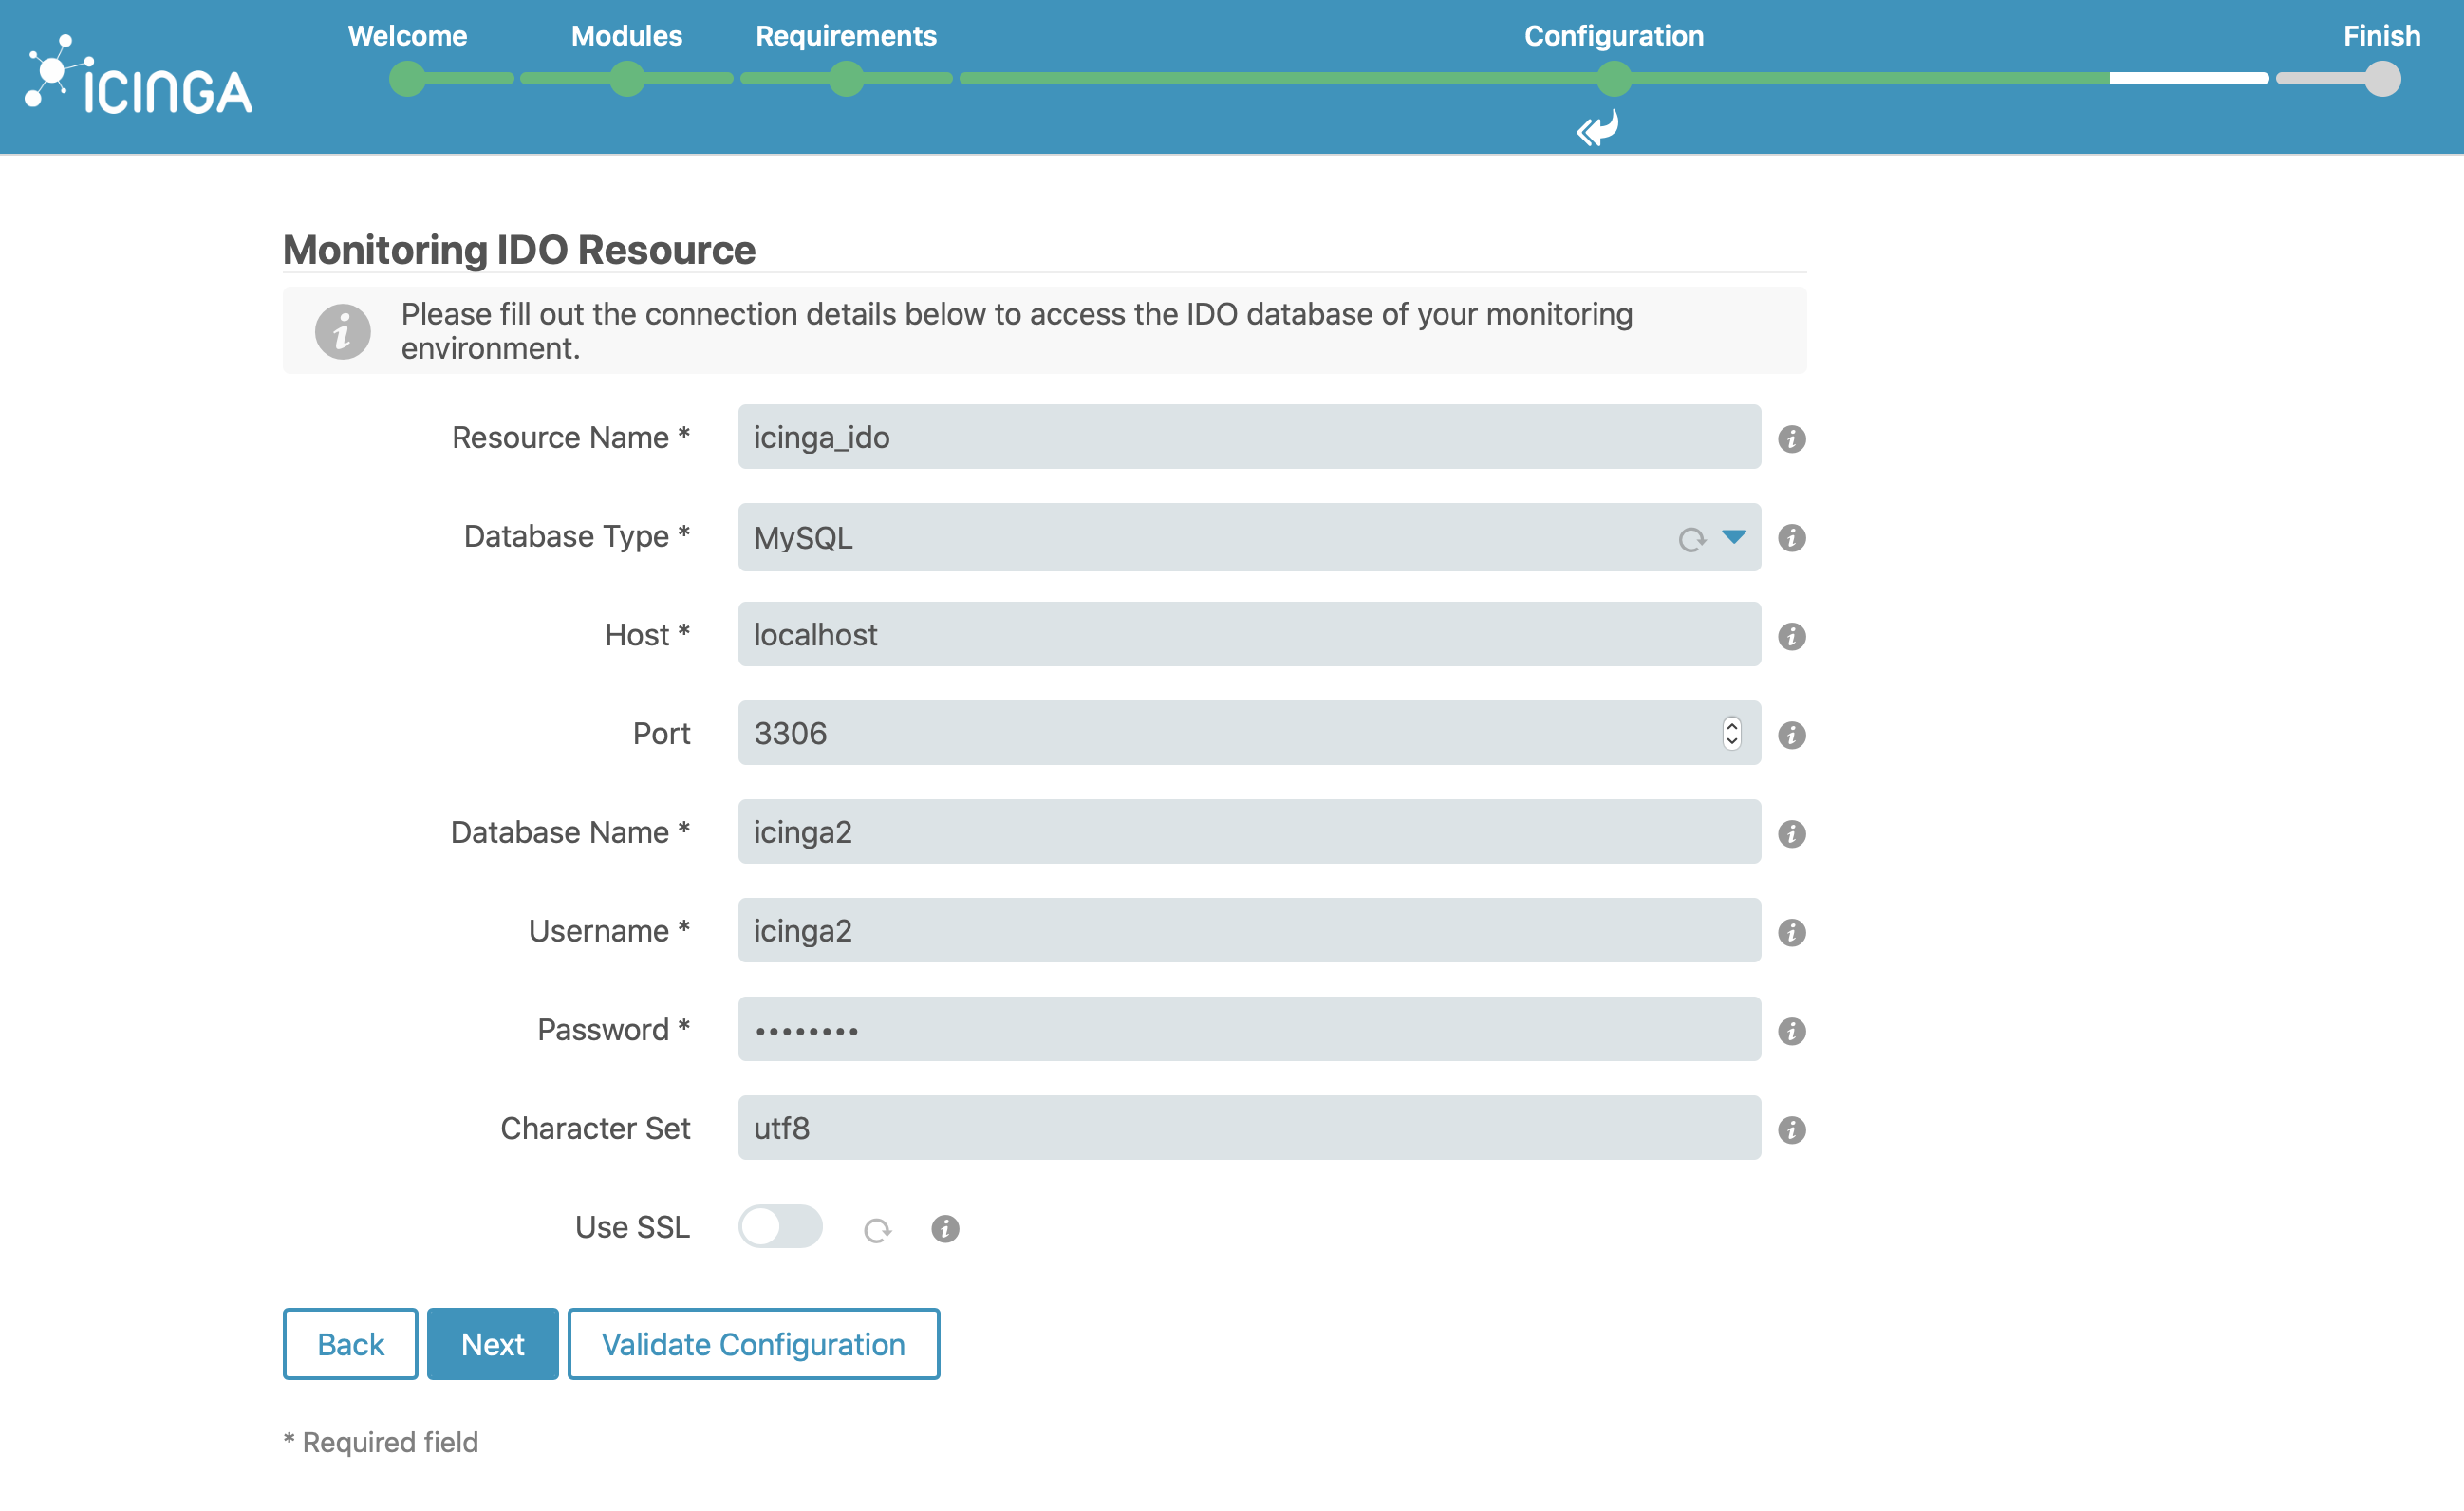
Configuring DB IDO MySQL
Installing MySQL database server
apt-get install mariadb-server
mysql_secure_installation
(After executing mysql_secure_installation, change the root password and remove test database.)
Installing the IDO modules for MySQL
The next step is to install the icinga2-ido-mysql
apt-get install icinga2-ido-mysql
Select yes for the options pop up and enter a password for when it prompt(it is used for icinga2 database)
Note :
(OPTIONAL)The Ubuntu packages provide a database configuration wizard by default. You can skip the automated setup and install/upgrade the database manually if you prefer.
Setting up the MySQL database
 mysql -u root -p

CREATE DATABASE icinga;

CREATE USER 'icinga'@'localhost' IDENTIFIED BY '###PASSSWORD### ;

GRANT SELECT, INSERT, UPDATE, DELETE, DROP, CREATE VIEW, INDEX, EXECUTE ON icinga.* TO 'icinga'@'localhost';

quit
After creating the database you can import the Icinga 2 IDO schema using the following command. Enter the root password into the prompt when asked.
mysql -u root -p icinga < /usr/share/icinga2-ido-mysql/schema/mysql.sql
Enabling the IDO MySQL module
The package provides a new configuration file that is installed in /etc/icinga2/features-available/ido-mysql.conf. (You can update the database credentials in this file if needed.)
You can enable the ido-mysql feature configuration file using icinga2 feature enable:
icinga2 feature enable ido-mysql
You will see Module 'ido-mysql' was enabled.
Make sure to restart Icinga 2 for these changes to take effect.
systemctl restart icinga2
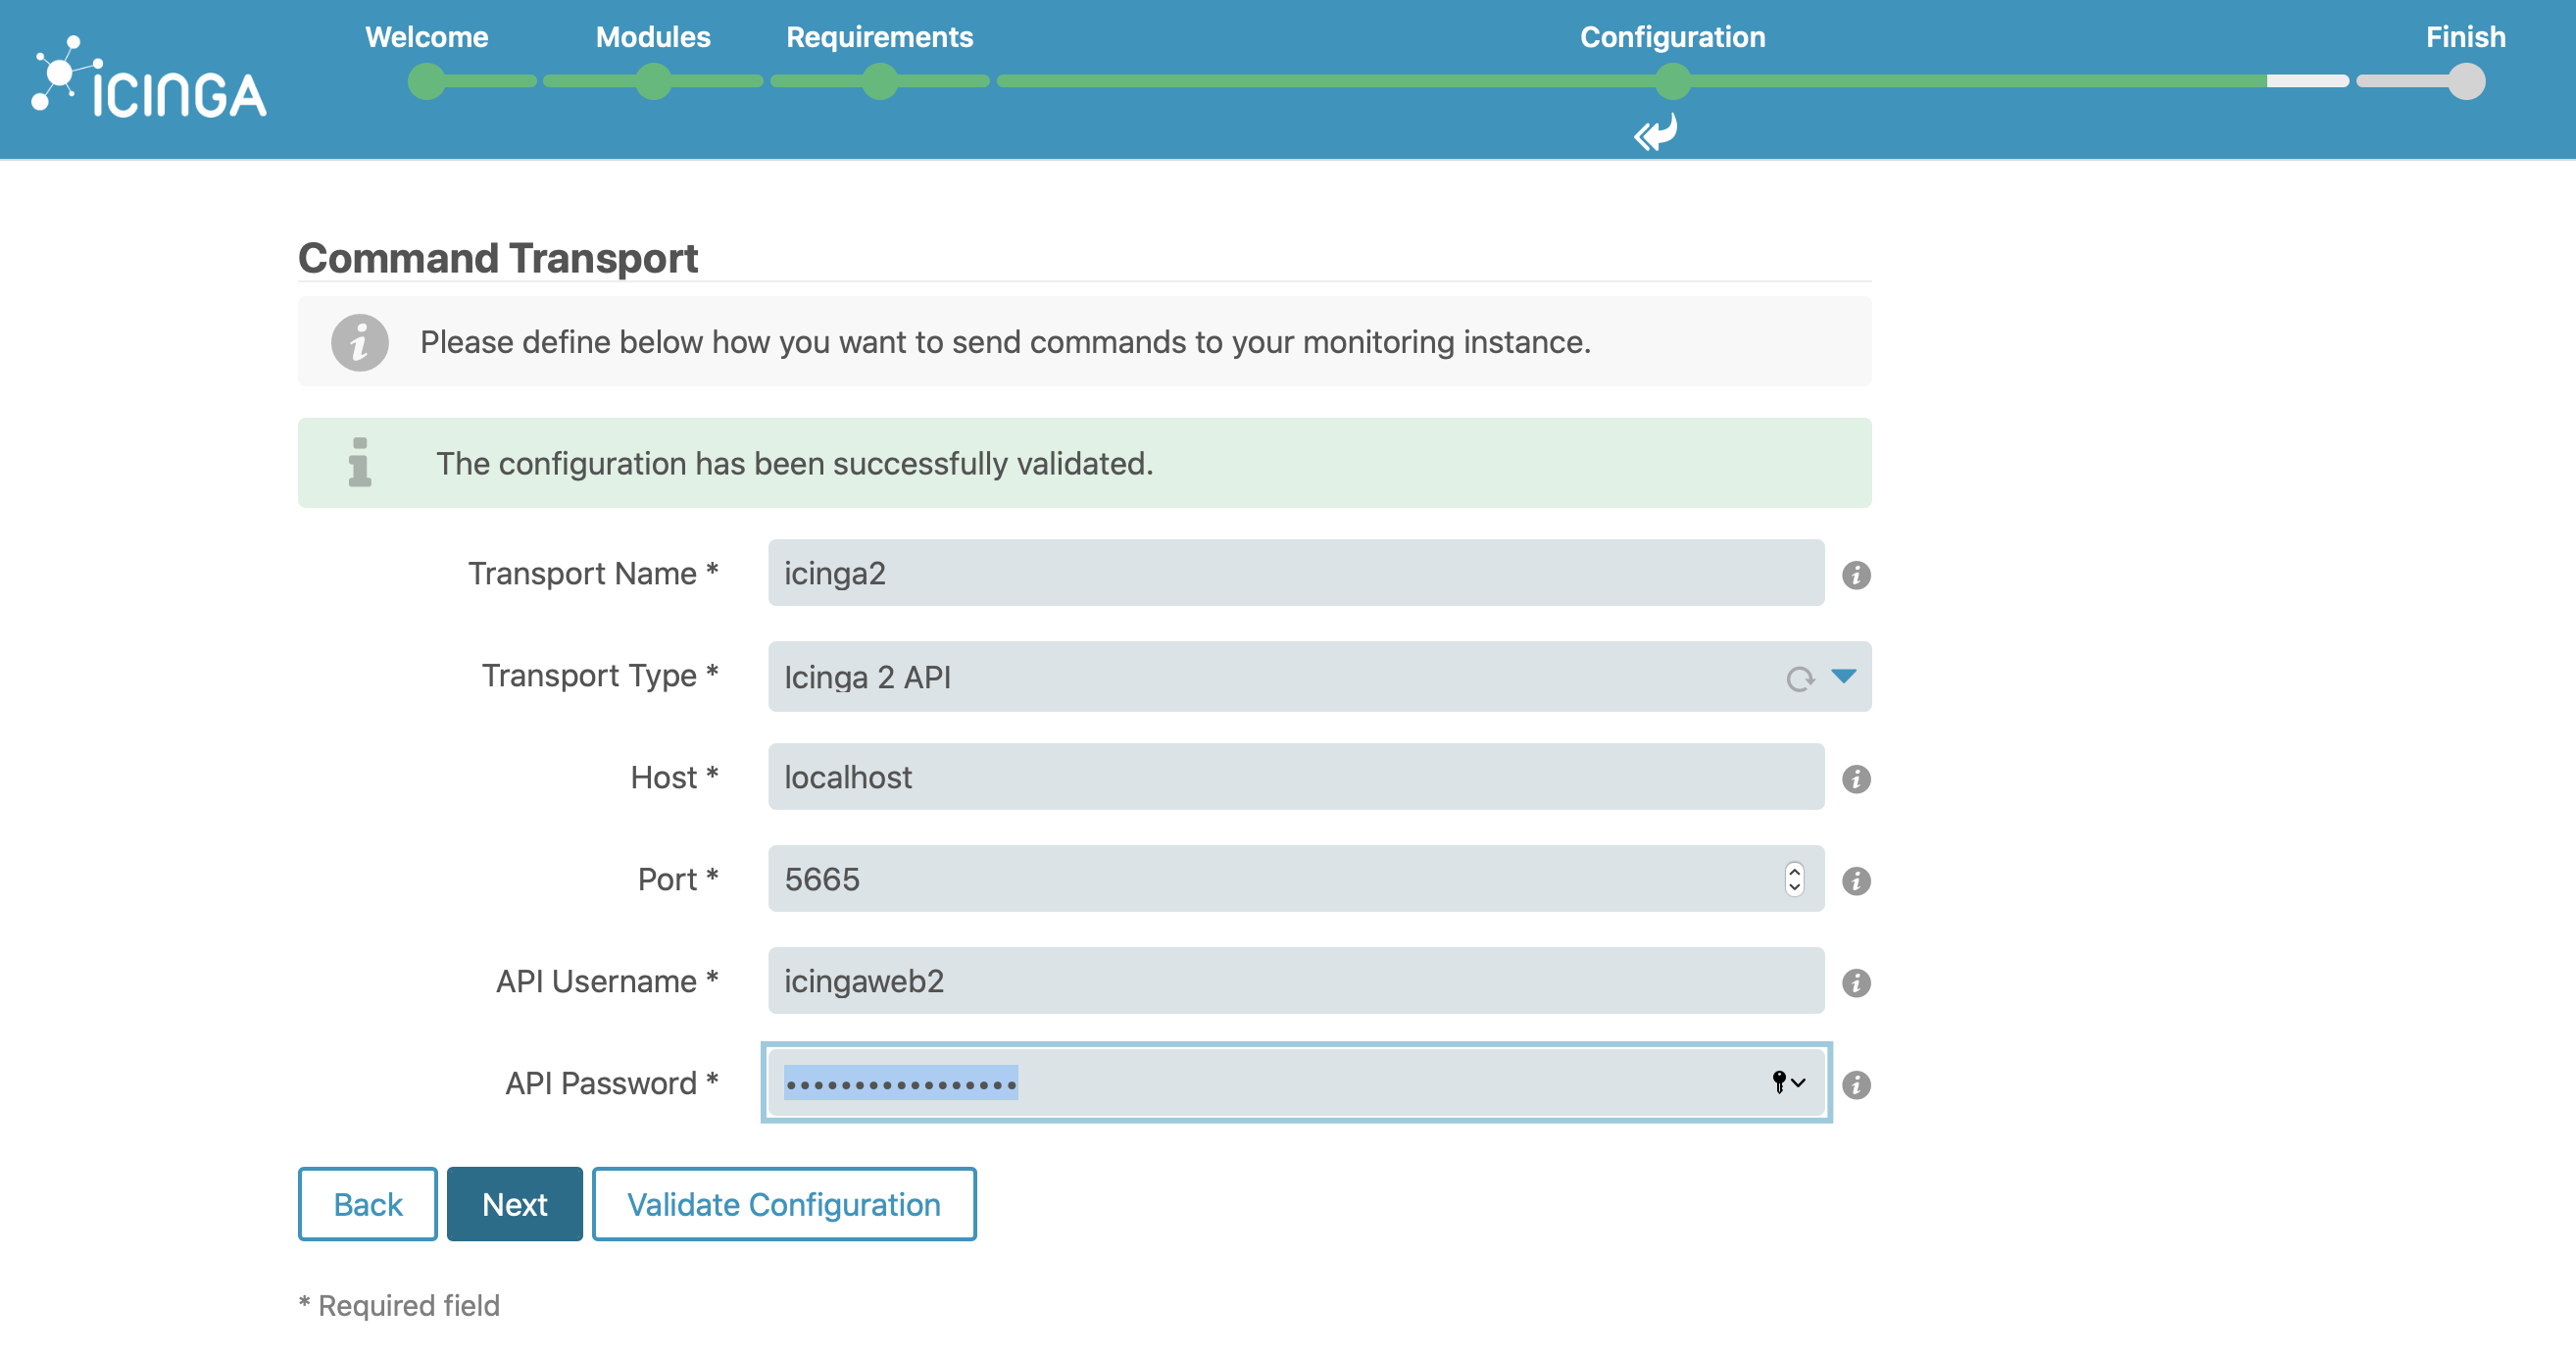
Setting Up Icinga 2 REST API
Icinga Web 2 and other web interfaces require the REST API to send actions (reschedule check, etc.) and query object details.
You can run the CLI command icinga2 api setup to enable the api feature and set up certificates as well as a new API user root with an auto-generated password in the /etc/icinga2/conf.d/api-users.conf configuration file:
icinga2 api setup
Edit the api-users.conf file and add a new ApiUser object. Specify the permissions attribute with minimal permissions required by Icinga Web 2.
vim /etc/icinga2/conf.d/api-users.conf
object ApiUser "icingaweb2" {
  password = "Wijsn8Z9eRs5E25d"
  permissions = [ "status/query", "actions/*", "objects/modify/*", "objects/query/*" ]
}
(add an api user for the director as well)
Restart Icinga 2 to activate the configuration.
systemctl restart icinga2
Installing Icinga Web 2
apt-get install icingaweb2 libapache2-mod-php
Preparing Web Setup
You can set up Icinga Web 2 quickly and easily with the Icinga Web 2 setup wizard which is available the first time you visit Icinga Web 2 in your browser. When using the web setup you are required to authenticate using a token. In order to generate a token use the icingacli:
icingacli setup token create
In case you do not remember the token you can show it using the icingacli:
icingacli setup token show
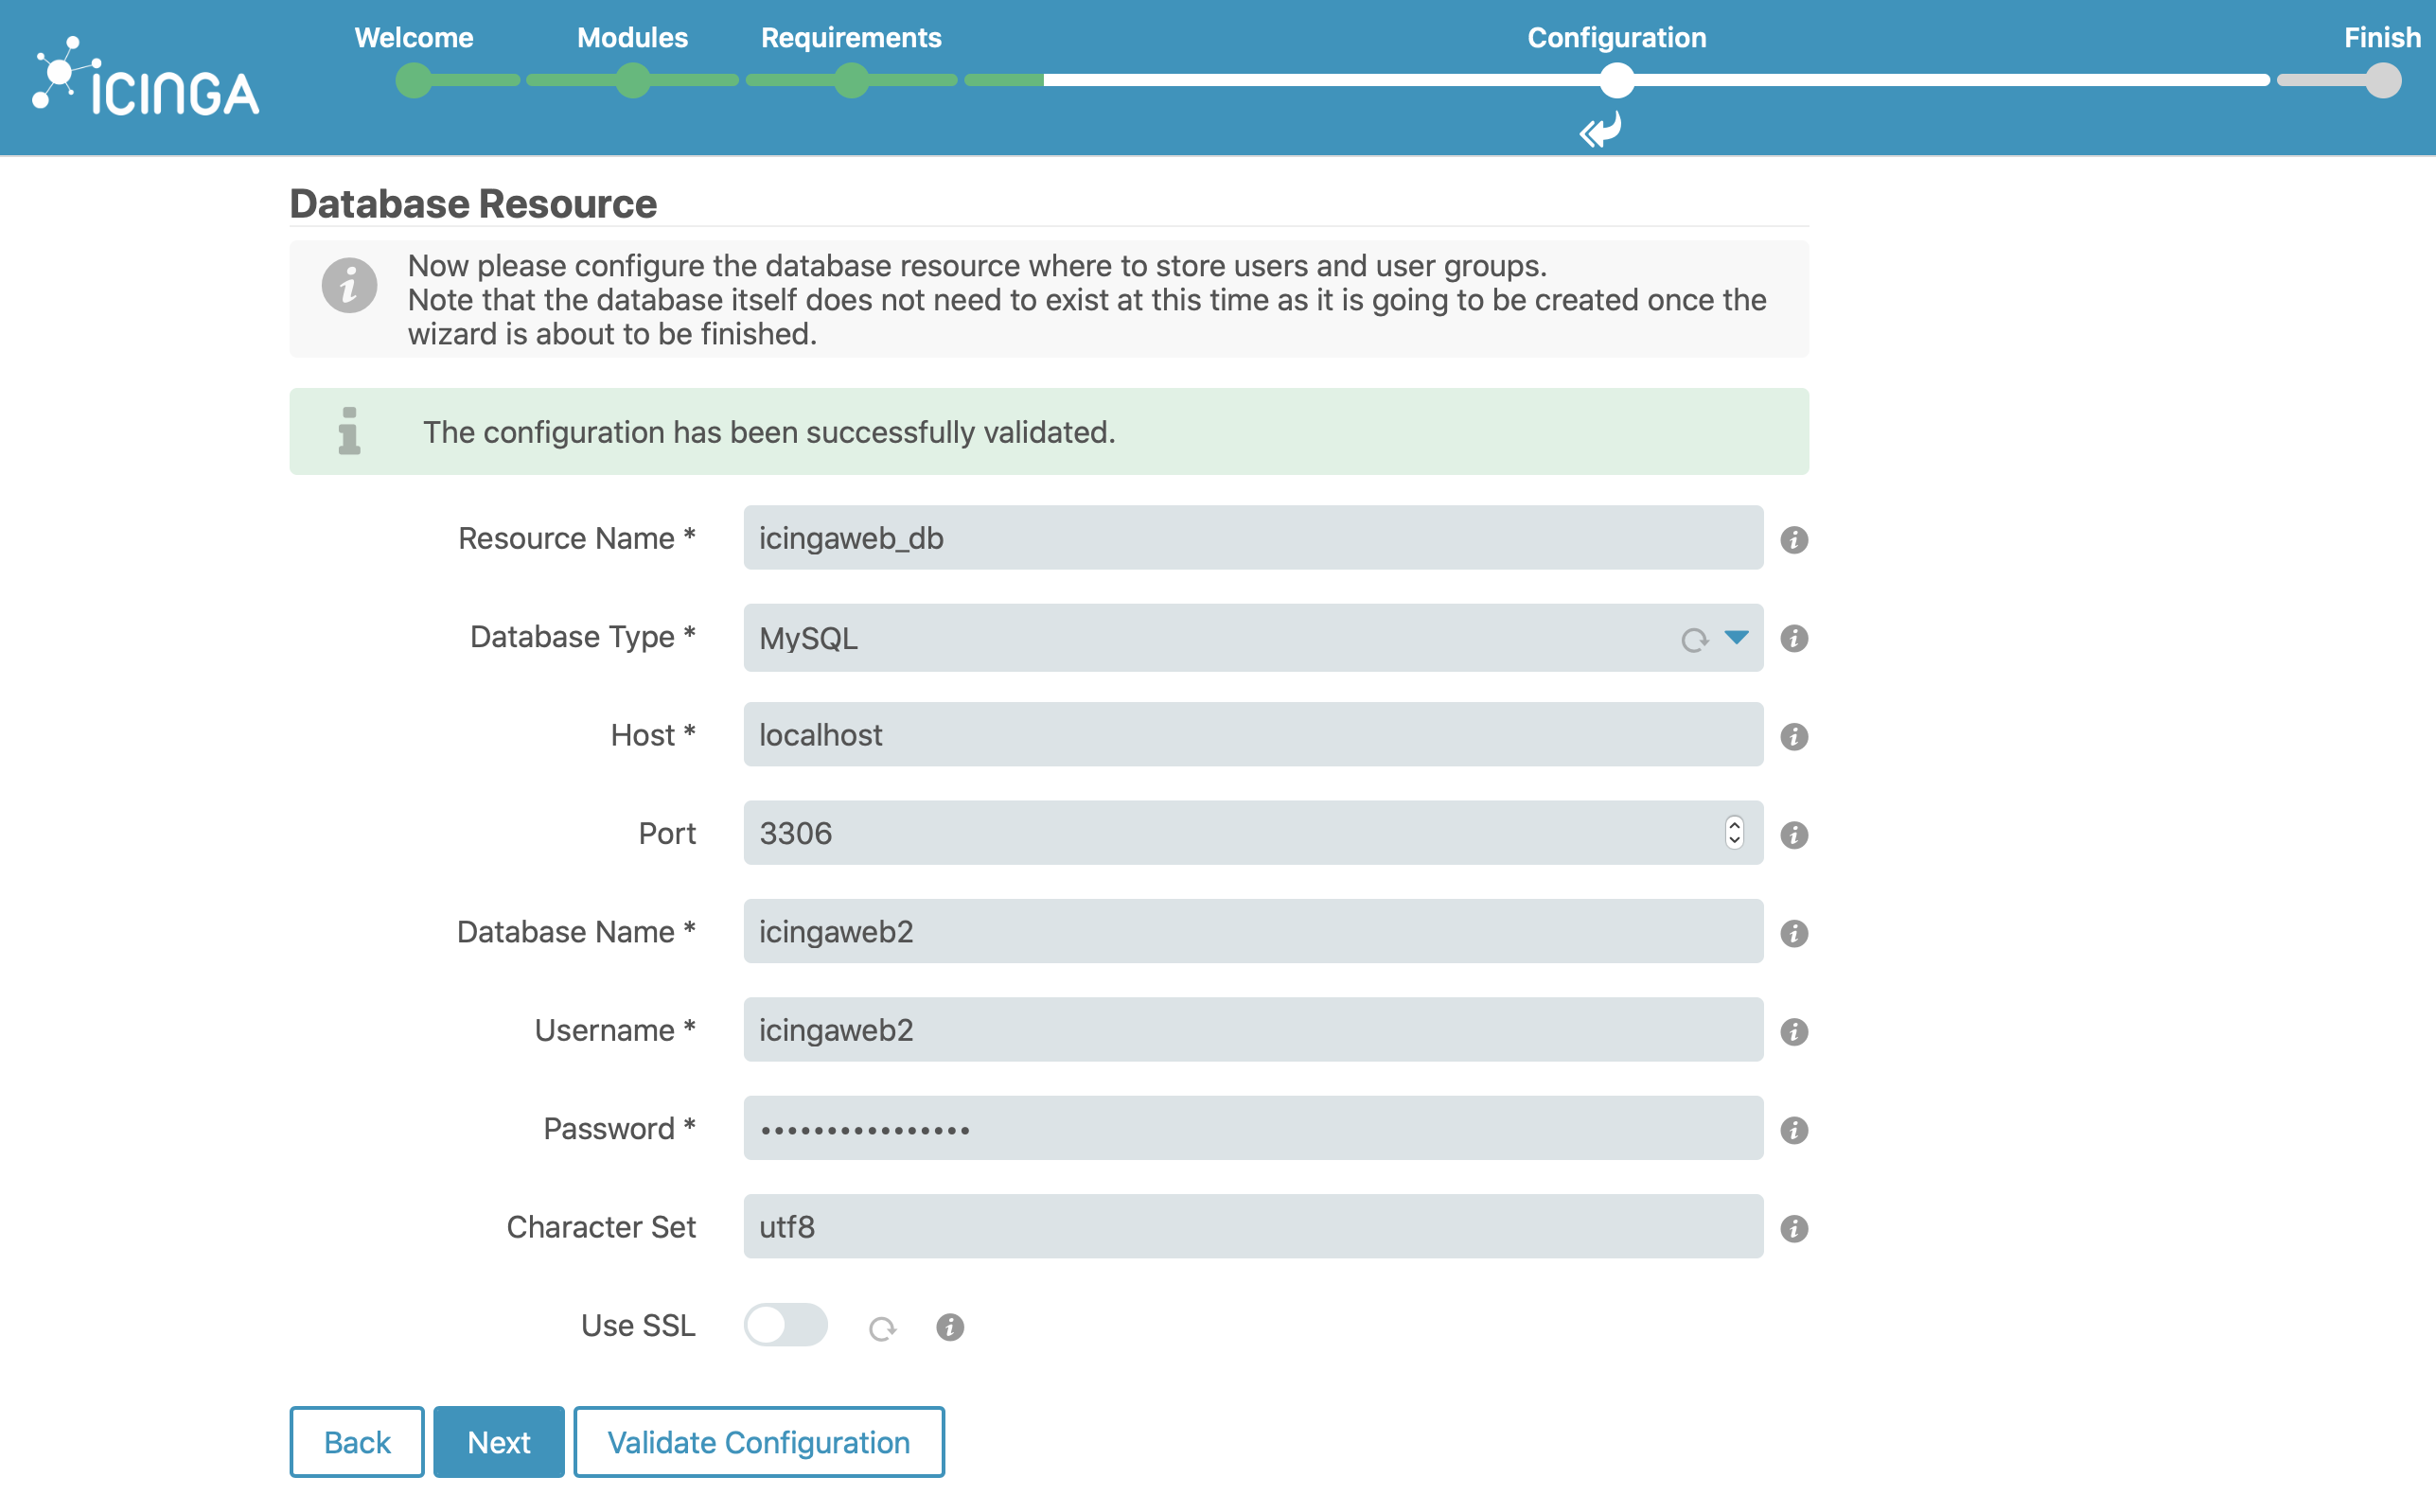
On Debian and derivates, you need to manually create a database and a database user prior to starting the web wizard. This is due to local security restrictions whereas the web wizard cannot create a database/user through a local unix domain socket.
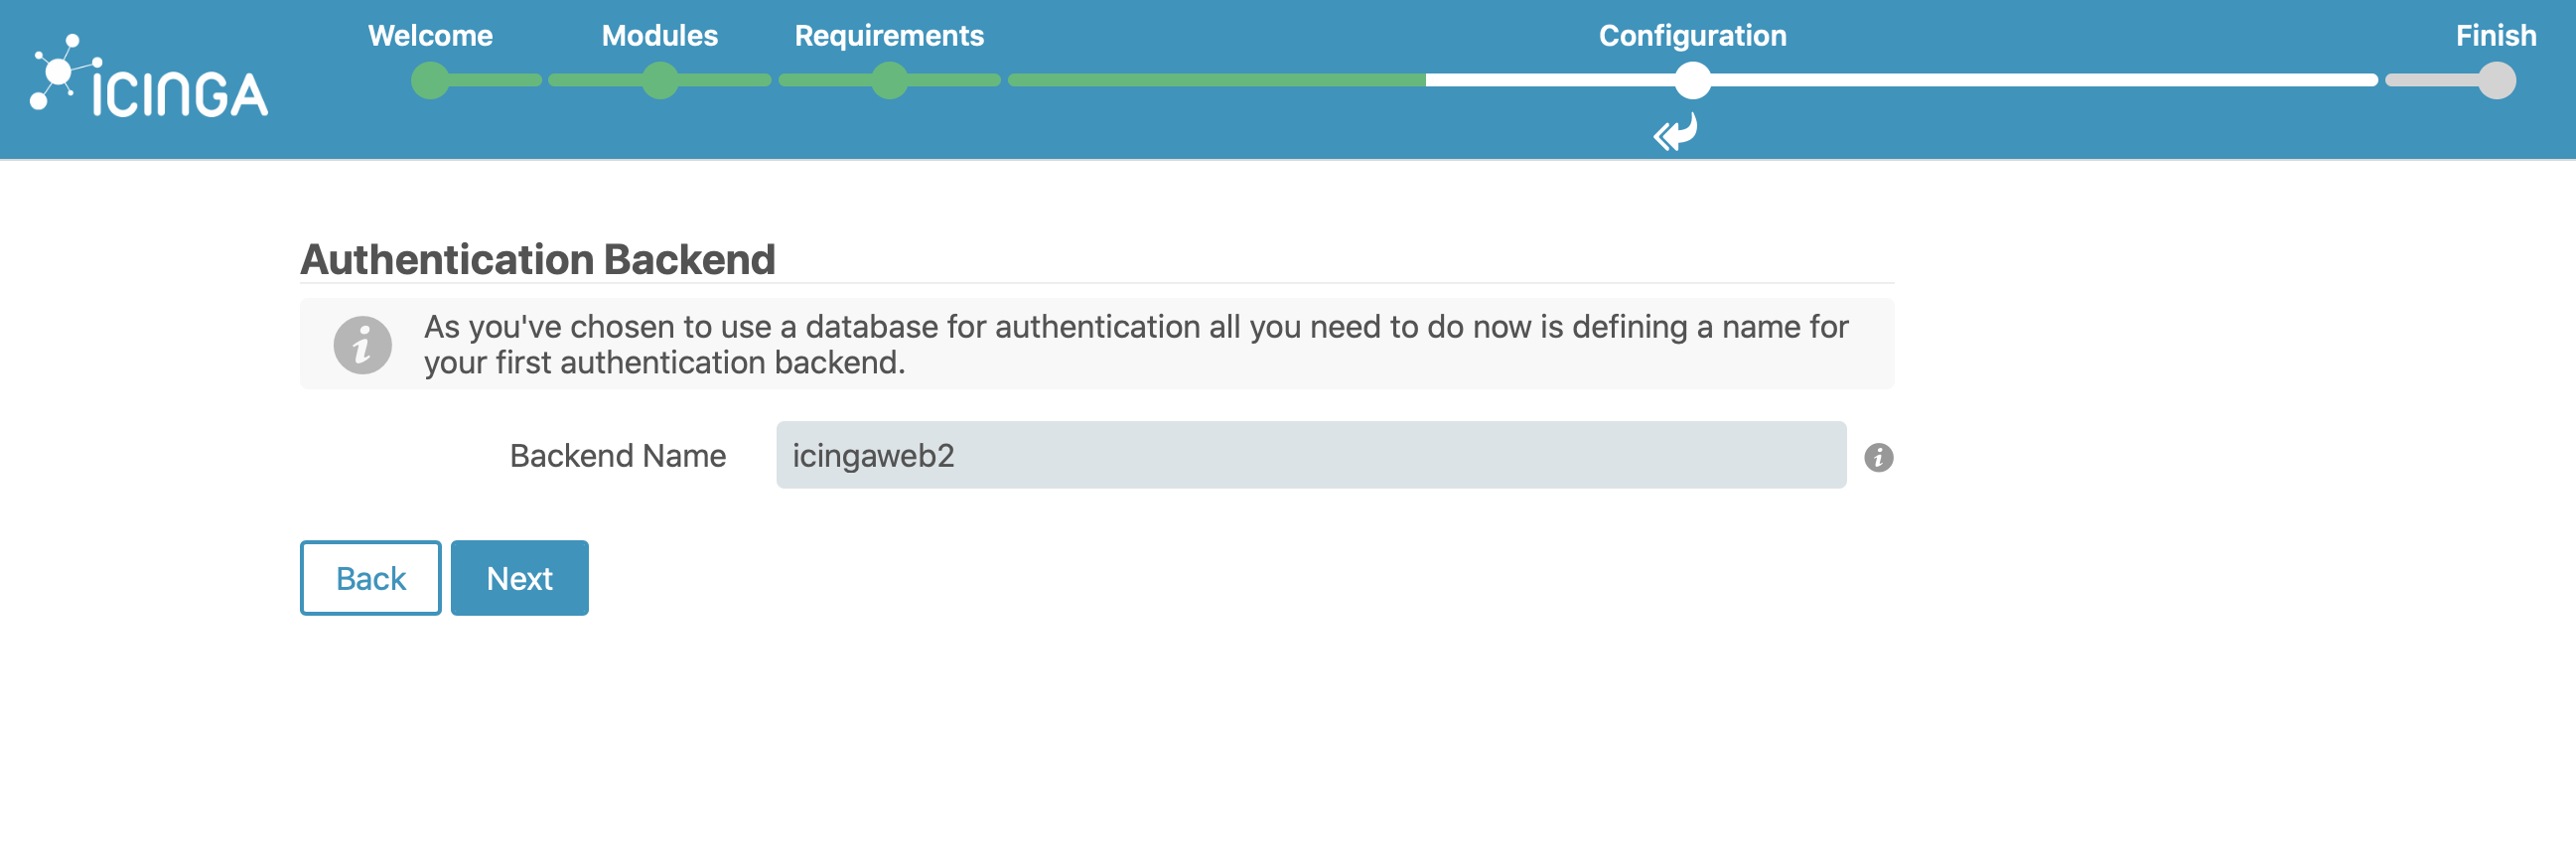
Database for backend use
log as root user
mysql -u root -p
then execute the following commands to create icingaweb db and director db
For icingaweb db ====
CREATE DATABASE icingaweb2;

CREATE USER icingaweb2@localhost IDENTIFIED BY '##PASSWORD##';

GRANT ALL ON icingaweb2.* TO icingaweb2@localhost;

Flush privileges;

quit
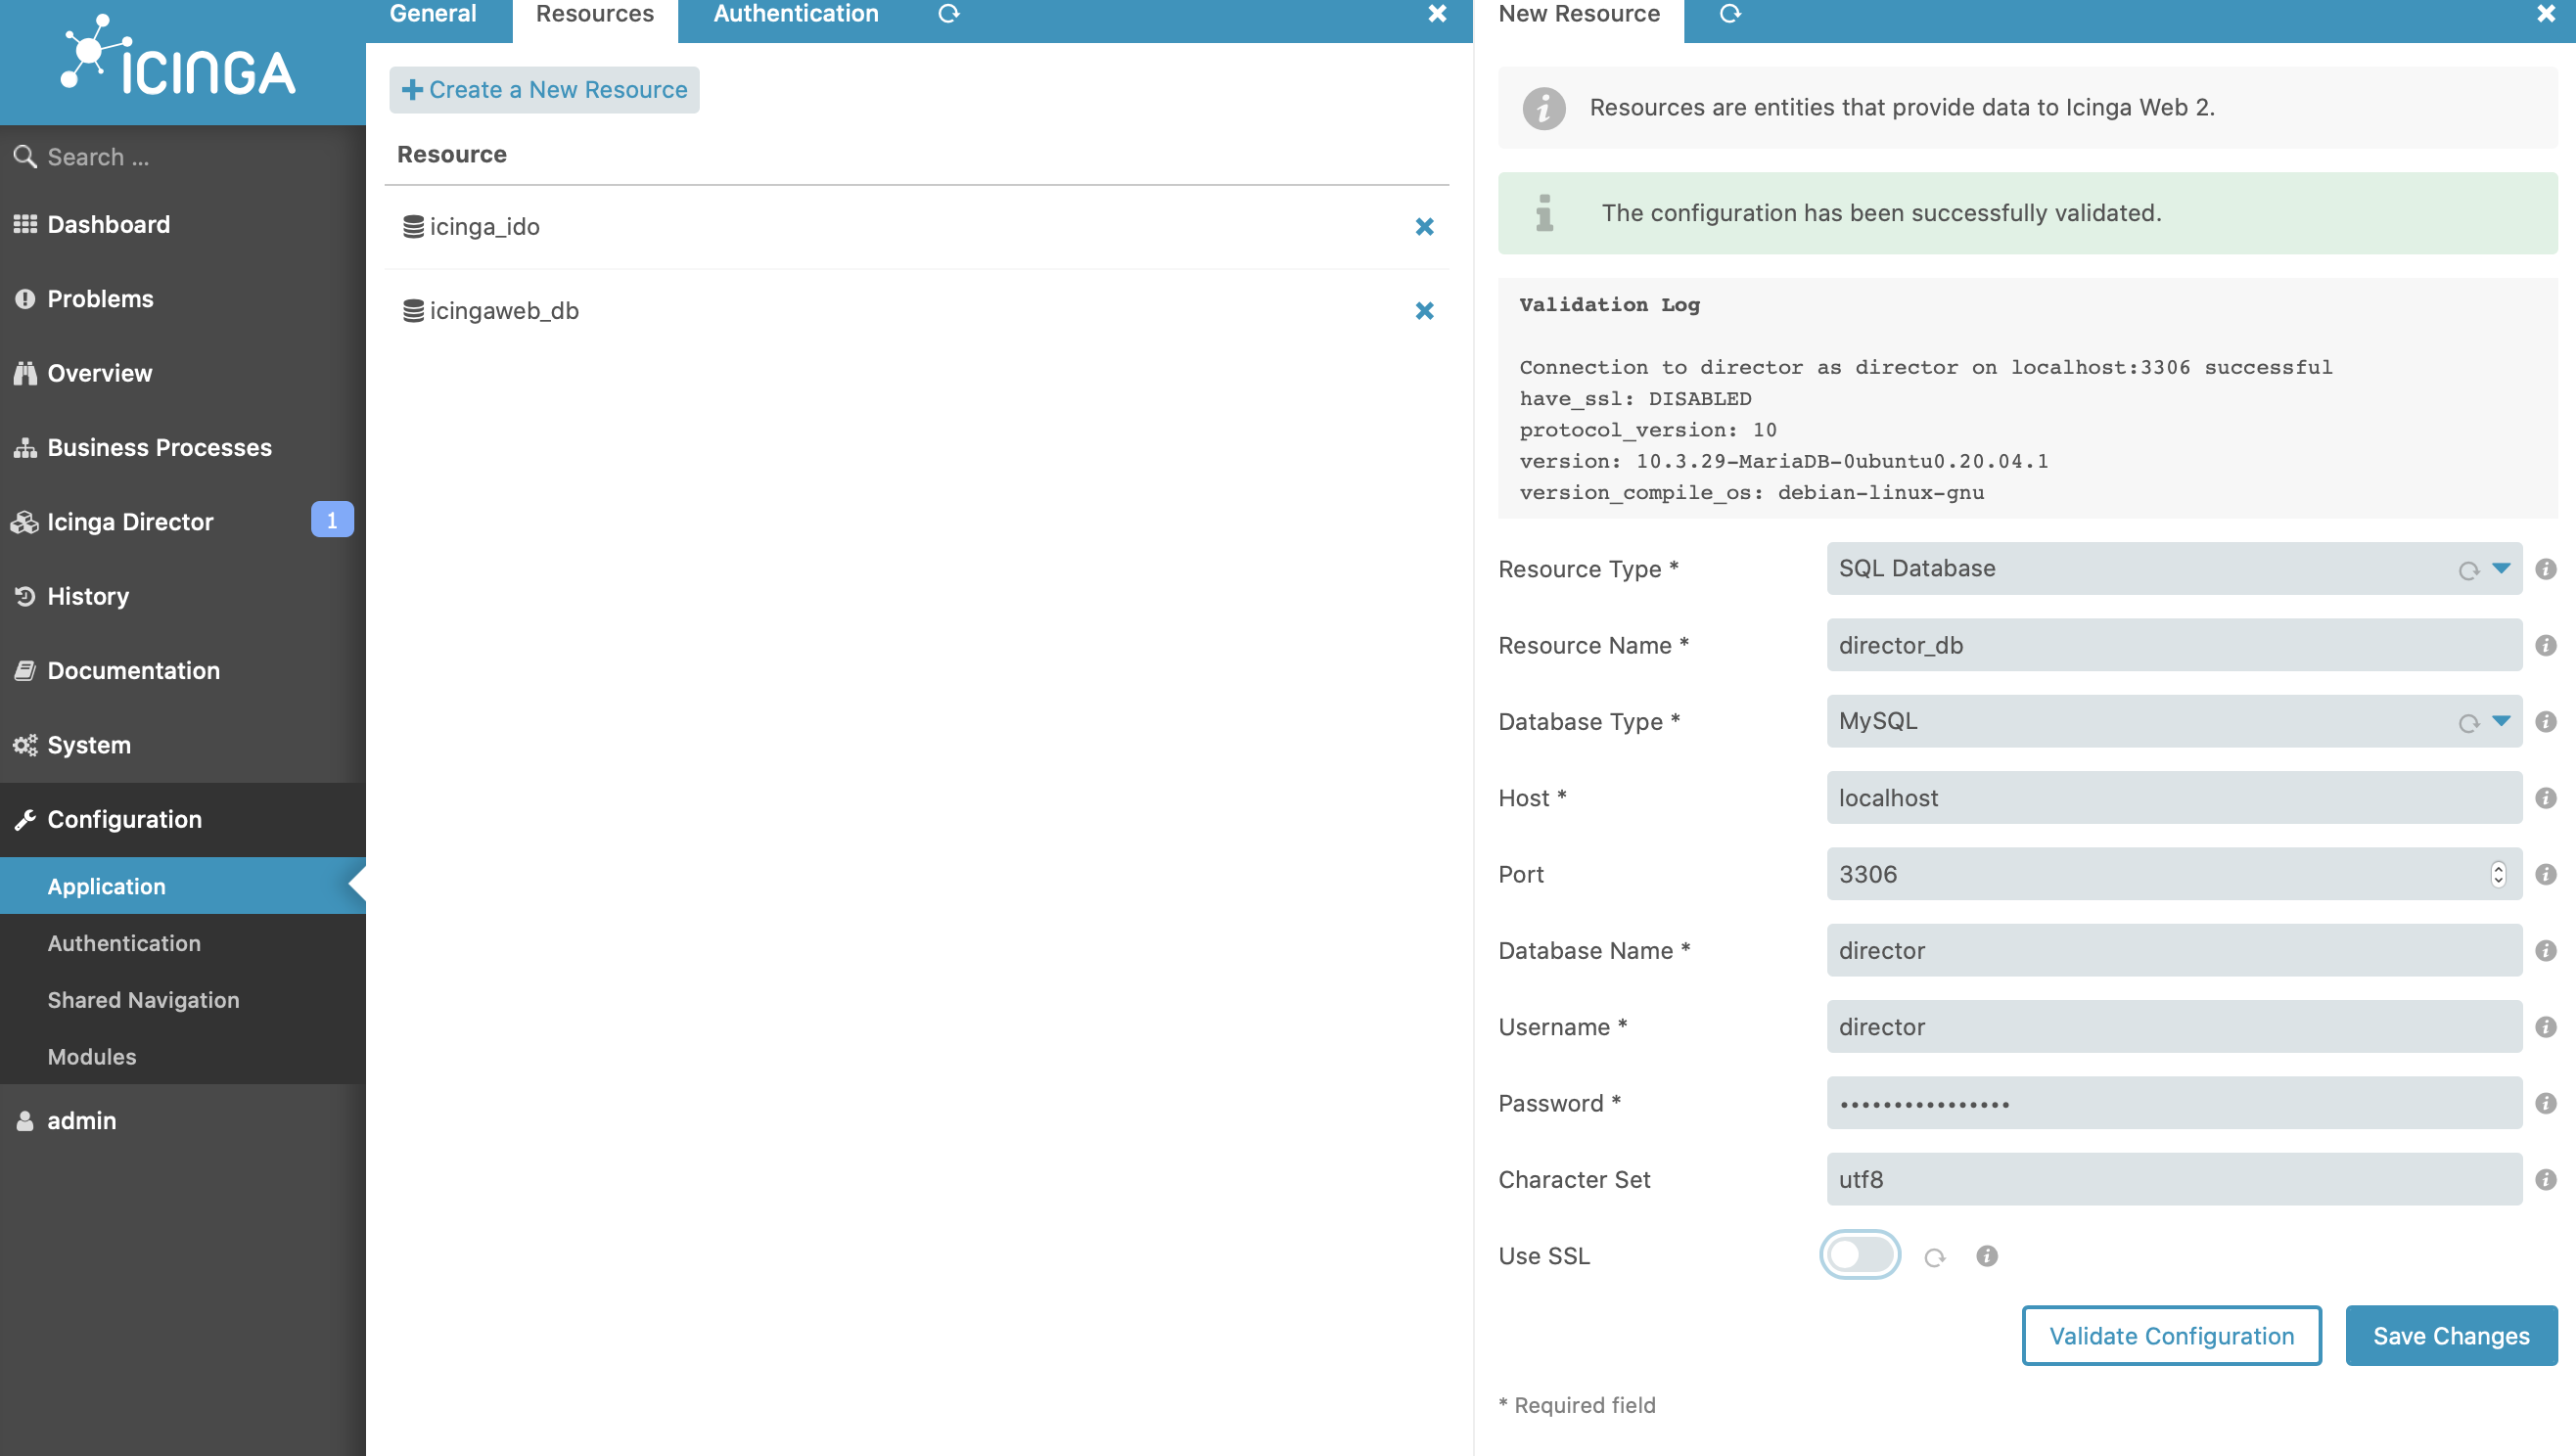
director db
CREATE DATABASE director CHARACTER SET 'utf8';

CREATE USER director@localhost IDENTIFIED BY '##PASSWORD##';

GRANT ALL ON director.* TO director@localhost;

Flush privileges;

quit
enabling reactbundle module
Copy following script to a bash flle and execute or execute in the terminal.
REACTBUNDLE_MODULE_NAME=reactbundle

REACTBUNDLE_MODULE_VERSION=v0.9.0

REACTBUNDLE_REPO="https://github.com/Icinga/icingaweb2-module-${REACTBUNDLE_MODULE_NAME}"

MODULES_PATH="/usr/share/icingaweb2/modules"

git config --global advice.detachedHead false

git clone ${REACTBUNDLE_REPO} "${MODULES_PATH}/${REACTBUNDLE_MODULE_NAME}" --branch "${REACTBUNDLE_MODULE_VERSION}"

icingacli module enable "${REACTBUNDLE_MODULE_NAME}"
enabling ipl module
Copy following script to a bash flle and execute or execute in the terminal.
IPL_MODULE_NAME=ipl

IPL_MODULE_VERSION=v0.5.0

IPL_REPO="https://github.com/Icinga/icingaweb2-module-${IPL_MODULE_NAME}"

MODULES_PATH="/usr/share/icingaweb2/modules"

git clone ${IPL_REPO} "${MODULES_PATH}/${IPL_MODULE_NAME}" --branch "${IPL_MODULE_VERSION}"

icingacli module enable "${IPL_MODULE_NAME}"
enabling incubator module
Copy following script to a bash flle and execute or execute in the terminal.
INCUBATOR_MODULE_NAME=incubator

INCUBATOR_MODULE_VERSION=v0.6.0

INCUBATOR_REPO="https://github.com/Icinga/icingaweb2-module-${INCUBATOR_MODULE_NAME}"

MODULES_PATH="/usr/share/icingaweb2/modules"

git clone ${INCUBATOR_REPO} "${MODULES_PATH}/${INCUBATOR_MODULE_NAME}" --branch "${INCUBATOR_MODULE_VERSION}"

icingacli module enable "${INCUBATOR_MODULE_NAME}"
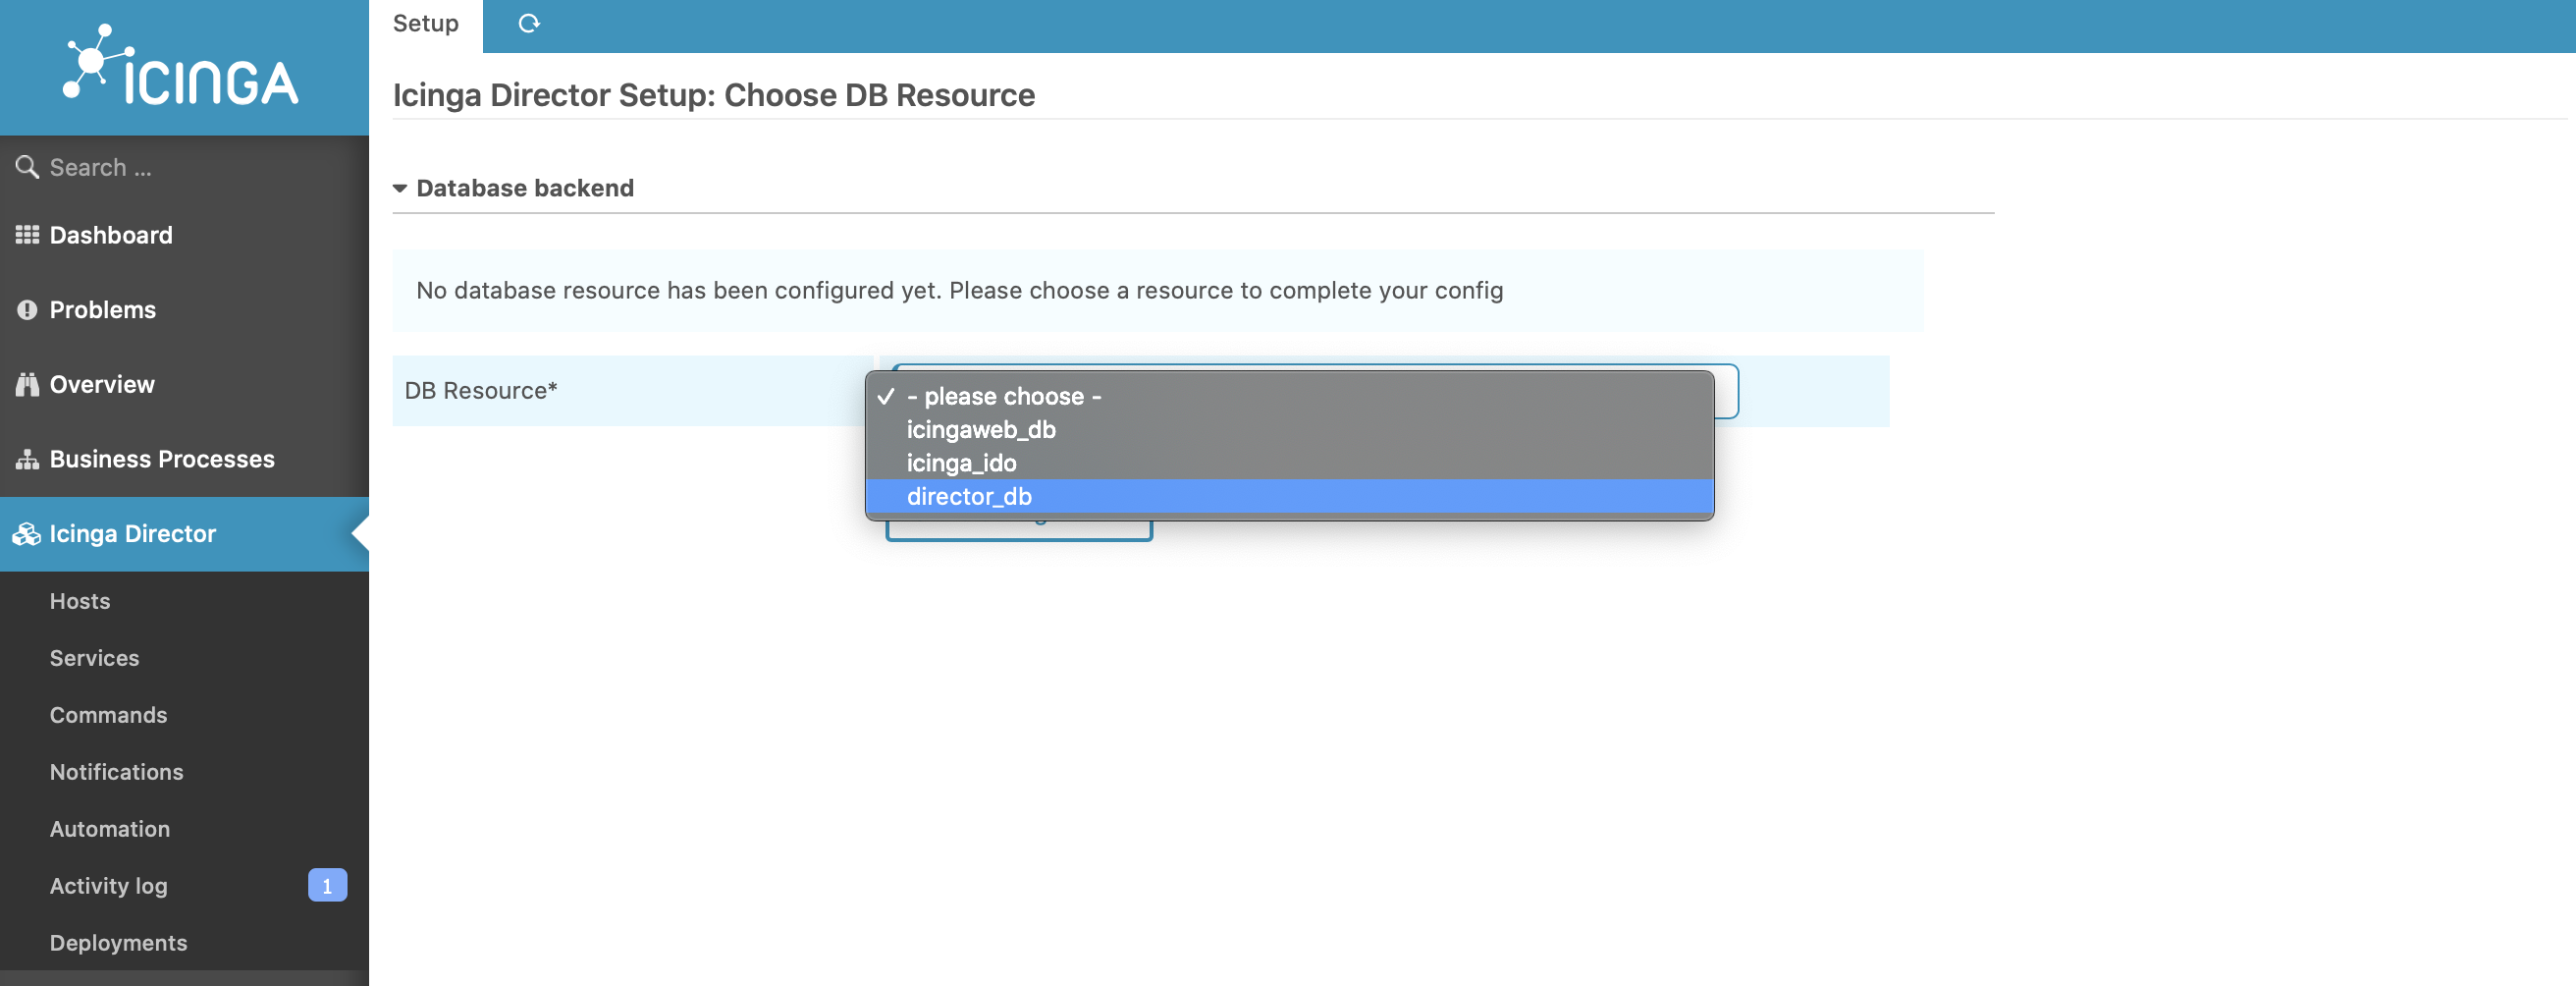
Enabling Director in Icinga
Copy following script to a bash flle and execute. The script with the files to the relevant directory using the script
ICINGAWEB_MODULEPATH="/usr/share/icingaweb2/modules"

REPO_URL="https://github.com/icinga/icingaweb2-module-director"

TARGET_DIR="${ICINGAWEB_MODULEPATH}/director"

MODULE_VERSION="1.8.0"

git clone "${REPO_URL}" "${TARGET_DIR}" --branch v${MODULE_VERSION}
and then enable the icinga-director module
icingacli module enable director
enabling business process module
Copy following script to a bash flle and execute or execute in the terminal.
BS_PROCESS_ICINGAWEB_MODULEPATH="/usr/share/icingaweb2/modules"

BS_PROCESS_REPO_URL="https://github.com/Icinga/icingaweb2-module-businessprocess"

BS_PROCESS_TARGET_DIR="${ICINGAWEB_MODULEPATH}/businessprocess"

git clone "${BS_PROCESS_REPO_URL}" "${BS_PROCESS_TARGET_DIR}"
icingacli module enable businessprocess
changing the permission for relevant users
chown -R www-data:icingaweb2 /etc/icingaweb2/
Running a demon for director service
useradd -r -g icingaweb2 -d /var/lib/icingadirector -s /bin/false icingadirector
apt install -d -o icingadirector -g icingaweb2 -m 0750 /var/lib/icingadirector
MODULE_PATH=/usr/share/icingaweb2/modules/director

cp "${MODULE_PATH}/contrib/systemd/icinga-director.service" /etc/systemd/system/
systemctl daemon-reload
systemctl enable icinga-director.service
systemctl start icinga-director.service
Firewall Rules
Enable port 80 (http). Best practice is to only enable port 443 (https) and use TLS certificates.
ufw-cmd:
ufw allow 22
ufw allow 80
ufw allow 443
ufw allow 5665
ufw reload
iptables:
iptables -A INPUT -p tcp -m tcp --dport 80 -j ACCEPT
service iptables save
Attachments (28)
- ido1.jpg (176.7 KB ) - added by 5 years ago.
- idoconfig2.png (314.8 KB ) - added by 5 years ago.
- idoconfig4.png (110.7 KB ) - added by 5 years ago.
- idoconfig_password3.png (178.7 KB ) - added by 5 years ago.
- wensetup5.png (321.9 KB ) - added by 5 years ago.
- mdulelist7.png (539.0 KB ) - added by 5 years ago.
- selectingmodules6.png (383.4 KB ) - added by 5 years ago.
- requirements8.png (125.4 KB ) - added by 5 years ago.
- icingaweb_db_respurce9.png (273.7 KB ) - added by 5 years ago.
- icingaweb_db_respurce9.2.png (273.7 KB ) - added by 5 years ago.
- authenticationbackend10.png (128.6 KB ) - added by 5 years ago.
- creatingadmininstratoraccount11.png (141.9 KB ) - added by 5 years ago.
- applicationconfiguration12.png (251.5 KB ) - added by 5 years ago.
- monitoringbackekend15.png (133.1 KB ) - added by 5 years ago.
- idoresource16.png (241.7 KB ) - added by 5 years ago.
- apiuser17.png (194.9 KB ) - added by 5 years ago.
- monitoringsecurity18.png (117.7 KB ) - added by 5 years ago.
- success20.png (257.7 KB ) - added by 5 years ago.
- initialdashboard22.png (358.6 KB ) - added by 5 years ago.
- addingresources24.png (342.4 KB ) - added by 5 years ago.
- config_source_fordirector25.png (293.9 KB ) - added by 5 years ago.
- deplypending_changes26.png (313.2 KB ) - added by 5 years ago.
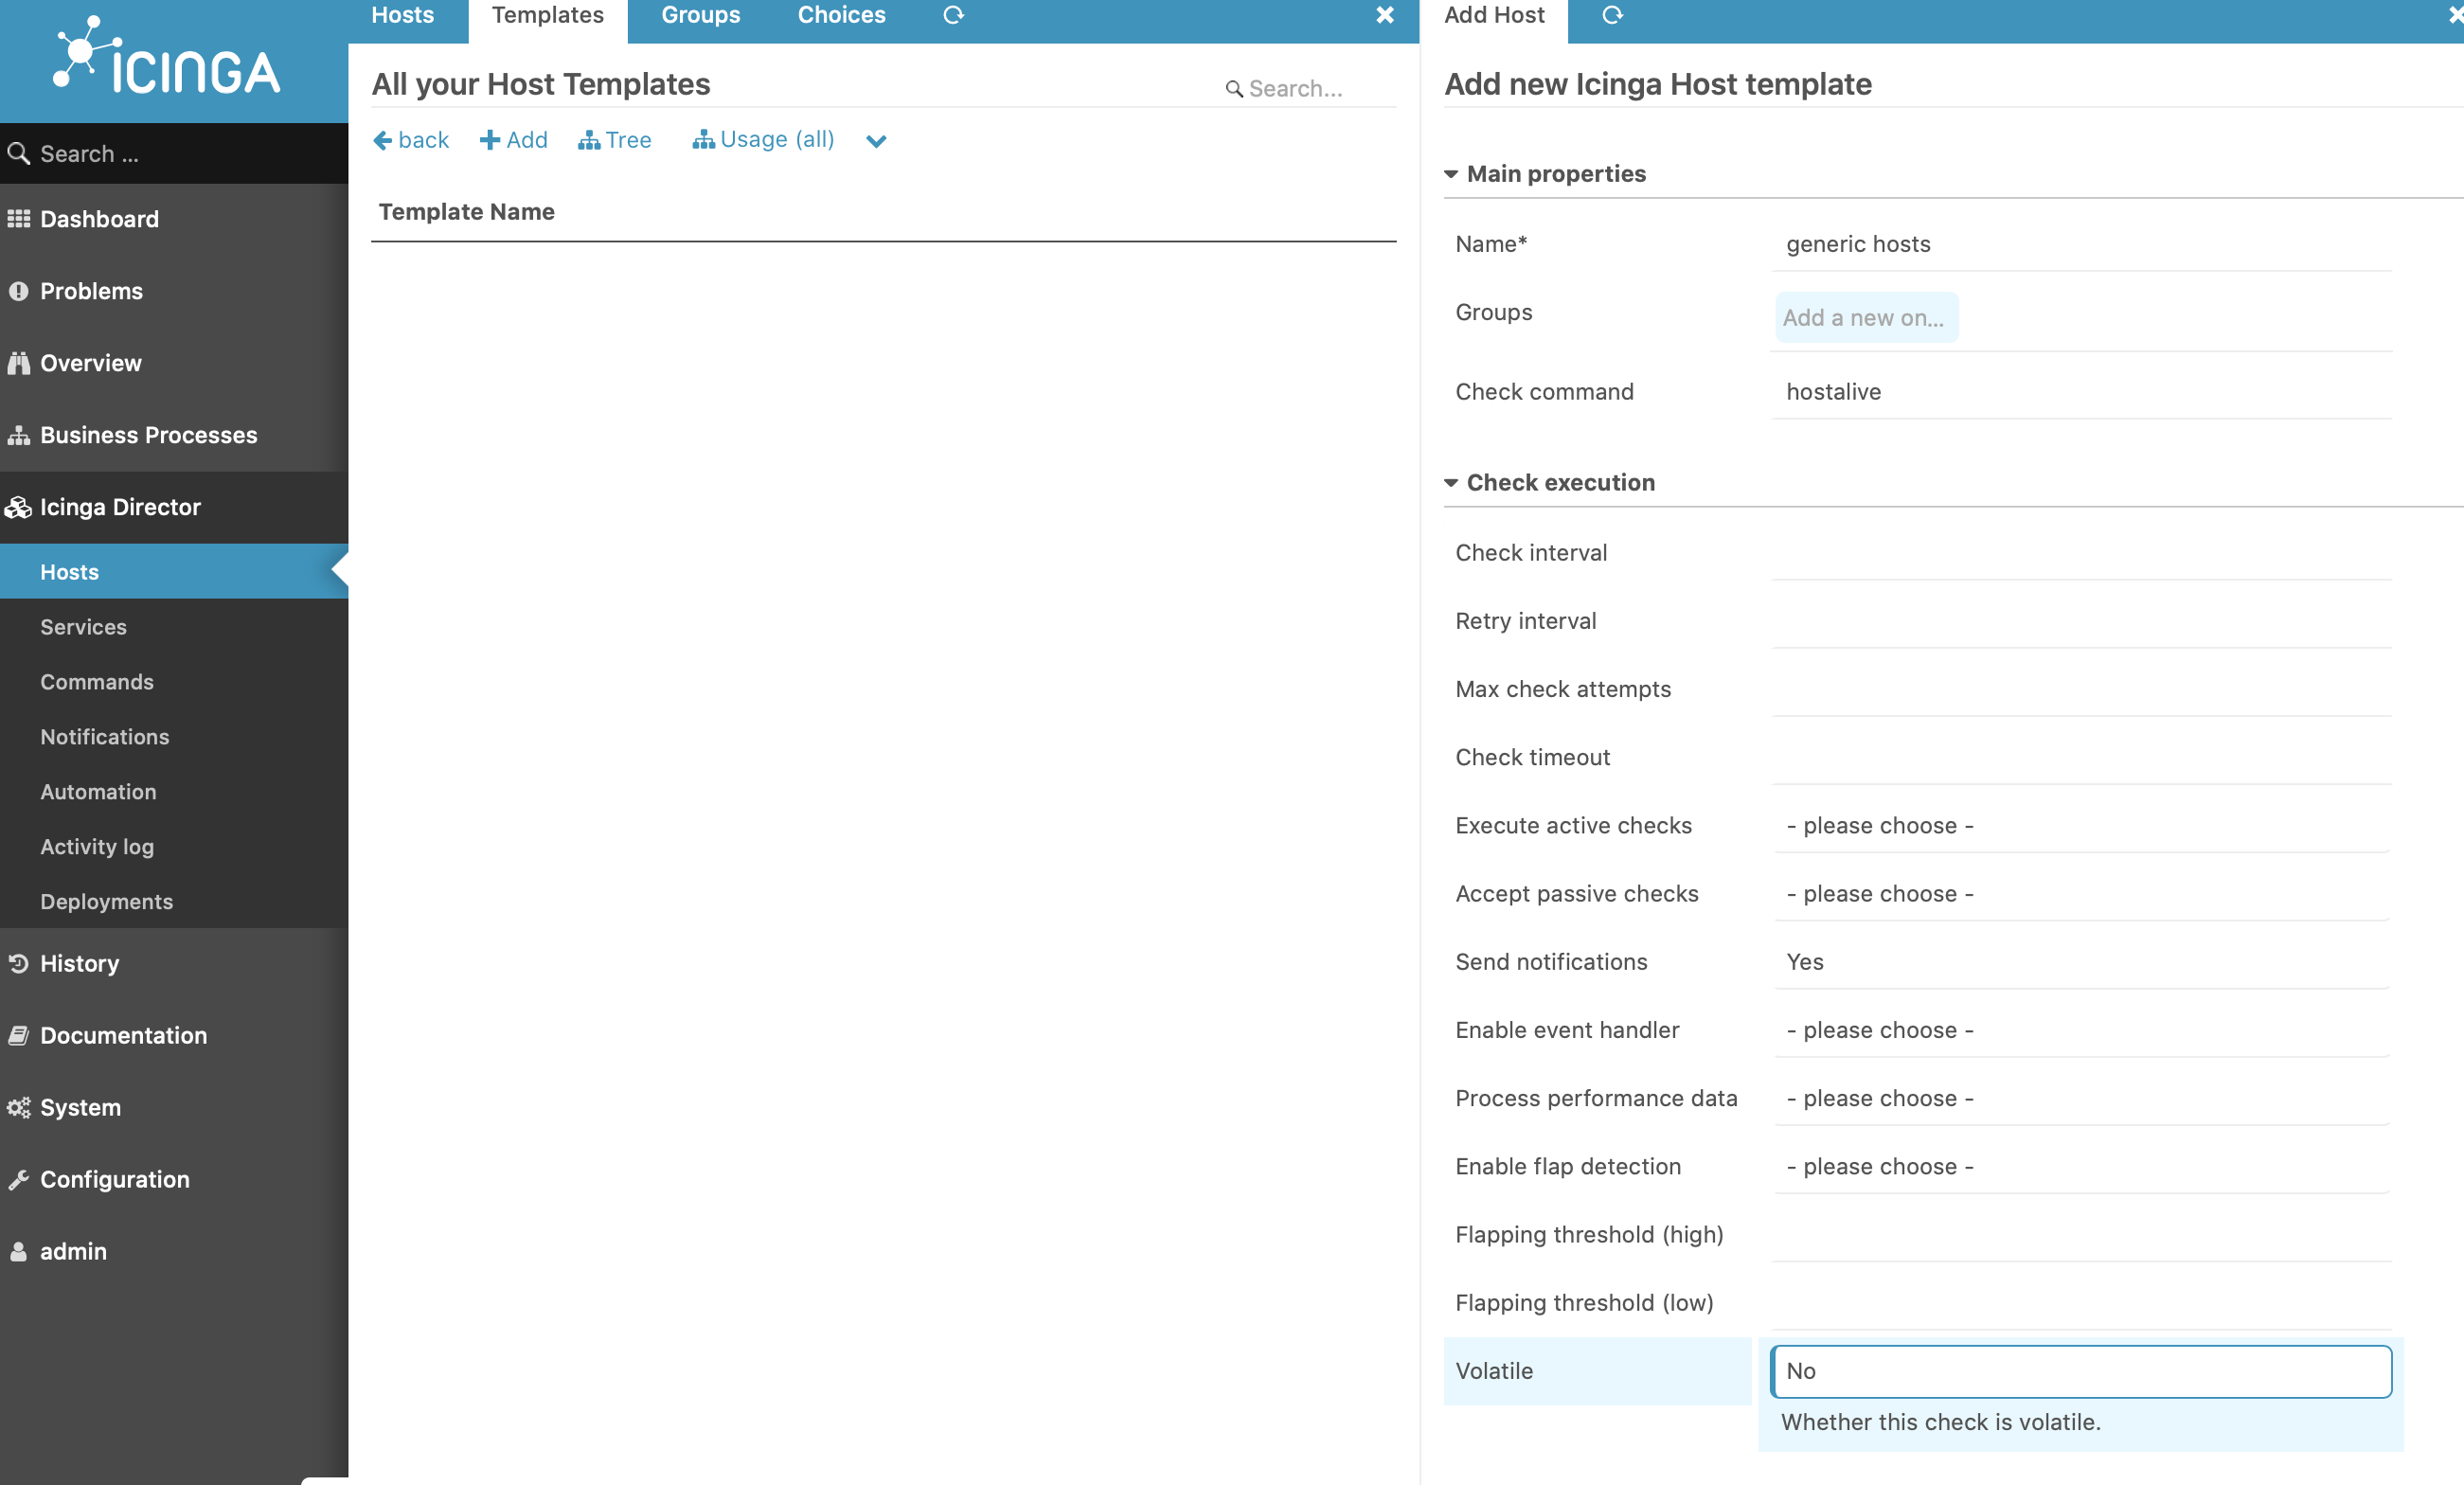
- host_template28.png (318.5 KB ) - added by 5 years ago.
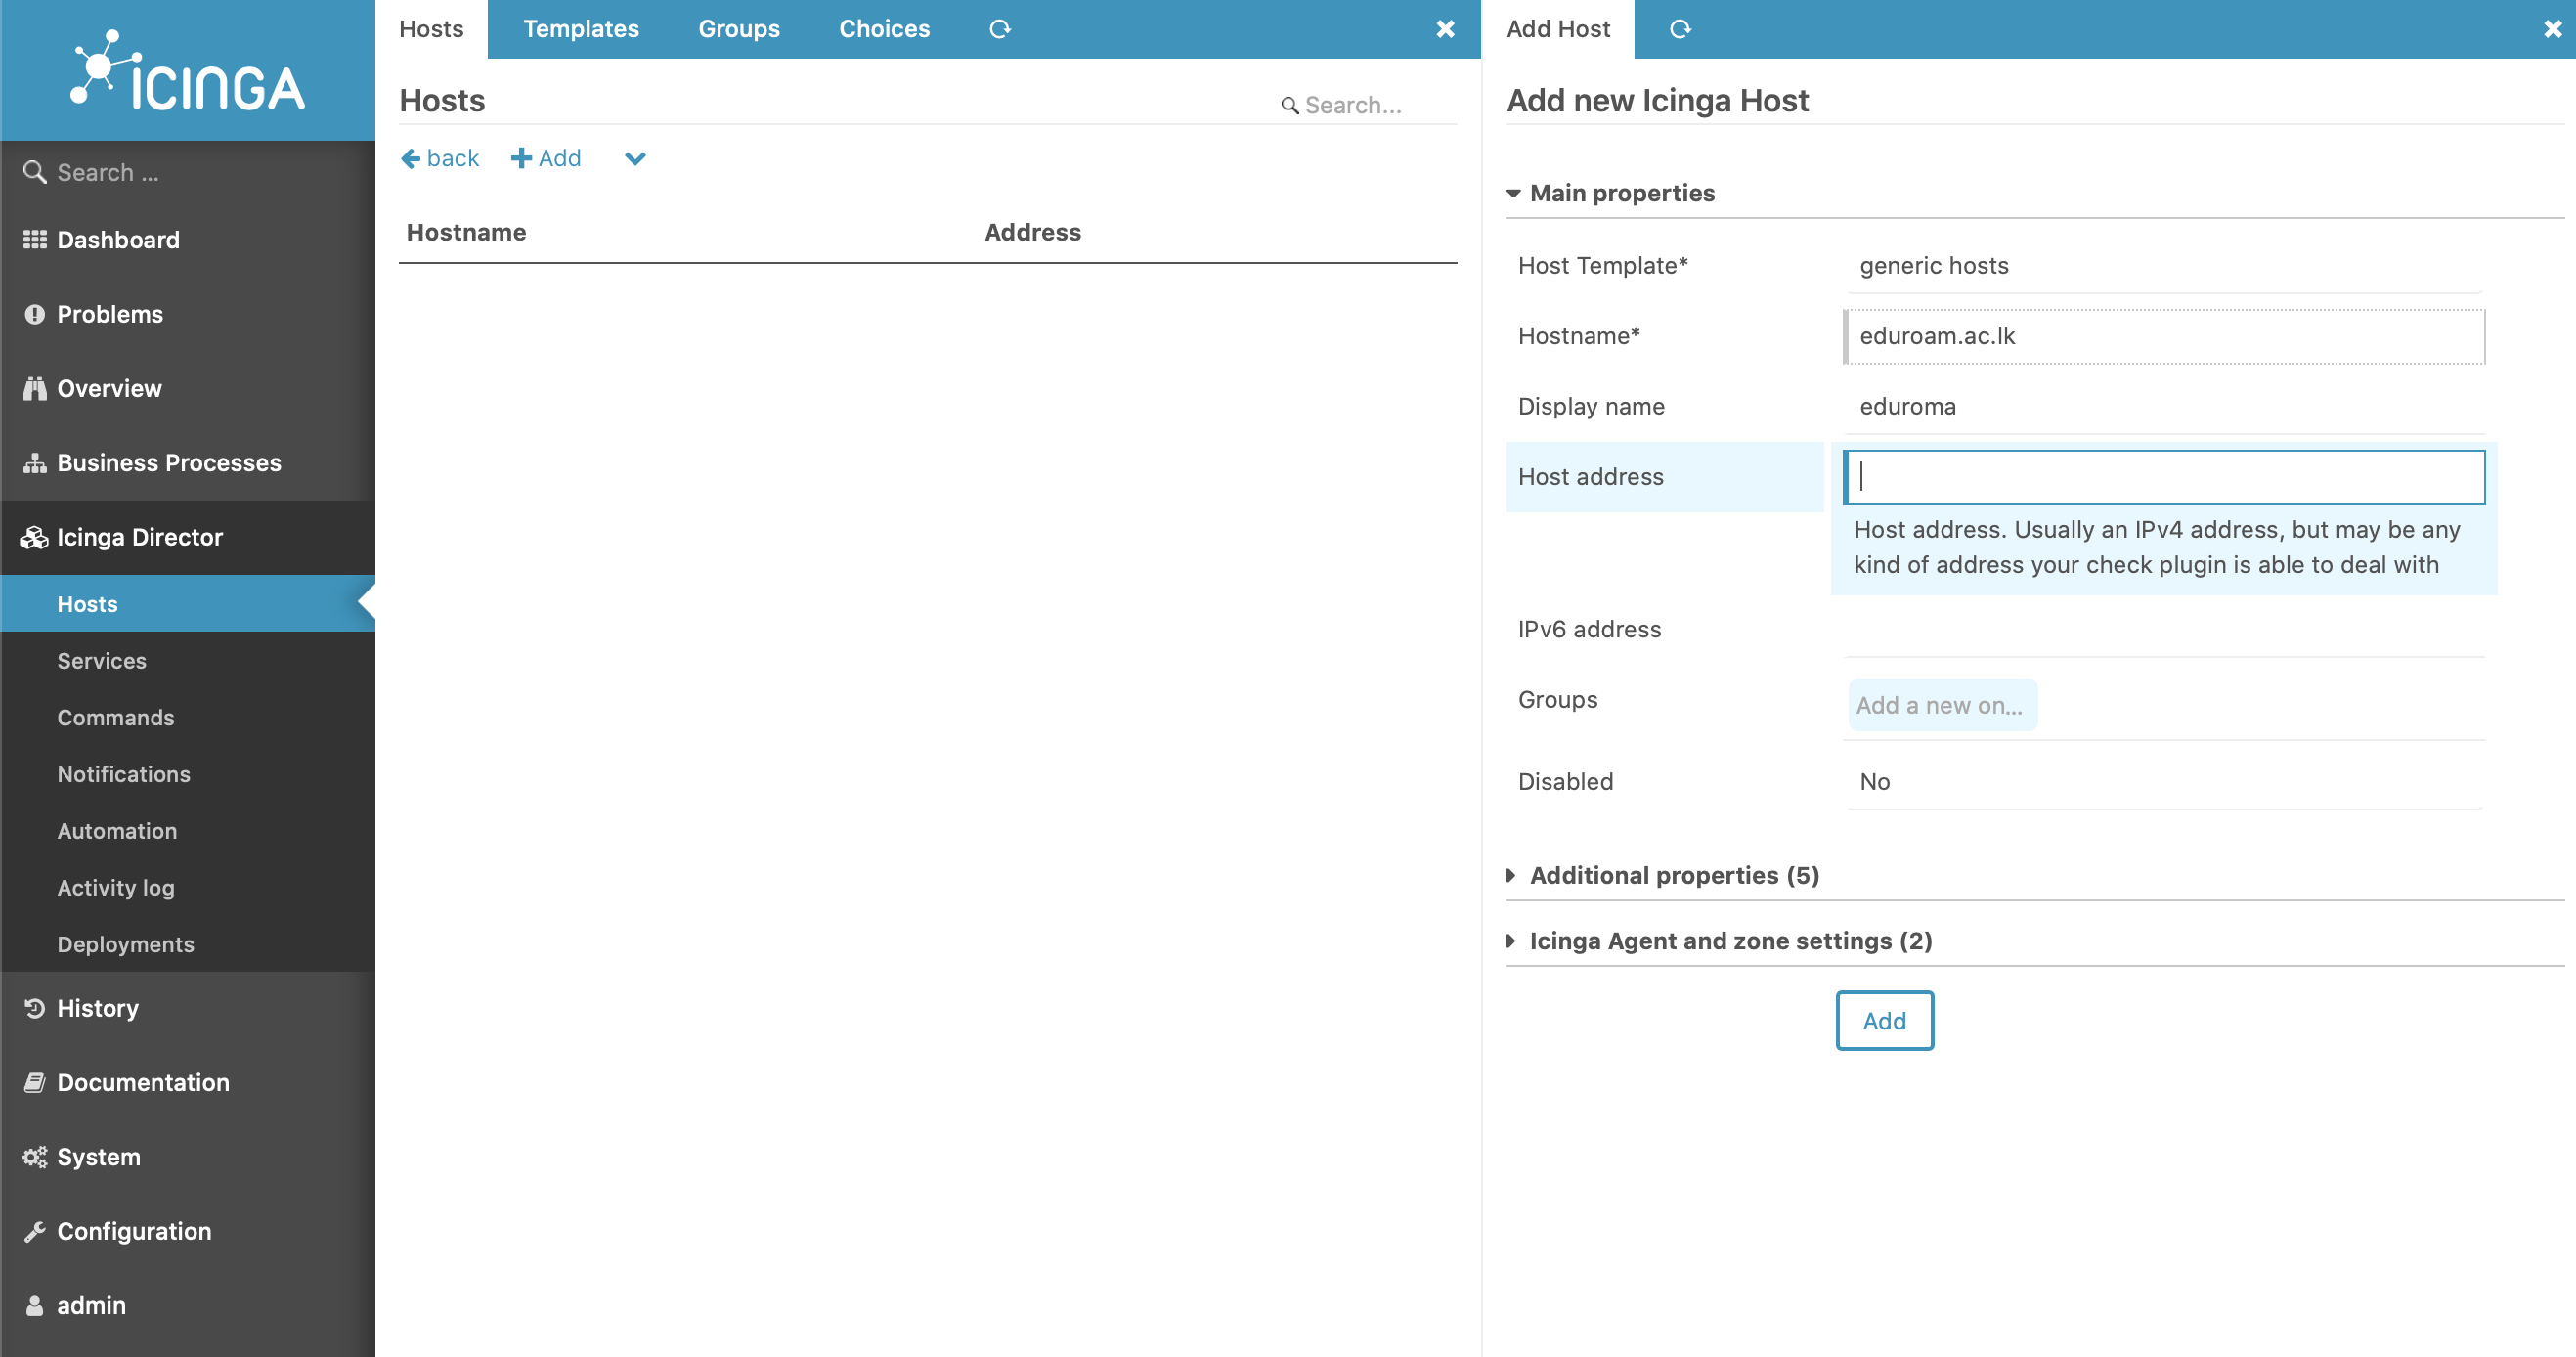
- add_hosts30.png (242.2 KB ) - added by 5 years ago.
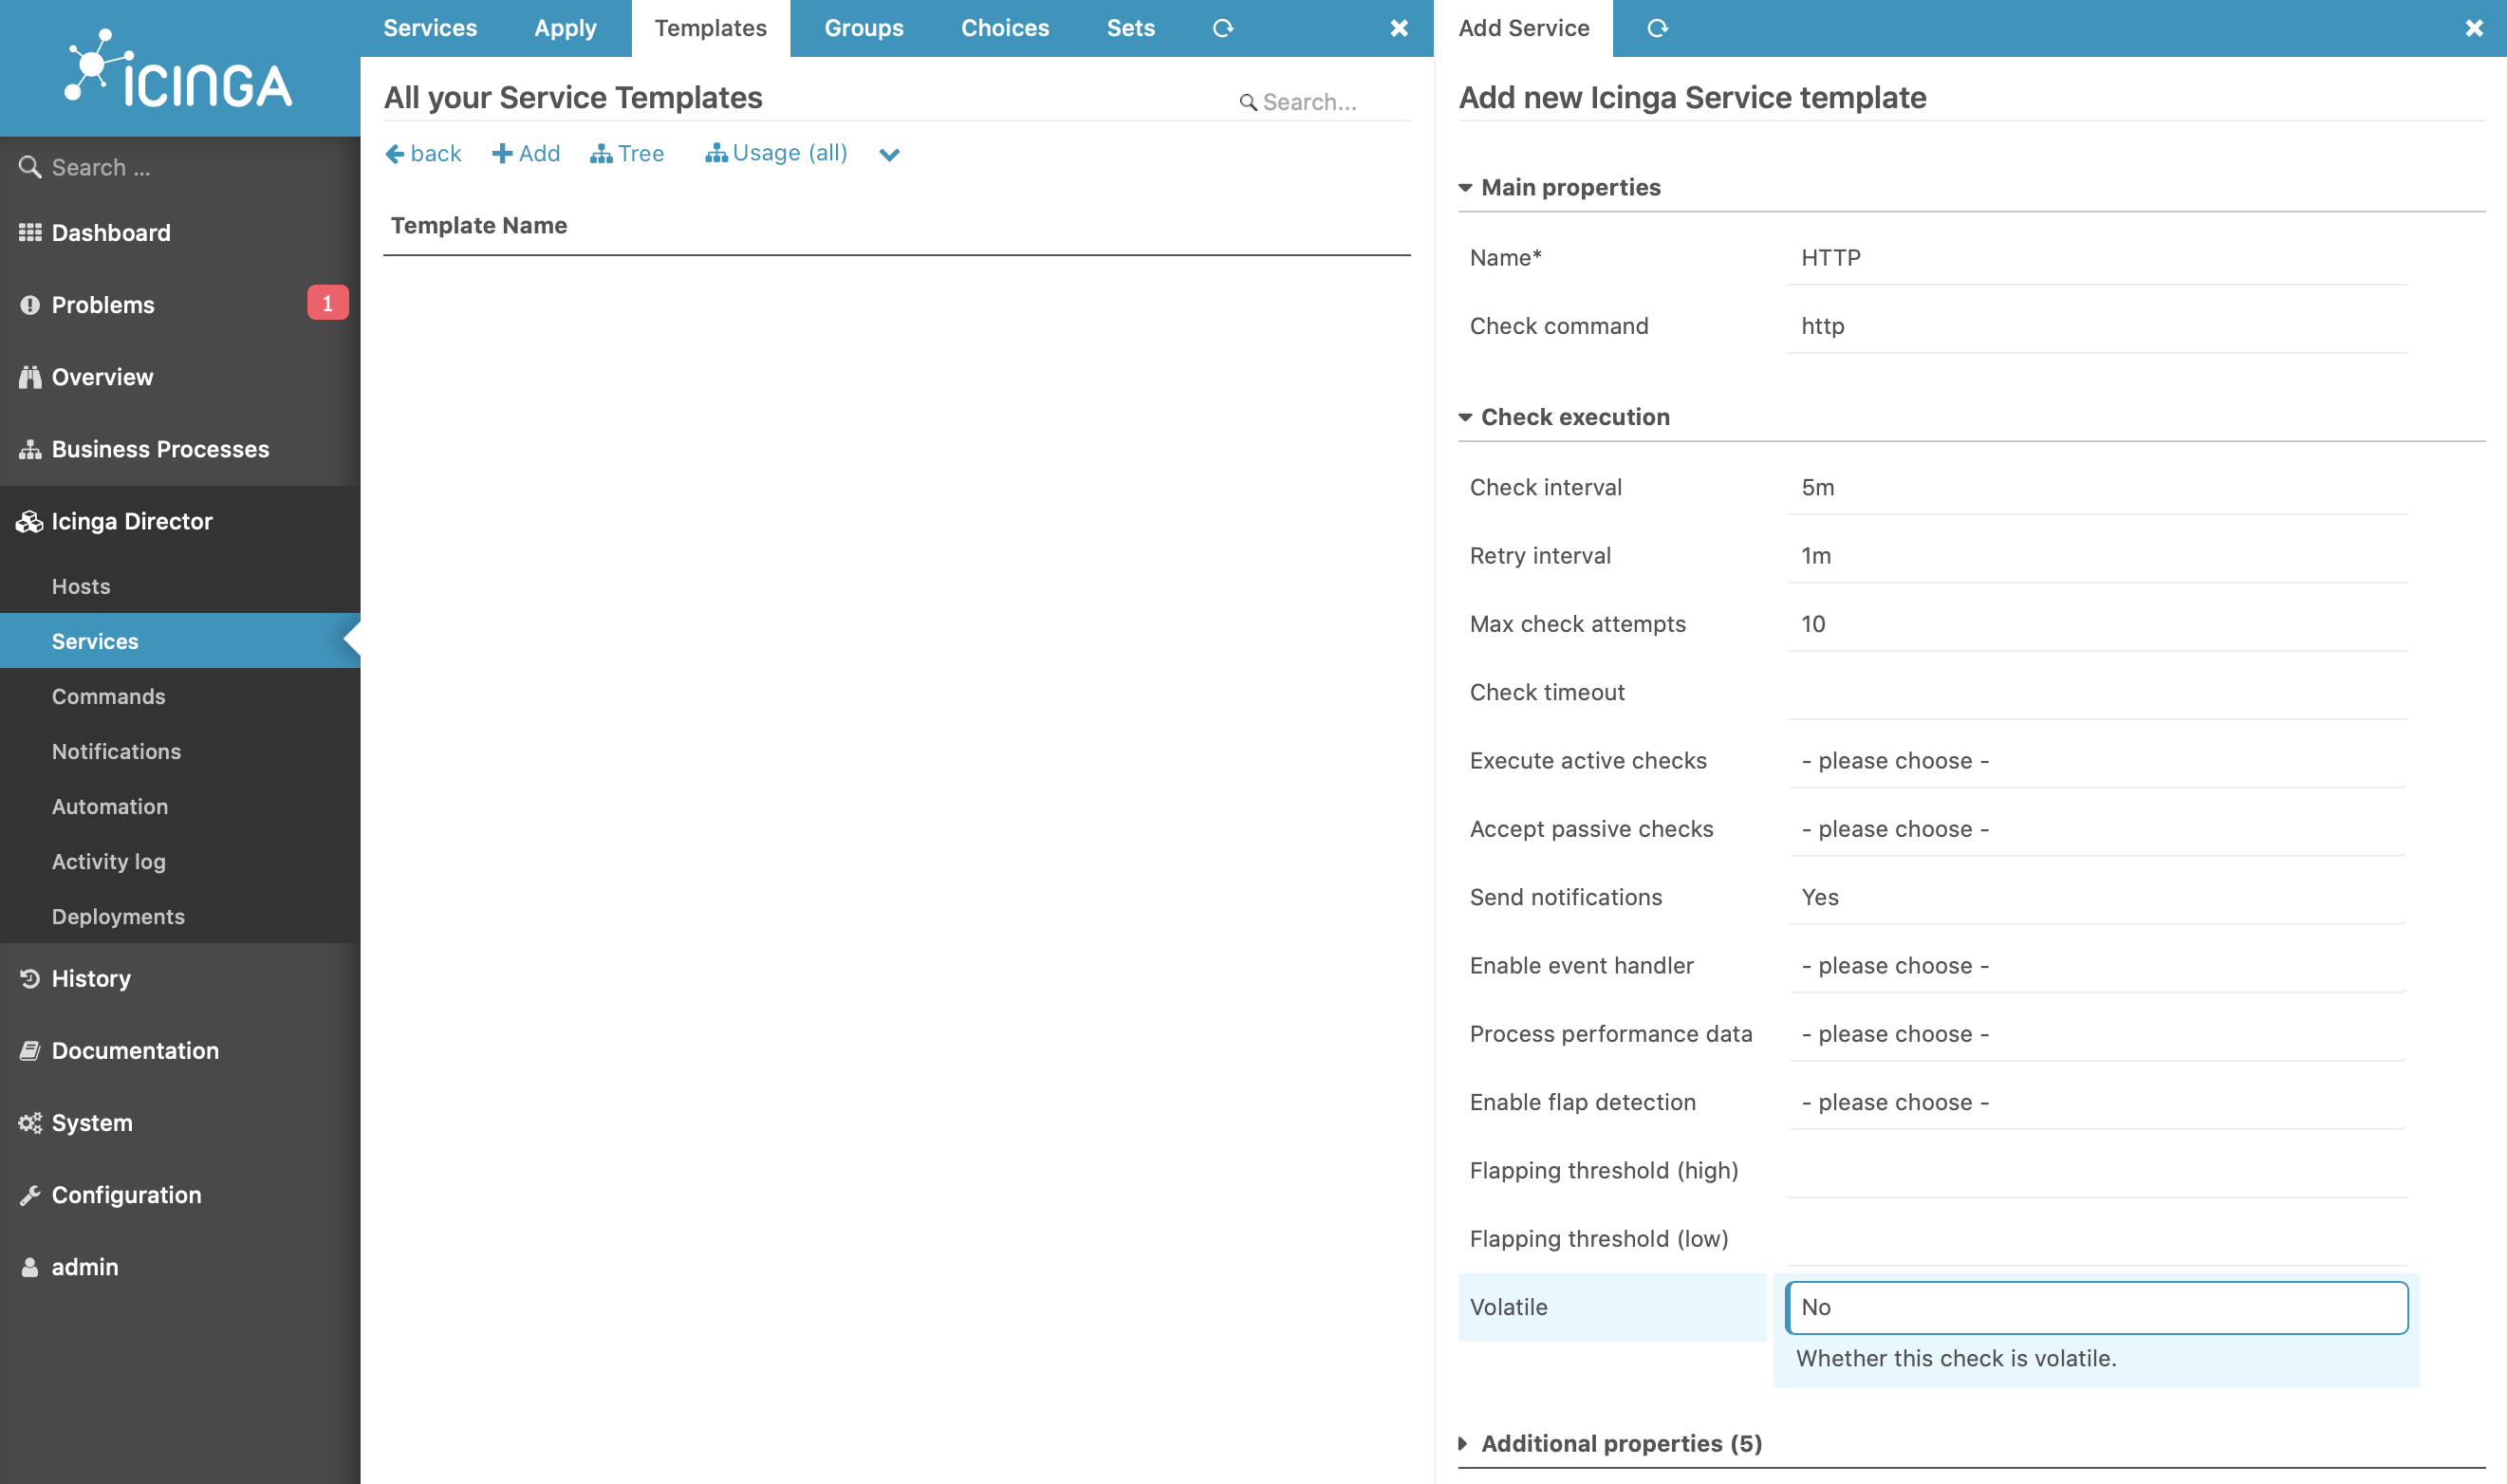
- service_template32.png (285.1 KB ) - added by 5 years ago.
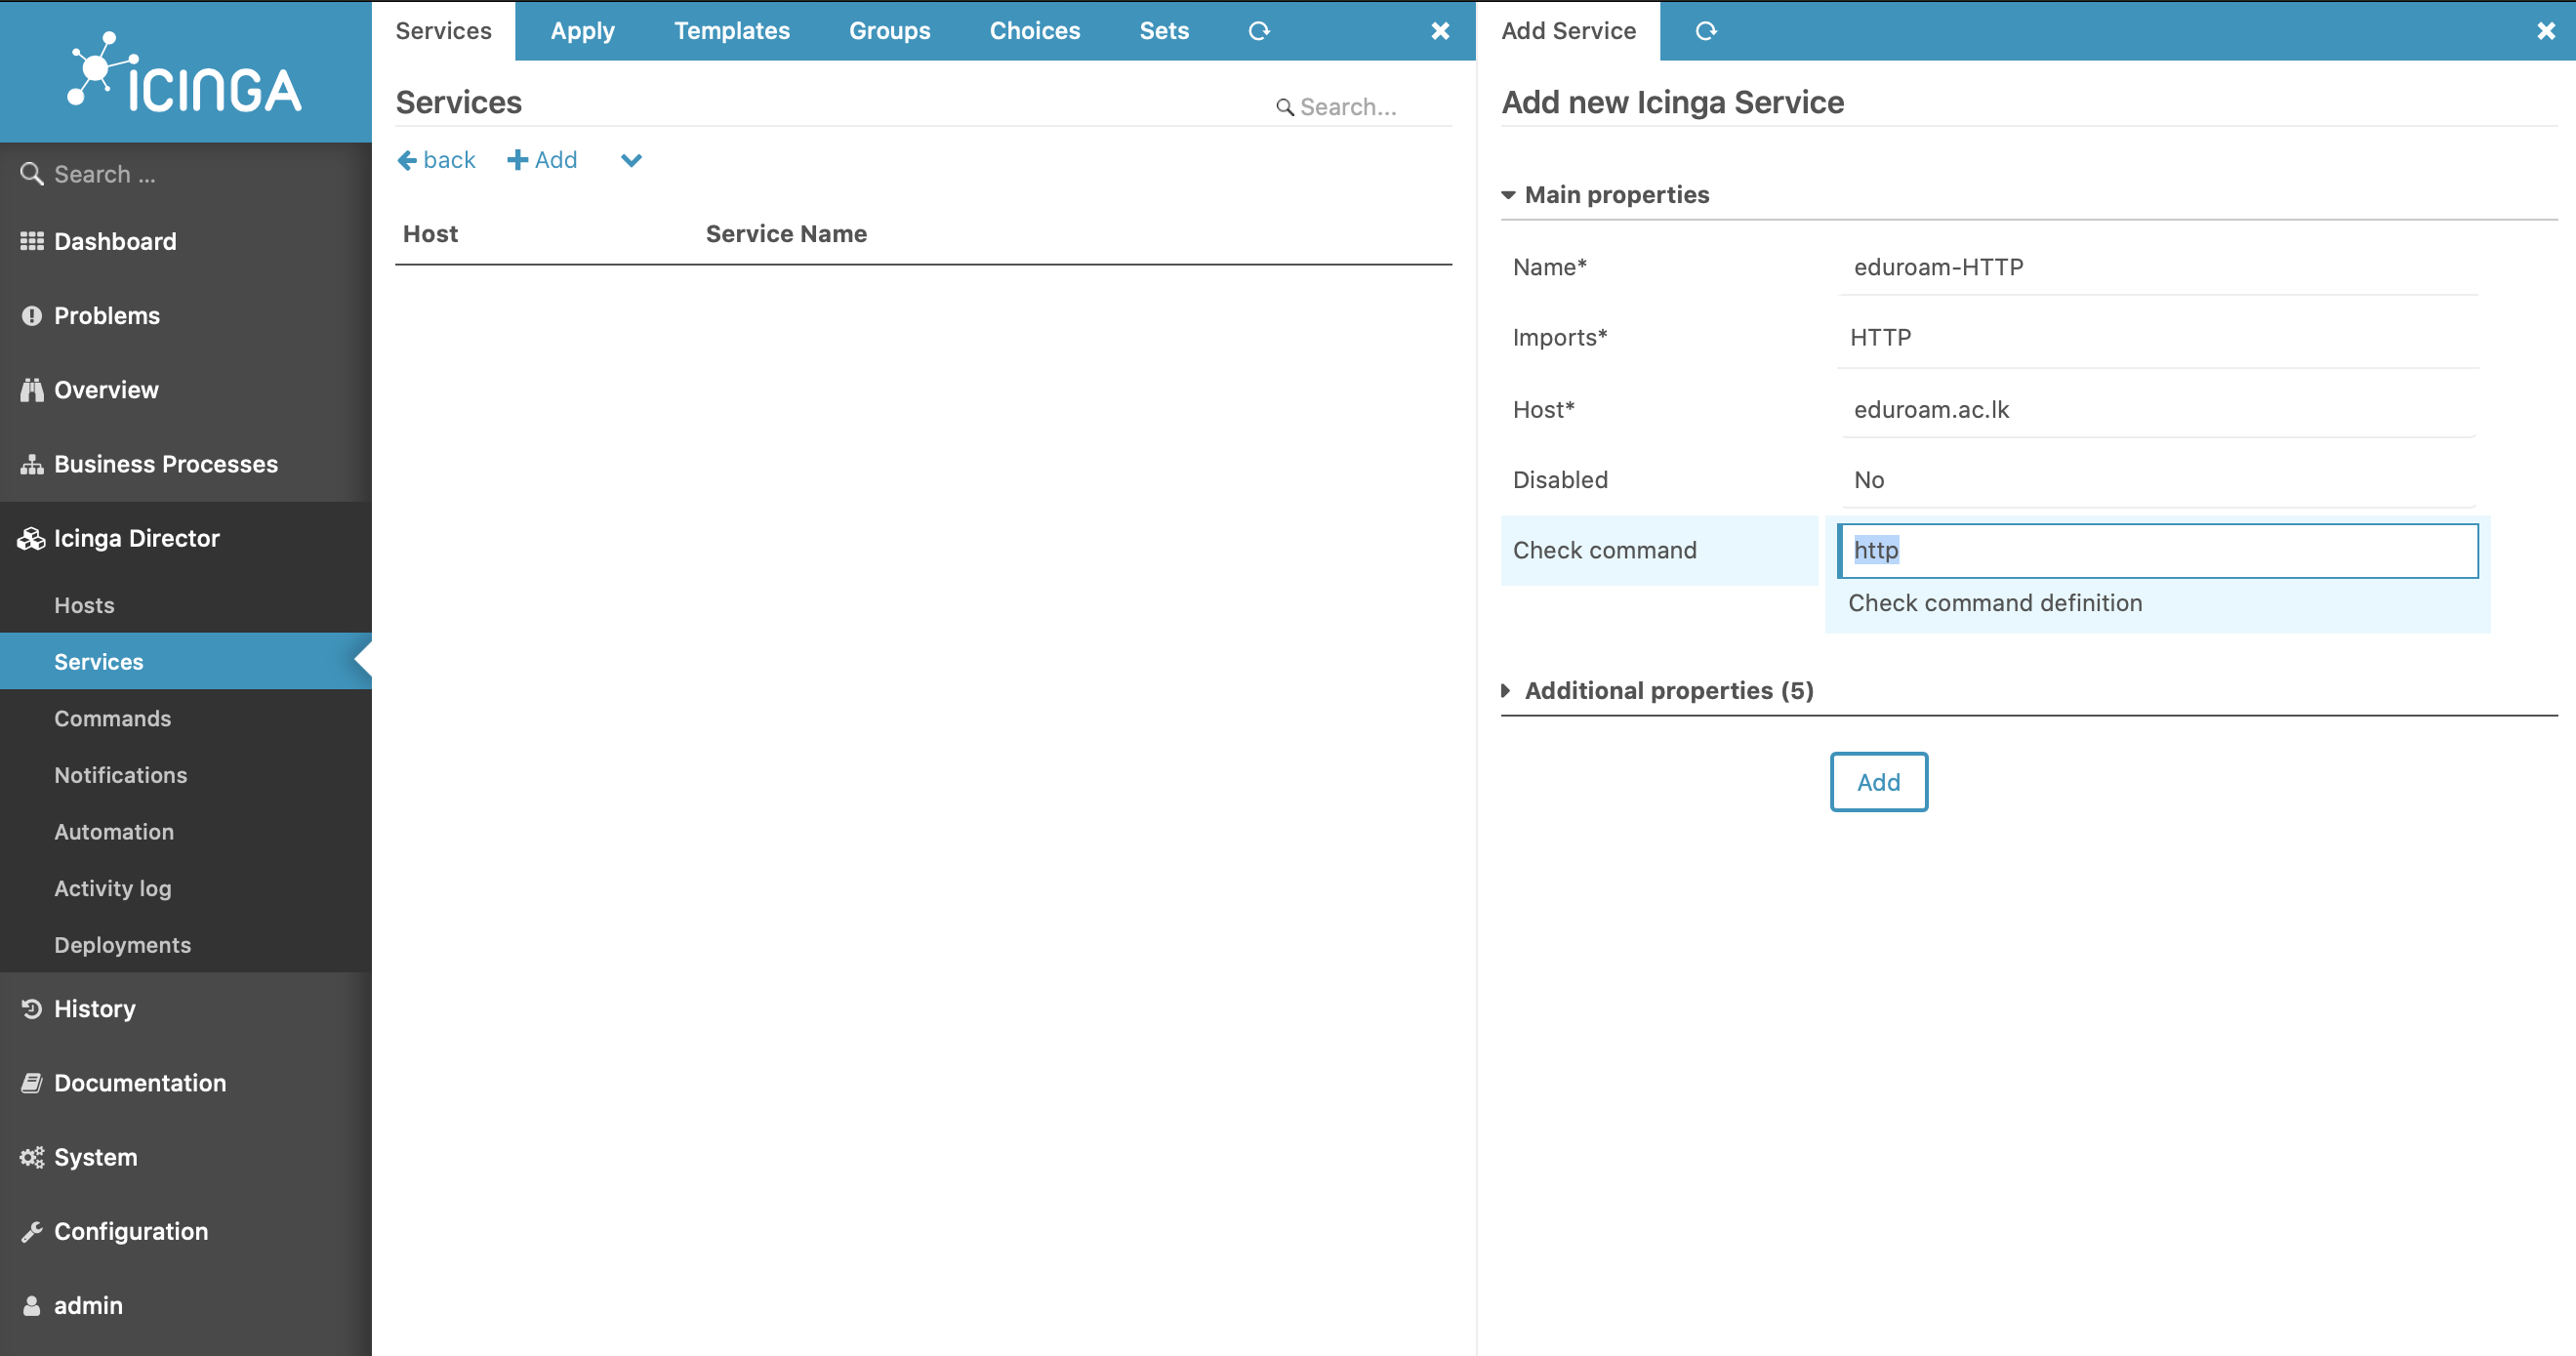
- service33.png (213.5 KB ) - added by 5 years ago.
- director.jpeg (48.9 KB ) - added by 5 years ago.
- Screenshot 2021-05-24 at 00.04.46.png (220.4 KB ) - added by 5 years ago.