
| Version 10 (modified by , 4 years ago) ( diff ) |
|---|
Apache Web Server Installation
First update the Ubuntu package repository.
sudo apt update
Then install the web server.
sudo apt install apache2
Check the apache version
apache2 -v
Now visit your server through the IP address. http://server_ip_address.

PHP Installation
Then install PHP and related modules for apache server and MariaDB.
sudo apt install php libapache2-mod-php php-mysql
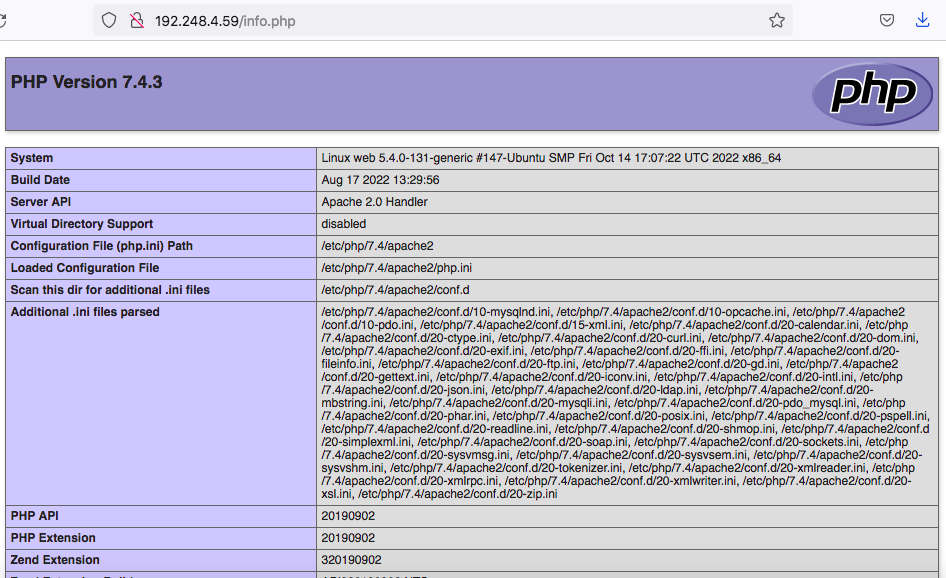
To test that your system is properly configured for PHP, create a PHP script called info.php. Here we will create at the root directory.
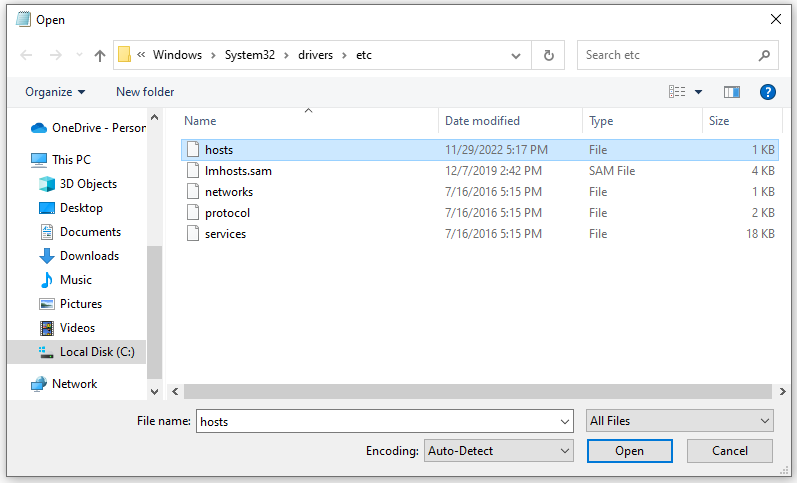
sudo nano /var/www/html/info.php
Insert the following command to show the php information.
<?php
phpinfo();
?>
Next go to http://your_IP/info.php URL and you will get page like below,

MariaDB DBMS Installation
Here we will choose MariaDB DBMS as our database application. Install this using below command.
sudo apt install mariadb-server mariadb-client
Once installed check the version,
mysql --version
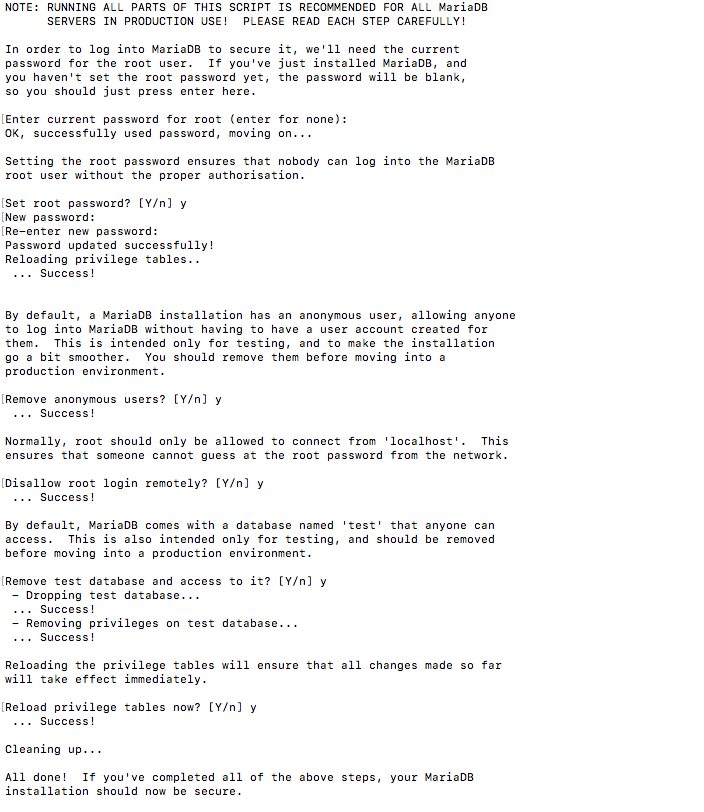
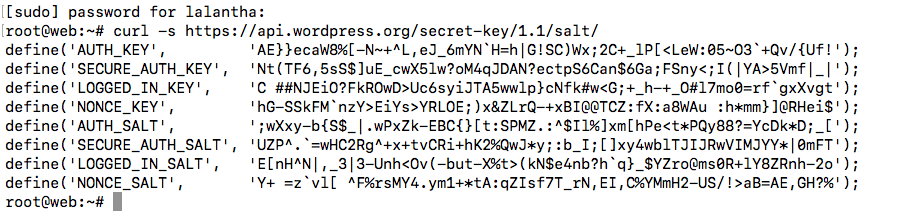
For mysql there is a script that strengthen the mariaDB server security. It is a series of yes no questions which removes initial weaknesses of the server.
To execute the scripts,
sudo mysql_secure_installation

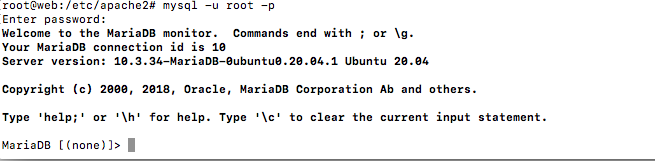
To login MariaDB enter below command and use the password entered above.
sudo mysql -u root -p

To exit type,
exit
Apache Virtual Hosting
Using virtual hosts, one Apache instance can serve multiple websites. Each domain or individual site that is configured using Apache will direct the visitor to a specific directory holding that site’s information. This is done without indicating to the visitor that the same server is also responsible for other sites.
Note: Before creating a virtual host for a web site domain, the particular domain or subdomain should be created. For this please contact your domain manager of your institutional IT department or relevant domain company. Then this domain should be assigned a DNS entry (A or AAAA record) to work on a web browser. In our case DNS entry should be pointed to your server IP.
Presuming you meet the prerequisites below will be the steps to create virtual hosts.
First you need to create a appropriate directory structure for each website hosted under each domain. By default root web directory in a Ubuntu system will be /var/www/html. For our setup we will use below directory structure for each site.
web site for domain 1 - /var/www/your_domain_1/public_html web site for domain 2 - /var/www/your_domain_2/public_html web site for domain 3 - /var/www/your_domain_3/public_html
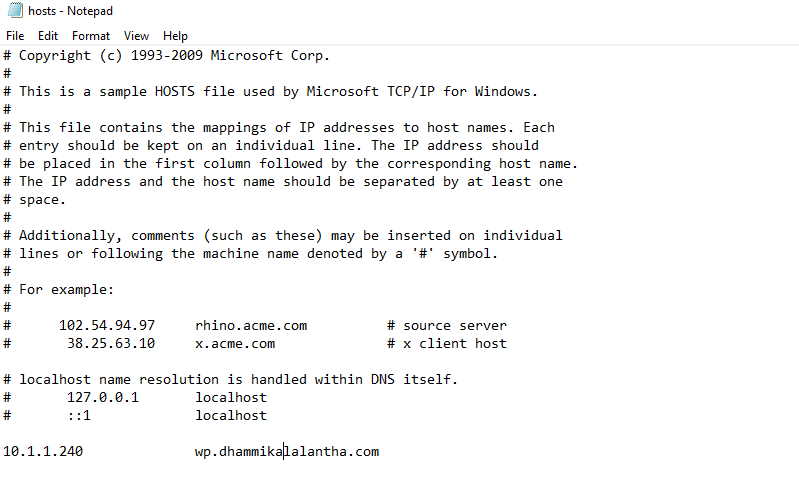
In our example we hope to create three subdomains called web,wp and lms. So the full domain names will be web.your_domain.com, wp.your_domain.com and lms.your_domain.com respectively. Use these commands, with your own domain names, to create your directories:
sudo mkdir -p /var/www/web.your_domain/public_html
sudo mkdir -p /var/www/wp.your_domain/public_html
sudo mkdir -p /var/www/lms.your_domain/public_html
For the web subdomain we will later create dummy a web site with just a single web page. In the wp subdomain we will install wordpress which is a content management system. We are going to install moodle as well under the lms subdomain.
Now we are done with creating web site directories. Now we need to do the actual apache server configurations for the virtual hosting.
On Ubuntu systems, Apache Virtual Hosts configuration files are located in /etc/apache2/sites-available directory. They can be enabled by creating symbolic links to the /etc/apache2/sites-enabled directory, which Apache read during the startup. Here we need to create a seperate configuration file for each domain/sub-domain as below.
sudo nano /etc/apache2/sites-available/web.your_domain.com.conf
And add the below configurations,
<VirtualHost *:80>
    ServerName web.dhammikalalantha.com
    ServerAlias web.dhammikalalantha.com
    ServerAdmin webmaster@dhammikalalantha.com
    DocumentRoot /var/www/web.dhammikalalantha.com/public_html

    <Directory /var/www/web.dhammikalalantha.com/public_html>
        Options -Indexes +FollowSymLinks
    </Directory>

    ErrorLog ${APACHE_LOG_DIR}/web.dhammikalalantha.com-error.log
    CustomLog ${APACHE_LOG_DIR}/web.dhammikalalantha.com-access.log combined
</VirtualHost>
Similarly do the necessary configurations for the sub-domain wp.
sudo nano /etc/apache2/sites-available/wp.your_domain.com.conf
<VirtualHost *:80>
    ServerName wp.dhammikalalantha.com
    ServerAlias wp.dhammikalalantha.com
    ServerAdmin webmaster@wp.dhammikalalantha.com
    DocumentRoot /var/www/wp.dhammikalalantha.com/public_html

    <Directory /var/www/wp.dhammikalalantha.com/public_html>
        Options -Indexes +FollowSymLinks
    </Directory>

    ErrorLog ${APACHE_LOG_DIR}/wp.dhammikalalantha.com-error.log
    CustomLog ${APACHE_LOG_DIR}/wp.dhammikalalantha.com-access.log combined
</VirtualHost>
We are going to host a moodle site too. Add a configuration file as below.
sudo nano /etc/apache2/sites-available/lms.your_domain.com.conf
<VirtualHost *:80>
    ServerName lms.dhammikalalantha.com
    ServerAlias lms.dhammikalalantha.com
    ServerAdmin webmaster@lms.dhammikalalantha.com
    DocumentRoot /var/www/lms.dhammikalalantha.com/public_html

    <Directory /var/www/lms.dhammikalalantha.com/public_html>
        Options -Indexes +FollowSymLinks
    </Directory>

    ErrorLog ${APACHE_LOG_DIR}/lms.dhammikalalantha.com-error.log
    CustomLog ${APACHE_LOG_DIR}/lms.dhammikalalantha.com-access.log combined
</VirtualHost>
Once we do the configurations we have to enable the created sites as below,
sudo a2ensite web.dhammikalalantha.com
sudo a2ensite wp.dhammikalalantha.com
sudo a2ensite lms.dhammikalalantha.com
Once done, test the configuration for any syntax errors with.
sudo apachectl configtest
Restart the Apache service for the changes to take effect.
sudo systemctl restart apache2
Now we are done with configurations of apache virtual hosting.
Registering your Domain Names and DNS configuration for your Domains
As you know we can't use any preferred domain for our services, websites as we wanted to do. First we have to register them in a relevant domain registry where usually we have to pay. In case you want a ac.lk sub domain you have to get it through LEARN. Once you get your domains registered they are to be assigned IP addresses so that they can be used in your services for hosting services, websites etc. Assigning of IP addresses to the domain names is done through DNS lookup service. This DNS service is also can be accomplished through the relevant domain registry or web hosting service. For the ac.lk domain, LEARN or your institutional network/system administrator will do that for you.
Installing Web sites/applications
Installing a dummy web site
Hope in someway you registered and setup DNS for the domain which you are going to use in your apache server. Now from any network you are able access your apache server hosted web sites through own domain. But we are not completely done. We have to install web sites in your server. Here we will see how to do that. We are going to install a static web site, Wordpress and Moodle in our servers.
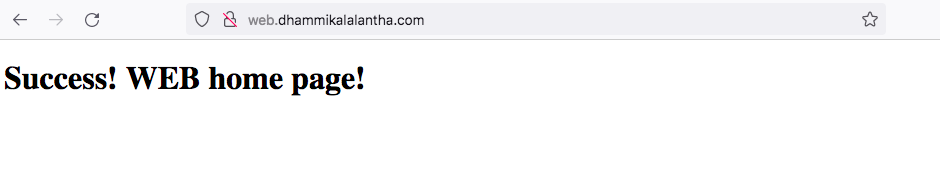
For the web sub-domain we will create a dummy web site with just a single webpage. Create a file as below,
sudo nano /var/www/web.your_domain/public_html/index.html
<!DOCTYPE html>
<html lang="en" dir="ltr">
  <head>
    <meta charset="utf-8">
    <title>Welcome to WEB</title>
  </head>
  <body>
    <h1>Success! WEB home page!</h1>
  </body>
</html>
Once created with the site we have to change ownership of the directories to the web server user.
sudo chown -R www-data: /var/www/*
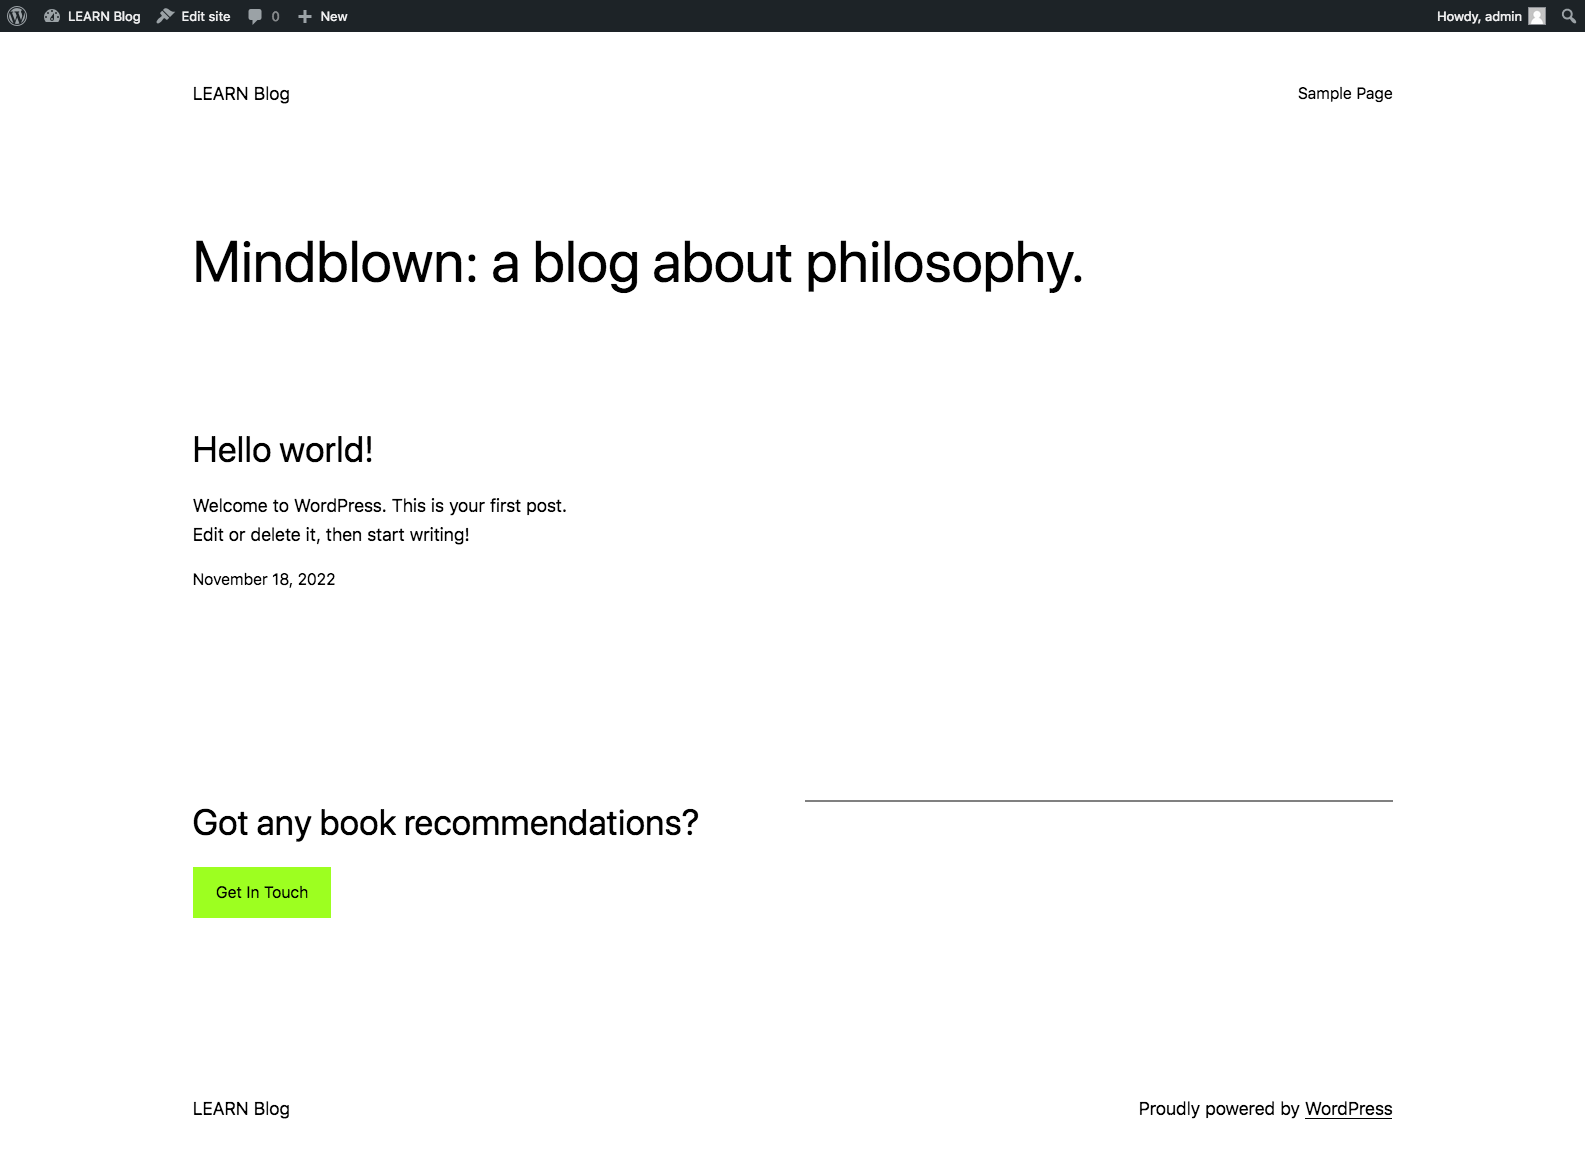
Now that you have your site created and you can test your site by going to the domains in your web browser. Below will be the output for the site we created.

Also check the other site created.
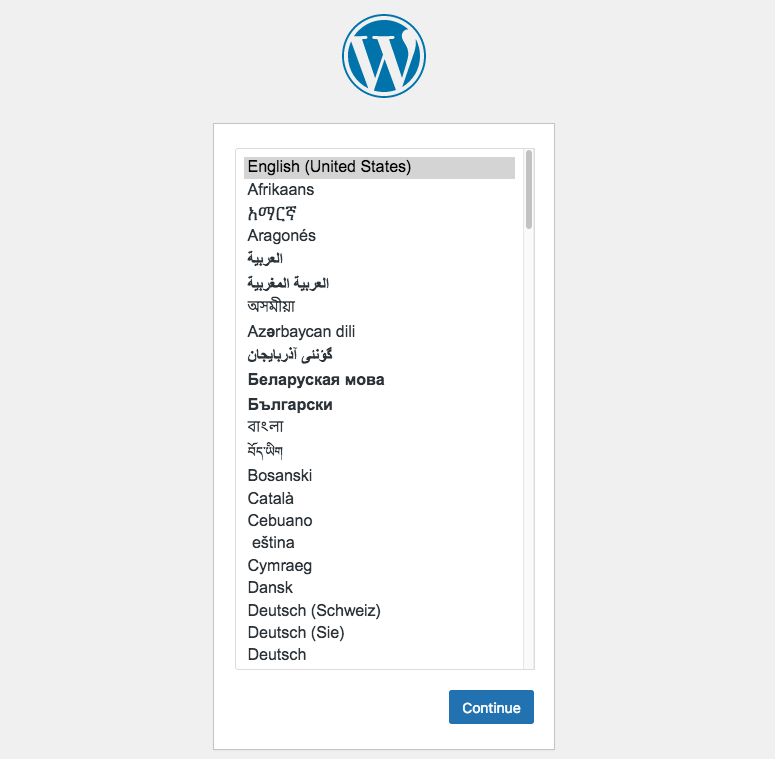
Installing Wordpress CMS
WordPress is a free and open-source content management system (CMS) written in PHP language. Features include a plugin architecture and a template system, referred to within WordPress as "Themes". WordPress was originally created as a blog-publishing system but has evolved to support other web content types including more traditional mailing lists and Internet fora, media galleries, membership sites, learning management systems (LMS) and online stores.
If you are hoping to start a blog or any other site WordPress would a most convenient and suitable choice. Then let's see how we can install WordPress in your own server.
WordPress is written using PHP and it uses MySQL/MariaDB for storing its data we can install it in a LAMP stack environment. So as the first step we are going to create a database in MySQL/MariaDB as below.
First login the MySQL server,
mysql -u root -p
Then create the database.
CREATE DATABASE wordpress DEFAULT CHARACTER SET utf8 COLLATE utf8_unicode_ci;
Then create a user for the database.
CREATE USER 'wordpressuser'@'localhost' IDENTIFIED BY 'dala1234';
Next you need to grant permissions to user to do any operations on the database as below.
GRANT ALL ON wordpress.* TO 'wordpressuser'@'localhost';
Then you have to set the authentication plugin to mysql_native_password plugin which will enable to login using the above created username and password.
UPDATE mysql.user set plugin = 'mysql_native_password' where User = 'wordpressuser';
Lastly, flush privileges for these changes to take effect immediately. Then exit the mysql server.
FLUSH PRIVILEGES;
EXIT;
Install additional PHP extensions
WordPress needs additional PHP extensions for its plugins to work. First, let’s update and install the necessary extensions using the following commands. Next for the extensions to start working, restart the Apache server.
sudo apt update
sudo apt install php-curl php-gd php-mbstring php-xml php-xmlrpc php-soap php-intl php-zip
sudo systemctl restart apache2
Allow Apache’s .htaccess to Handle Override and Rewrite Rules on the WordPress Site
In Apache, .htaccess files provide a way to make configuration changes on a per-directory basis. To Enable this you have to go the virtual host configuration file of the WordPress site and add the AllowOverride directive within the Directory block pointing to the website’s document root.
<VirtualHost *:80>
    ServerName wp.dhammikalalantha.com
    ServerAlias wp.dhammikalalantha.com
    ServerAdmin webmaster@wp.dhammikalalantha.com
    DocumentRoot /var/www/wp.dhammikalalantha.com/public_html

    <Directory /var/www/wp.dhammikalalantha.com/public_html>
        Options -Indexes +FollowSymLinks
        AllowOverride All
    </Directory>

    ErrorLog ${APACHE_LOG_DIR}/wp.dhammikalalantha.com-error.log
    CustomLog ${APACHE_LOG_DIR}/wp.dhammikalalantha.com-access.log combined
</VirtualHost>
Then enable the Apache rewrite module.
sudo a2enmod rewrite
Next verify the configuration changes for the Syntax errors and restart Apache to make changes effective.
sudo apache2ctl configtest
sudo systemctl restart apache2
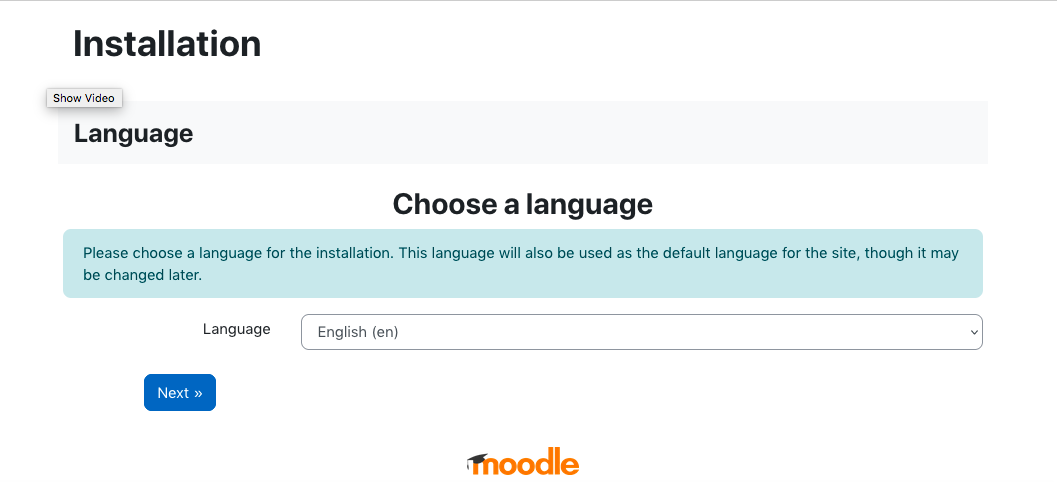
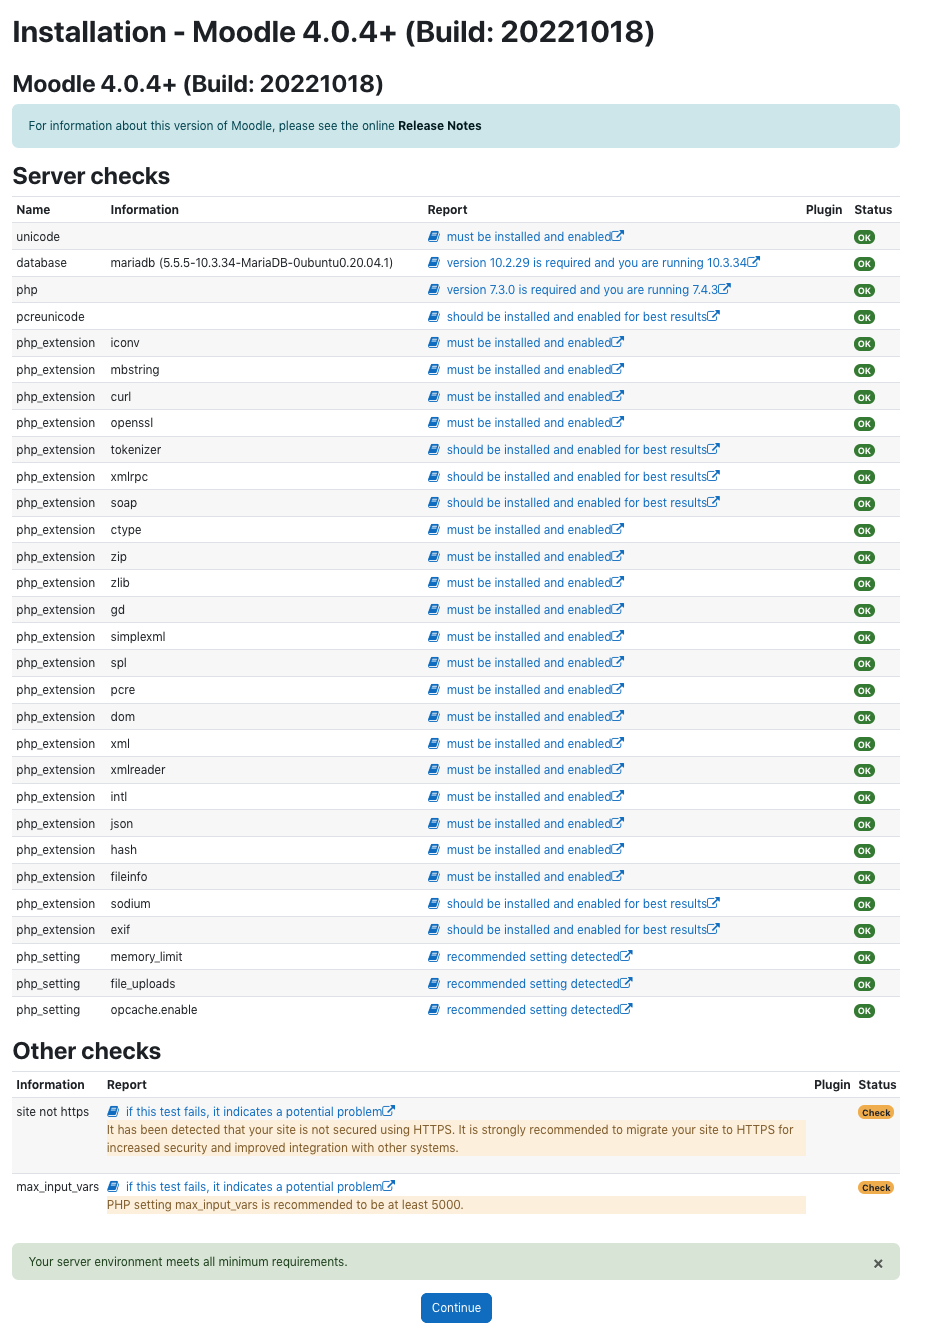
Moodle Installation
Now we have setup the web server, PHP and database server. Also we have configured virtual hosting. Now we are going to install Moodle under lms sub domain created above. Before installing the Moodle need to install the prerequisites for Moodle. This includes software and PHP modules that support Moodle’s features and Git for installing Moodle and keeping it up to date.
sudo apt install graphviz aspell ghostscript clamav php7.4-pspell php7.4-curl php7.4-gd php7.4-intl php7.4-mysql php7.4-xml php7.4-xmlrpc php7.4-ldap php7.4-zip php7.4-soap php7.4-mbstring
Restart Apache to load the modules.
sudo systemctl restart apache2
Then let's download the Moodle using Git repository.
 cd /opt
 sudo git clone git://git.moodle.org/moodle.git
 cd moodle
Then get a list of stable releases from below command,
sudo git branch -a
Here we are selecting release MOODLE_400_STABLE, track and then check out the branch selected.
 sudo git branch --track MOODLE_310_STABLE origin/MOODLE_310_STABLE
 sudo git checkout MOODLE_310_STABLE
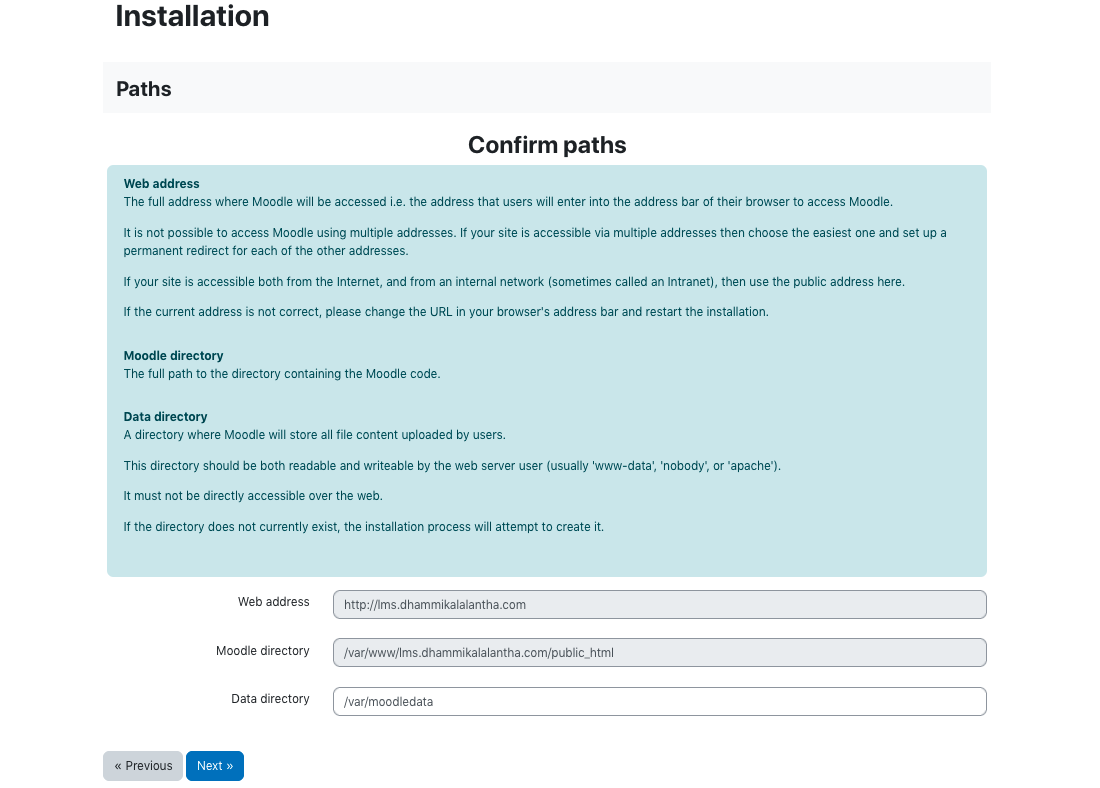
Copy the directory with the Moodle repository into the /var/www/lms.your_domain.com/public_html directory. Then, modify the new Moodle directory’s permissions to grant read, execute, and write access to any user.
 sudo cp -R /opt/moodle/* /var/www/lms.your_domain.com/public_html
 sudo chmod -R 0777 /var/www/lms.your_domain.com/public_html
Then we need to create a directory to hold moodle data in /var/moodledata and make www-data its owner, and modify its permissions to grant all users read, execute, and write access. below will be the steps.
 sudo mkdir /var/moodledata
 sudo chown -R www-data /var/moodledata
 sudo chmod -R 0777 /var/moodledata
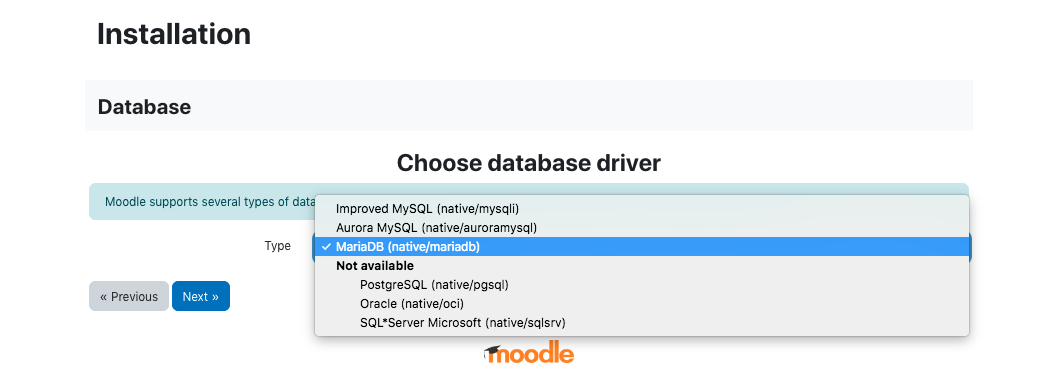
Moodle uses a database which needs to be created in MariaDB in our case. below are the steps to create the database.
First login the database,
sudo mysql -u root -p
Then use the following MySQL command to create a database for Moodle.
CREATE DATABASE moodle DEFAULT CHARACTER SET utf8mb4 COLLATE utf8mb4_unicode_ci;
Next create the user for the database and grant permissions to the database and exit,
create user 'moodledude'@'localhost' IDENTIFIED BY 'passwordformoodledude';
GRANT SELECT,INSERT,UPDATE,DELETE,CREATE,CREATE TEMPORARY TABLES,DROP,INDEX,ALTER ON moodle.* TO 'moodledude'@'localhost';
quit;
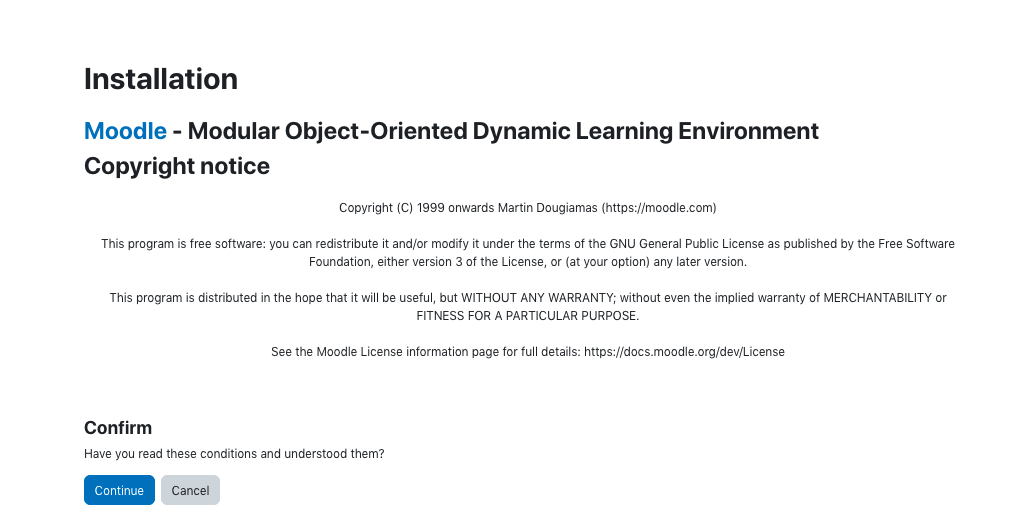
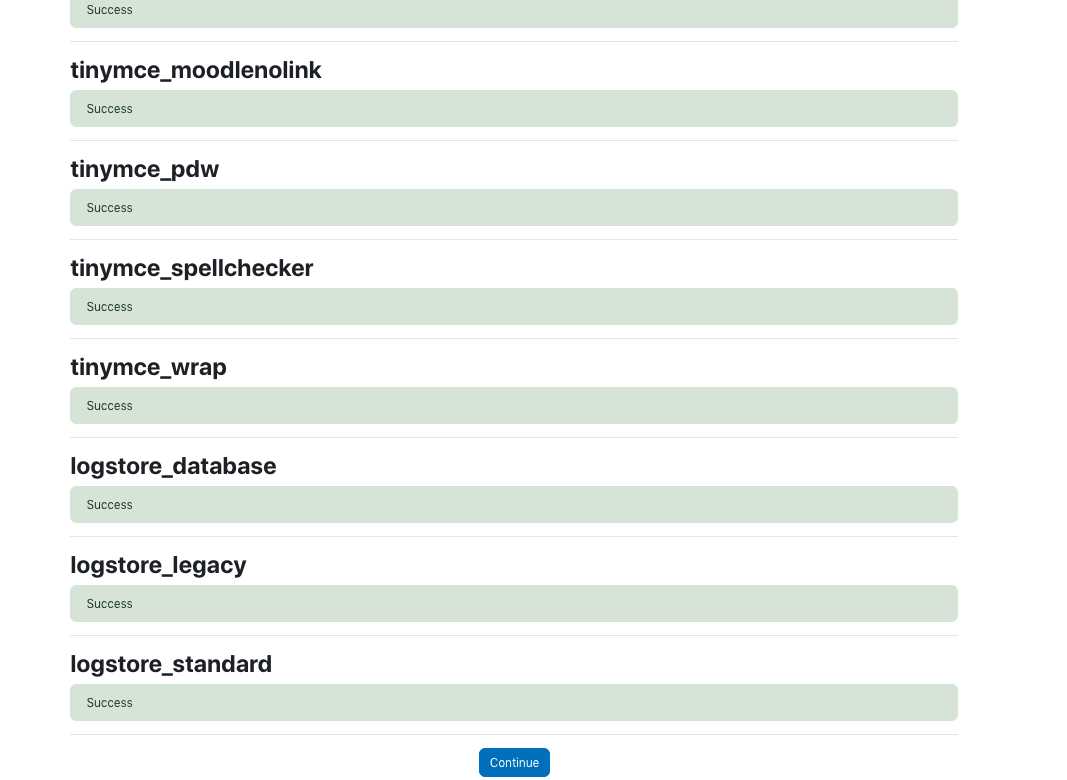
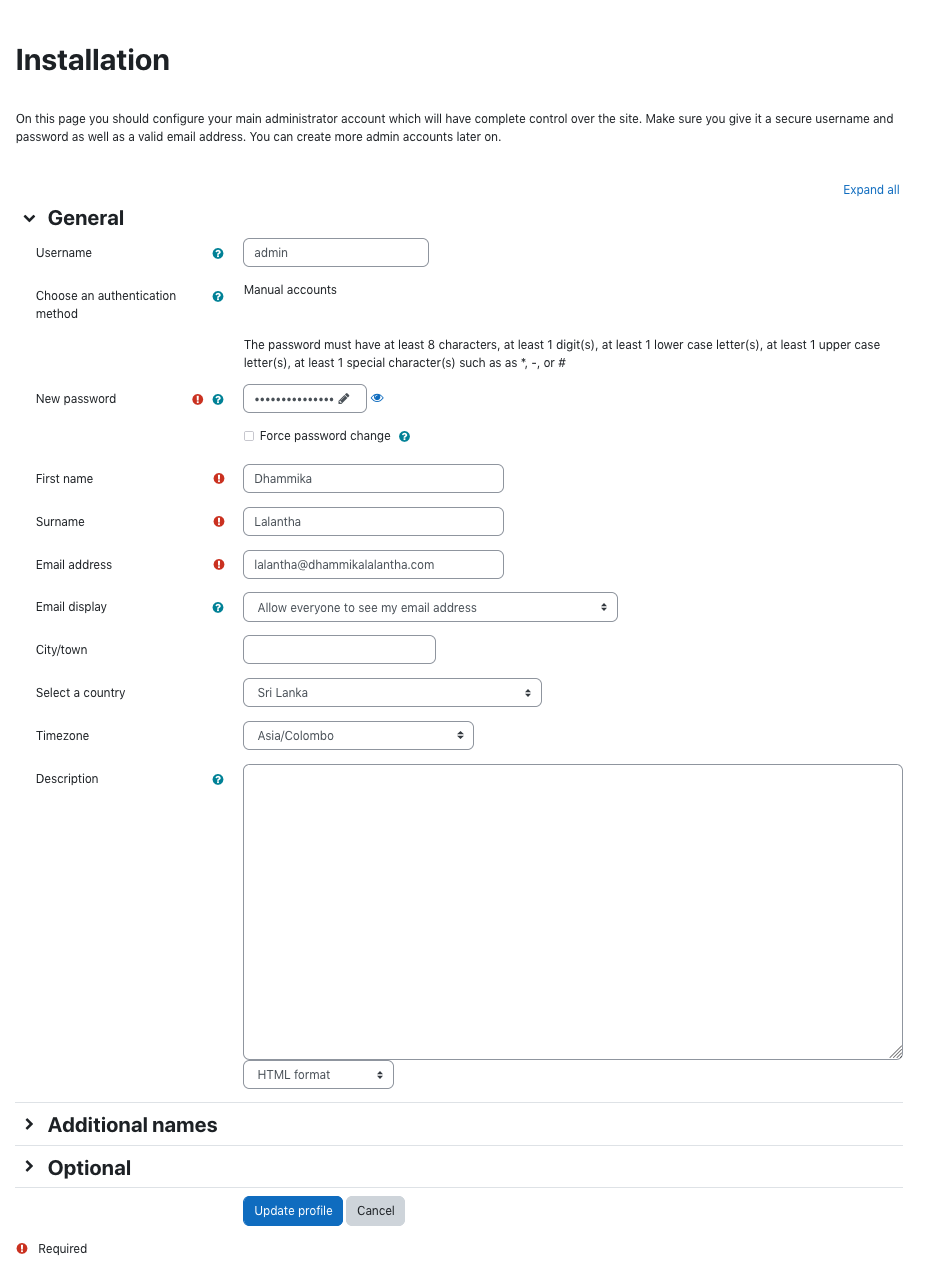
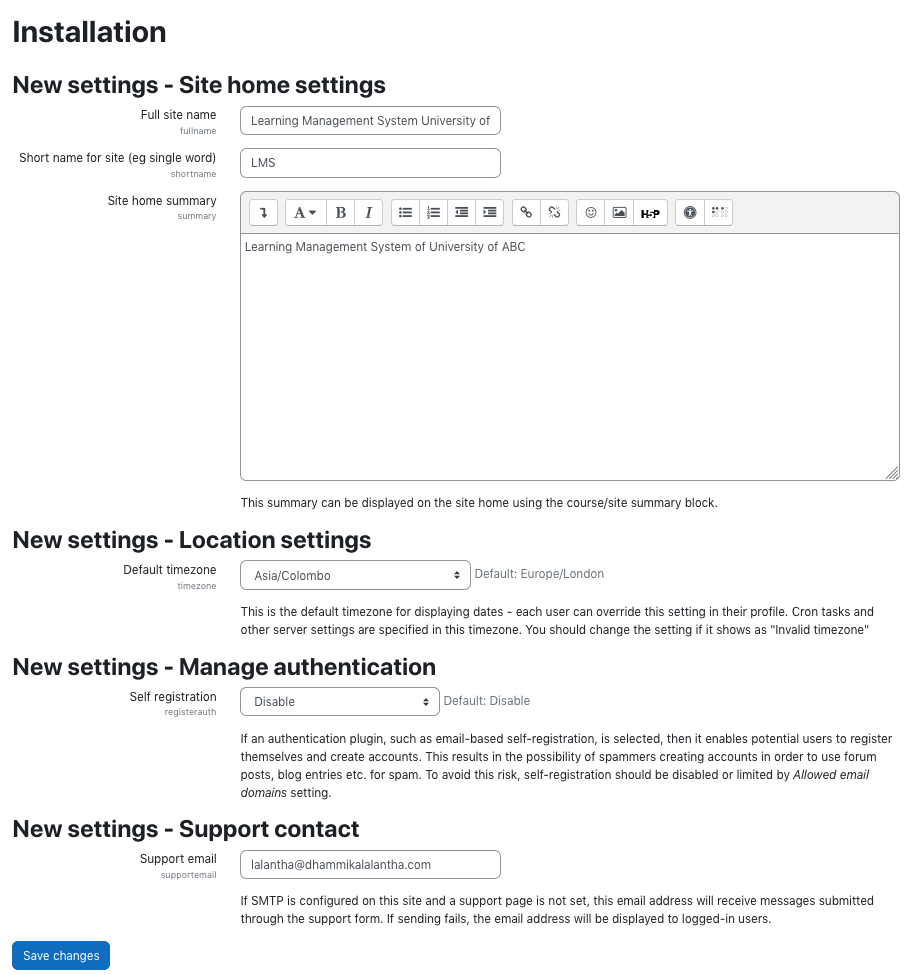
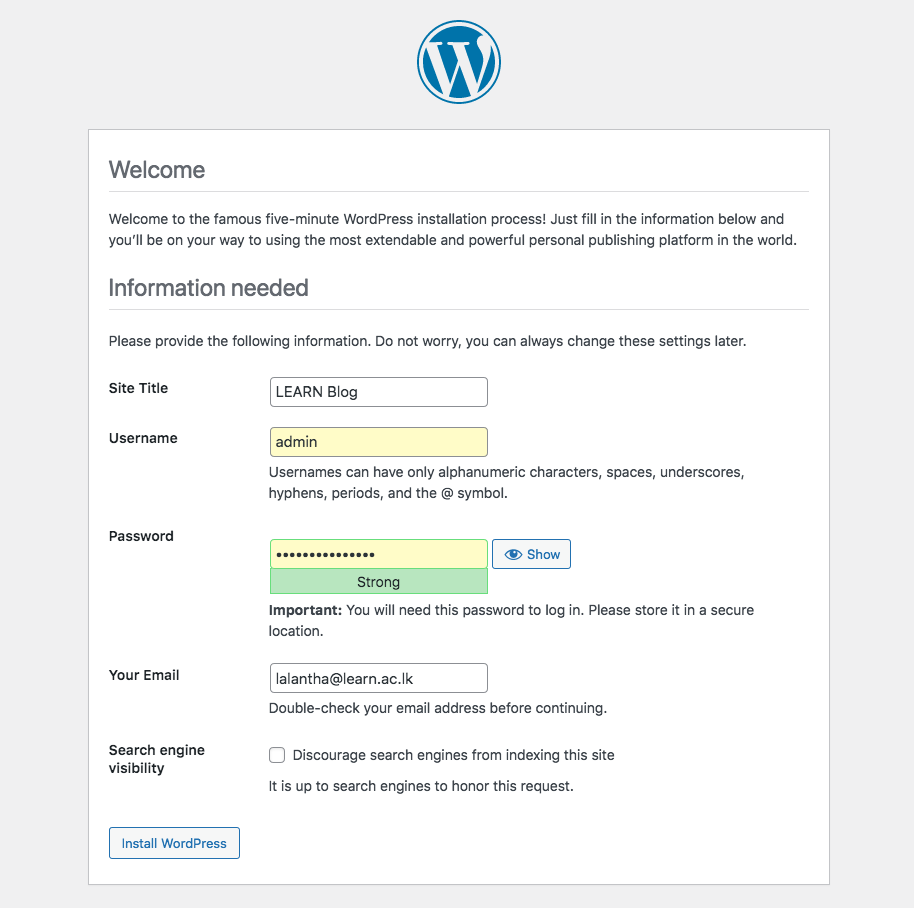
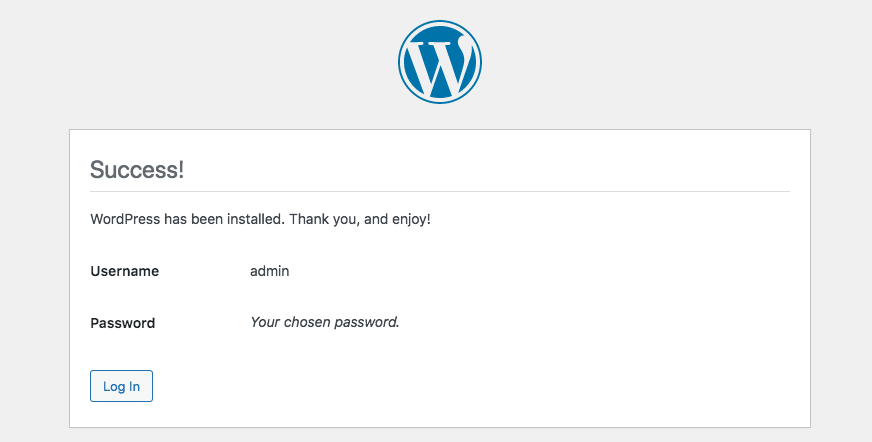
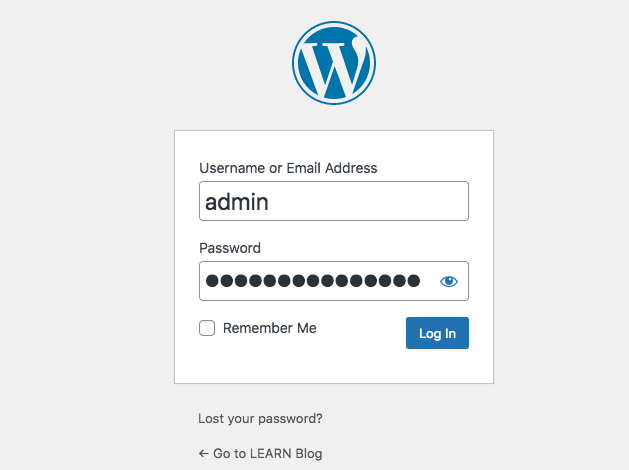
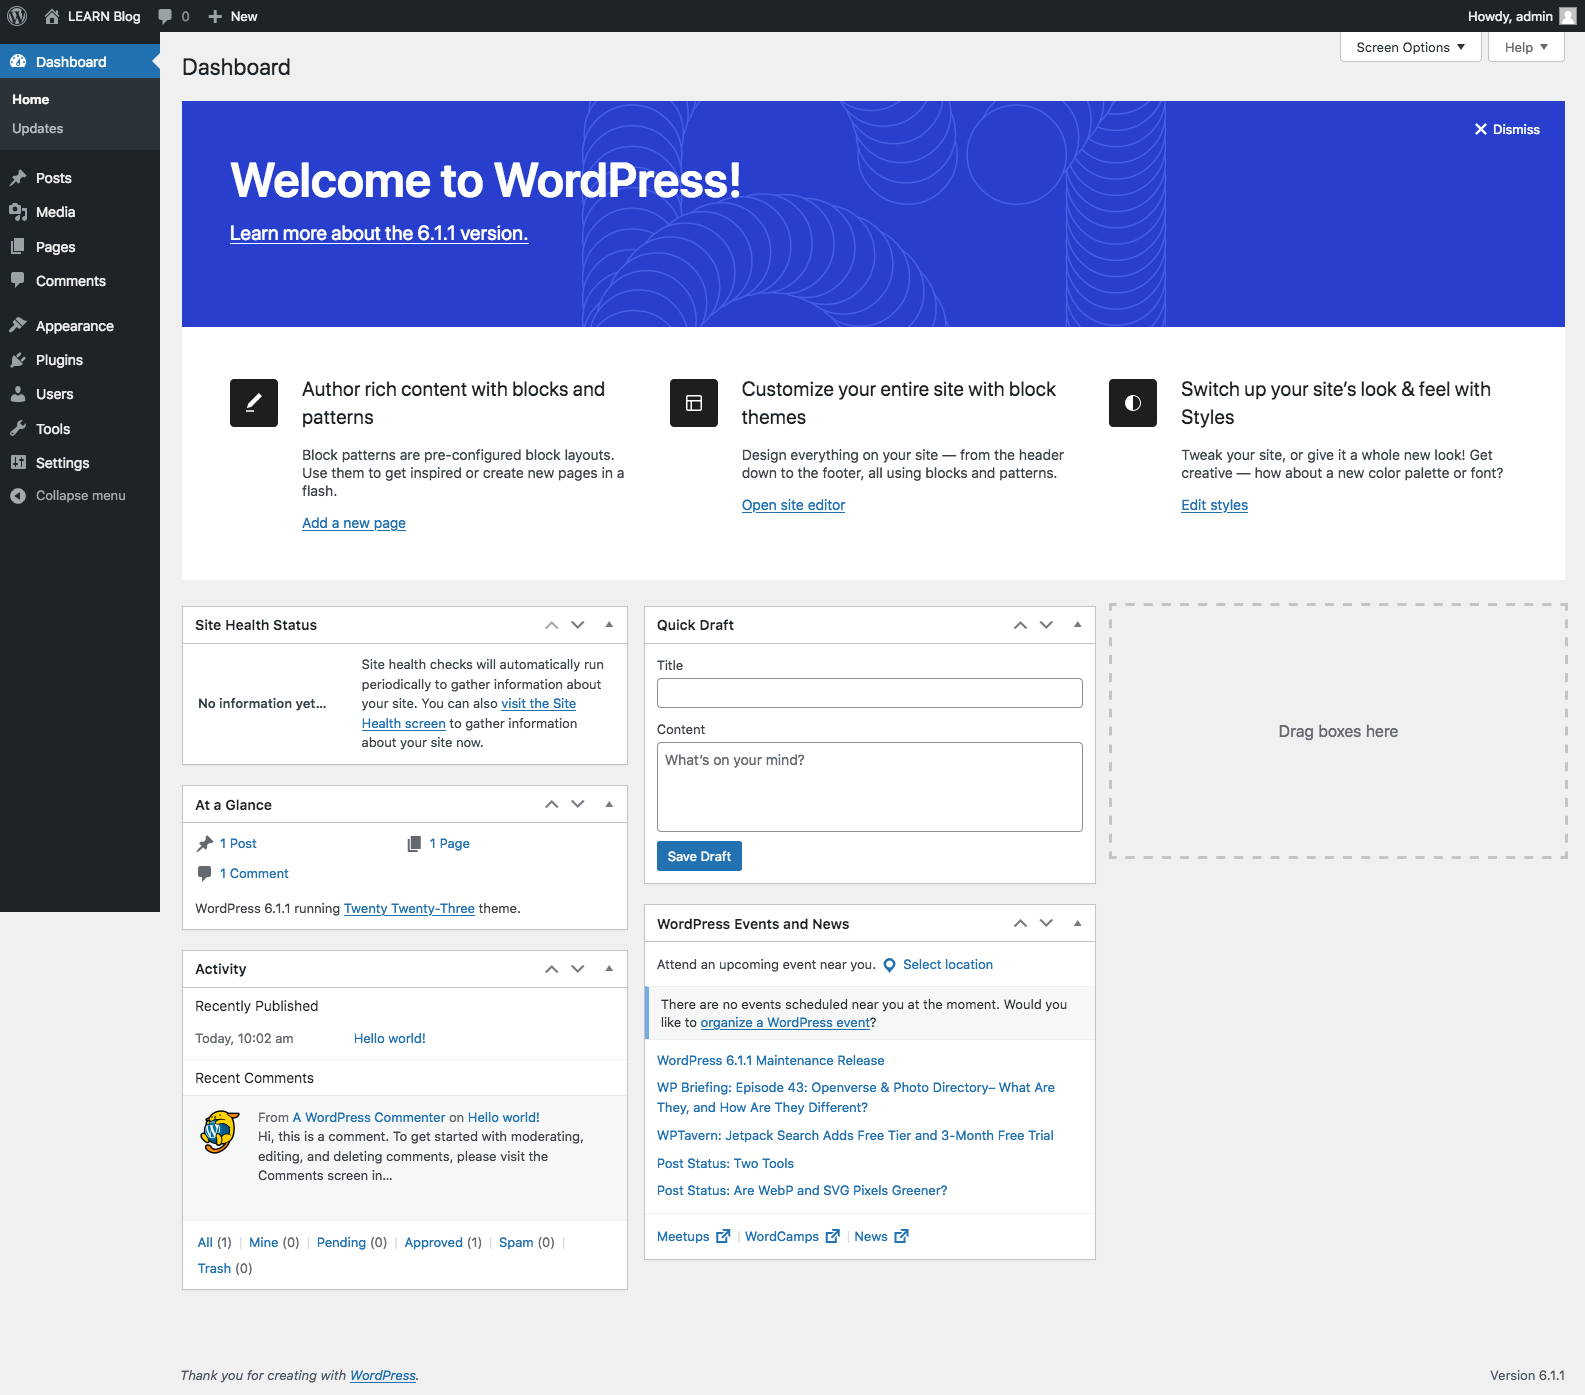
Now the rest of the installation is done through a web installer. To access that visit the url http://lms.your_domain.com/.
In the installation follow the steps as below.


Attachments (29)
- web1.png (195.5 KB ) - added by 4 years ago.
- web2.png (114.4 KB ) - added by 4 years ago.
- web3.png (28.7 KB ) - added by 4 years ago.
- web4.png (24.9 KB ) - added by 4 years ago.
- web5.png (206.2 KB ) - added by 4 years ago.
- web6.png (55.9 KB ) - added by 4 years ago.
- web7.png (116.6 KB ) - added by 4 years ago.
- web8.png (57.7 KB ) - added by 4 years ago.
- web9.png (92.1 KB ) - added by 4 years ago.
- web10.png (80.2 KB ) - added by 4 years ago.
- web11.png (287.8 KB ) - added by 4 years ago.
- web12.png (12.0 KB ) - added by 4 years ago.
- web13.png (63.5 KB ) - added by 4 years ago.
- web14.png (116.4 KB ) - added by 4 years ago.
- web15.png (156.3 KB ) - added by 4 years ago.
- web16.png (122.1 KB ) - added by 4 years ago.
- web17.png (83.4 KB ) - added by 4 years ago.
- web18.png (66.0 KB ) - added by 4 years ago.
- web19.png (118.5 KB ) - added by 4 years ago.
- web20.png (31.0 KB ) - added by 4 years ago.
- web21.png (30.2 KB ) - added by 4 years ago.
- web22.png (336.5 KB ) - added by 4 years ago.
- web23.png (97.0 KB ) - added by 4 years ago.
- web24.png (93.8 KB ) - added by 4 years ago.
- web25.png (30.1 KB ) - added by 4 years ago.
- web33.png (16.2 KB ) - added by 4 years ago.
- web29.png (470.2 KB ) - added by 4 years ago.
- web30.png (31.1 KB ) - added by 4 years ago.
- web31.png (25.2 KB ) - added by 4 years ago.