
Download the Pre-installed Linux Virtual Machine
First for this lab you need a linux server machine. For this please download the pre-installed ubuntu 22.04 server image file from the below URL.
http://192.248.4.120/VMs/ubuntu-22.04-server.ova
Now open the Virtual Box and import this.
Apache Web Server Installation
Once imported start the VM and login to the system using below credentials.
user: user password: Csle@2022
Once logged in you need to update the Ubuntu package repository.
sudo apt update
Then install the web server.
sudo apt install apache2
Check the apache version
apache2 -v
Now visit your server through the IP address. http://server_ip_address.

PHP Installation
Then install PHP and related modules for apache server and MariaDB.
sudo apt install php libapache2-mod-php php-mysql
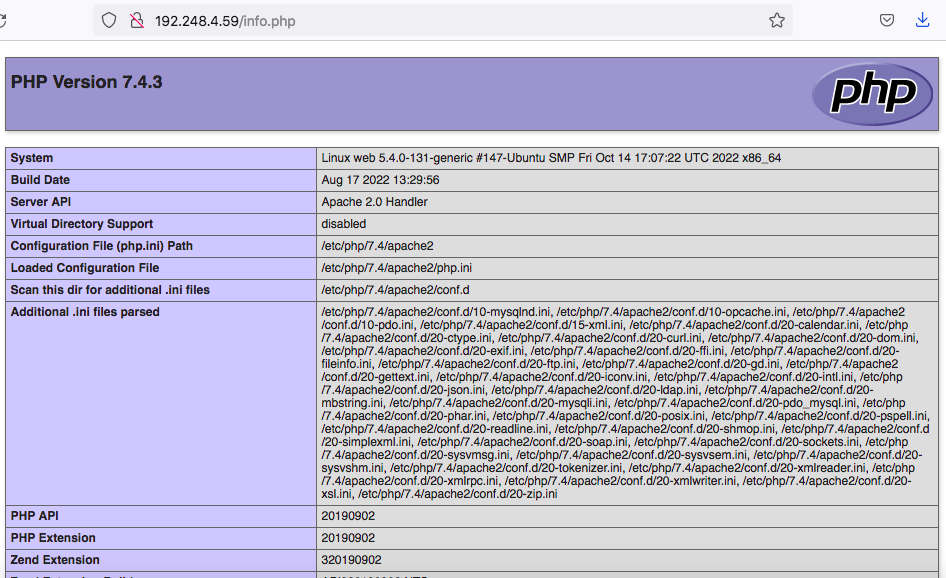
To test that your system is properly configured for PHP, create a PHP script called info.php. Here we will create at the root directory.
sudo nano /var/www/html/info.php
Insert the following command to show the php information.
<?php
phpinfo();
?>
Next go to http://your_IP/info.php URL and you will get page like below,

MariaDB DBMS Installation
Here we will choose MariaDB DBMS as our database application. Install this using below command.
sudo apt install mariadb-server mariadb-client
Once installed check the version,
mysql --version
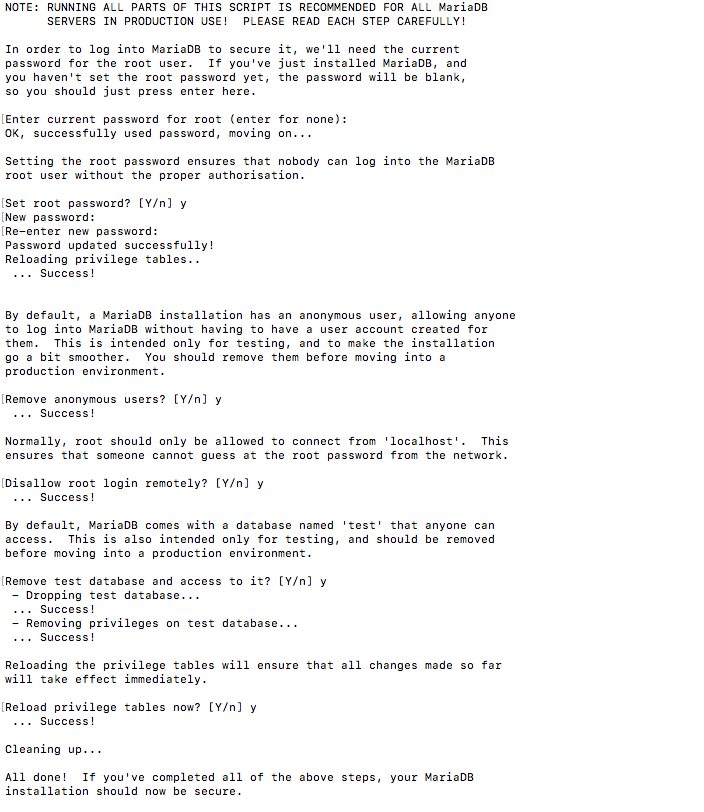
For mysql there is a script that strengthen the mariaDB server security. It is a series of yes no questions which removes initial weaknesses of the server.
To execute the scripts,
sudo mysql_secure_installation
NOTE: RUNNING ALL PARTS OF THIS SCRIPT IS RECOMMENDED FOR ALL MariaDB
      SERVERS IN PRODUCTION USE!  PLEASE READ EACH STEP CAREFULLY!

In order to log into MariaDB to secure it, we'll need the current
password for the root user. If you've just installed MariaDB, and
haven't set the root password yet, you should just press enter here.

Enter current password for root (enter for none):
OK, successfully used password, moving on...

Setting the root password or using the unix_socket ensures that nobody
can log into the MariaDB root user without the proper authorisation.

You already have your root account protected, so you can safely answer 'n'.

Switch to unix_socket authentication [Y/n] n
 ... skipping.

You already have your root account protected, so you can safely answer 'n'.

Change the root password? [Y/n] y
New password:
Re-enter new password:
Password updated successfully!
Reloading privilege tables..
 ... Success!


By default, a MariaDB installation has an anonymous user, allowing anyone
to log into MariaDB without having to have a user account created for
them.  This is intended only for testing, and to make the installation
go a bit smoother.  You should remove them before moving into a
production environment.

Remove anonymous users? [Y/n] y
 ... Success!

Normally, root should only be allowed to connect from 'localhost'.  This
ensures that someone cannot guess at the root password from the network.

Disallow root login remotely? [Y/n] y
 ... Success!

By default, MariaDB comes with a database named 'test' that anyone can
access.  This is also intended only for testing, and should be removed
before moving into a production environment.

Remove test database and access to it? [Y/n] y
 - Dropping test database...
 ... Success!
 - Removing privileges on test database...
 ... Success!

Reloading the privilege tables will ensure that all changes made so far
will take effect immediately.

Reload privilege tables now? [Y/n] y
 ... Success!

Cleaning up...

All done!  If you've completed all of the above steps, your MariaDB
installation should now be secure.

Thanks for using MariaDB!
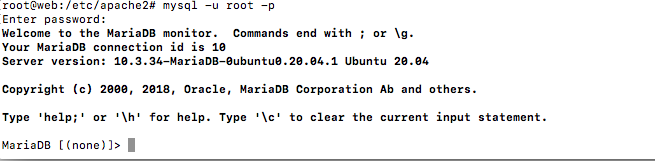
To login MariaDB enter below command and use the password entered above.
mysql -u root -p

To exit type,
exit
Apache Virtual Hosting
Using virtual hosts, one Apache instance can serve multiple websites. Each domain or individual site that is configured using Apache will direct the visitor to a specific directory holding that site’s information. This is done without indicating to the visitor that the same server is also responsible for other sites.
Note: Before creating a virtual host for a web site domain, the particular domain or subdomain should be created. For this please contact your domain manager of your institutional IT department or relevant domain company. Then this domain should be assigned a DNS entry (A or AAAA record) to work on a web browser. In our case DNS entry should be pointed to your server IP.
Presuming you meet the prerequisites below will be the steps to create virtual hosts.
First you need to create a appropriate directory structure for each website hosted under each domain. By default root web directory in a Ubuntu system will be /var/www/html. For our setup we will use below directory structure for each site.
web site for domain 1 - /var/www/web.your_domain.com/public_html
web site for domain 2 - /var/www/wp.your_domain.com/public_html
web site for domain 3 - /var/www/lms.your_domain.com/public_html
In our example we hope to create three subdomains called web,wp and lms. So the full domain names will be web.your_domain.com, wp.your_domain.com and lms.your_domain.com respectively. Use these commands, with your own domain names, to create your directories:
sudo mkdir -p /var/www/web.your_domain.com/public_html
sudo mkdir -p /var/www/wp.your_domain.com/public_html
sudo mkdir -p /var/www/lms.your_domain.com/public_html
For the web subdomain we will later create dummy a web site with just a single web page. In the wp subdomain we will install wordpress which is a content management system. We are going to install moodle as well under the lms subdomain.
Now we are done with creating web site directories. Now we need to do the actual apache server configurations for the virtual hosting.
On Ubuntu systems, Apache Virtual Hosts configuration files are located in /etc/apache2/sites-available directory. They can be enabled by creating symbolic links to the /etc/apache2/sites-enabled directory, which Apache read during the startup. Here we need to create a seperate configuration file for each domain/sub-domain as below.
sudo nano /etc/apache2/sites-available/web.your_domain.com.conf
And add the below configurations,
<VirtualHost *:80>
    ServerName web.your_domain.com
    ServerAlias web.your_domain.com
    ServerAdmin webmaster@your_domain.com
    DocumentRoot /var/www/web.your_domain.com/public_html

    <Directory /var/www/web.your_domain.com/public_html>
        Options -Indexes +FollowSymLinks
    </Directory>

    ErrorLog ${APACHE_LOG_DIR}/web.your_domain.com-error.log
    CustomLog ${APACHE_LOG_DIR}/web.your_domain.com-access.log combined
</VirtualHost>
Similarly do the necessary configurations for the sub-domain wp.
sudo nano /etc/apache2/sites-available/wp.your_domain.com.conf
<VirtualHost *:80>
    ServerName wp.your_domain.com
    ServerAlias wp.your_domain.com
    ServerAdmin webmaster@wp.your_domain.com
    DocumentRoot /var/www/wp.your_domain.com/public_html

    <Directory /var/www/wp.your_domain.com/public_html>
        Options -Indexes +FollowSymLinks
    </Directory>

    ErrorLog ${APACHE_LOG_DIR}/wp.your_domain.com-error.log
    CustomLog ${APACHE_LOG_DIR}/wp.your_domain.com-access.log combined
</VirtualHost>
We are going to host a moodle site too. Add a configuration file as below.
sudo nano /etc/apache2/sites-available/lms.your_domain.com.conf
<VirtualHost *:80>
    ServerName lms.your_domain.com
    ServerAlias lms.your_domain.com
    ServerAdmin webmaster@lms.your_domain.com
    DocumentRoot /var/www/lms.your_domain.com/public_html

    <Directory /var/www/lms.your_domain.com/public_html>
        Options -Indexes +FollowSymLinks
    </Directory>

    ErrorLog ${APACHE_LOG_DIR}/lms.your_domain.com-error.log
    CustomLog ${APACHE_LOG_DIR}/lms.your_domain.com-access.log combined
</VirtualHost>
Once we do the configurations we have to enable the created sites as below,
sudo a2ensite web.your_domain.com
sudo a2ensite wp.your_domain.com
sudo a2ensite lms.your_domain.com
Once done, test the configuration for any syntax errors with.
sudo apachectl configtest
Restart the Apache service for the changes to take effect.
sudo systemctl restart apache2
Now we are done with configurations of apache virtual hosting.
Registering your Domain Names and DNS configuration for your Domains
As you know we can't use any preferred domain for our services, websites as we wanted to do. First we have to register them in a relevant domain registry where usually we have to pay. In case you want a ac.lk sub domain you have to get it through LEARN. Once you get your domains registered they are to be assigned IP addresses so that they can be used in your services for hosting services, websites etc. Assigning of IP addresses to the domain names is done through DNS lookup service. This DNS service is also can be accomplished through the relevant domain registry or web hosting service. For the ac.lk domain, LEARN or your institutional network/system administrator will do that for you.
Receiving domains costs or need the approval from the System Administrator. Hence, for this workshop we can use hosts file in your computer operating system to create any arbitrary domain for your self. Hosts file will override any public DNS but only for your own computer.
Add domains to the hosts file in Windows
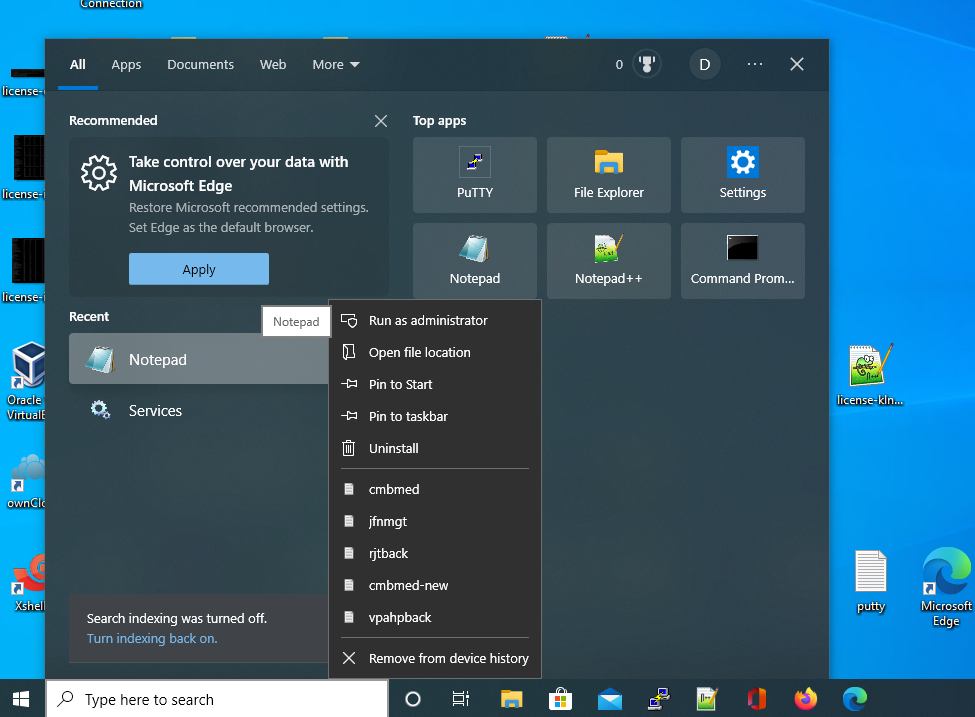
To add domains to the hosts file in Windows please Run the Notepad as the Adminitrator as below.

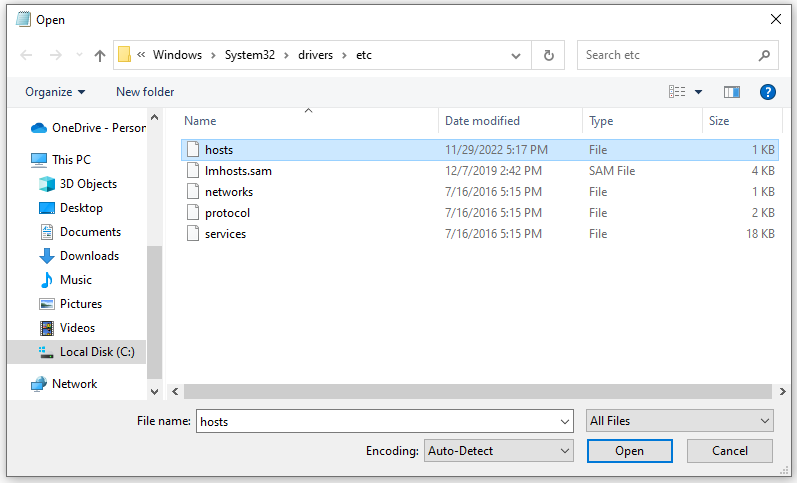
Then go to /Windows/System32/drivers/etc directory. If you cannot view hosts file please select All Files from the drop down list at bottom. Now open hosts file.

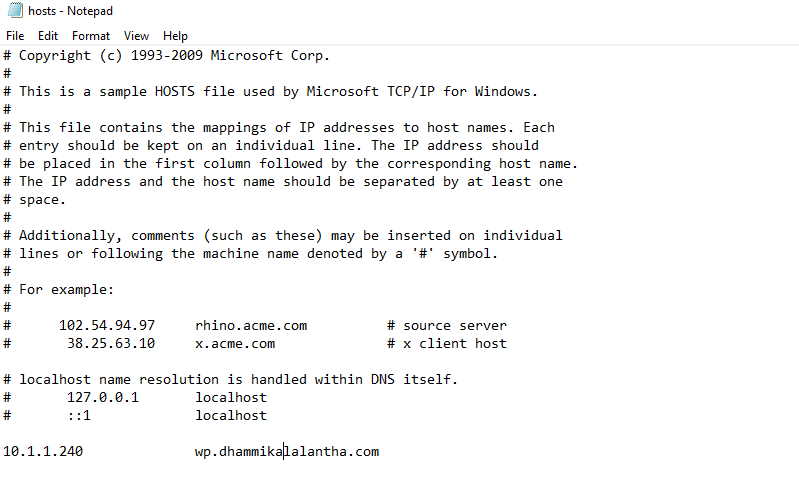
Now as below edit the hosts file and add you domains with the IP address of your guest VM.

Add domains to the hosts file in Linux
To add domains to the hosts file edit the hosts file as below. Once done save it.
nano /etc/hosts


127.0.0.1 localhost
127.0.1.1 web
10.1.1.240 web.your_domain.com
10.1.1.240 wp.your_domain.com
10.1.1.240 lms.your_domain.com
10.1.1.240 xy.your_2nd_domain.com
Now you should be able to access the virtual hosts by their domain names within the computer.
To check it you can ping to the domain or browse from the web browser.
ping wp.your_domain.com
ping xy.your_2nd_domain.com
Installing Web sites/applications
Installing a dummy web site
Hope in someway you registered and setup DNS for the domain which you are going to use in your apache server. Now from any network you are able access your apache server hosted web sites through own domain. But we are not completely done. We have to install web sites in your server. Here we will see how to do that. We are going to install a static web site, Wordpress and Moodle in our servers.
For the web sub-domain we will create a dummy web site with just a single webpage. Create a file as below,
sudo nano /var/www/web.your_domain/public_html/index.html
<!DOCTYPE html>
<html lang="en" dir="ltr">
  <head>
    <meta charset="utf-8">
    <title>Welcome to WEB</title>
  </head>
  <body>
    <h1>Success! WEB home page!</h1>
  </body>
</html>
Once created with the site we have to change ownership of the directories to the web server user.
sudo chown -R www-data: /var/www/*
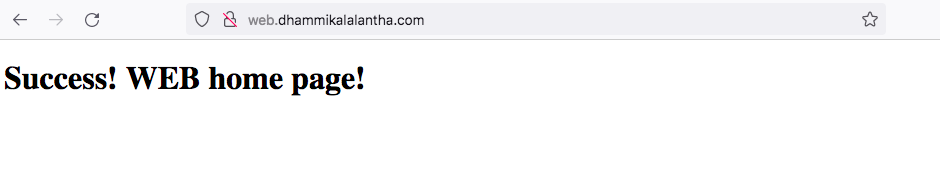
Now that you have your site created and you can test your site by going to the domains in your web browser. Below will be the output for the site we created.

Also check the other site created.
Installing Wordpress CMS
WordPress is a free and open-source content management system (CMS) written in PHP language. Features include a plugin architecture and a template system, referred to within WordPress as "Themes". WordPress was originally created as a blog-publishing system but has evolved to support other web content types including more traditional mailing lists and Internet fora, media galleries, membership sites, learning management systems (LMS) and online stores.
If you are hoping to start a blog or any other site WordPress would a most convenient and suitable choice. Then let's see how we can install WordPress in your own server.
WordPress is written using PHP and it uses MySQL/MariaDB for storing its data we can install it in a LAMP stack environment. So as the first step we are going to create a database in MySQL/MariaDB as below.
First login the MySQL server,
mysql -u root -p
Then create the database.
CREATE DATABASE wordpress DEFAULT CHARACTER SET utf8 COLLATE utf8_unicode_ci;
Next you need to grant permissions to user called wordpressuser to do any operations on the database as below.
grant all privileges on wordpress.* to 'wordpressuser'@'localhost' IDENTIFIED BY 'password_here';
SET PASSWORD = PASSWORD('password_here');
Then you have to set the authentication plugin to mysql_native_password plugin which will enable to login using the above created username and password.
ALTER USER wordpressuser@localhost IDENTIFIED VIA mysql_native_password;
Lastly, flush privileges for these changes to take effect immediately. Then exit the mysql server.
FLUSH PRIVILEGES;
EXIT;
Install additional PHP extensions
WordPress needs additional PHP extensions for its plugins to work. First, let’s update and install the necessary extensions using the following commands. Next for the extensions to start working, restart the Apache server.
sudo apt update
sudo apt install php-curl php-gd php-mbstring php-xml php-xmlrpc php-soap php-intl php-zip
sudo systemctl restart apache2
Allow Apache’s .htaccess to Handle Override and Rewrite Rules on the WordPress Site
In Apache, .htaccess files provide a way to make configuration changes on a per-directory basis. To Enable this you have to go the virtual host configuration file of the WordPress site and add the 'AllowOverride all' directive within the Directory block pointing to the website’s document root.
sudo nano /etc/apache2/sites-available/wp.your_domain.com.conf
<VirtualHost *:80>
    ServerName wp.your_domain.com
    ServerAlias wp.your_domain.com
    ServerAdmin webmaster@wp.your_domain.com
    DocumentRoot /var/www/wp.your_domain.com/public_html

    <Directory /var/www/wp.your_domain.com/public_html>
        Options -Indexes +FollowSymLinks
        AllowOverride All
    </Directory>

    ErrorLog ${APACHE_LOG_DIR}/wp.your_domain.com-error.log
    CustomLog ${APACHE_LOG_DIR}/wp.your_domain.com-access.log combined
</VirtualHost>
Then enable the Apache rewrite module.
sudo a2enmod rewrite
Next verify the configuration changes for the Syntax errors and restart Apache to make changes effective.
sudo apache2ctl configtest
sudo systemctl restart apache2
Now that our server software is configured, we can download and set up WordPress. For security reasons in particular, it is always recommended to get the latest version of WordPress from their site. In this lab to make easy for you we have already downloaded the WordPress. Now please go to the directory below for continuing the WordPress installation.
cd /opt/softwares
Extract the compressed file
sudo tar xzvf latest.tar.gz
To enable Wordpress modify the directory content through the .htaccess file let's create the required file within the directory.
sudo touch wordpress/.htaccess
Then let's create a initial configuration file from a sample configuration given.
sudo cp wordpress/wp-config-sample.php wordpress/wp-config.php
We will also create the upgrade directory for WordPress as below.
sudo mkdir -p wordpress/wp-content/upgrade
Now we will copy entire content to the document root of WordPress site.
sudo cp -a wordpress/. /var/www/wp.your_domain.com/public_html/
Now we will set the ownership settings of the WordPress directory to the Apache user.
sudo chown -R www-data:www-data /var/www/wp.your_domain.com
Next we will set correct directory and file permissions for document root.
cd /var/www

sudo find wp.your_domain.com/public_html/  -type d -exec chmod 750 {} \;
sudo find wp.your_domain.com/public_html/  -type f -exec chmod 640 {} \;
Now we are going to modify the configuration file we have added earlier. Here we will configure WordPress security keys and database connection settings.
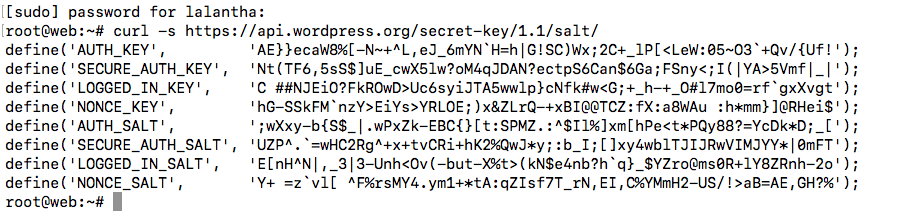
WordPress uses security keys to protect your website against hacking attempts. WordPress security keys are an encryption tool that protects login information by making it harder to decode. WordPress provides a secure generator for these keys to generate them use the below command.
curl -s https://api.wordpress.org/secret-key/1.1/salt/

These lines can be directly copied into the WordPress configuration file. Open configuration file and replace the existing sample keys with them.
sudo nano /var/www/wp.your_domain.com/public_html/wp-config.php
Now we will add the database connection settings as below.
// ** MySQL settings - You can get this info from your web host ** //
/** The name of the database for WordPress */
define( 'DB_NAME', 'wordpress' );

/** MySQL database username */
define( 'DB_USER', 'wordpressuser' );

/** MySQL database password */
define( 'DB_PASSWORD', '********' );

/** MySQL hostname */
define( 'DB_HOST', 'localhost' );

/** Database Charset to use in creating database tables. */
define( 'DB_CHARSET', 'utf8' );

/** The Database Collate type. Don't change this if in doubt. */
define( 'DB_COLLATE', '' );
The other change we need to make is to set the method that WordPress should use to write to the filesystem. Since we’ve given the web server permission to write where it needs to, we can explicitly set the filesystem method to “direct”.
define('FS_METHOD', 'direct');
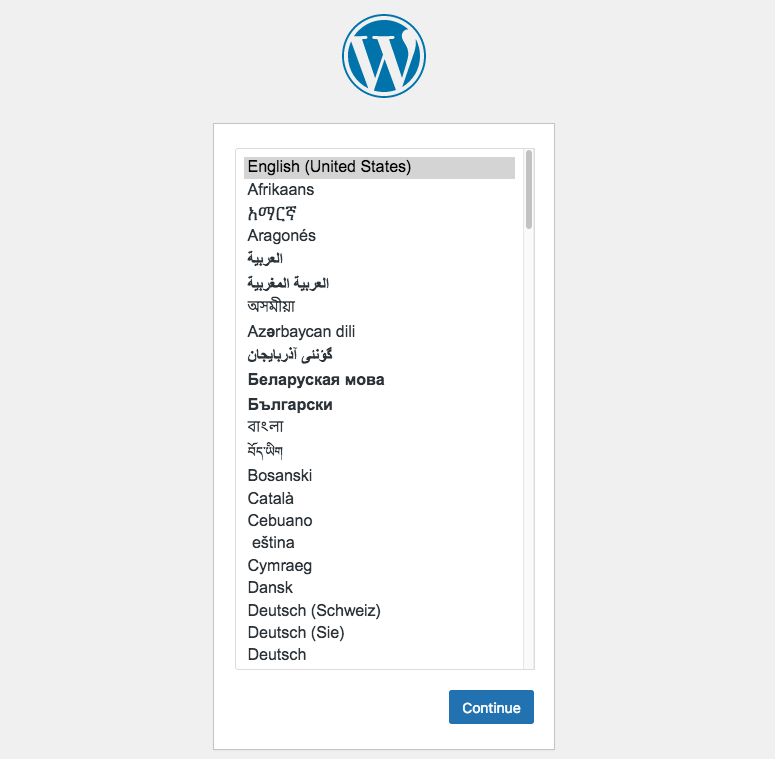
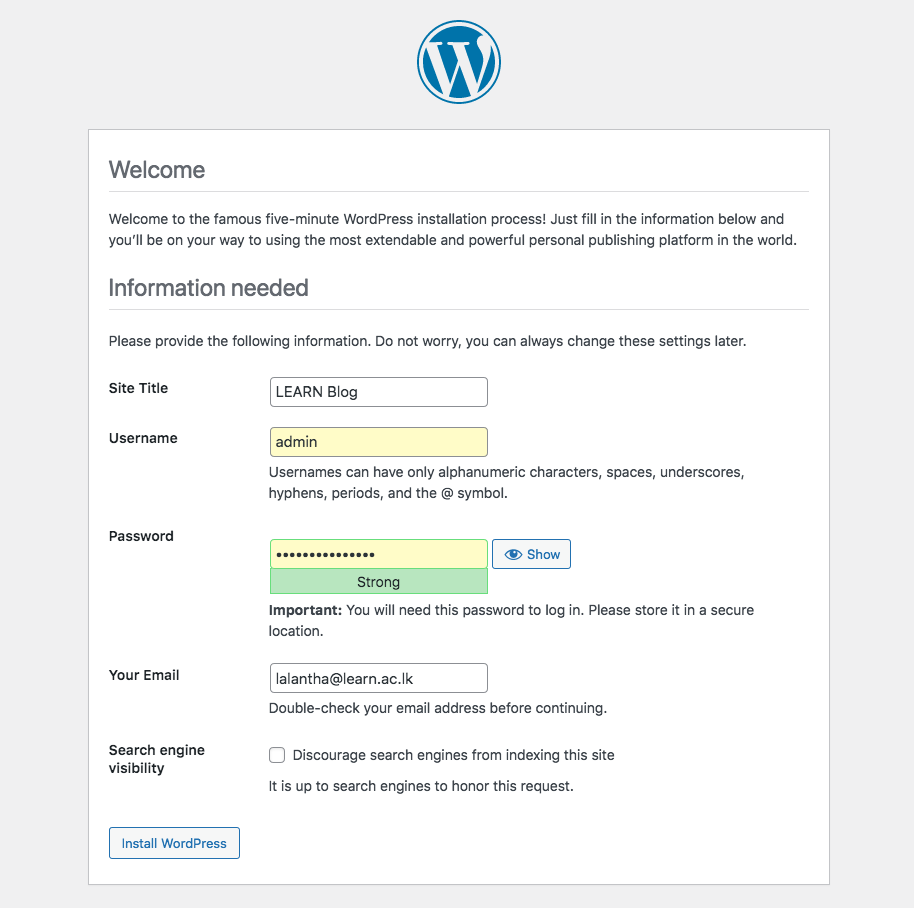
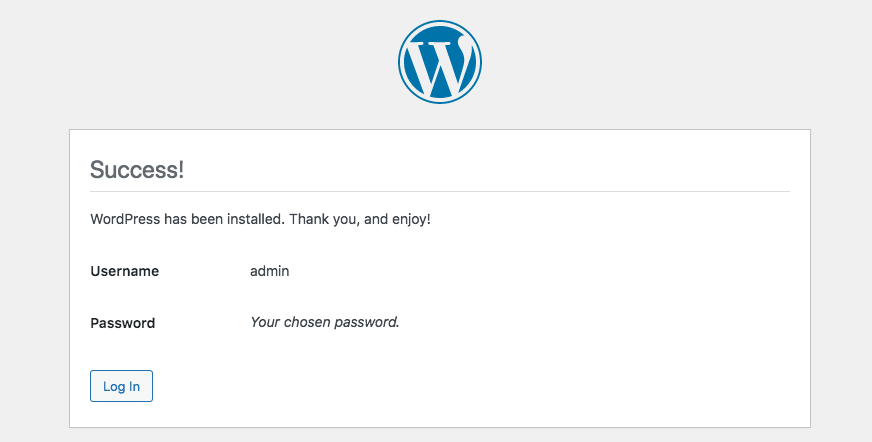
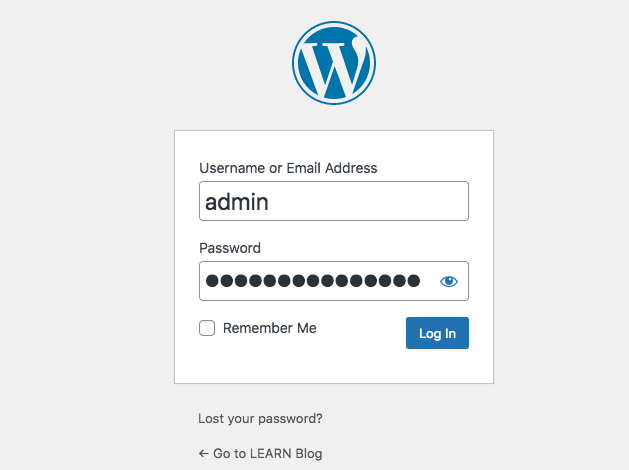
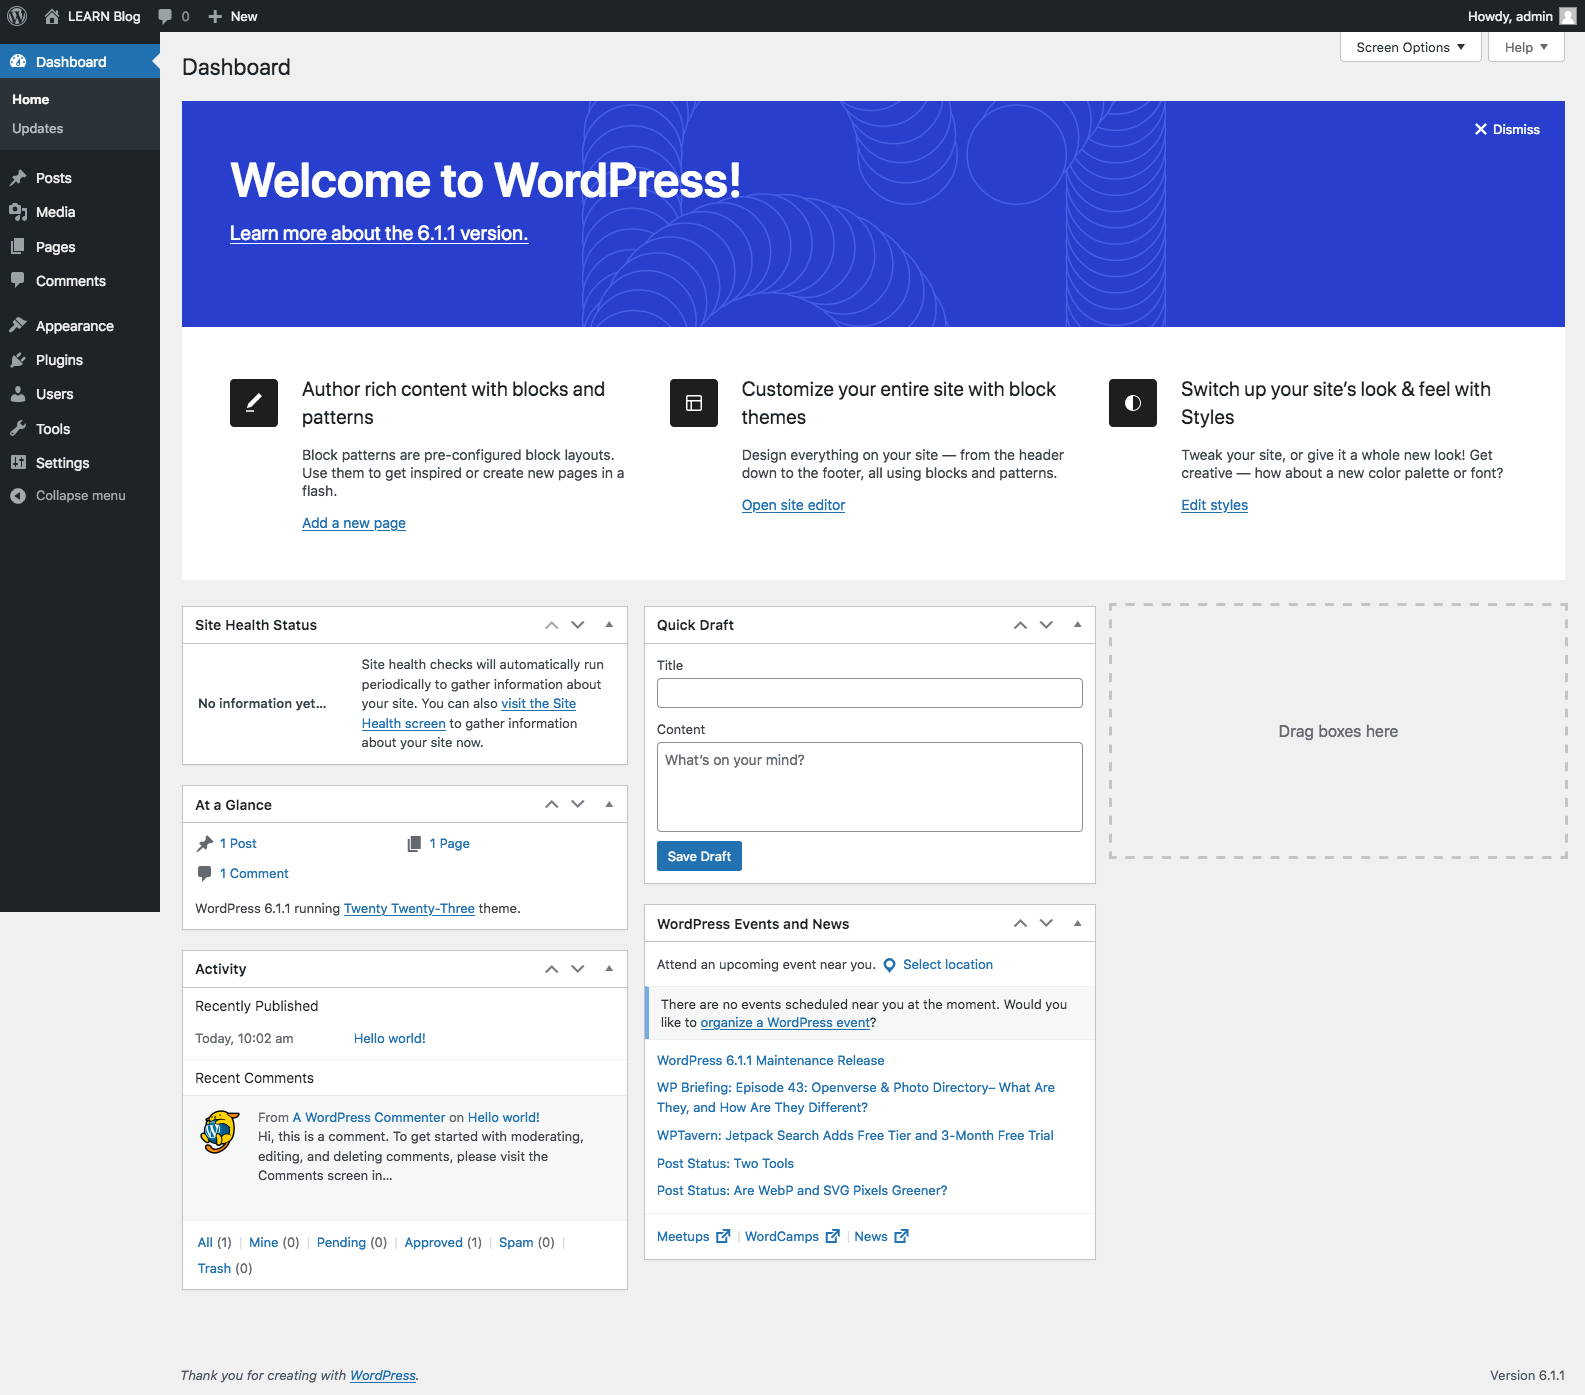
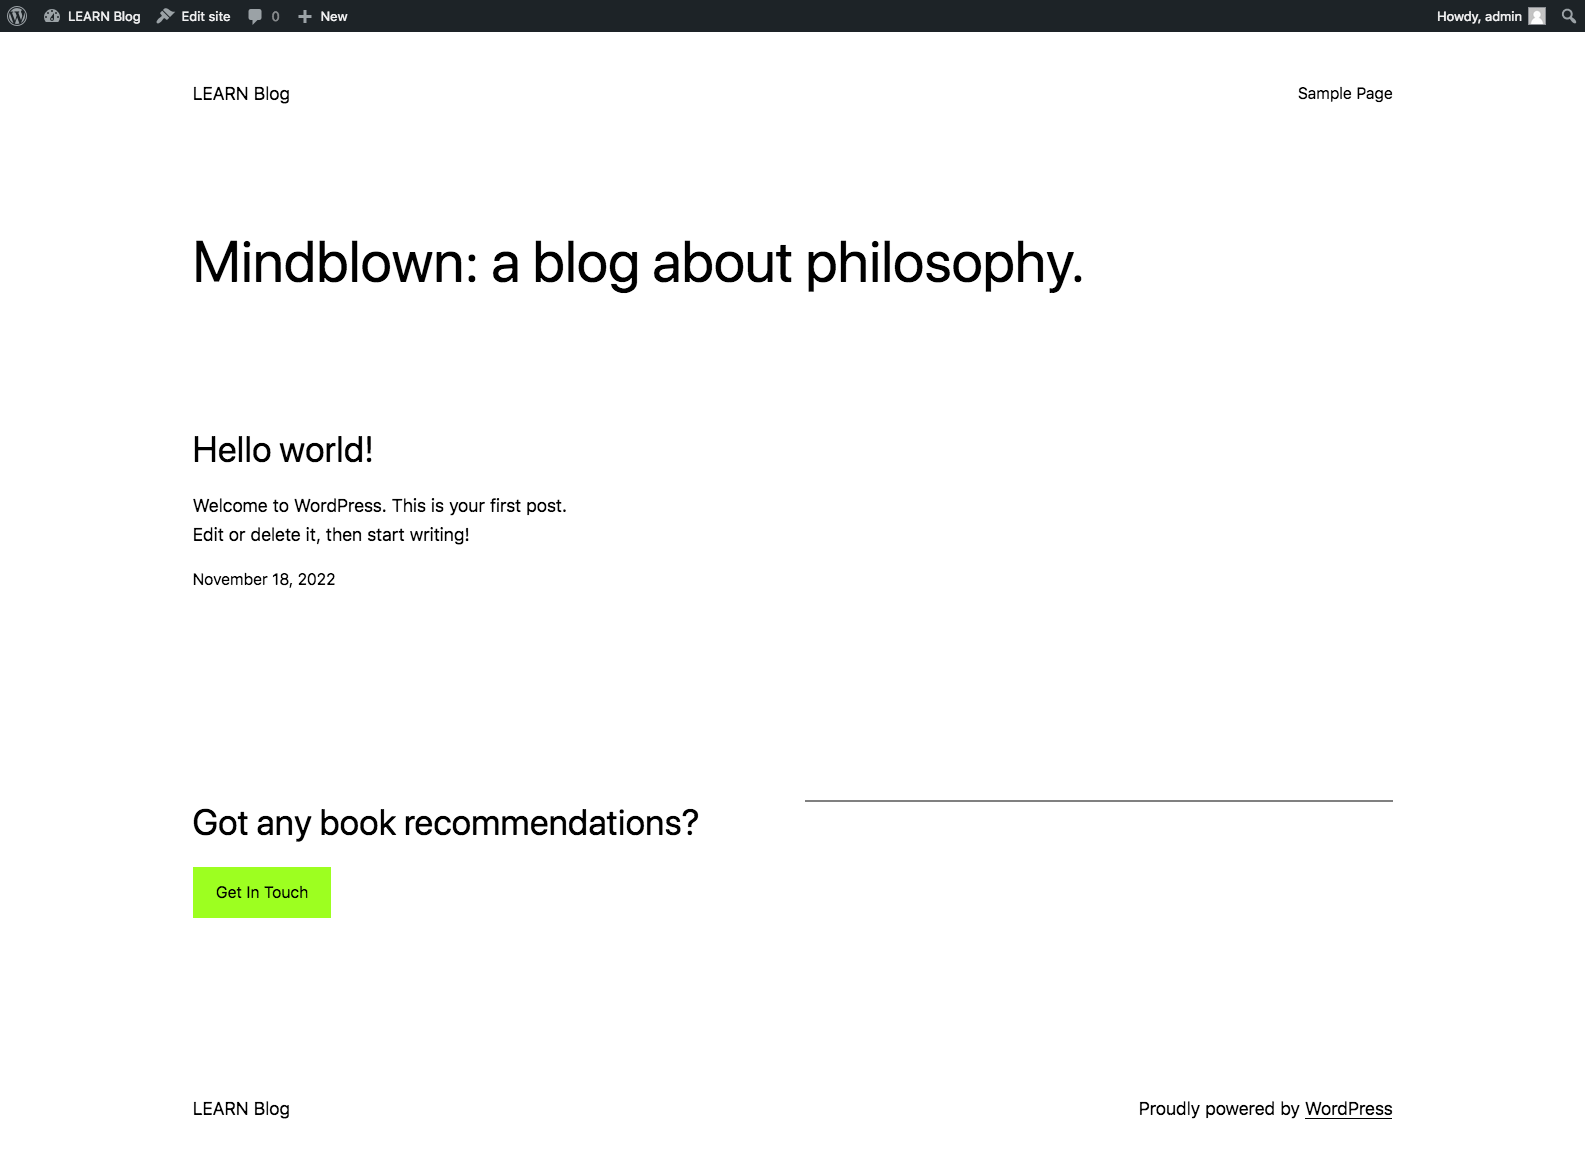
Now we are done with configuration of the WordPress. To begin the installation you have to access the WordPress URL from the web browser. Enter the http://wp.your_domain.com/ on the browser and we need to follow the steps as below.


Moodle Installation
Now we have setup the web server, PHP and database server. Also we have configured virtual hosting. Now we are going to install Moodle under lms sub domain created above. Before installing the Moodle need to install the prerequisites for Moodle. This includes software and PHP modules that support Moodle’s features and Git for installing Moodle and keeping it up to date.
sudo apt install graphviz aspell ghostscript clamav php-pspell php-curl php-gd php-intl php-mysql php-xml php-xmlrpc php-ldap php-zip php-soap php-mbstring
Restart Apache to load the modules.
sudo systemctl restart apache2
Note: You don't need to download the Moodle since we have already downloaded it for you. You can locate it in /opt/softwares directory.
Copy the Moodle directory into the /var/www/lms.your_domain.com/public_html directory. Then, modify the new Moodle directory’s permissions to grant read, execute, and write access to any user.
 sudo cp -R /opt/softwares/moodle/* /var/www/lms.your_domain.com/public_html
 sudo chmod -R 0777 /var/www/lms.your_domain.com/public_html
Then we need to create a directory to hold moodle data in /var/moodledata and make www-data its owner, and modify its permissions to grant all users read, execute, and write access. below will be the steps.
 sudo mkdir /var/moodledata
 sudo chown -R www-data /var/moodledata
 sudo chmod -R 0777 /var/moodledata
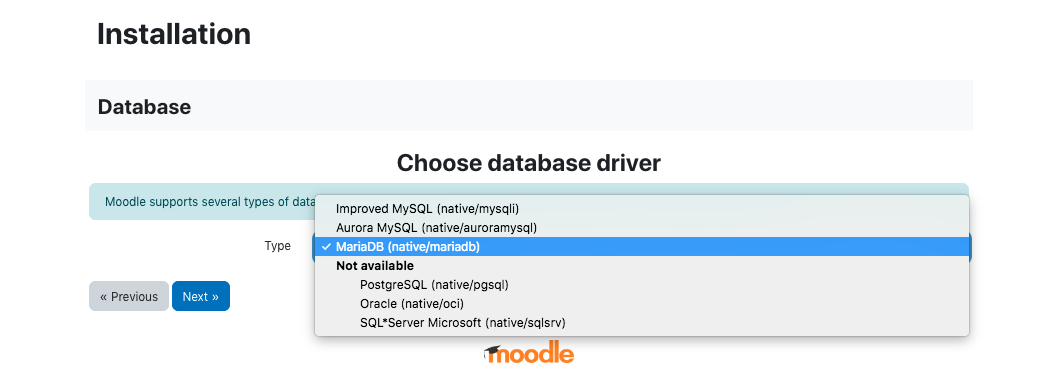
Moodle uses a database which needs to be created in MariaDB in our case. below are the steps to create the database.
First login the database,
sudo mysql -u root -p
Then use the following MySQL command to create a database for Moodle.
CREATE DATABASE moodle DEFAULT CHARACTER SET utf8mb4 COLLATE utf8mb4_unicode_ci;
Next create the user for the database and grant permissions to the database and exit,
create user 'moodledude'@'localhost' IDENTIFIED BY 'passwordformoodledude';
GRANT SELECT,INSERT,UPDATE,DELETE,CREATE,CREATE TEMPORARY TABLES,DROP,INDEX,ALTER ON moodle.* TO 'moodledude'@'localhost';
quit;
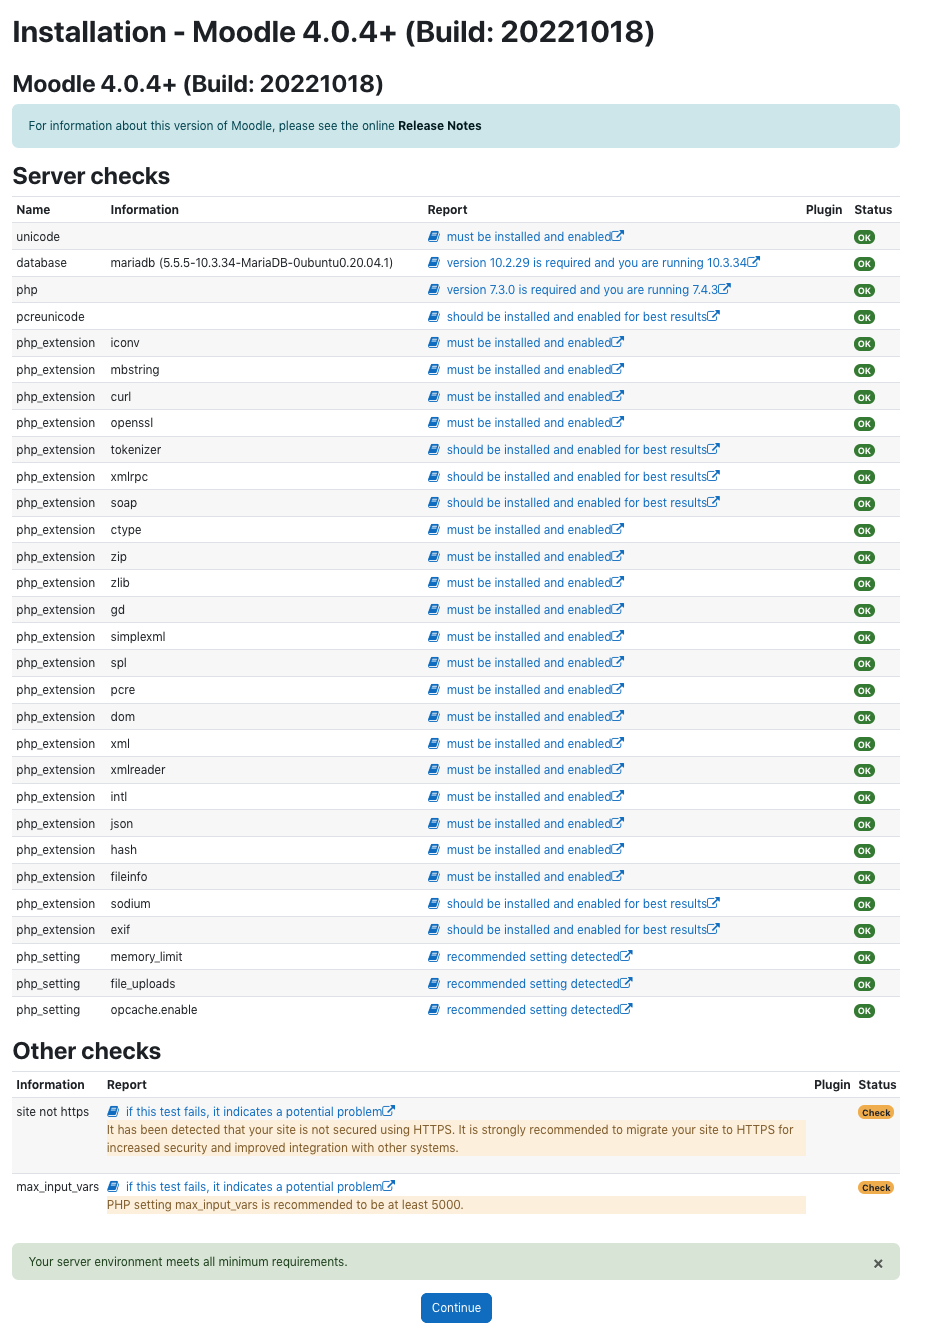
Next you need to change the max_input_vars PHP attribute value to atleast 5000. To change it please edit below file and restart the apache to make it effective.
sudo nano /etc/php/8.1/apache2/php.ini
sudo systemctl restart apache2
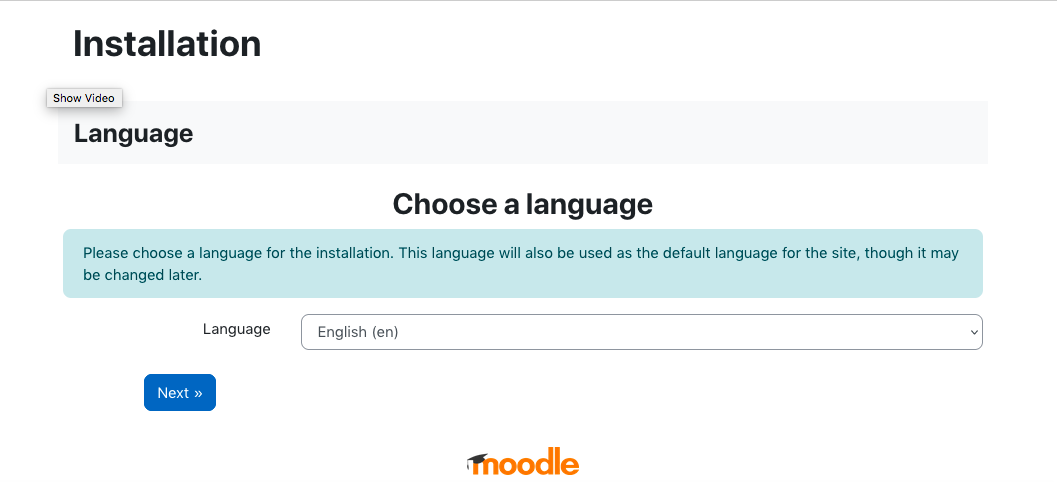
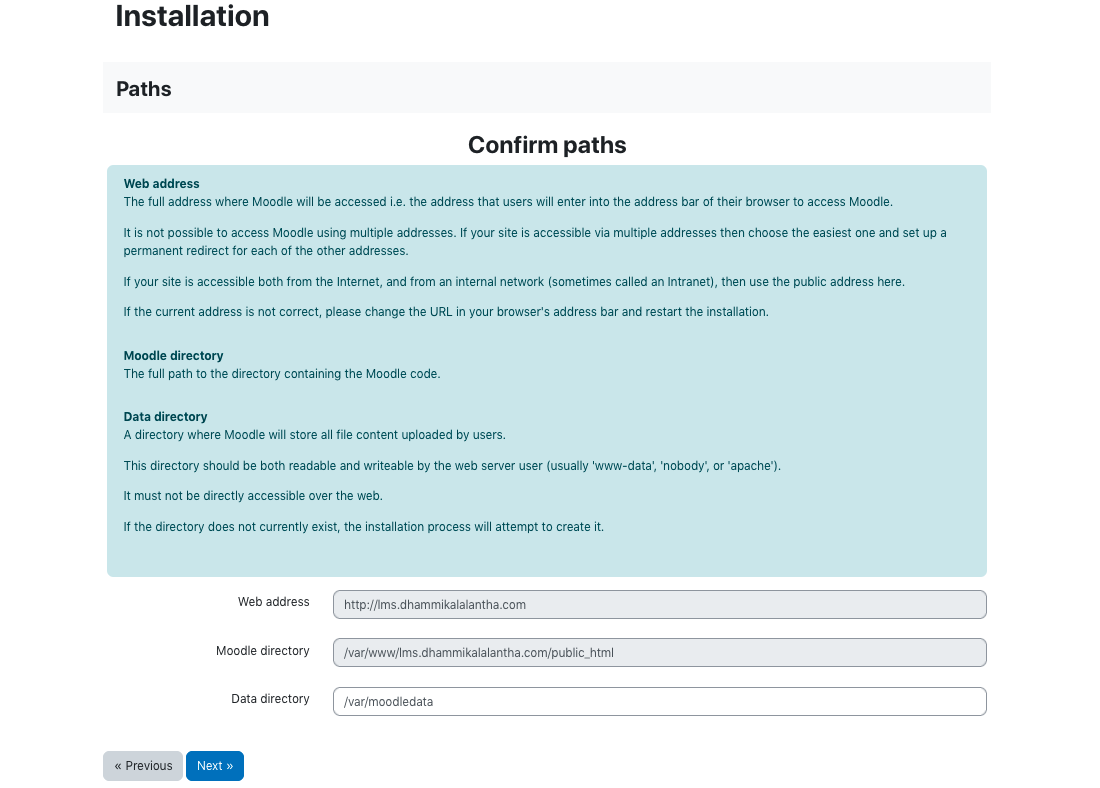
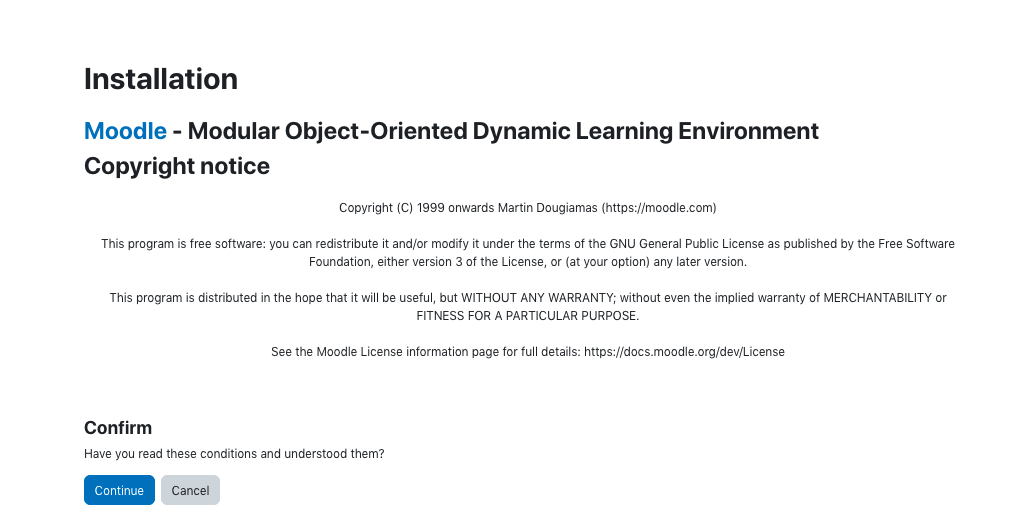
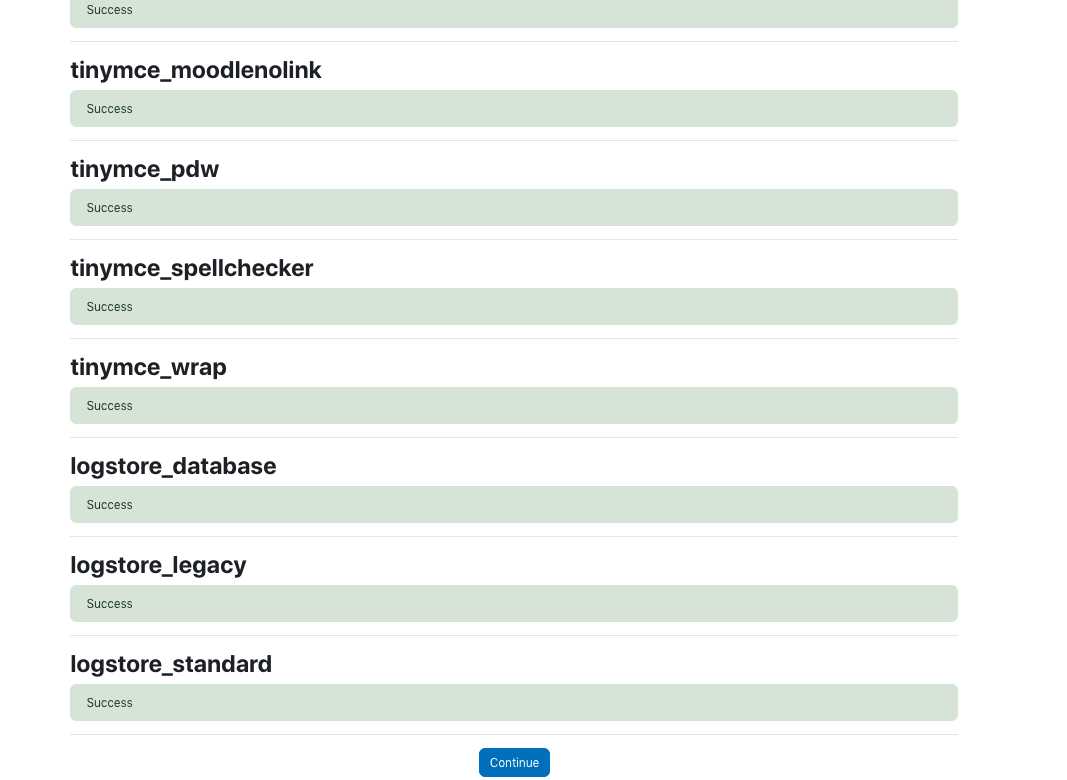
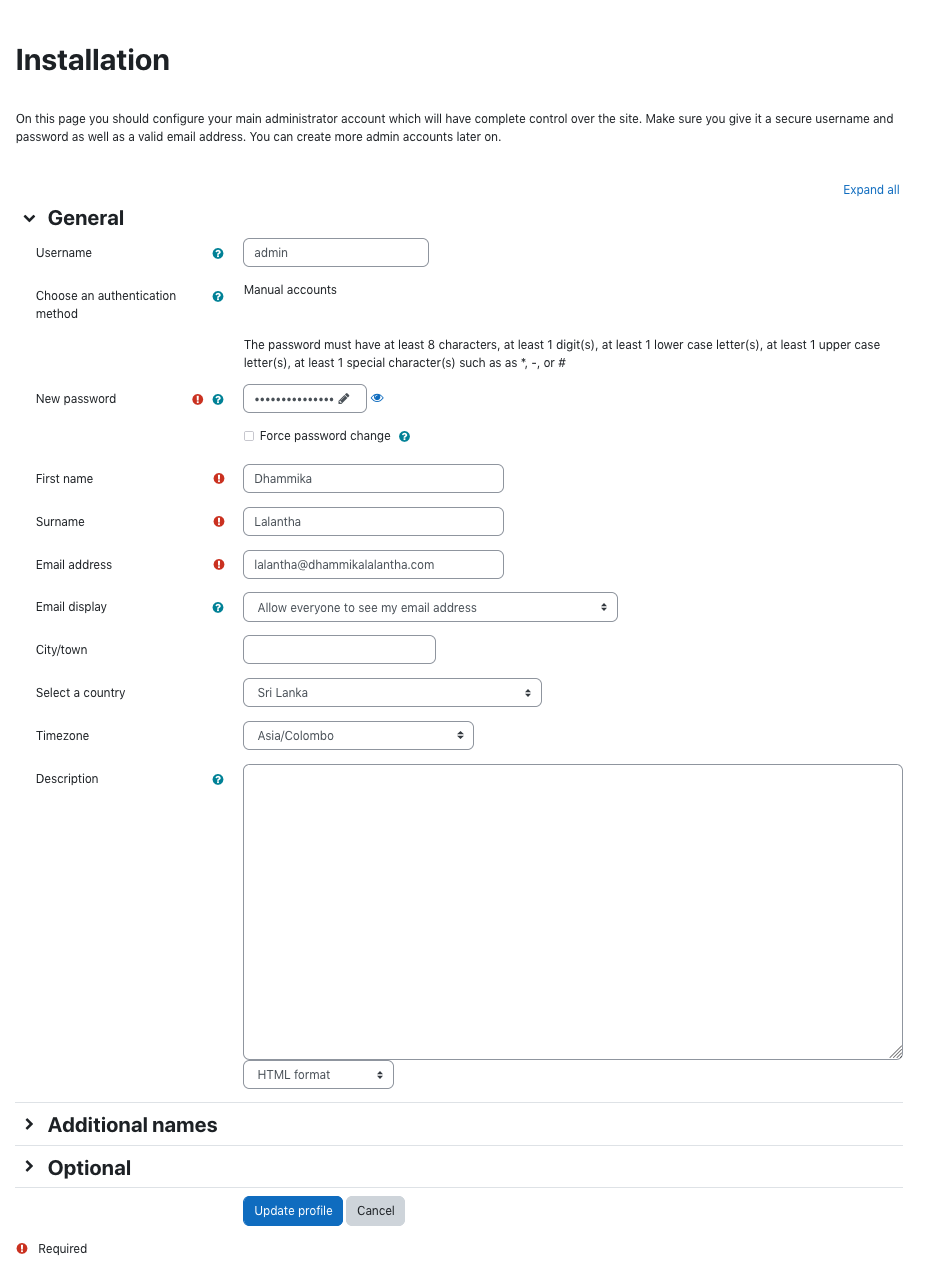
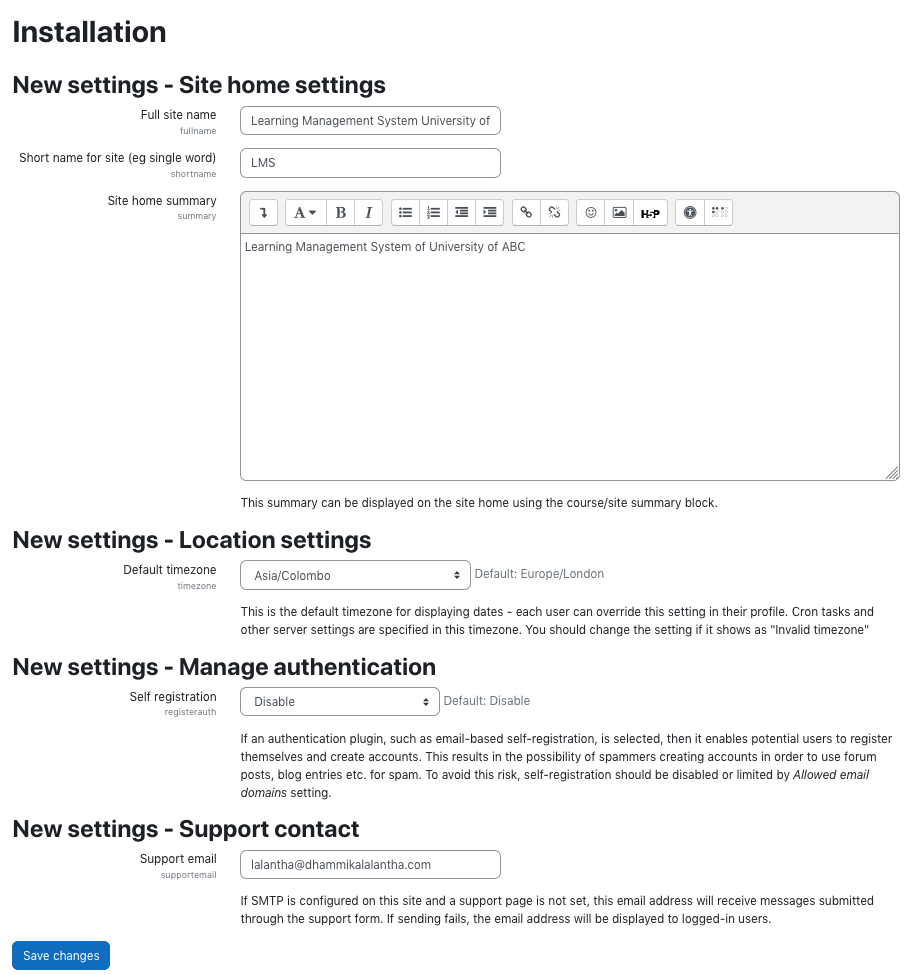
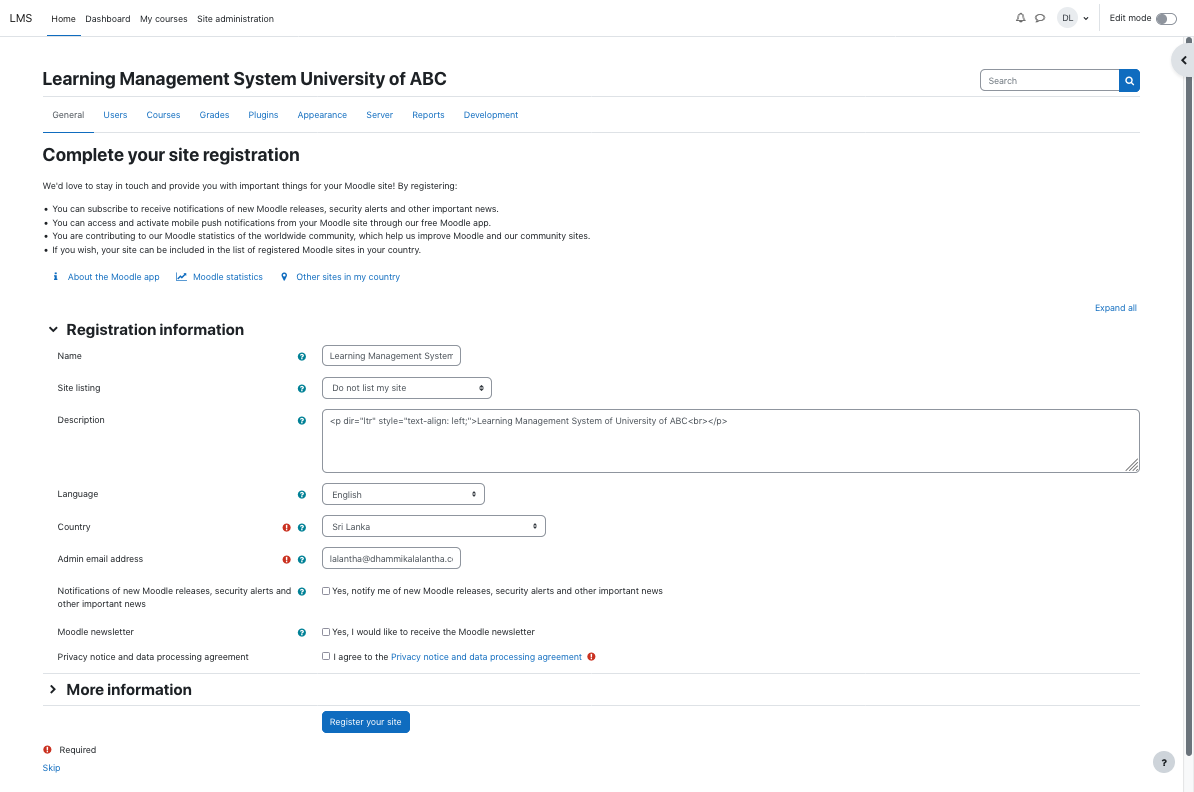
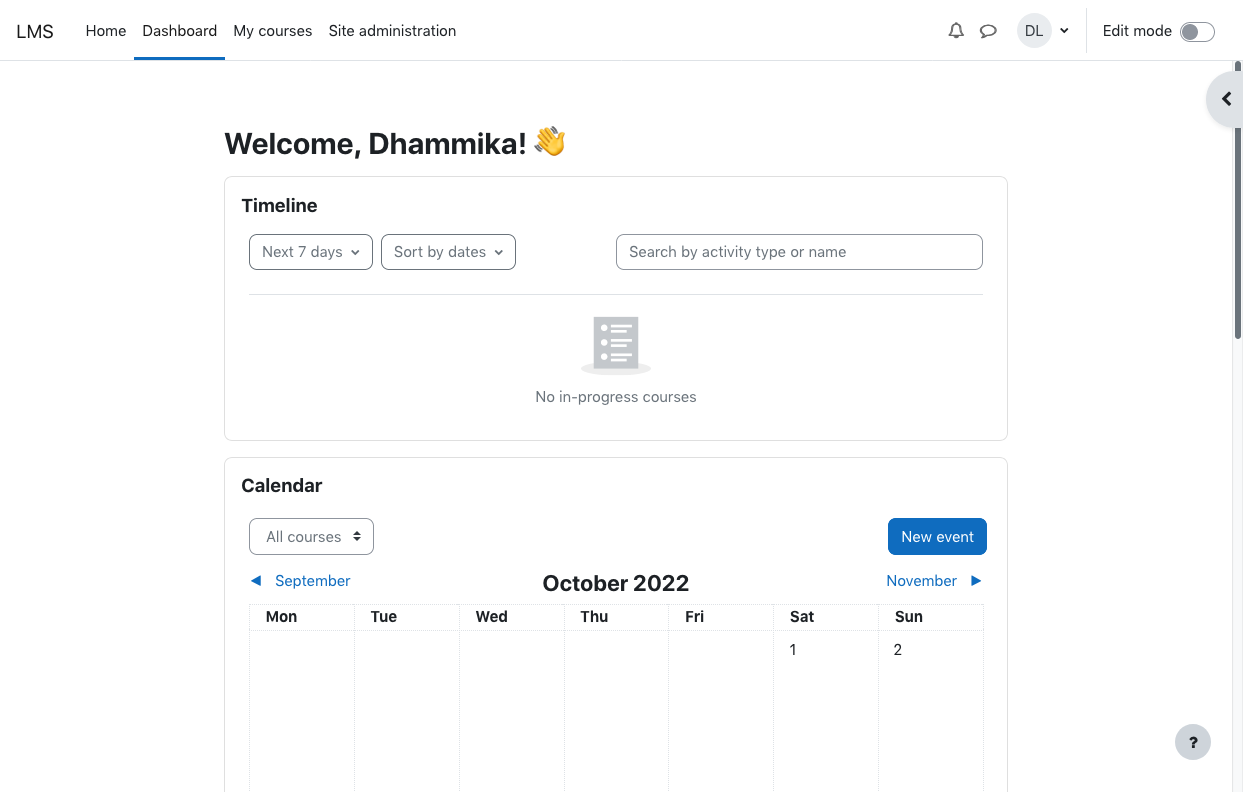
Now the rest of the installation is done through a web installer. To access that visit the url http://lms.your_domain.com/.
In the installation follow the steps as below.


Securing Apache
Securing Apache with Basic Authentication
Apache provides some inbuilt directory level authentication mechanism. Though this is not a most secure authentication method, this could be useful. To do this you need to create .htaccess within the web directory that you need to be password protected. For our lab we will protect our whole web site with this method. So let's create a .htaccess file on the document root.
cd /var/www/web.your_domain.com/public_html
sudo nano .htaccess
And add below,
AuthType Basic
AuthName "Authentication Required"
AuthUserFile "/var/www/web.your_domain.com/.htpasswd"
require valid-user
Now you will add users using the htpasswd utility to a file call .htpasswd. Make sure this file to keep outside the document root.
htpasswd -c /var/www/web.your_domain.com/.htpasswd user
If you need to add another user please avoid the option -c,
htpasswd -c /var/www/web.your_domain.com/.htpasswd user2
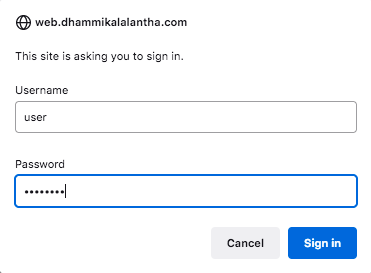
Now refresh the site and you will be asked the password to enter the site.

Secure the Web Sites with Let's Encrypt
To secure web sites we need to install TLS/SSL certificates on the servers. These certificates are normally purchased from certificate vendors. But using Let's Encrypt we can have these certificates freely and easily. Here we will go through the steps to install certificates for your domains.
Let's Encrypt simplifies the process by providing a software client called Certbot, that attempts to automate most of the required steps. So first we need to install the certbot.
sudo apt install certbot python3-certbot-apache
Once install we need to verify that in virtual host configuration we have set the ServerName and ServerAlias directives properly.
sudo nano /etc/apache2/sites-available/wp.your_domain.com.conf

ServerName wp.your_domain.com
ServerAlias wp.your_domain.com
Then we will go ahead with obtaining the certicates using below command.
sudo certbot --apache
In the process it will ask for a valid email address which will be used for renewal notifications and security notices. Let's provide it.
Saving debug log to /var/log/letsencrypt/letsencrypt.log
Plugins selected: Authenticator apache, Installer apache
Enter email address (used for urgent renewal and security notices) (Enter 'c' to
cancel): lalantha@learn.ac.lk
You will then be prompted to confirm if you agree to Let’s Encrypt terms of service. You can confirm by pressing A and then ENTER.
- - - - - - - - - - - - - - - - - - - - - - - - - - - - - - - - - - - - - - - -
Please read the Terms of Service at
https://letsencrypt.org/documents/LE-SA-v1.3-September-21-2022.pdf. You must
agree in order to register with the ACME server at
https://acme-v02.api.letsencrypt.org/directory
- - - - - - - - - - - - - - - - - - - - - - - - - - - - - - - - - - - - - - - -
(A)gree/(C)ancel: A
Next, you’ll be asked if you would like to share your email with the Electronic Frontier Foundation to receive news and other information.
- - - - - - - - - - - - - - - - - - - - - - - - - - - - - - - - - - - - - - - -
Would you be willing to share your email address with the Electronic Frontier
Foundation, a founding partner of the Let's Encrypt project and the non-profit
organization that develops Certbot? We'd like to send you email about our work
encrypting the web, EFF news, campaigns, and ways to support digital freedom.
- - - - - - - - - - - - - - - - - - - - - - - - - - - - - - - - - - - - - - - -
(Y)es/(N)o: N
Then the certbot will give an list of domains that it discoverd and to select one or more domains to obtain the certificates. For this I will choose only 3rd domain.
Which names would you like to activate HTTPS for?
- - - - - - - - - - - - - - - - - - - - - - - - - - - - - - - - - - - - - - - -
1: lms.your_domain.com
2: web.your_domain.com
3: wp.your_domain.com
- - - - - - - - - - - - - - - - - - - - - - - - - - - - - - - - - - - - - - - -
Select the appropriate numbers separated by commas and/or spaces, or leave input
blank to select all options shown (Enter 'c' to cancel): 3
Next, you’ll be prompted to select whether or not you want HTTP traffic redirected to HTTPS. In practice, that means when someone visits your website through unencrypted channels (HTTP), they will be automatically redirected to the HTTPS address of your website. Choose 2 to enable the redirection.
Obtaining a new certificate
Performing the following challenges:
http-01 challenge for wp.your_domain.com
Waiting for verification...
Cleaning up challenges
Created an SSL vhost at /etc/apache2/sites-available/wp.your_domain.com-le-ssl.conf
Enabled Apache socache_shmcb module
Enabled Apache ssl module
Deploying Certificate to VirtualHost /etc/apache2/sites-available/wp.your_domain.com-le-ssl.conf
Enabling available site: /etc/apache2/sites-available/wp.your_domain.com-le-ssl.conf

Please choose whether or not to redirect HTTP traffic to HTTPS, removing HTTP access.
- - - - - - - - - - - - - - - - - - - - - - - - - - - - - - - - - - - - - - - -
1: No redirect - Make no further changes to the webserver configuration.
2: Redirect - Make all requests redirect to secure HTTPS access. Choose this for
new sites, or if you're confident your site works on HTTPS. You can undo this
change by editing your web server's configuration.
- - - - - - - - - - - - - - - - - - - - - - - - - - - - - - - - - - - - - - - -
Select the appropriate number [1-2] then [enter] (press 'c' to cancel): 2
Finally the below will be printed and if successful certificates will be installed.
Redirecting vhost in /etc/apache2/sites-enabled/wp.your_domain.com.conf to ssl vhost in /etc/apache2/sites-available/wp.dhammikalalantha.com-le-ssl.conf

- - - - - - - - - - - - - - - - - - - - - - - - - - - - - - - - - - - - - - - -
Congratulations! You have successfully enabled https://wp.your_domain.com

You should test your configuration at:
https://www.ssllabs.com/ssltest/analyze.html?d=wp.your_domain.com
- - - - - - - - - - - - - - - - - - - - - - - - - - - - - - - - - - - - - - - -

IMPORTANT NOTES:
 - Congratulations! Your certificate and chain have been saved at:
   /etc/letsencrypt/live/wp.your_domain.com/fullchain.pem
   Your key file has been saved at:
   /etc/letsencrypt/live/wp.your_domain.com/privkey.pem
   Your cert will expire on 2023-02-20. To obtain a new or tweaked
   version of this certificate in the future, simply run certbot again
   with the "certonly" option. To non-interactively renew *all* of
   your certificates, run "certbot renew"
 - Your account credentials have been saved in your Certbot
   configuration directory at /etc/letsencrypt. You should make a
   secure backup of this folder now. This configuration directory will
   also contain certificates and private keys obtained by Certbot so
   making regular backups of this folder is ideal.
 - If you like Certbot, please consider supporting our work by:

   Donating to ISRG / Let's Encrypt:   https://letsencrypt.org/donate
   Donating to EFF:                    https://eff.org/donate-le
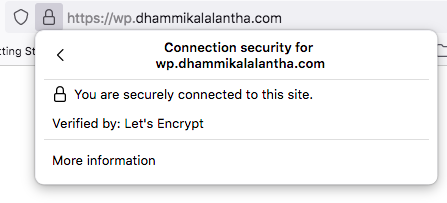
Please visit your domain now check whether SSL is enabled.

Attachments (29)
- web1.png (195.5 KB ) - added by 4 years ago.
- web2.png (114.4 KB ) - added by 4 years ago.
- web3.png (28.7 KB ) - added by 4 years ago.
- web4.png (24.9 KB ) - added by 4 years ago.
- web5.png (206.2 KB ) - added by 4 years ago.
- web6.png (55.9 KB ) - added by 4 years ago.
- web7.png (116.6 KB ) - added by 4 years ago.
- web8.png (57.7 KB ) - added by 4 years ago.
- web9.png (92.1 KB ) - added by 4 years ago.
- web10.png (80.2 KB ) - added by 4 years ago.
- web11.png (287.8 KB ) - added by 4 years ago.
- web12.png (12.0 KB ) - added by 4 years ago.
- web13.png (63.5 KB ) - added by 4 years ago.
- web14.png (116.4 KB ) - added by 4 years ago.
- web15.png (156.3 KB ) - added by 4 years ago.
- web16.png (122.1 KB ) - added by 4 years ago.
- web17.png (83.4 KB ) - added by 4 years ago.
- web18.png (66.0 KB ) - added by 4 years ago.
- web19.png (118.5 KB ) - added by 4 years ago.
- web20.png (31.0 KB ) - added by 4 years ago.
- web21.png (30.2 KB ) - added by 4 years ago.
- web22.png (336.5 KB ) - added by 4 years ago.
- web23.png (97.0 KB ) - added by 4 years ago.
- web24.png (93.8 KB ) - added by 4 years ago.
- web25.png (30.1 KB ) - added by 4 years ago.
- web33.png (16.2 KB ) - added by 4 years ago.
- web29.png (470.2 KB ) - added by 4 years ago.
- web30.png (31.1 KB ) - added by 4 years ago.
- web31.png (25.2 KB ) - added by 4 years ago.