
| Version 6 (modified by , 8 years ago) ( diff ) |
|---|
PGP (Pretty Good Privacy)
- GnuPG : GnuPG forms the heart of Gpg4win – the actual encryption software.
- Kleopatra : The central certificate administration of Gpg4win, which ensures uniform user navigation for all cryptographic operations.
You can use your host machine for this. Download Gpg4win (GNU Privacy Guard for Windows) from here
Installation
- Open the windows installer file and click Next
- The next page displays the licensing agreement. Make an Exception for this Lab and click next without reading the license.
- Select GnuPG, Kleopatra, GpgOL and GpgEX as applications to be install and click next
- Click next in all the other steps.
Create Certificate
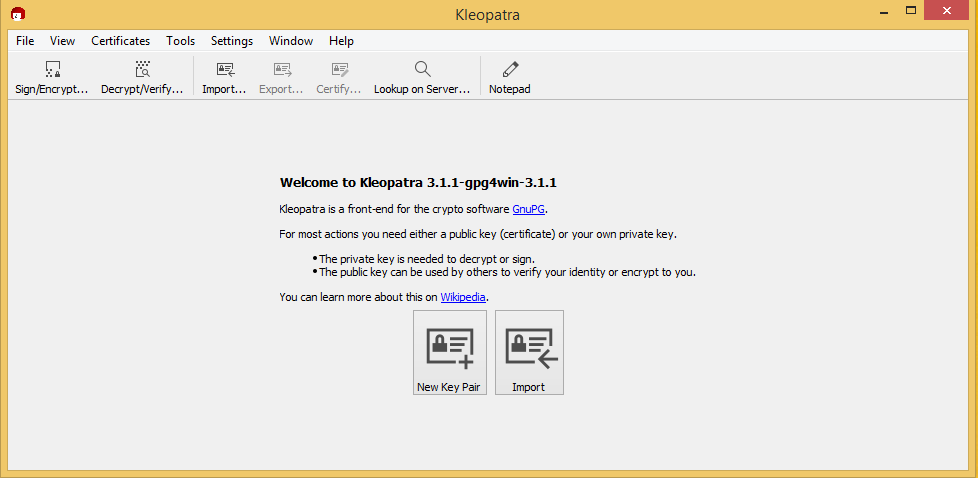
- Open Kleopatra

- Click on File > New Key Pair .
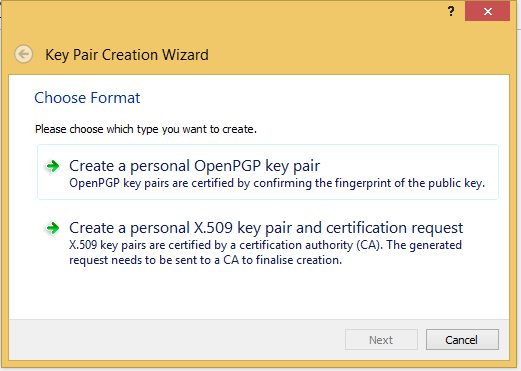
- In the following dialog you select the format for the certificate. You can choose from the following

- Create personal OpenPGP key pair.
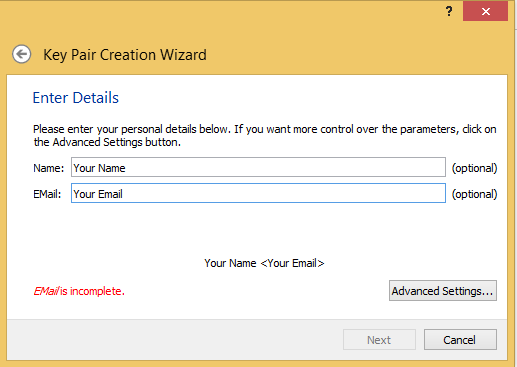
- Now enter your your name and e-mail address in the following window.

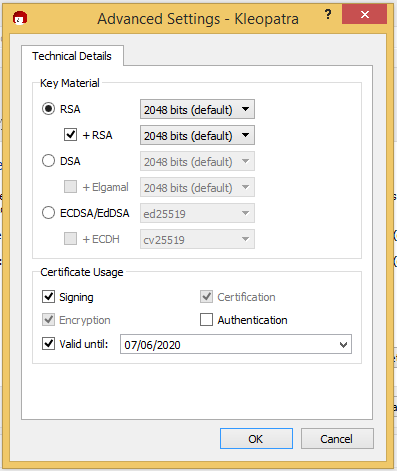
- Click Advanced Settings and Tick the Valid Until check box

- You will see a list of all of the main entries and settings for review purposes. If you are interested in the expert settings, you can view these via the Show All details option.If everything is correct, click on Create
- Now to the most important part entering your passphrase! To create a key pair, you must enter your personal passphrase. Choose passphrase which is easy-to-remember but hard to break secret passphrase. You can't recover this passphrase if you lost it. Confirm the passphrase and click Create
- Now your OpenPGP key pair is being created. This may take a couple of minutes.
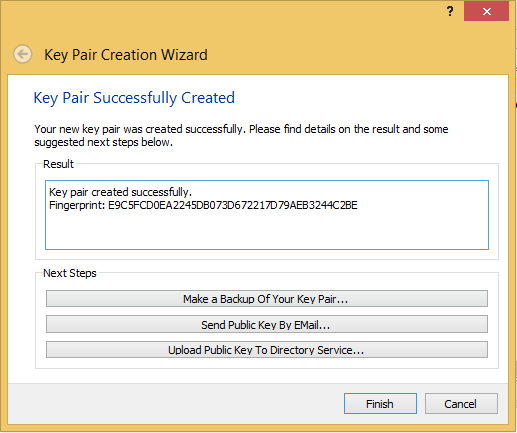
- As soon as the key pair creation has been successful, you will see the following page.

- Click finish
- You will see the created key entry on the
The 40-digit “fingerprint” of your newly generated OpenPGP certificate is displayed in the results text field. This fingerprint is unique anywhere in the world, i.e. no other person will have a certificate withthe same fingerprint. Actually, even at 8 digits it would already be quite unlikely that the same sequence would occur twice anywhere in world. For this reason, it is often only the last 8 digits of a fingerprint which are used or shown, and which are described as the key ID. This fingerprint identifies the identity of the certificate as well as the fingerprint of a person.
Key servers
- You can upload your public key to a key server so that public can access it. You can Submit your public key to a keyserver by selecting the key entry and click file > Publish on keyserver.
- Or you can submit it manually. For that first export the public key by selecting the key entry and do to File > Export. Select the location to save and click Save
- Go to the saved location and open the key file in a notepad. Copy every thing
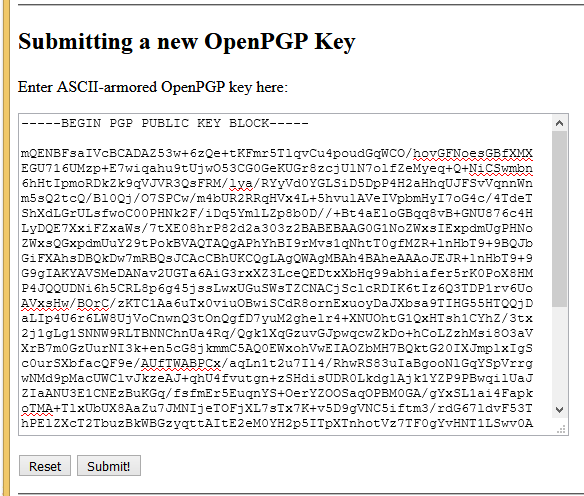
- Open a browser and go to keyserver.ubuntu.com and paste the key in Submitting a new OpenPGP Key text field. Click the Submit.

- You should get a 1 key(s) added successfully message.
- Go back to the keyserver.ubuntu.com and search your key by giving the Name(Name you given when creating the key pair) in the Search String: text box and clicking Search
Importing keys from keyservers and Signing
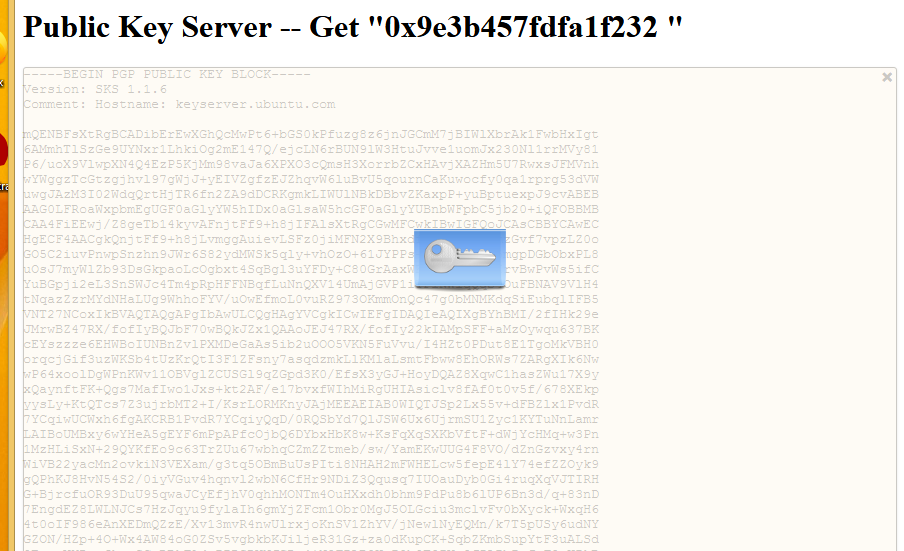
- Go to the keyserver.ubuntu.com and search your neighbors key by giving the Name(Name he has given when creating the key pair) in the Search String: text box and clicking Search
- Once it appears. Click on the fingerprint and you will get the public key. Copy the whole key as shown.
-----BEGIN PGP PUBLIC KEY BLOCK-----
Version: SKS 1.1.6
Comment: Hostname: keyserver.ubuntu.com

mQINBFsaNl0BEADibv71gRdknEQ5dOz++rSaeu/91ayWpfavrYMdfyO69vQsXTwOuCFTVu8n
jyiPWTB563KANCdybIbHDg88SwmXi5XZgEI+6oOJ5//EGLJCiBbXRLEnn1lAjgOqgem4Vgfn
...
...
21nn8fliGBWbCFI4aeqLjr/dJ6Mdwu/1Zvr3lP0ZcN6+bP7pMwuV/91rxRJ0wgd14har5h4Z
nPavHdfKuyHCEX+VRUUPMDQE3P688zCcsz/gRz5D8sa/h0N77tOTCAhS8tJsLzgxffpAEHpq
9A==
=ynpw
-----END PGP PUBLIC KEY BLOCK-----
- Open a note pad, Paste the key and Save the file.
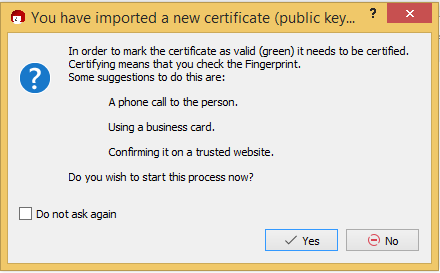
- Go to Kleopatra interface and go to File>Import. Select the Saved txt file that contain your neighbors Public key
- You will get the following window. Click Yes

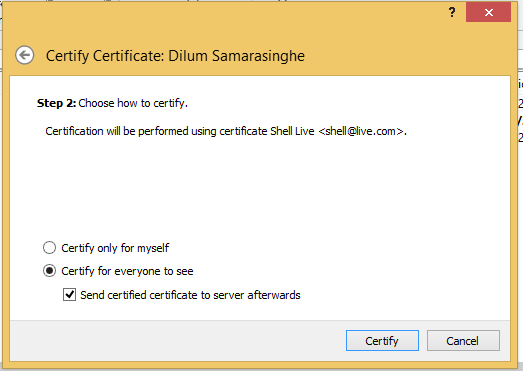
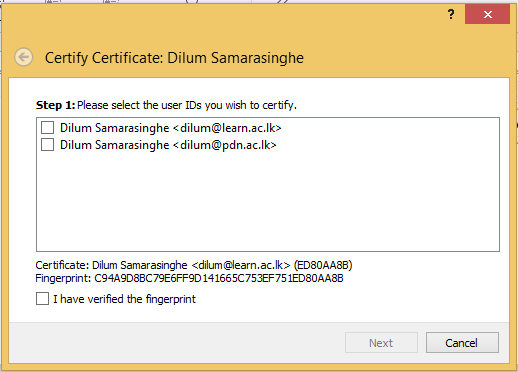
- Then the system will ask you to Sign the the key. Check the User ID's and check the I have verified the fingerprint check box. Click Next

- You will ask for your the passphrase. Enter the passphrase and Click Certify

Sending signed e-mails and encrypted messages
- Go to Kleoptra interface Select your key entry and go to File>Export Secret Keys.
- Give a location in the next window and Click the ASCII armour check box. Click OK. Note the location where you save
- Open Firefox or Chrome browser. and go to https://www.mailvelope.com/en
- Get the mailvelope Add-on and allow in your web browser.
- Now you will see the mailvelope icon on your browser. Click on it and Again click on Configure Mailvelope tab

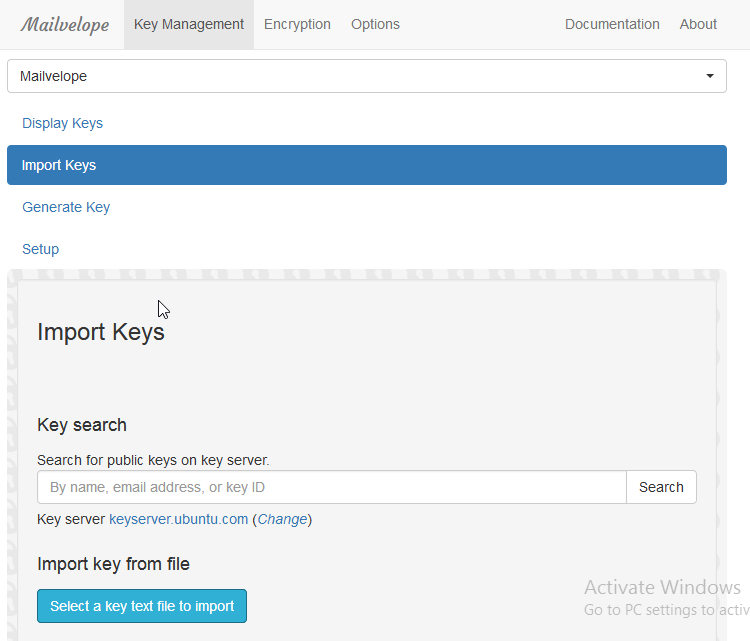
- You will get the Configure page. Go to Key Management nad Click Import Keys.

- Click Select a key text file to import Button. Locate the private key you exported from Kleopatra and click Open.
- Search your Neighbors key from the Key search text box. Once you get it click on the fingerprint and you will get the following output. Click on the key icon and the Public key will be saved.

- Now go to Display Keys and you will see the imported keys. And Primary key will be the private key
Now you have setup Mailvelope you can try sending mails.
- Open mail from the browser. Compose a mail and you will see the following button. Click on it.

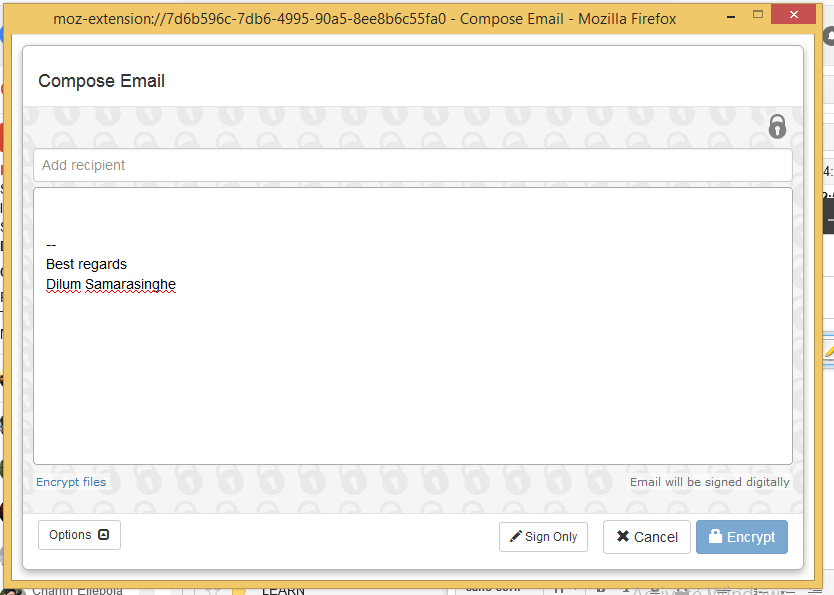
- And you will get Compose Email window.

- Give your neighbors email in the Add recipient text box. (It will automatically suggest you as you have your neighbors public key) and Type a message in the text field
- Click Options and check the Sign message with key: check box.
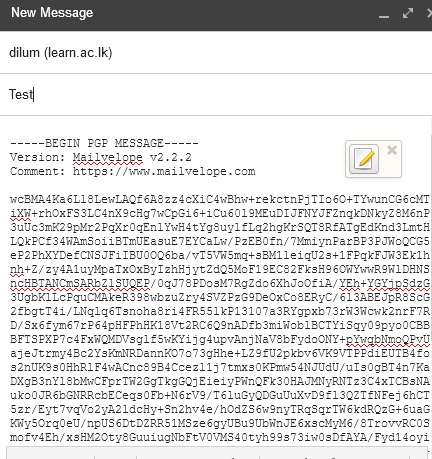
- Click the encrypt Button and you will be directed back to the original compose mail window with a PGP Message.

- Send the e-mail. See whether your neighbor can decrypt the message.
Attachments (15)
- sign2.png (24.6 KB ) - added by 8 years ago.
- sign1.png (26.1 KB ) - added by 8 years ago.
- sign.png (24.1 KB ) - added by 8 years ago.
- maileve2.png (154.9 KB ) - added by 8 years ago.
- maileve1.png (51.7 KB ) - added by 8 years ago.
- maileve.png (7.2 KB ) - added by 8 years ago.
- kleo4.png (31.0 KB ) - added by 8 years ago.
- kleo3.png (34.2 KB ) - added by 8 years ago.
- kleo2.png (24.4 KB ) - added by 8 years ago.
- kleo1.png (29.7 KB ) - added by 8 years ago.
- kleo.png (40.1 KB ) - added by 8 years ago.
- keys.png (73.2 KB ) - added by 8 years ago.
- email2.png (56.8 KB ) - added by 8 years ago.
- email1.png (55.3 KB ) - added by 8 years ago.
- email.png (8.3 KB ) - added by 8 years ago.
Download all attachments as: .zip