
| Version 8 (modified by , 9 years ago) ( diff ) |
|---|
Monitoring Netflow Using nfdump/nfsen
You will install nfdump and nfsen in this hands-on.
install nfdump
First install dependancies
$ sudo apt-get install build-essential autoconf
$ sudo apt-get install rrdtool mrtg librrds-perl librrdp-perl librrd-dev \
       libmailtools-perl bison flex
Now proceed to download and build. Note that only the last step (make install) has to be done as root.
$ cd
$ wget http://192.248.4.49/NotMon/nfdump-1.6.13.tar.gz
$ tar xvzf nfdump-1.6.13.tar.gz
$ cd nfdump-1.6.13
$ ./configure --help      # optional, shows the build settings available
$ ./configure --enable-nfprofile --enable-nftrack --enable-sflow
$ make
$ sudo make install
Router Configuration
Note: This part is already done for you.
Cisco Router
Let's configure netflow on a cisco router
- Log in to the router and go to configuration mode
Router>enable
Password:
#configure terminal
Router(config)#
- Create an exporter profile with the IP Address of the server where you have configure the nfdump and the transport port.
flow exporter EXPORTER-1
 description Export to nfdump
 destination <IP Address>
 transport udp <port>
 template data timeout 60
- Define the flow monitor for IPv4 and call the created exporter.
flow monitor FLOW-MONITOR-V4
 exporter EXPORTER-1
 record netflow ipv4 original-input
 cache timeout active 300
- Define the flow monitor for IPv6 and call the created exporter.
flow monitor FLOW-MONITOR-V6
 exporter EXPORTER-1
 record netflow ipv6 original-input
 cache timeout active 300
- Add the moniter profile to the Interface that export the flows
interface FastEthernet 0/0
 ip flow monitor FLOW-MONITOR-V4 input
 ip flow monitor FLOW-MONITOR-V4 output
  ipv6 flow monitor FLOW-MONITOR-V6 input
  ipv6 flow monitor FLOW-MONITOR-V6 output
- Save the configuration
HP Router
- Login to the router and go to Configure mode
<Router>system-view
[Router]
- Create the sflow agent and sflow source IP. (Interface IP of the interface that export the flow)
sflow agent ip <IP Address>
sflow source ip <IP Address>
- Define the sflow collector with the nfdump server IP and transport port.
sflow collector 1 ip <IP Address> port <Port> description "Export to nfdump"
- Call the sflow collector fromm the interface and define other parameters.
interface GigabitEthernet0/0
 sflow flow collector 1
 sflow sampling-rate 4000
 sflow counter collector 1
 sflow counter interval 120
- Save the configuration
Testing nfcapd/sfcapd and nfdump
If your institutes access router uses netflow you shloud use nfcapd. If it uses sflow you should use sfcapd. You can find your router's flow expoter from this table
For a netflow router
$ mkdir /tmp/nfcap-test $ nfcapd -E -p 9001 -l /tmp/nfcap-test ... after a while, a series of flows should be dumped on your screen.
Stop the tool with CTRL+C, then look at the contents of /tmp/nfcap-test
$ ls -l /tmp/nfcap-test You should see one or more files called nfcapd.<YEAR><MON><DAY><HR><MIN>
Process the file(s) with nfdump:
nfdump -r /tmp/nfcap-test/nfcapd.201Ywwxxyyzz | less nfdump -r /tmp/nfcap-test/nfcapd.201Ywwxxyyzz -s srcip/bytes
For a slow router
$ mkdir /tmp/sfcap-test $ sfcapd -E -p 9001 -l /tmp/sfcap-test ... after a while, a series of flows should be dumped on your screen.
Stop the tool with CTRL+C, then look at the contents of /tmp/nfcap-test
$ ls -l /tmp/sfcap-test You should see one or more files called nfcapd.<YEAR><MON><DAY><HR><MIN>
Process the file(s) with nfdump:
nfdump -r /tmp/sfcap-test/sfcapd.201Ywwxxyyzz | less nfdump -r /tmp/sfcap-test/sfcapd.201Ywwxxyyzz -s srcip/bytes
Installing and setting up NfSen
Download and compile nfsen.
$ cd
$ wget http://wget http://192.248.4.49/NotMon/nfsen-1.3.6p1.tar.gz
$ tar xvzf nfsen-1.3.6p1.tar.gz
$ cd nfsen-1.3.6p1
$ perl -MCPAN -e 'install Socket6'
$ cd etc
$ cp nfsen-dist.conf nfsen.conf
$ vi nfsen.conf
Set the $BASEDIR variable
$BASEDIR = "/var/nfsen";
Set the users appropriately so that Apache can access files:
$WWWUSER = 'www-data';
$WWWGROUP = 'www-data';
Set the buffer size to something small, so that we see data quickly. You would not do this on a production system.
# Receive buffer size for nfcapd - see man page nfcapd(1)
$BUFFLEN = 2000;
Find the %sources definition, and change it to:
For a netflow router
%sources=(
'accessrtr' => {'port'=>'9001','col'=>'#0000ff','type'=>'netflow'},
 );
For a sflow router
%sources=(
'accessrtr' => {'port'=>'9001','col'=>'#0000ff','type'=>'sflow'},
 );
(substitute your group's router for rtrX, and either remove or comment out the existing sample sources).
Change the HTMLDIR from /var/www/nfsen/ to /var/www/html/nfsen/
$HTMLDIR = "/var/www/html/nfsen/";
Now save and exit from the file.
Deafault rrd tool version for nfsen is 1.5 but the latest version 1.6 therefore a slight configuration is needed
vi libexec/NfSenRRD.pm
Find the following line'
if ( $rrd_version >= 1.2 && $rrd_version < 1.5 )
change it to,
if ( $rrd_version >= 1.2 && $rrd_version < 1.6 )
Create the netflow user on the system
$ sudo useradd -d /var/nfsen -G www-data -m -s /bin/false netflow
Install NfSen and start it
Change directory back to just inside the source directory:
$ cd
$ cd nfsen-1.3.6p1
Now, finally, we install:
$ sudo perl install.pl etc/nfsen.conf
Press ENTER when prompted for the path to Perl.
Install init script
In order to have nfsen start and stop automatically when the system starts, add a link to the init.d diretory pointing to the nfsen startup script:
$ sudo ln -s /var/nfsen/bin/nfsen /etc/init.d/nfsen
$ sudo update-rc.d nfsen defaults 20
Start NfSen
$ sudo service nfsen start
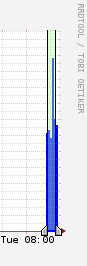
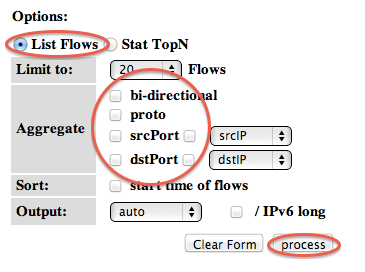
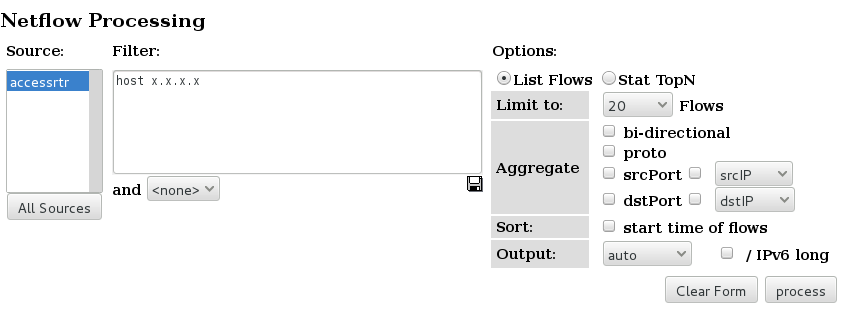
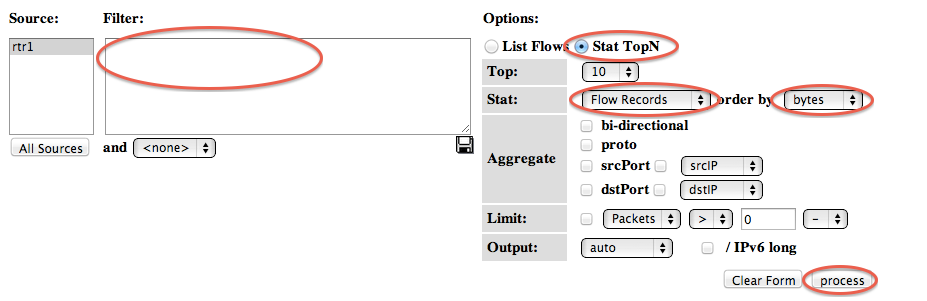
View flows via the web:
You can find the nfsen page here:
http://<your IP address>/nfsen/nfsen.php
You may see a message such as:
Frontend - Backend version mismatch'''
This will go away if you reload the page, it's not a problem.
Attachments (6)
- ns1.png (2.9 KB ) - added by 9 years ago.
- ns2.png (24.5 KB ) - added by 9 years ago.
- ns3.png (38.9 KB ) - added by 9 years ago.
- ns4.png (32.8 KB ) - added by 9 years ago.
- ns5.png (62.5 KB ) - added by 9 years ago.
- ns6.png (48.8 KB ) - added by 9 years ago.
Download all attachments as: .zip