
| Version 13 (modified by , 4 years ago) ( diff ) |
|---|
Bacula Lab
In this lab, you will backup and restore files using a Bacula. For this practical we need 2 Machines, Bacula Server and a Bacula Client. Download Bacula_VM from below link. We will use Existing Machine from previous sessions of this workshop as client.
Install Bacula Server in Bacula_VM
A Bacula server, which we will also refer to as the “backup server”, has these components:
Bacula Director (DIR): Software that controls the backup and restore operations that are performed by the File and Storage daemons
Storage Daemon (SD): Software that performs reads and writes on the storage devices used for backups
Catalog: Services that maintain a database of files that are backed up. The database is stored in an SQL database such as MySQL or PostgreSQL
Bacula Console: A command-line interface that allows the backup administrator to interact with, and control, Bacula Director
Install postgresql Database
sudo apt-get update -y
sudo apt install postgresql
Install Bacula
sudo apt-get install bacula -y
While installing Bacula, you will be asked to configure Postfix.Pick "No configuration" under 'General Type of Mail Configuration.
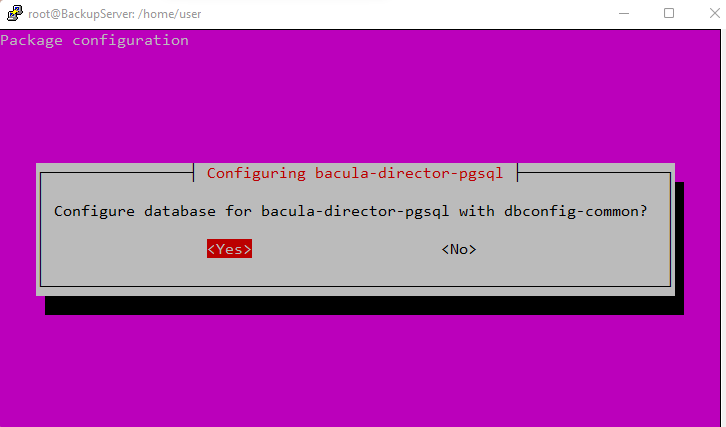
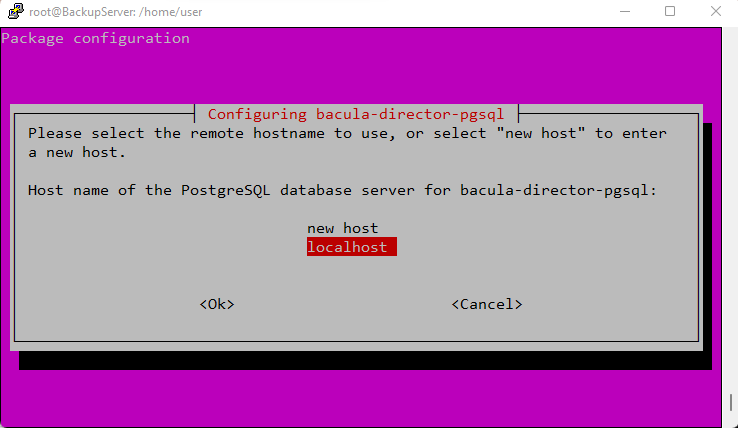
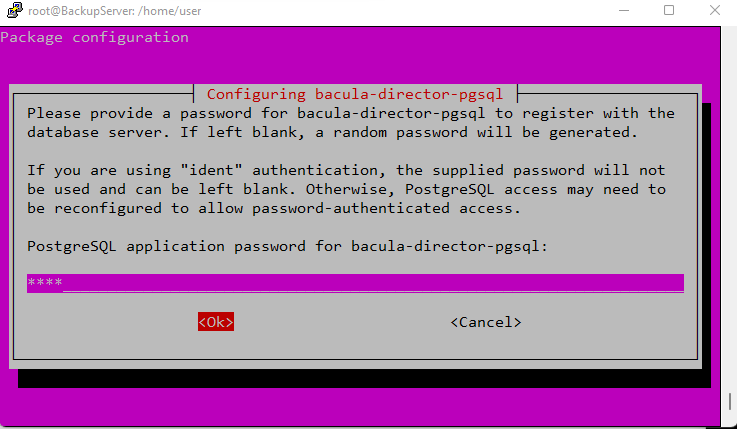
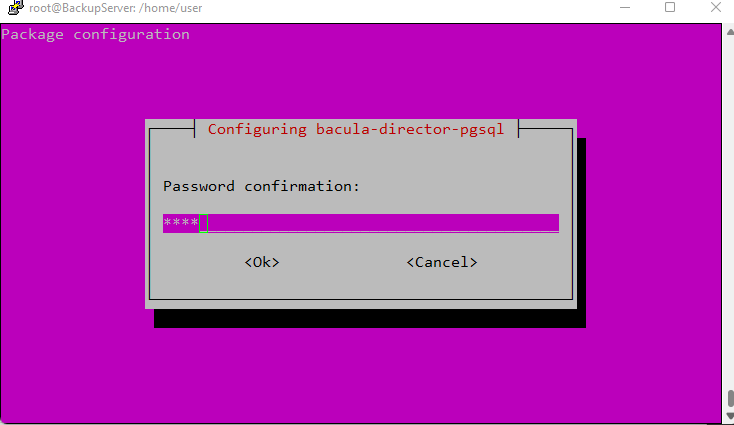
If prompted for 'Configure database for bacula-director-postgresql with dbconfig-common?' Enter "Yes." For 'Password of the database's administrative user,set the password as 1234.
Configure Bacula Director
Bacula has several components that must be configured independently in order to function correctly. The configuration files can all be found in the /etc/bacula directory.
We’ll start with the Bacula Director.
Open the Bacula Director configuration file in your favorite text editor. We’ll use vi:
sudo vi /etc/bacula/bacula-dir.conf
This is the main configuration file of Bacula and we will modify this file later according our Lab setup.
Create Backup Directory and assign permission
sudo mkdir -p /bacula/backup
sudo chown -R bacula:bacula /bacula
sudo chmod -R 700 /bacula
Install Bacula Client in Client Machine
A Bacula client, i.e. a server that will be backed up, runs the File Daemon (FD) component. The File Daemon is software that provides the Bacula server (the Director, specifically) access to the data that will be backed up. We will also refer to these servers as “backup clients” or “clients”.
Install and Configure Bacula Client
sudo apt-get update
sudo apt-get install bacula-client
you can verify your installation by executing
sudo systemctl status bacula-fd
if the service is not running
sudo systemctl start bacula-fd
sudo systemctl enable bacula-fd
Configure Client
Before configuring the client File Daemon, you will want to look up the following information, which will be used throughout the remainder of this practical:
Client hostname: Our example will use “ClientHost”
Client Private FQDN: We’ll refer to this as “client_private_FQDN”, which may look like clienthost.private.example.com or private IP address
Bacula Server hostname: Our example will use “BackupServer”
Note:-Your actual setup will vary from the example, so be sure to make substitutions where appropriate.
Open the File Daemon configuration:
sudo vi /etc/bacula/bacula-fd.conf
We need to change a few items and save some information that we will need for our server configuration.
change the “Name” parameter to the hostname of your backup server followed by “-dir”.
Director {
  Name = BackupServer-dir
  Password = "IrIK4BHRA2o5JUvw2C_YNmBX_70oqfaUi"
}
You also need to copy the Password, which is the automatically generated password used for connections to File Daemon, and save it for future reference. This will be used in the Backup Server’s Director configuration, which we will set in an upcoming step, to connect to your Client’s File Daemon.
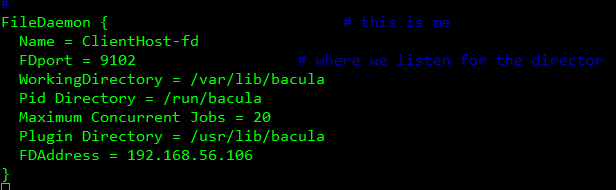
Next, we need to adjust one parameter in the FileDaemon resource. We will change the FDAddress parameter to match the private FQDN of our client machine. The Name parameter should already be populated correctly with the client file daemon name. The resource should looks something like this (substitute the actual FQDN or IP address):
FileDaemon {                          # this is me
  Name = ClientHost-fd
  FDport = 9102                       # where we listen for the director
  WorkingDirectory = /var/lib/bacula
  Pid Directory = /var/run/bacula
  Maximum Concurrent Jobs = 20
  FDAddress = client_private_FQDN / Private IP
}
We also need to configure this daemon to pass its log messages to the Backup Server. Find the Messages resource and change the director parameter to match your backup server’s hostname with a “-dir” suffix. It should look something like this:
Messages {
  Name = Standard
  director =  BackupServer-dir = all, !skipped, !restored
}
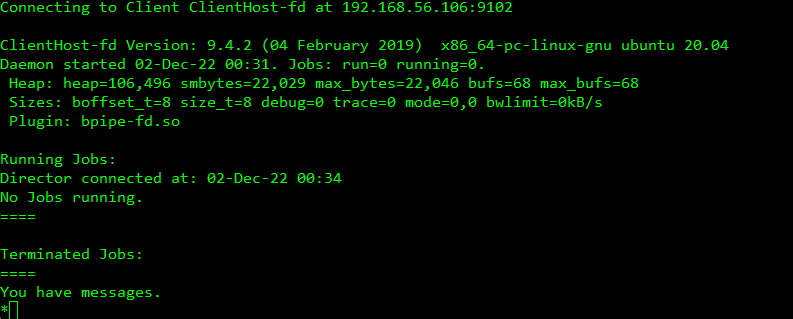
Save the file and exit. Your File Daemon (Bacula Client) is now configured to listen for connections over the private network.
Check that your configuration file has the correct syntax with the following command:
sudo bacula-fd -tc /etc/bacula/bacula-fd.conf
If the command returns no output, the configuration file has valid syntax. Restart the file daemon to use the new settings:
sudo service bacula-fd restart
Let’s set up a directory that the Bacula Server can restore files to. Create the file structure and lock down the permissions and ownership for security with the following commands:
sudo mkdir -p /bacula/restore
sudo chown -R bacula:bacula /bacula
sudo chmod -R 700 /bacula
Add FileSets (Bacula Server)
A Bacula FileSet defines a set of files or directories to include or exclude files from a backup selection, and are used by backup jobs on the Bacula Server. With the default Bacula Server components, you already have a FileSet called “Full Set”. If you want to run Backup jobs that include almost every file on your Backup Clients, you can use that FileSet in your jobs. You may find, however, that you often don’t want or need to have backups of everything on a server, and that a subset of data will suffice.
Being more selective in which files are included in a FileSet will decrease the amount of disk space and time, required by your Backup Server, to run a backup job. It can also make restoration simpler, as you won’t need to sift through the “Full Set” to find which files you want to restore.
We will create new FileSet resources, so that you can be more selective in what you back up.
On your Bacula Server, open bacula-dir.conf,
sudo vi /etc/bacula/bacula-dir.conf
Create a FileSet resource for each particular set of files that you want to use in your backup jobs. In this example, we’ll create a FileSet that only includes the home and etc directories:
FileSet {
  Name = "Home and Etc"
  Include {
    Options {
      signature = MD5
      compression = GZIP
    }
    File = /home
    File = /etc
  }
  Exclude {
    File = /home/bacula/not_important
  }
}
There are a lot of things going on in this file, but here are a few details to keep in mind:
The FileSet Name must be unique
Include any files or partitions that you want to have backups of
Exclude any files that you don’t want to back up, but were selected as a result of existing within an included file
You can create multiple FileSets if you wish. Save and exit, when you are finished.
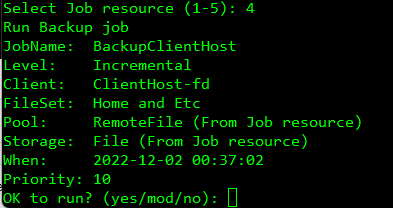
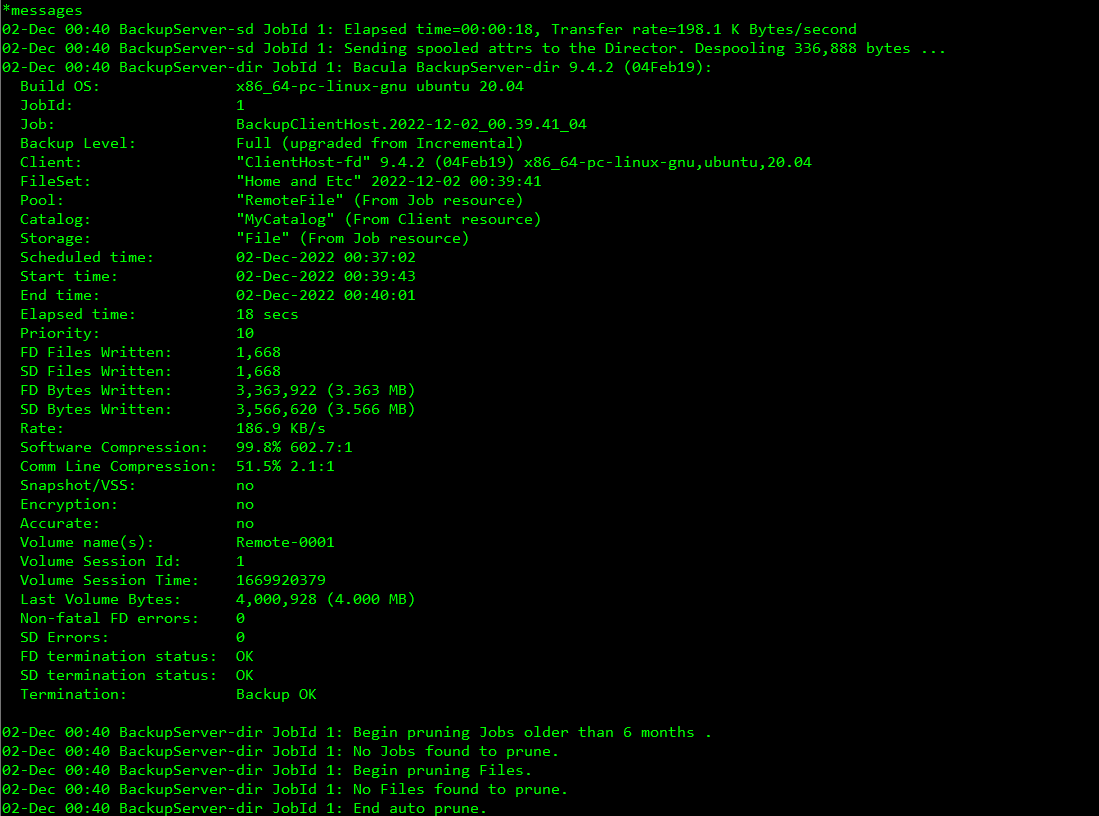
Now we’re ready to create backup job that will use our new FileSet.
Attachments (19)
- image1.png (10.0 KB ) - added by 4 years ago.
- image2.png (13.8 KB ) - added by 4 years ago.
- image3.png (20.7 KB ) - added by 4 years ago.
- image4.png (9.6 KB ) - added by 4 years ago.
- image5.png (9.9 KB ) - added by 4 years ago.
- image6.png (4.9 KB ) - added by 4 years ago.
- image7.png (16.2 KB ) - added by 4 years ago.
- image8.png (9.5 KB ) - added by 4 years ago.
- image9.png (22.7 KB ) - added by 4 years ago.
- image10.png (26.9 KB ) - added by 4 years ago.
- image11.png (59.2 KB ) - added by 4 years ago.
- image12.png (27.3 KB ) - added by 4 years ago.
- image13.png (3.7 KB ) - added by 4 years ago.
- image14.png (16.6 KB ) - added by 4 years ago.
- image15.png (13.2 KB ) - added by 4 years ago.
- image16.png (14.9 KB ) - added by 4 years ago.
- image17.png (8.3 KB ) - added by 4 years ago.
- image18.png (51.1 KB ) - added by 4 years ago.
- image19.png (2.4 KB ) - added by 4 years ago.
Download all attachments as: .zip